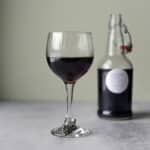
Easy Elderberry Wine Recipe
A simple and delicious elderberry wine recipe.
Servings: 25 glasses
Calories: 125kcal
Equipment
- Wine-making kit (see link in post)
Ingredients
- 3¼ lbs. frozen elderberries (approx. 10 cups)
- 1 gallon water
- 2½ lbs granulated white sugar (approx. 5 cups)
- 1 teaspoon yeast nutrient
- 1½ teaspoon acid blend
- 1 Campden crush tablet (crushed)
- 1 wine yeast packet (premier blanc)
Instructions
- Start by sanitizing all the equipment with no-rinse homebrewing sanitizer.
- Add sugar and one gallon of water to a large pot. Mix and heat until the sugar dissolves and the water is about to boil.
- Place a mesh straining bag inside the primary fermentor bucket and carefully fill it with cleaned and destemmed elderberries. Tie a knot in the bag and pour the hot syrup over the berries. Crush the elderberries with a potato masher then allow the syrup to come to room temperature.
- Dissolve the acid blend and a crushed Campden tablet and stir them into the must (unfermented fruit juice before it's converted to wine).
- Take the initial specific gravity (SG) reading by pouring some of the must into the test tube. Leave a few inches from the top of the vile. Next, gently place the hydrometer into the liquid and spin it to release the bubbles. Read the corresponding number on the hydrometer and log into your wine log.
- Cover the elderberry must with a clean napkin and secure it with a rubber band. Set the bucket aside for 24 hours.
Day 2
- After 24 hours, add the yeast nutrient and the yeast to the must. You can either sprinkle the yeast on top, stir it in with a sanitized bar spoon, or activate the yeast in ½ cup of warm water before adding it to the bucket. Cover again with the napkin and set aside to ferment.
Day 3-7
- Mix and mash the fruit every day. On the third day take the SG reading and jot it down in your notebook. Take a reading daily, until it reads 1.030. This should take approximately 3-5 days.
- When it's ready, strain the wine from the fermentor bucked and transfer it into a sterilized one-gallon carboy. This is referred to as "racking the wine." Place any extra wine in a smaller bottle and top both with a bung and airlock.
- Allow the wine to clear for one month then get it off the lees by reracking the wine into a clean carboy. Let it go for another month or two.
- When your wine has been clearing for at least two months, take a final SG reading. Use an ABV calculator to determine the percentage of alcohol in the wine. Taste the wine to decide if it needs back-sweetening. Add ¼ to ½ cup of syrup per gallon, another crushed Campden tablet, and ½ teaspoon of potassium sorbate (stabilizer) to keep the wine from refermenting.
- Siphon the wine into sanitized wine bottles. This can be anything from flip-top bottles (such as Grolsch bottles) or wine bottles. Of course, you'll need corks and a corker for the latter. Label the wine bottles with the date, type of wine, and alcohol percentage.
- The longer you wait the better elderberry wine will be. If you can wait a year do so! If not, give it at least 3 months and save one of the bottles for a year so you can taste the difference.
Notes
- Do your best to not only keep the stems out but also unripe, green berries, which are toxic.
- If using dried/dehydrated elderberries, you'll need approximately 5 cups of elderberries.
- I usually like to add tannins to my wines but since elderberries are high in tannins it doesn't need it.
- Pectic enzyme is sometimes added to wine. The enzymes break up the pectin in to extract the flavor of the fruit. Since elderberries are low in pectin, you don't need to add pectic enzymes to this recipe.
- The ideal temperature for fermentation is somewhere between 70°—85° F.
- Make sure you dry the mouth of the bottle as well as the bung so that it does not slide out of the bottle once the wine begins to ferment.
- Bungs come in different sizes. You'll need a larger size bung for the juice bottles.
- As the wine is clearing, you may notice tiny black particles that resemble coffee grounds along the top of the wine. This is perfectly normal and it does not mean your wine has gone bad. A greenish substance may also be present, see the FAQ section where I discuss "elderberry goo."
- Make sure to label the wine with the type of wine and the date it was racked. As the wine clears, you'll notice the dead yeast and particles will settle on the bottom of the carboy. Leave this "lees" behind when you re-rack the wine. Don't toss the lees, it's great for your garden!
Nutrition
Serving: 1glass | Calories: 125kcal | Carbohydrates: 22g | Protein: 0g | Fat: 0g | Cholesterol: 0mg | Sodium: 0mg | Fiber: 0g | Sugar: 15g
