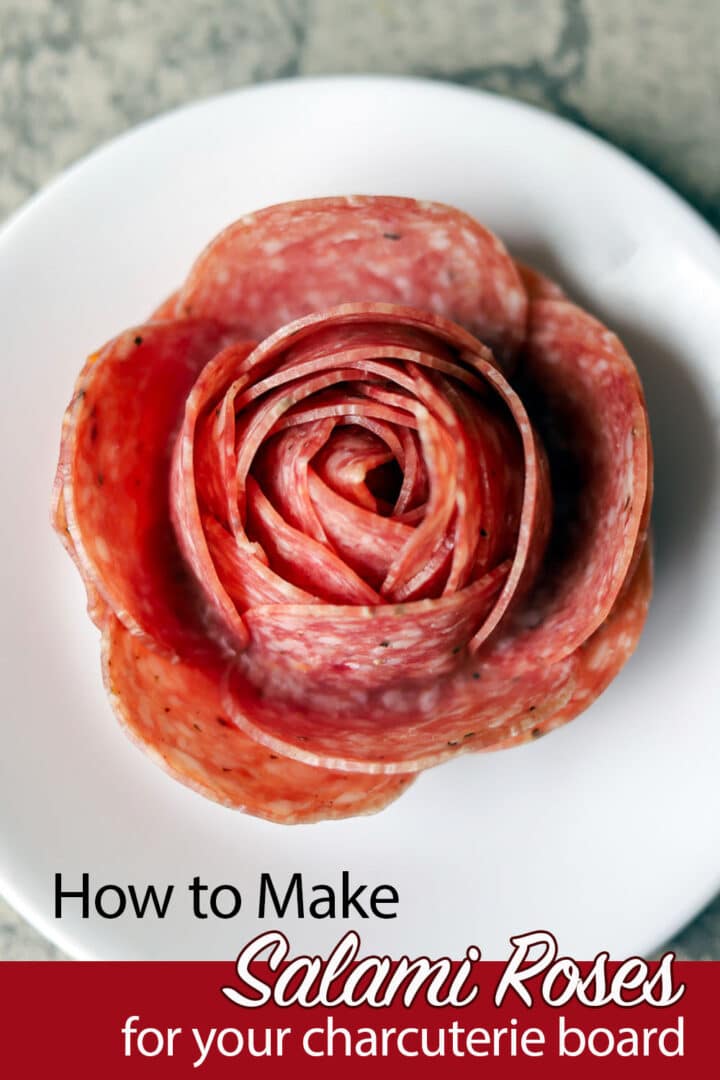
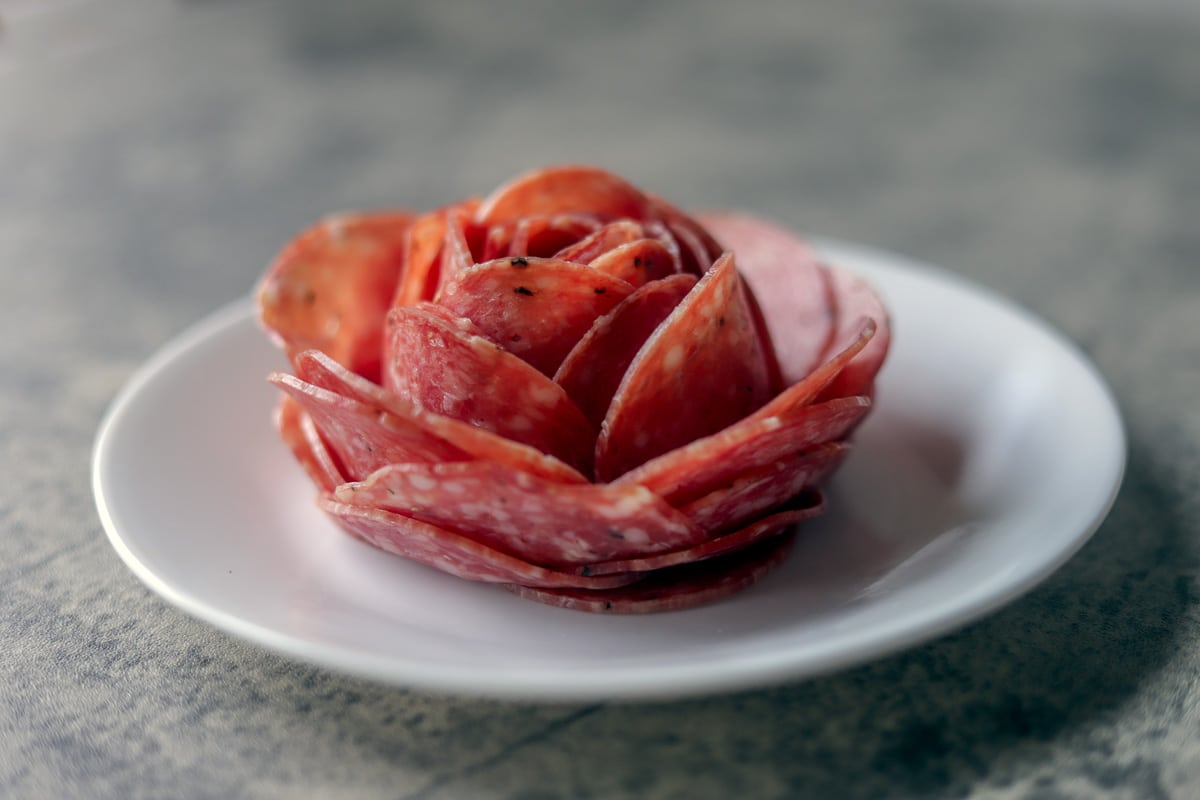
Have you ever wondered how to make a Salami Rose for your easy charcuterie board? Learn how to make salami roses, pepperoni roses, mini rosebuds, and salami roses in a cup. These perfect meat roses will help you create a unique charcuterie board that will impress and dazzle your guests!
Would you like to save this recipe?
Recently, I attended a cheese board/charcuterie designing class put on by Pours and Boards Montana at Unleashed Winery in Whitefish, Montana.
My friends and I also learned how to make various meat flowers, including large roses. We formed the salami roses on wine glasses and also formed salami flowers in a cup. Since I couldn't bring you all along, I thought I'd share what I learned in this post and video.
Although the instructions below are for making salami roses, the video also contains a few other types of meat roses that you can make using sliced salami and pepperoni. This includes mini pepperoni flowers skewered on toothpicks with fresh herbs like basil and mint for the leaves.
These various salami roses and mini pepperoni roses are a great way to elevate your charcuterie board and are so easy to make!
Jump to:
🌹 Why Make Salami Roses?
- Salami roses are easy to prepare, delicious, and provide a unique way to add cold cuts to your cheeseboards.
- Meat roses elevate your snack board or grazing board. They're a great addition to any grazing board, including an Easter charcuterie board, a fall charcuterie board, a Halloween charcuterie board, or a Christmas charcuterie board!
- Once you learn how to make the salami roses, the same process can be used to make smaller roses with pepperoni.
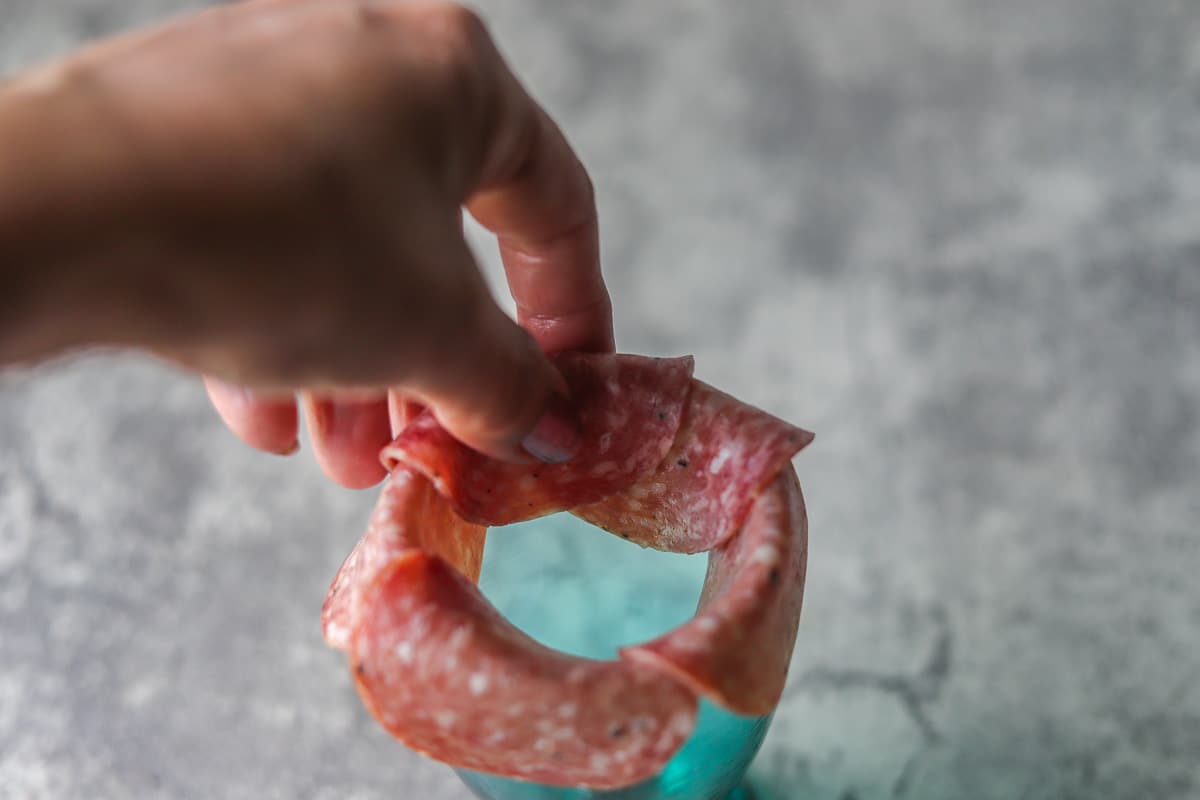
- When making the meat roses, you'll want to press and hold the salami slices over the glass so that they can take on the shape of the glass.
🛒 What You Need To Make Salami Roses
🔖 Ingredients & Substitutions
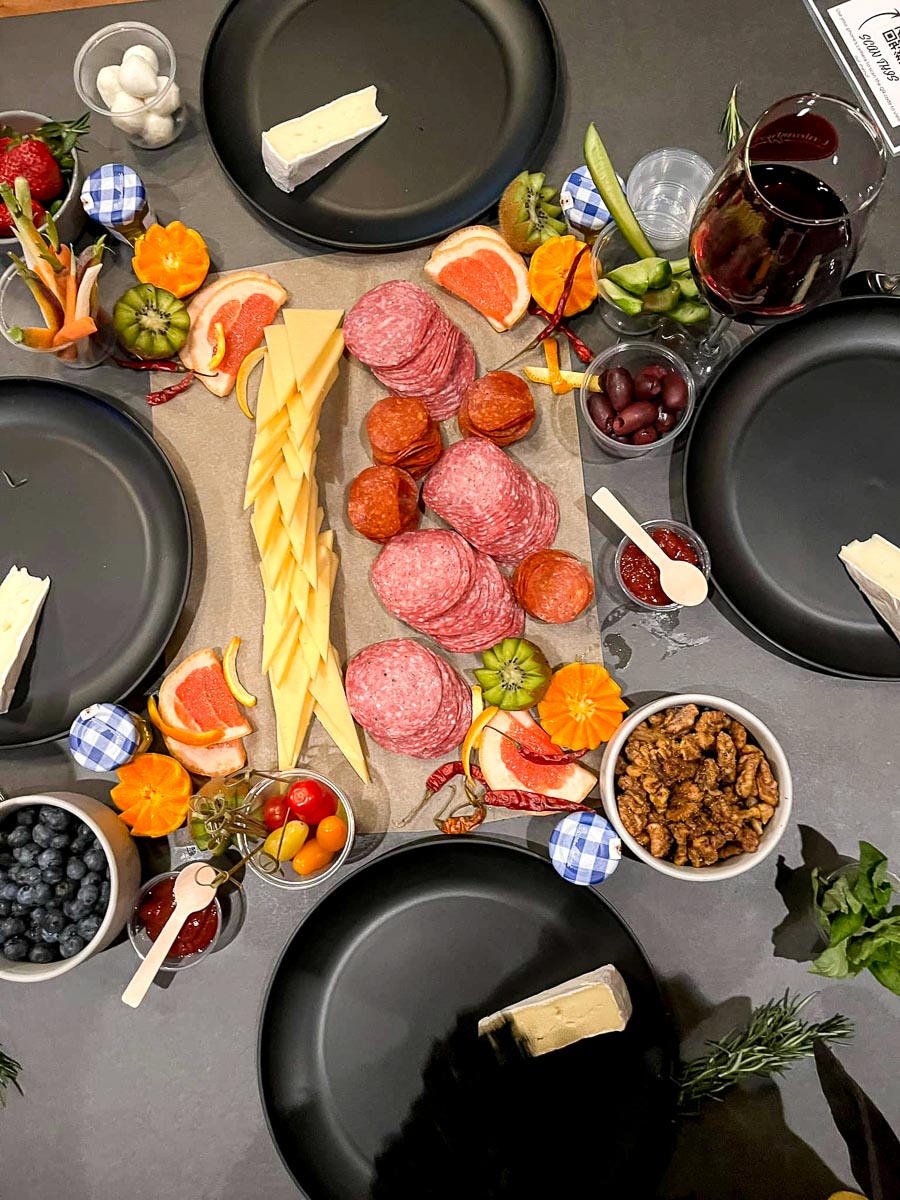
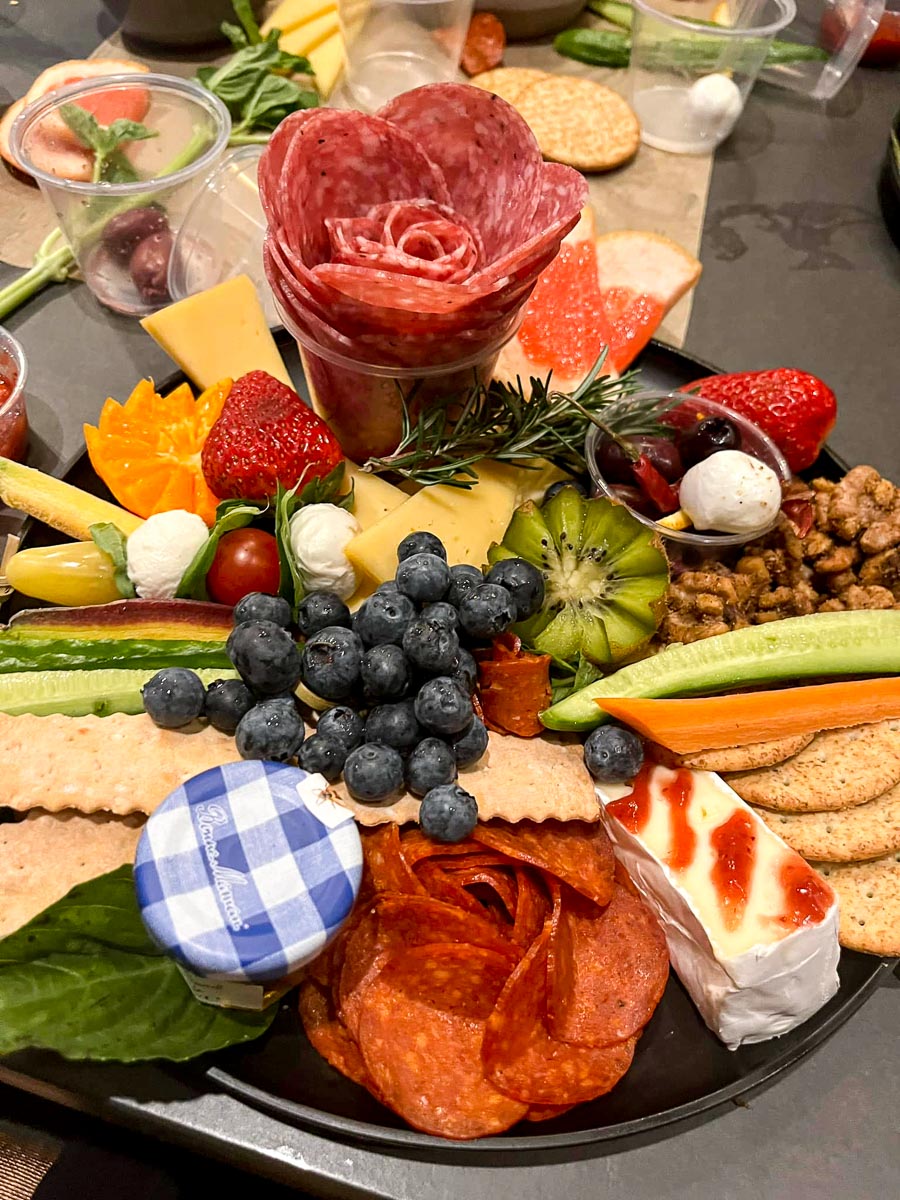
All you need to make a gorgeous charcuterie board is some beautiful meat roses, a few different gourmet cheeses, crackers, and fresh fruit (strawberries, blueberries, grapes, and kiwis). Add some veggies, nuts, jam, and olives, and you've got yourself a masterpiece!
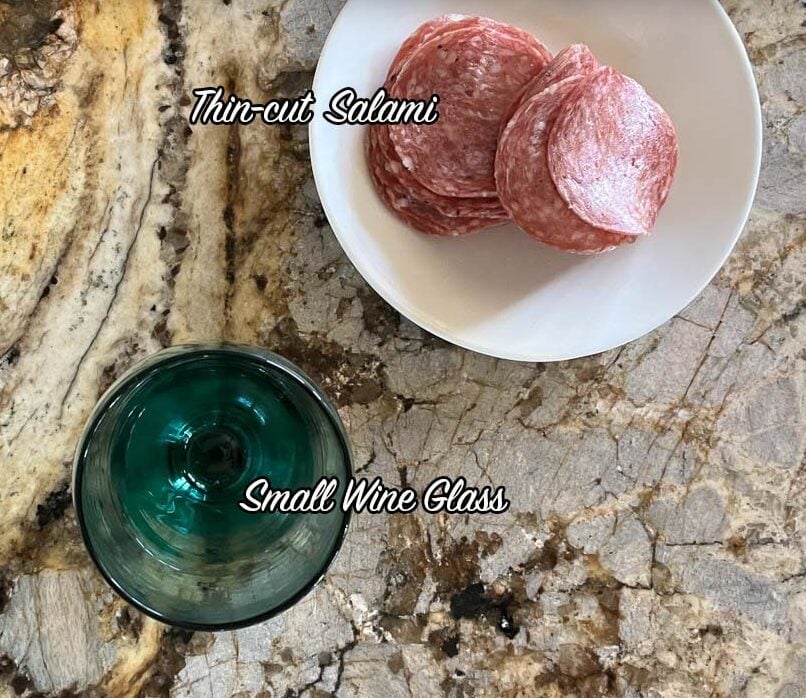
- Salami: Depending on the size of your wine glass, you will need 20 to 30 slices of thin-cut salami for each salami rose.
- Pepperoni: Pepperoni is an optional ingredient, but it can be used to make mini pepperoni rosebuds.
- Herbs: If you decide to make mini pepperoni roses, you'll need herb leaves (mint, basil, or sage) to imitate rose leaves. You can also use leaves from a rose plant. Although they are edible, they're not particularly tasty.
🔪 Helpful Tools
Glass: I used a goblet that was 3" in diameter, which required four slices to cover the entire rim of the glass, 24 salami slices in total. A champagne flute is another great option. If you use a smaller or larger glass, you will have to adjust the amount of salami needed to make a beautiful rose.
💐 How to Make Salami Roses
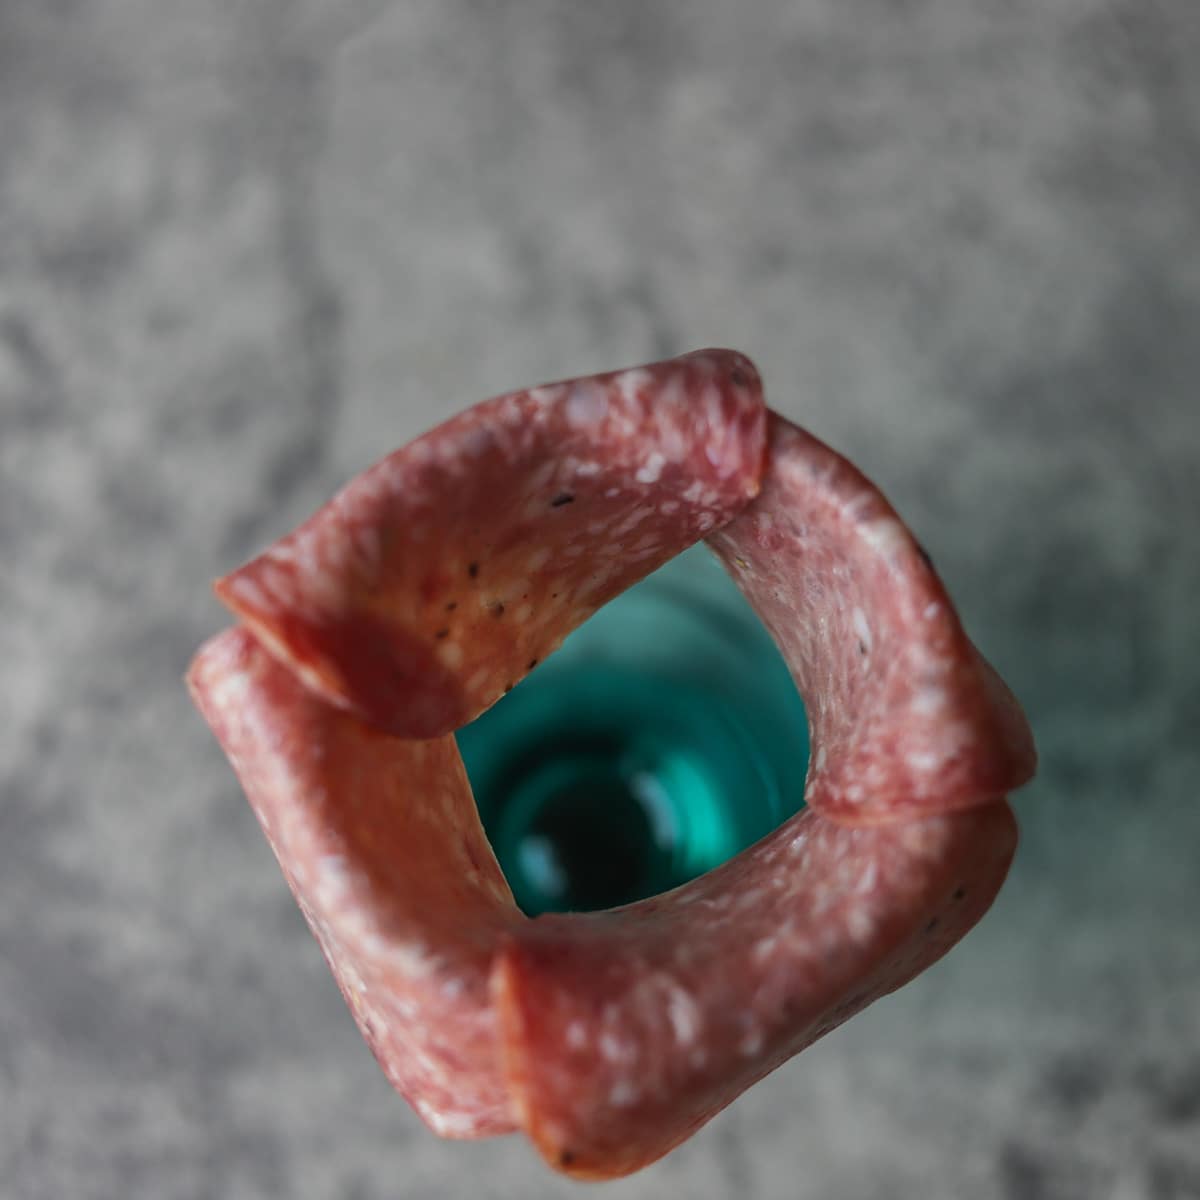
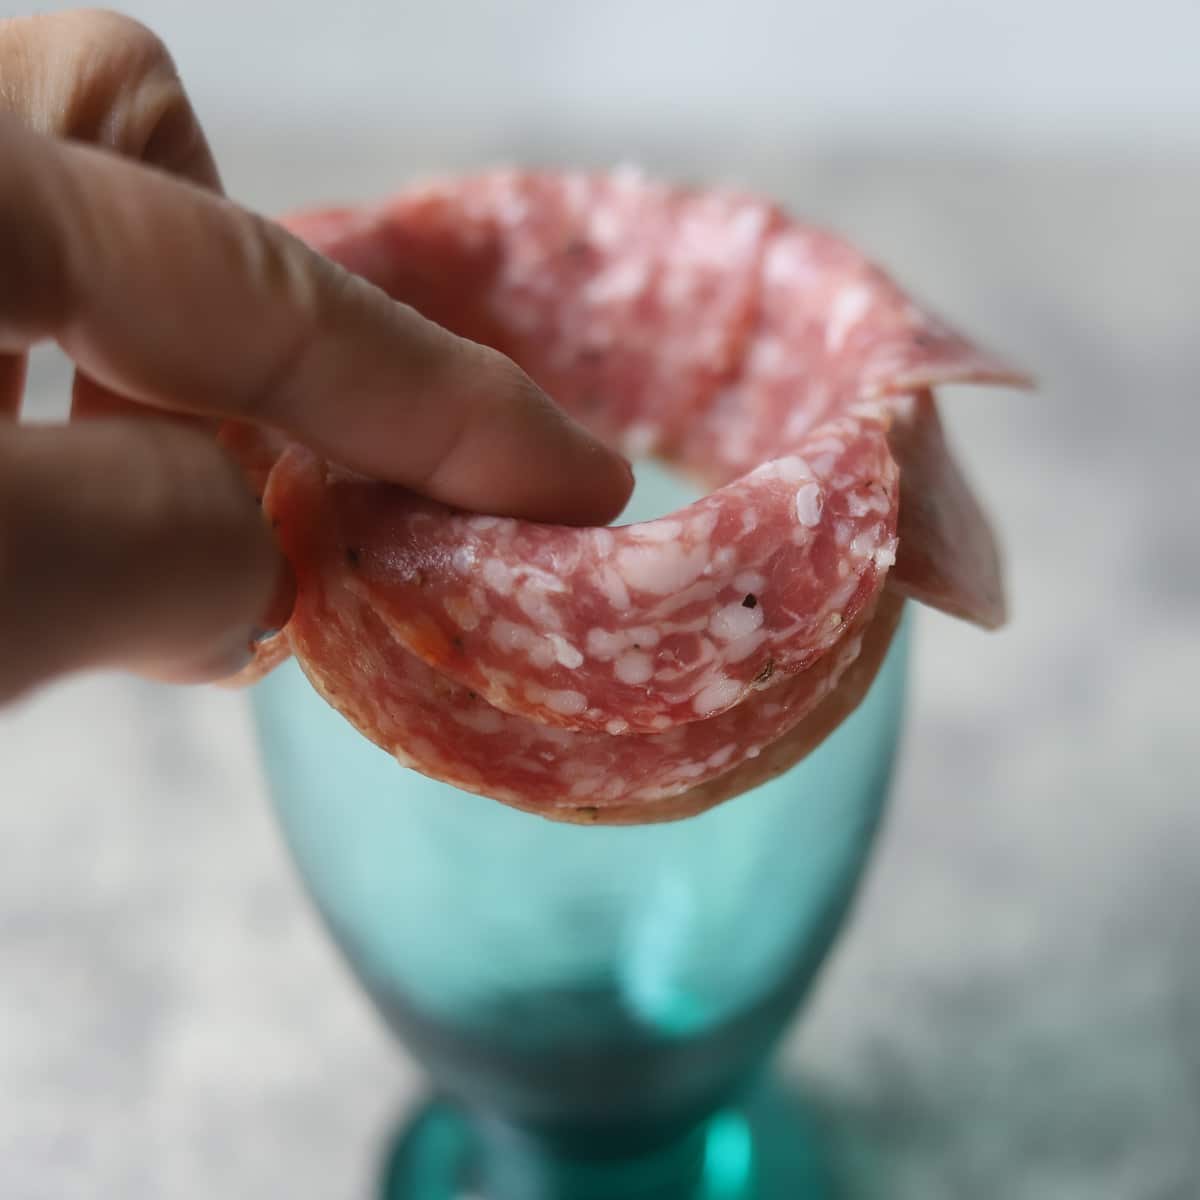
Step 1: For the first layer, fold one salami slice in half and place it on the rim of a wine glass. Make sure half of the salami is inside the glass and the other half is outside the glass. Add another salami slice and overlap the first slice by ¼" to ½." Repeat the steps with 2 more slices, which should cover the entire rim.

Step 2: For layers 3 through 6, place the salami layers so that more of the salami is inside the glass than outside. Looking at it from the outside of the glass, the 3rd-row slices should be approximately ⅛th" higher than the first 2 rows. Each of the remaining rows will be higher than the one under it.

Step 3: For layers 3 through 6, place the salami so that more of it is inside the glass than outside. When looking at it from the outside of the glass, the 3rd-row slices should be approximately ⅛th" higher than the first 2 rows. Each of the remaining rows will be higher than the one under it.
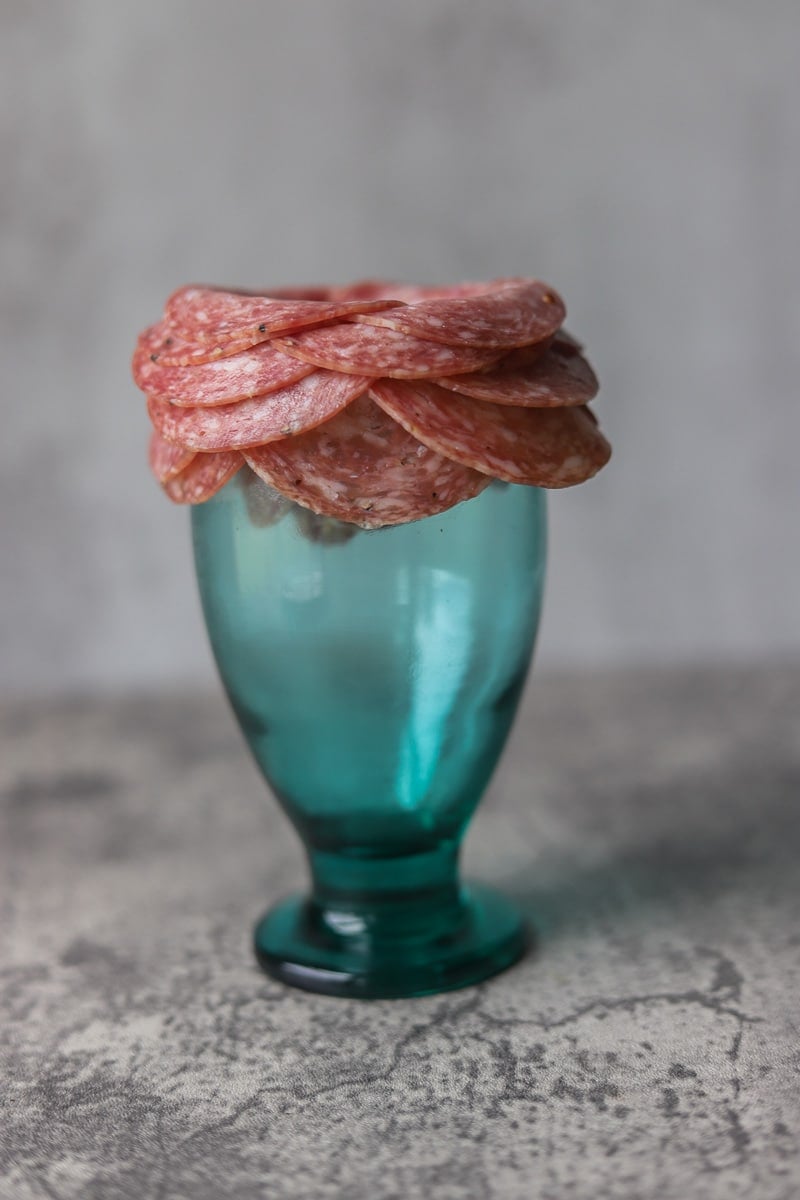
Step 4: As you continue to add rows, you will be left with a small hole in the center or none at all. At this point, cover the glass with a saucer and turn the glass over. Push down on the salami flower while twisting the glass slightly to help set the salami rose.
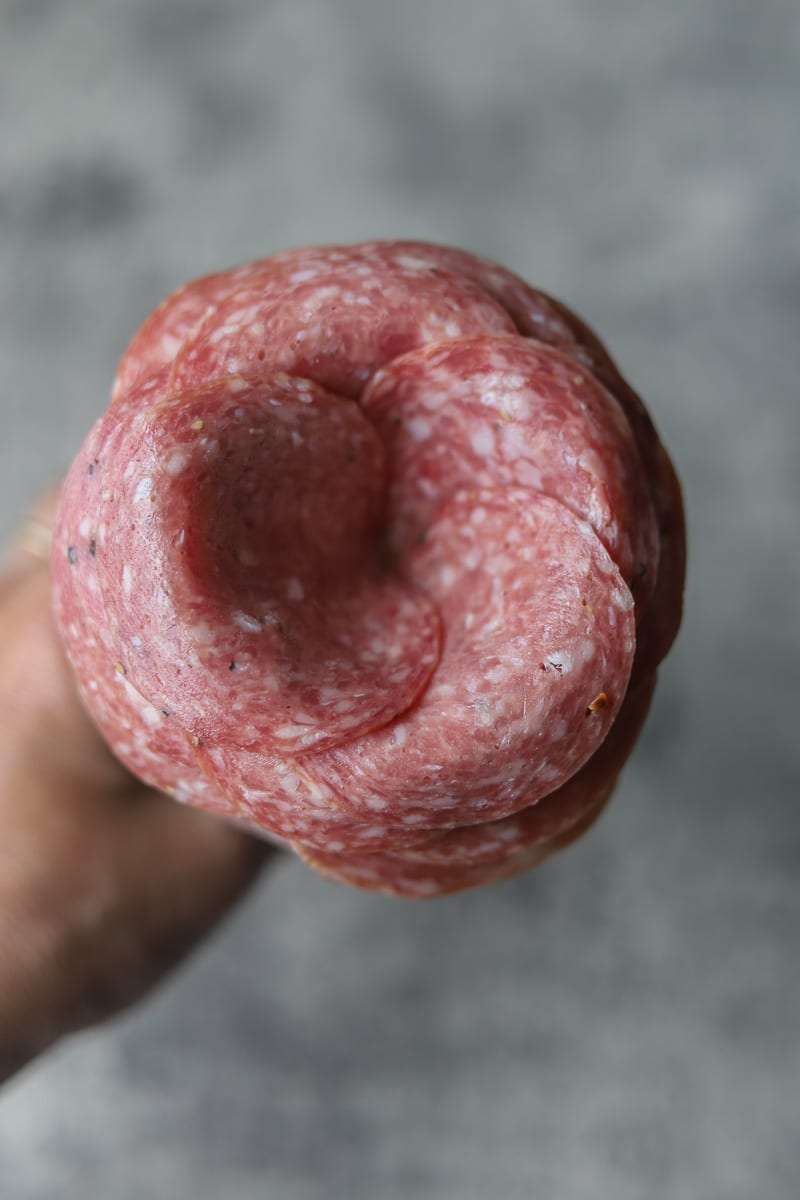
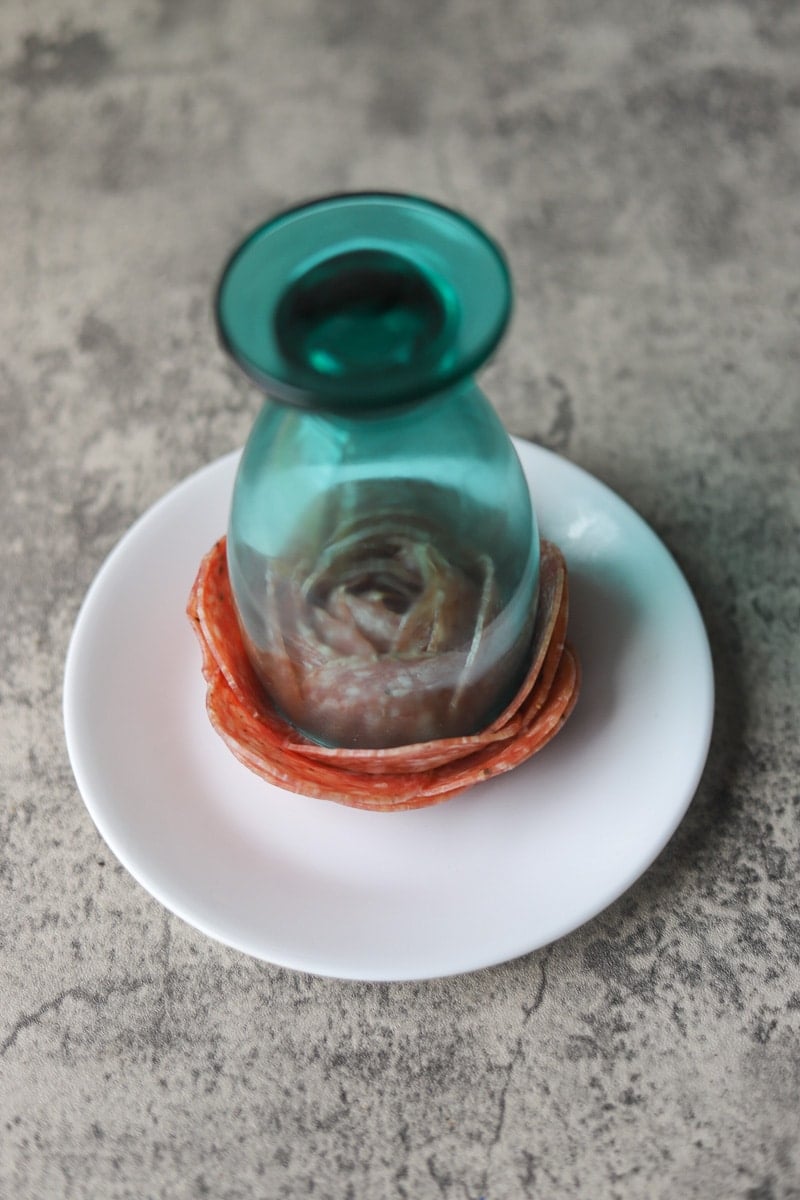
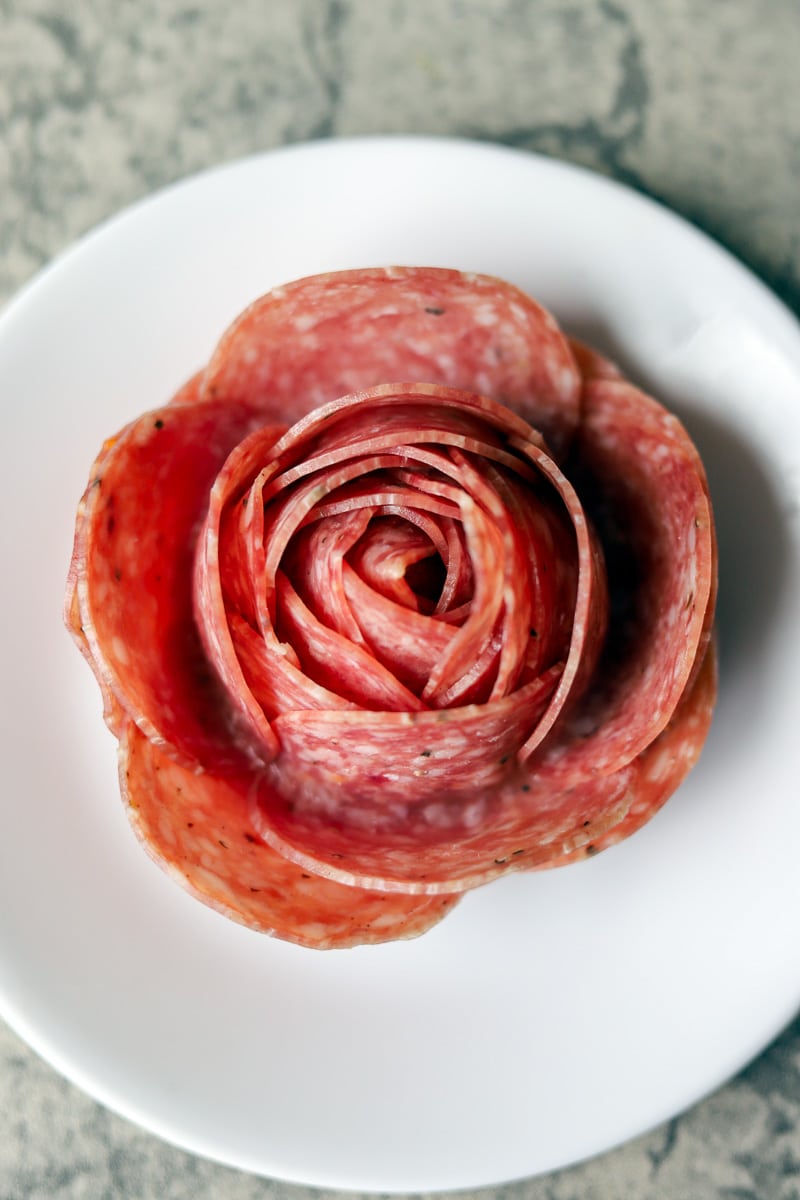
Now lift the glass up to reveal your gorgeous salami rose!
Mini Pepperoni Roses
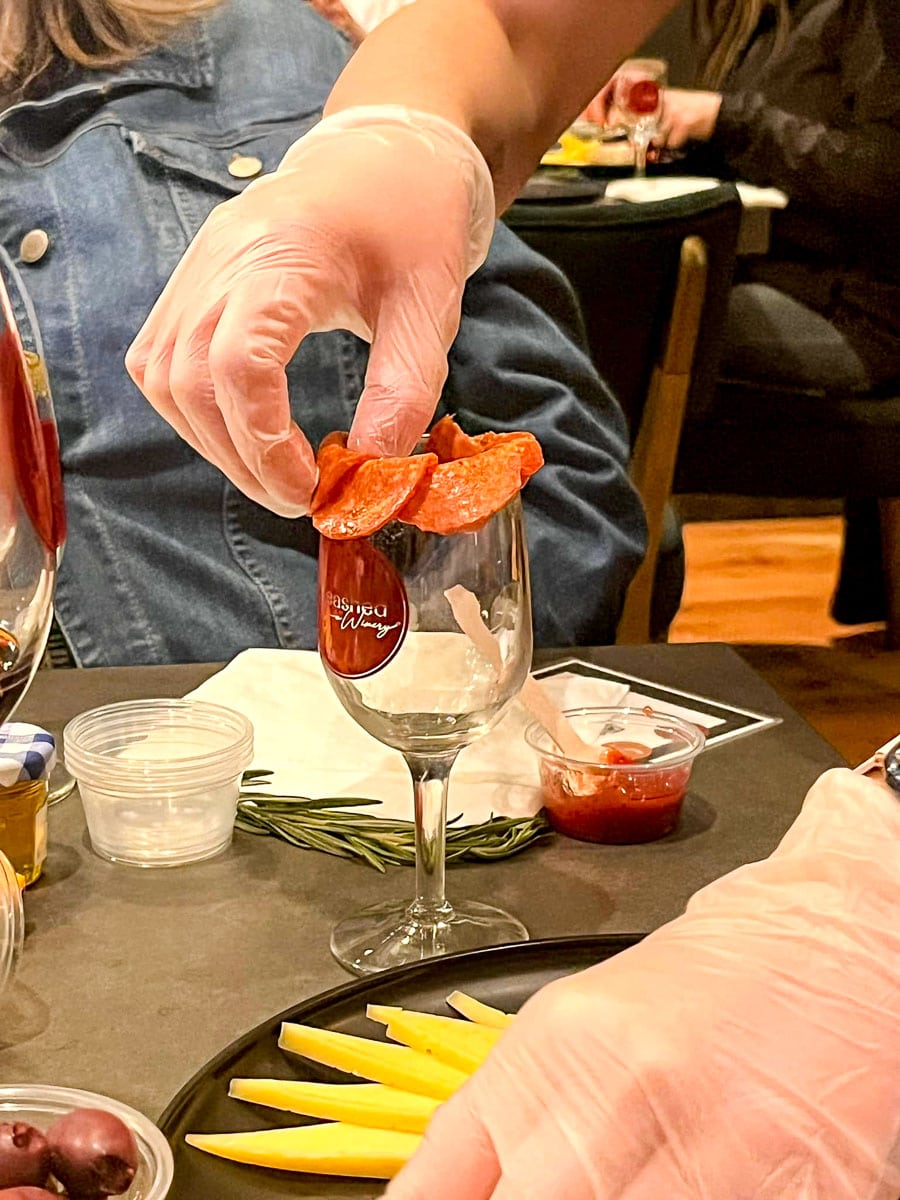
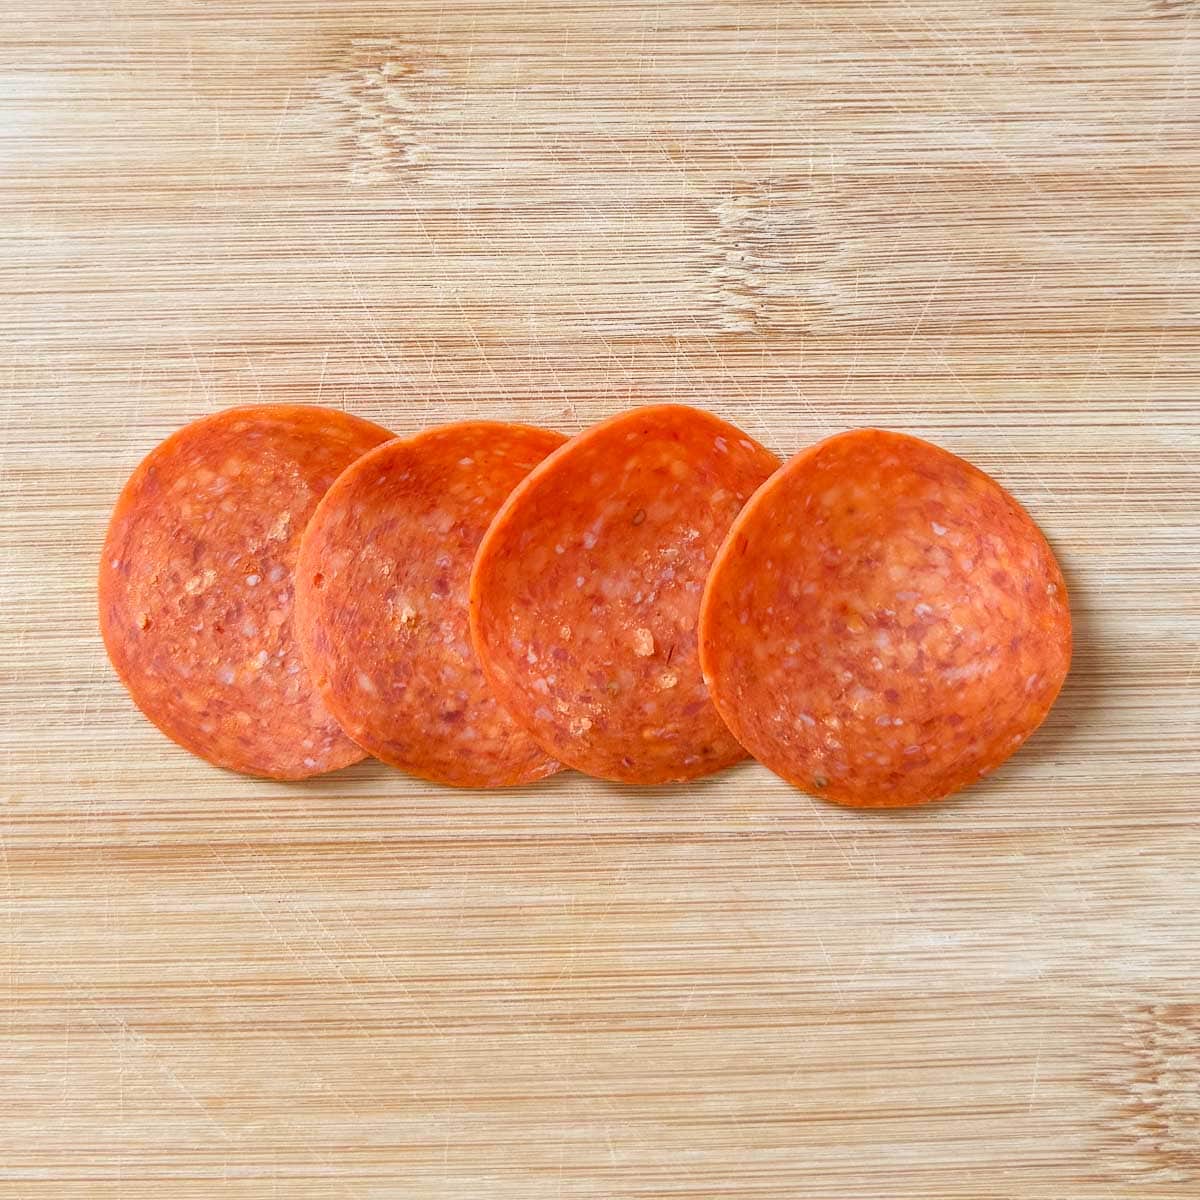
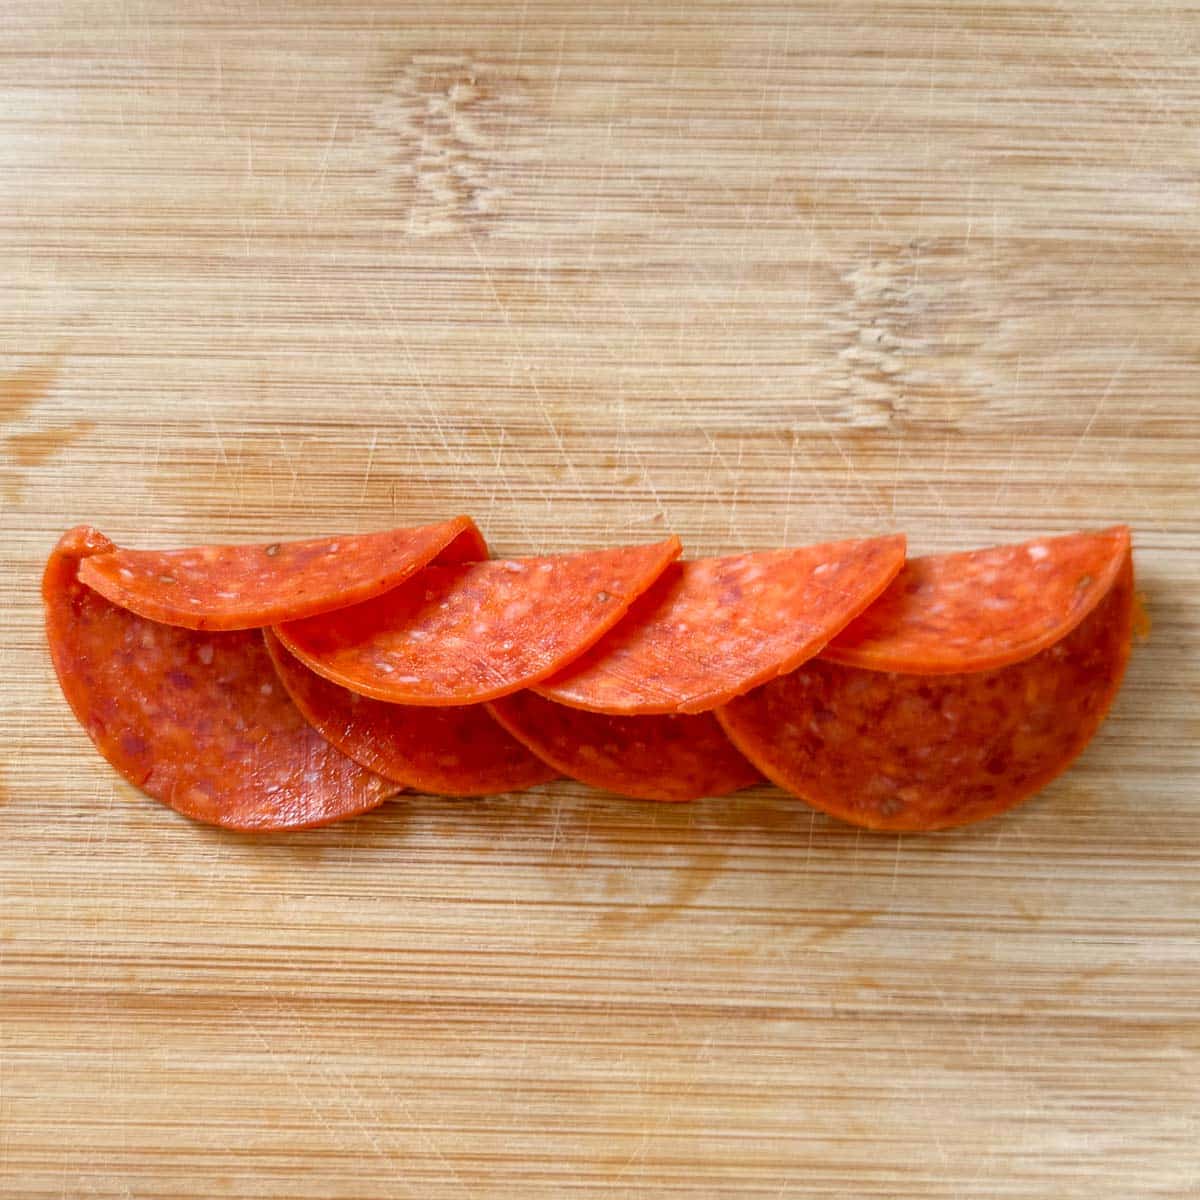
To create mini pepperoni roses, line up 4 pepperoni slices so that they are slightly overlapping. Fold them in half from top to bottom, then roll the stack from right to left to assemble the rose. Use a skewer to keep it in place.
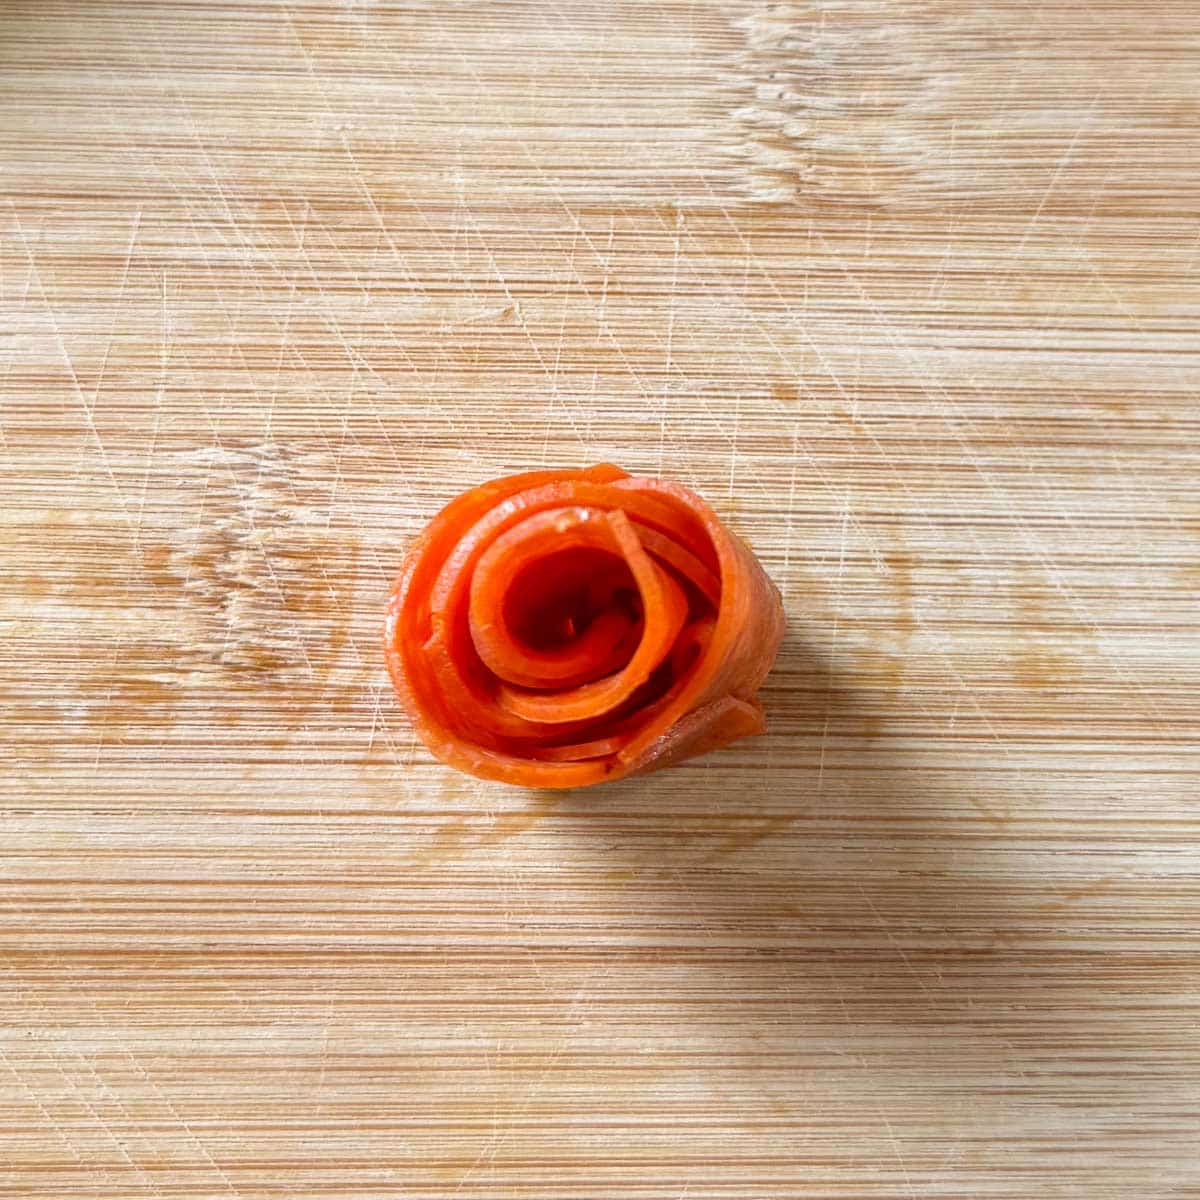
Mini pepperoni roses go great in charcuterie cups! Watch the video to learn how to prepare a salami rose, a salami rose in a cup, and a mini pepperoni rosebud.
🤷🏻♀️ FAQs
The number of salami slices required to make a salami rose will depend on the size of the glass used. The larger the glass, the more salami it will take to make each row. If you use a glass 3" in diameter, it should take approximately 24 slices of salami to make a salami rose.
Meat roses (salami roses) look better when freshly prepared, but can also be prepared a day ahead of time. If you decide to make them ahead of time, they should be covered with plastic wrap or foil or stored in a sealed container and refrigerated until you are ready to serve your salami roses.
Pepperoni roses are made using the same method as making salami roses. The pepperoni slices are folded over the rim of a glass and overlapped continuously until you have approximately 5 rows. Since pepperoni slices are smaller than salami slices, you should use a smaller glass, for example, a round shot glass.
Looking for other easy appetizer ideas? Check out these yummy pepperoni appetizers or this Burrata Caprese recipe!
👩🏻🍳 Pro Tips
- Use a see-through glass so you can keep an eye on the placement of the salami slices.
- The size of the glass will determine the size of the salami rose. Larger glasses will result in larger salami roses.
- When making the salami roses, you'll want to press and hold the salami slices over the glass so that they can take on the shape of the glass. Especially the first few layers.
- To add interest to your charcuterie board, consider making a few different salami roses. Watch the recipe video to learn how to make the other types of meat roses.
- When making a charcuterie board for your friends or guests, always wear rubber gloves.
- If you will be making the meat roses ahead of time, keep the rose on the glass, wrap it with Saran Wrap, and refrigerate it. This will help the salami rose to hold its shape until you're ready to add it to your board.
- You can also try other cuts of meat to make your meat roses, including ham and turkey slices. If you need to, use a round biscuit cutter to cut the meat into round slices.
- You can even make cheese roses with sliced cheese, for example, provolone!
🧀 More Charcuterie Board Options


Did you make this recipe?
📖 Recipe
Would you like to save this recipe?

How to Make A Salami Rose For A Charcuterie Board
Ingredients
Equipment
Method
- For the first layer, fold one salami slice in half and place it on the rim of a wine glass. Make sure half of the salami is inside the glass and the other half is outside the glass. Add another salami slice and overlap the first slice by ¼" to ½." Repeat the steps with 2 more slices which should cover the entire rim.
- To create the second layer, repeat the steps, making sure to cover the overlapped pieces with the second row of salami slices. You will be making 6 layers of salami.
- For layers 3 through 6, place the salami layers so that more of the salami is inside the glass than outside. When looking at it from the outside of the glass, the 3rd-row slices should be approximately ⅛th" higher than the first 2 rows. Each of the remaining rows will be higher than the one under it.
- As you continue to add rows you will be left with a small hole in the center or none at all. At this point, cover the glass with a saucer and turn the glass over. Push down on the salami flower while twisting the glass slightly to help set the rose.
- Now lift the glass up to reveal your salami rose!
Nutrition
Video
Notes
- Use a see-through glass so you can keep an eye on the placement of the salami slices.
- The size of the glass will determine the size of the rose. Larger glasses will result in larger roses.
- When making the roses, you'll want to press and hold the salami slices over the glass so that they can take on the shape of the glass. Especially the first few layers.
- To add interest to your charcuterie board, consider making a few different roses. Watch the recipe video to learn how to make the other types of roses.
- When making a charcuterie board for your friends or guests, always wear rubber gloves.
- If you will be making the roses ahead of time, keep the rose on the glass, wrap it with saran wrap, and refrigerate it. This will help the rose to hold its shape until you're ready to add it to your board.
- You can also try other cuts of meat to make your meat roses including ham and turkey slices. If you need to, use a round biscuit cutter to cut the meat into round slices.
Ann says
Thank you for the very clear instructions and illustrations. I think I can do this! I was at an event this afternoon and there was a giant charcuterie board with just a few salami roses and they looked so special. As a bonus, guests hesitated to demolish them, so they helped keep the board looking abundant longer than if the meat had just been arranged in rows. Anyway I came home wanting to figure out how to make these and came across this site - thank you for sharing the technique! I'm having a party next weekend and may just give this a go if time permits.
Hilda Sterner says
You're welcome, Ann! Good luck with your party! 🙂
Nancy Helsel says
I paid $45 to go to a charcuterie class The night before I saw your post and made my first pepperoni rose and it turned out beautiful Next day they taught roses but not with the glass It took forever and did not look near as good as the one I made at home Could have save some $$! Thanks so much!
Hilda Sterner says
Thanks, Nancy! I think my charcuterie class was around $75 but also included wine tasting. I'm glad you were able to follow along with my instructions. Sometimes in a class setting it's hard to see a close-up of what the instructor is doing so, I can see that being an issue. Either way, I appreciate the review!
Deanna Jakel says
Beautiful and so easy to make.
Hilda Sterner says
Thank you, Deanna, I appreciate it! 🌹
Kelly Methey says
Such a fun night! Your roses look perfect! Enjoy your charcuterie with your Twilight Zone Marathon!
Hilda Sterner says
Who could have known that the little class we attended could end up with such a popular post?
Melodie says
Was the glass you used three inches in diameter (across the top of the glass from one side to the other side) or in circumference?
Hilda Sterner says
Hi Melody, it was 3" in diameter.
Maureen says
Thank you for the excellent instructions. I do not have any "artsy" in me. And mine turned out beautiful with your thorough
instructions. My Christmas plate will look wonderful!!!
Hilda Sterner says
Thank you, Maureen! I'm glad you were able to master it, Merry Christmas!
Debra Birkinshaw says
It turned out beautifully the very first time!
Hilda Sterner says
That's great!
Terry Smith says
I want to invite a few friends over to make a take home charcuterie board and wine tasting party. Thanks for the reminder of how much fun the evening in Whitefish was. I ate my rose!
Hilda Sterner says
You always make everything extra fun!
Kathy Fisher says
WOW Very impressive. I love the video. You make it look so easy. Thank you Hilda.
O
Hilda Sterner says
Thanks, Kathy, I appreciate your review.