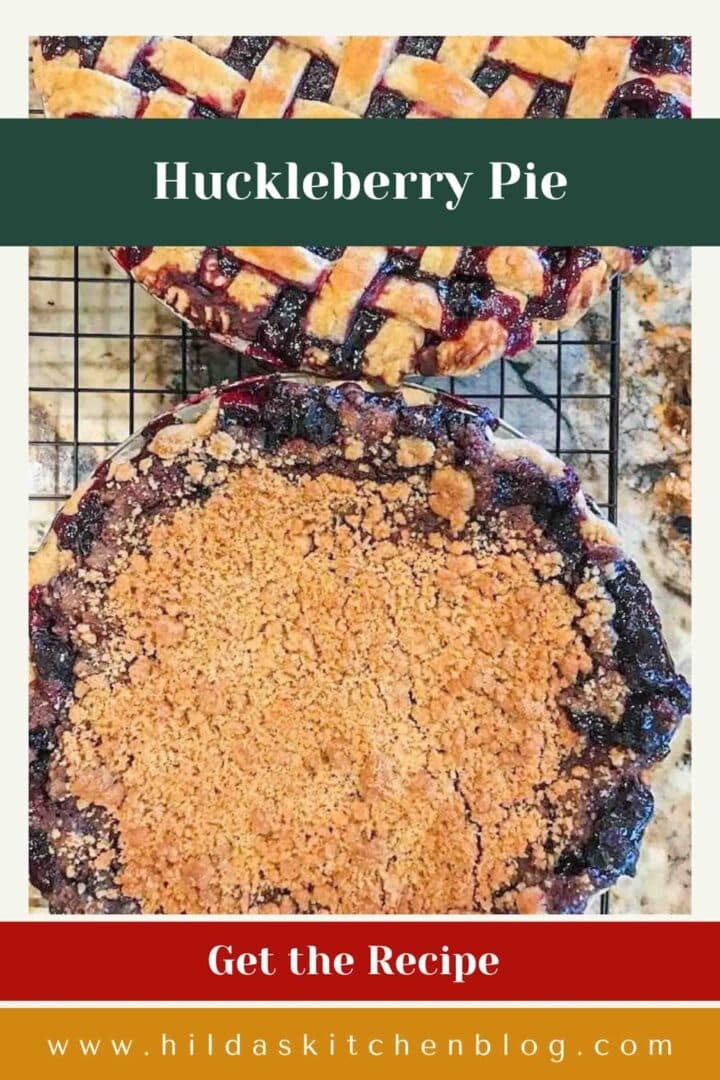
This Huckleberry Pie Recipe is as gorgeous as it is tasty. It's the perfect summer treat and the last huckleberry pie recipe you'll need! It's not overly sweet and bursting with huckleberry flavor. If you have more huckleberries, make sure to try this huckleberry syrup and my new huckleberry curd recipe!

Would you like to save this recipe?
Huckleberries are the perfect balance between sweet and tart. As a matter of fact, many describe the taste of huckleberries as a combination of blueberries and cranberries. Tart, sweet, and delicious!
I kept this huckleberry pie recipe simple by using huckleberries, sugar, orange juice, and zest. Instead of cornstarch, I used tapioca as a thickening agent. Let's be honest, don't we all hate runny pies that ruin an otherwise perfectly tasty crust?
I left the cinnamon as optional because I personally did not want anything to compete with the huckleberry flavor. However, feel free to add ½ of a teaspoon if you would like.
Huckleberry pie begs for a big scoop of homemade huckleberry ice cream, so make sure you have some on hand... and don't forget a piping hot cup of coffee!
Jump to:
🔖 Ingredients & Substitutions
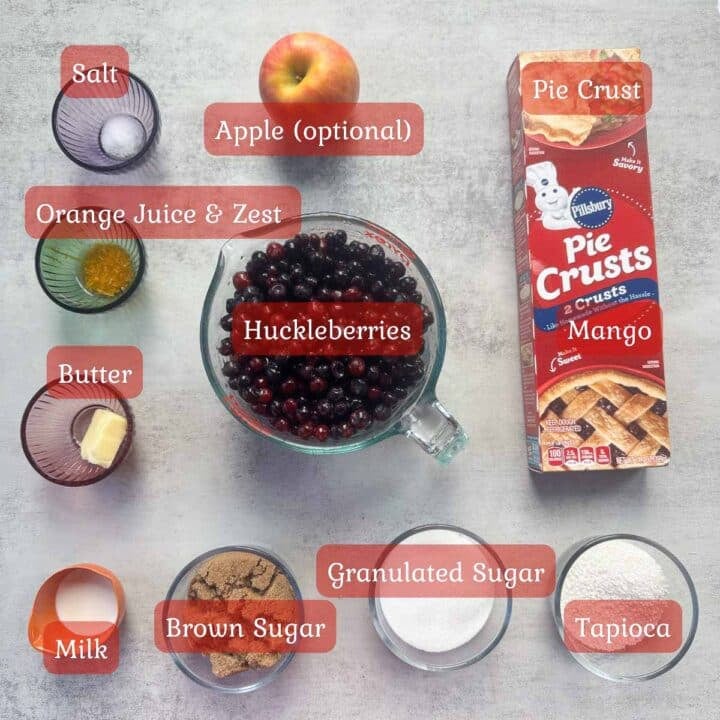
- Huckleberries: If you don't have enough huckleberries, you can add an apple or two or sneak in some blueberries. Some folks even add peaches.
- Pie Dough: You can make your own shortening or butter pie crust, or take a shortcut and use a store-bought pie crust like I did.
- Tapioca: Tapioca gives the pie a nice, thick texture. I use Kraft Minute Tapioca for pudding and fruit pies. Make sure your tapioca has not expired!
- Orange Juice & Zest: I love the orange flavor in this pie, and so do my readers. However, if you need to, substitute with fresh lemon juice & zest.
- Butter: Unsalted butter for dotting the pie.
- Cinnamon: Add a pinch of cinnamon or cardamom, or leave it out if you prefer the natural flavor of the huckleberries to shine through.
* A full list of ingredients can be found in the recipe card at the bottom of the post.
🔪 Helpful Tools
🥧 How to Make Huckleberry Pie
Preheat oven to 375°F
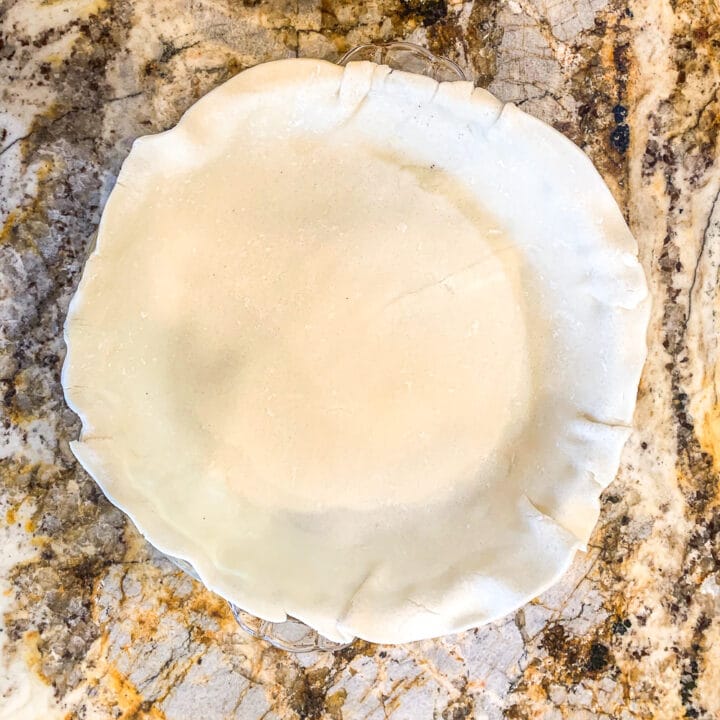
Step 1: Line the bottom of a 9" pie pan with one of the two pie crusts.
Pro Tip: If using frozen huckleberries, quickly rinse off any ice that may have formed around the berries and drain them completely.
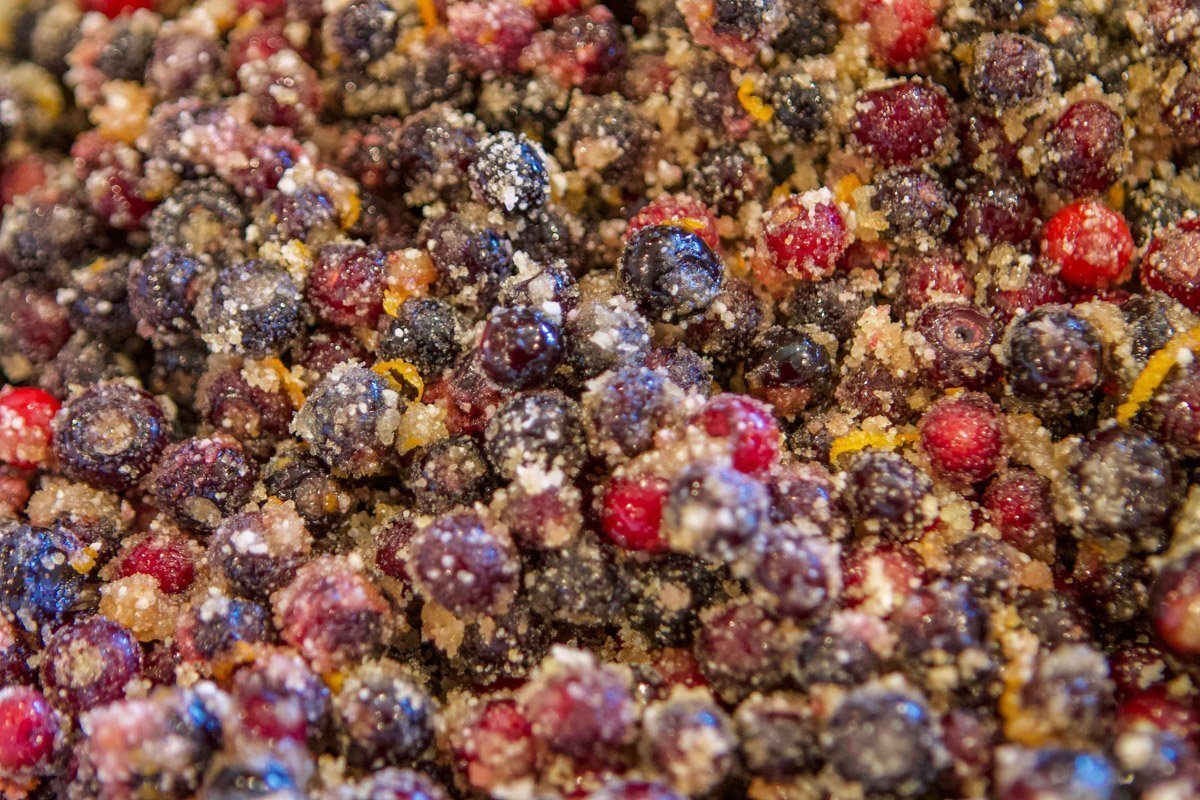
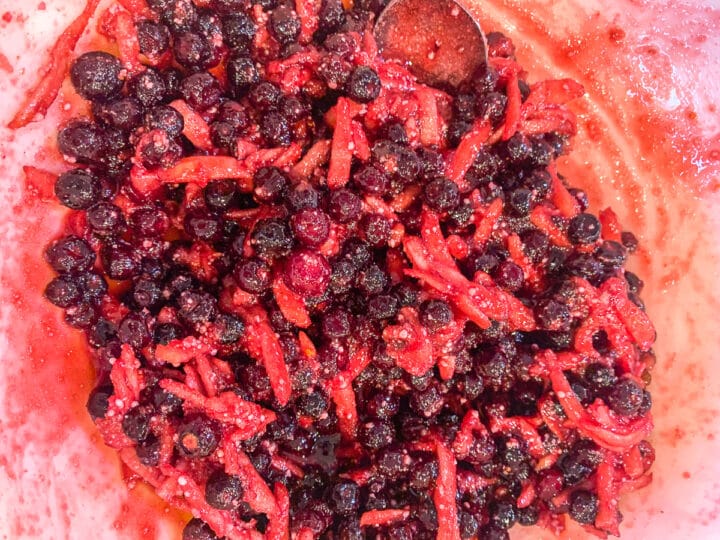
Step 2: In a large bowl, mix both sugars, tapioca, orange zest, orange juice, salt, and cinnamon, if using. Add fresh huckleberries (or frozen) and one shredded apple (optional) and mix gently to combine.
Pro Tip: The apple is used both as a filler and to thicken the huckleberry filling.
Step 3: Allow the filling to rest for 15 minutes. This will allow the quick-cooking tapioca to activate.
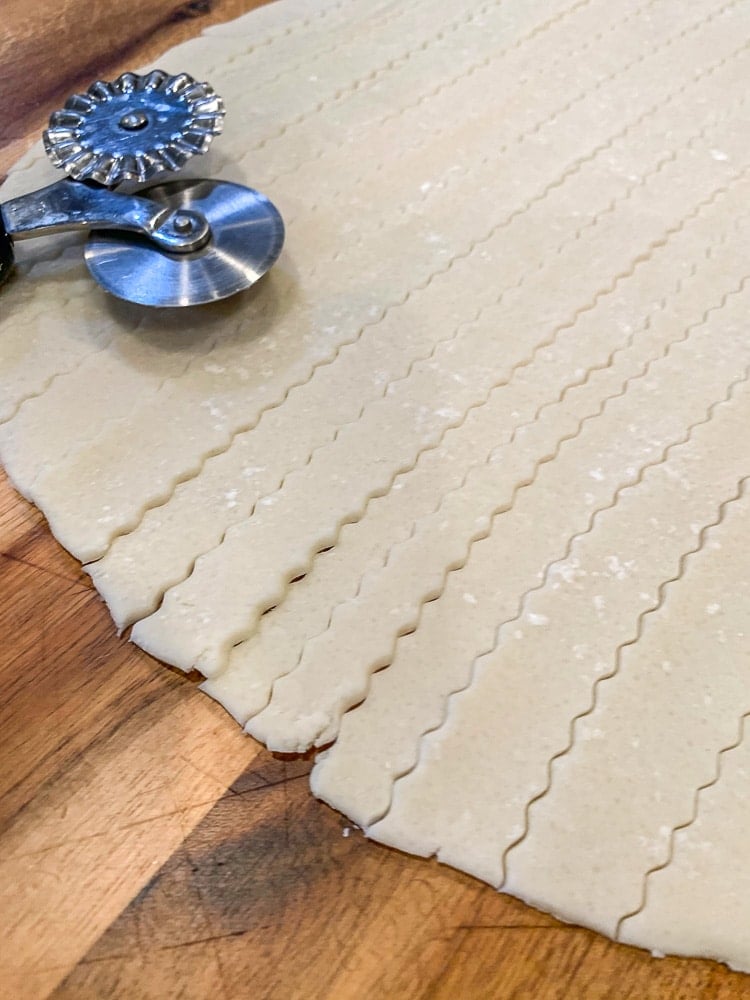
Step 4: Meanwhile, on a lightly floured surface, slice the remaining pie crust into ¼" strips using a pastry wheel or a sharp knife.
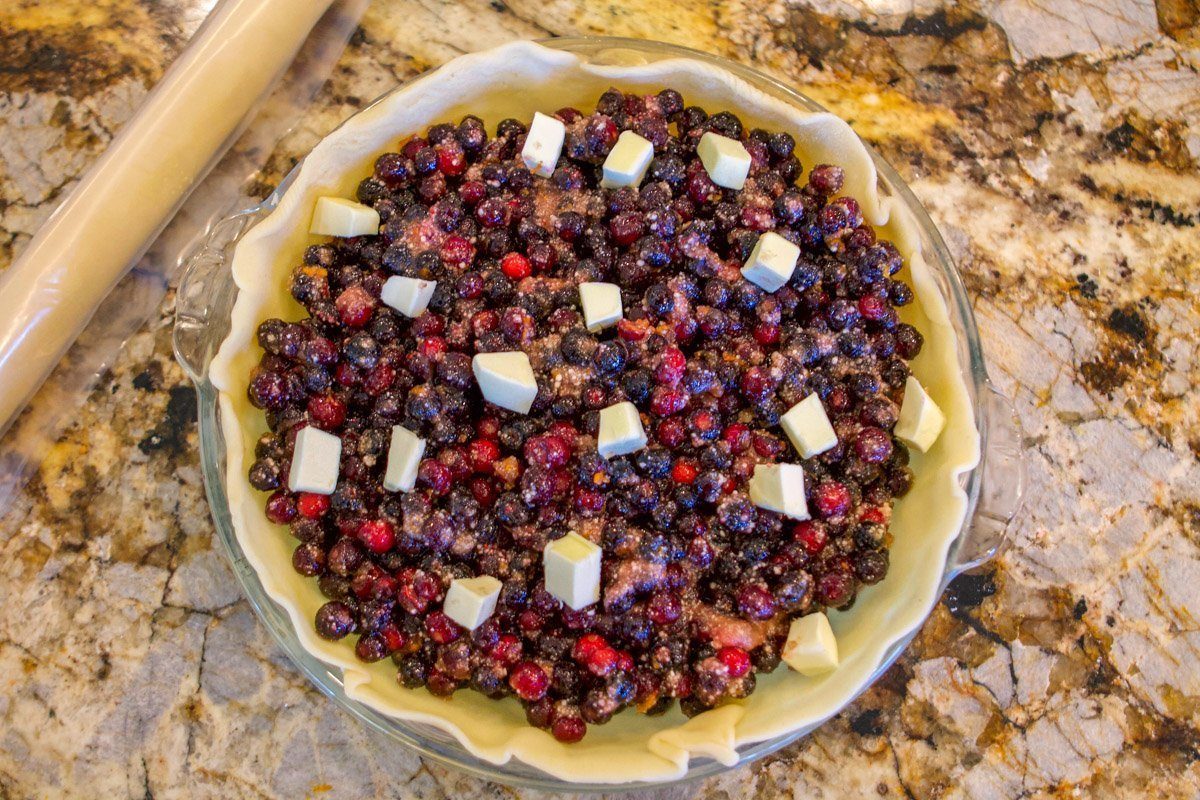
Step 5: After fifteen minutes, pour pie filling into the prepared pie crust, then dot with butter.
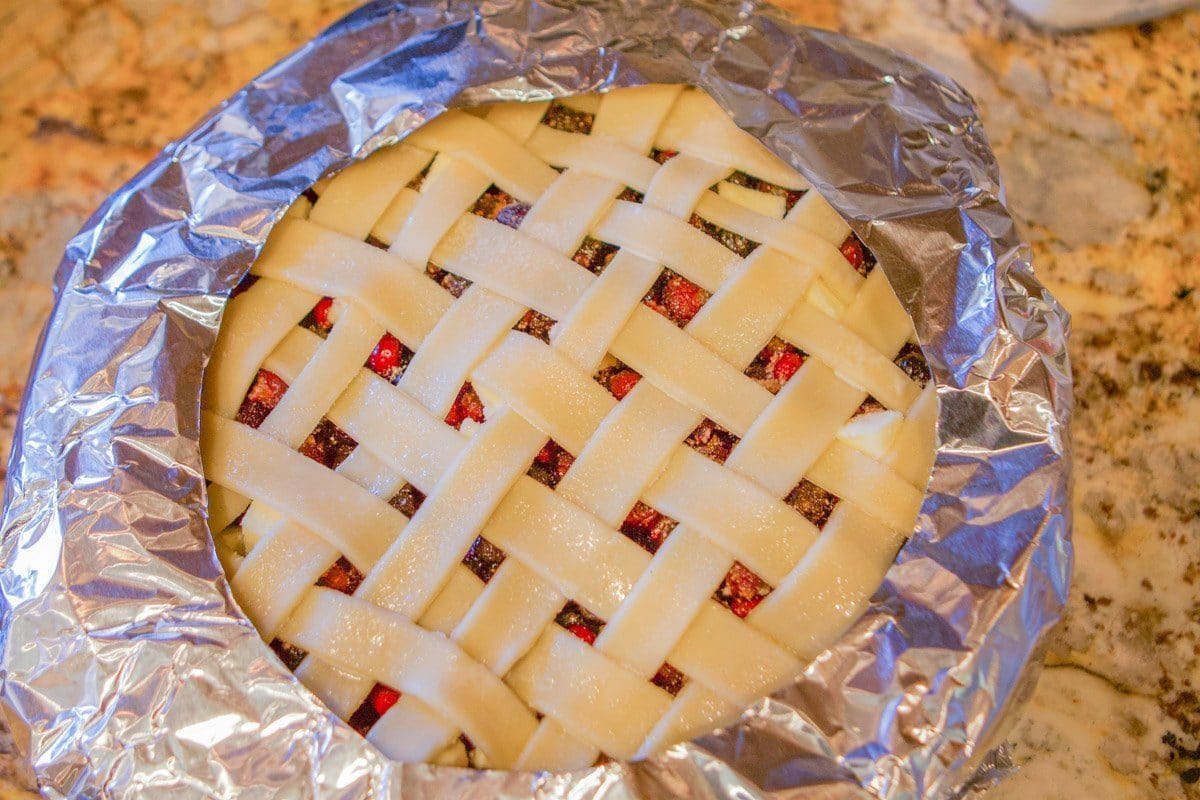
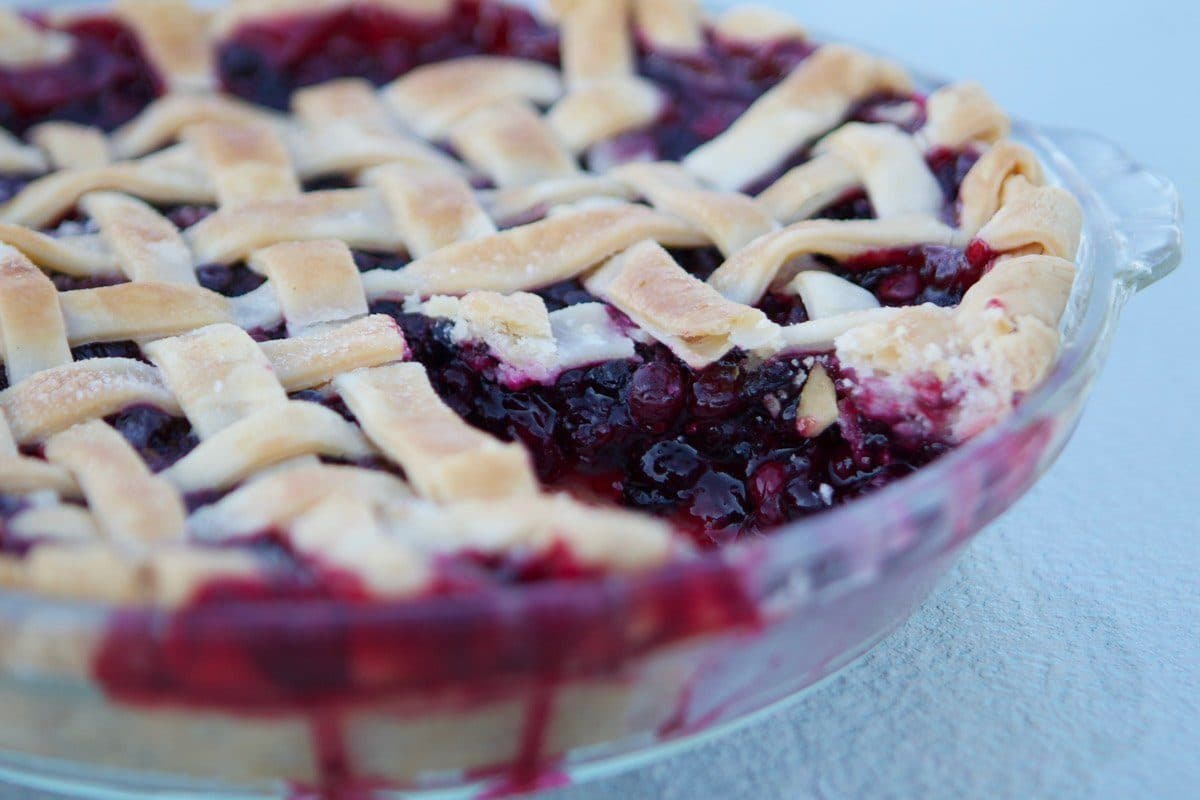
Step 6: Arrange strips of dough in a lattice fashion over the top of the pie and either tuck the ends of the strips under the bottom crust or fold the bottom crust over the strips and crimp.

Step 7: Cover pie edges with foil. Brush with 1 tablespoon milk or an egg wash. Sprinkle with 2 teaspoons of sugar. Bake for an hour, or until the pie filling is bubbly and oozes out of the lattice crust, and the top crust is golden brown. Remove foil during the last 15 minutes.
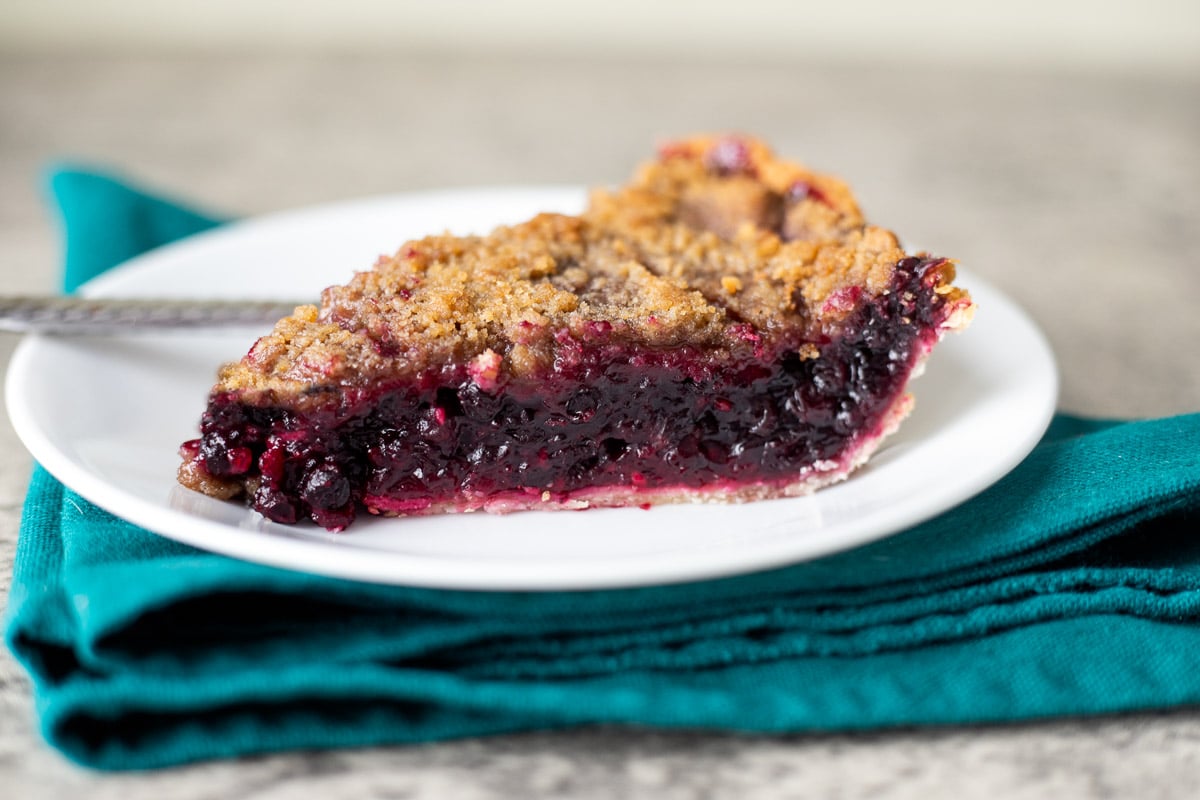
Cool the huckleberry pie before slicing. Top with vanilla ice cream and enjoy!
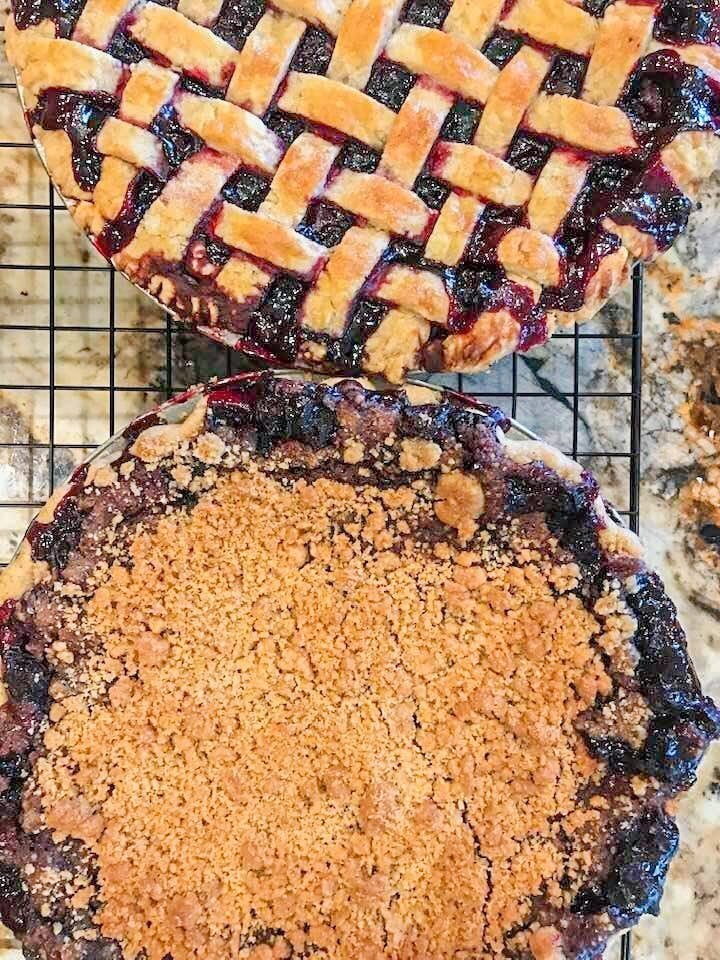
🫐 Crumb Topping Huckleberry Pie Recipe
If you prefer your huckleberry pie with crumb topping, you're in luck! I actually prefer it that way, too! You can easily make this a crumb-topping huckleberry pie by following these simple steps.
- Follow the recipe steps up to dotting the filling with butter, but do not dot with butter.
- Bake at 375°F for 30 minutes.
- Meanwhile, mix ½ cup of brown sugar, ¾ cup of flour, ¼ teaspoon cardamom, ¼ teaspoon cinnamon, and a pinch of salt. Make sure there are no clumps in the brown sugar and that the ingredients are thoroughly mixed.
- Using your hands or a fork, cut in 6 tablespoons of cold, cubed butter until the mixture is crumbly.
- After 30 minutes have elapsed, remove the pie from the oven and turn up the oven temperature to 400 degrees F.
- Carefully distribute the crumb topping evenly over the berries, so that the berries are no longer visible.
- Cover pie edges with foil or a pie crust protector. Bake for an additional 15 minutes, or until the pie is bubbly and begins to ooze out from under the topping.
- The pie will firm up once refrigerated.
🤷🏻♀️ Recipe FAQs
"Huckleberries" (also known as 'Hurtleberry' or 'Whortleberry') are glorious red and purple berries that resemble blueberries in taste and appearance (although smaller).
The berries go from green to light pink, dark pink, and a deep purple when fully ripened. Some varieties have larger berries that are deep red when fully ripe and more tart than the purple variety.
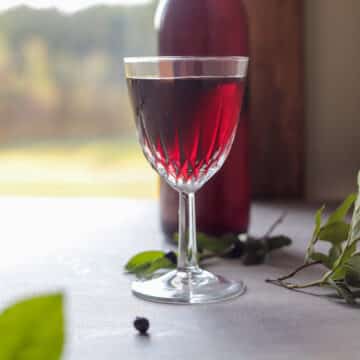
Huckleberry bushes grow in acidic mountain soil and range in size from 1' to 5' in height. They are delicious when eaten raw and just as tasty when used to make huckleberry pie, jam, syrup, cheesecake, and wine.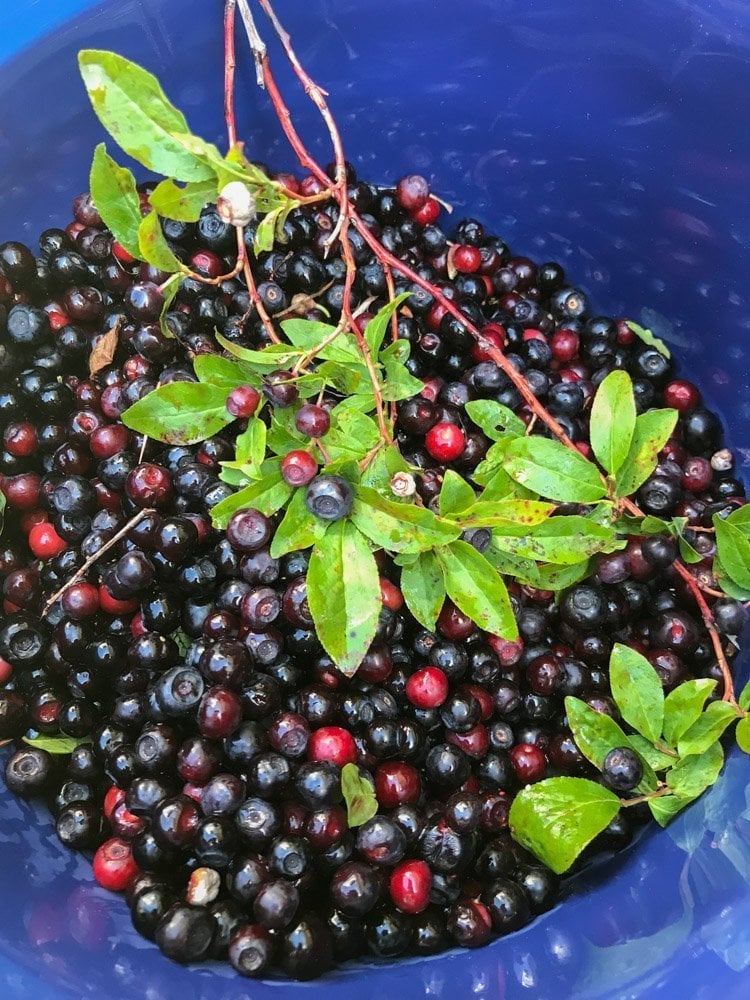
Huckleberries are native to the Northwestern United States. They grow in the wild in elevations from 3000' to 6,000'.
States where huckleberries grow include Montana, Idaho, Wyoming, Oregon, Washington, and Alaska.
Since huckleberries are not commercially grown, they're usually handpicked by individuals and sold for as much as $50 to $100 a gallon! Here in Montana, they are ready to harvest from late June through late August, depending on the elevation.
However, if you're looking for an exact location, good luck! Most people have their own "secret spot" that they won't even share with their own mother. If you can't get your hands on huckleberries, substitute blueberries instead!
🍽 Other Huckleberry Recipes
If you are looking for more recipes with huckleberries, you're in luck! Here are some of my favorites!
- Gourmet grilled cheese sandwich with huckleberries
- Huckleberry Chutney
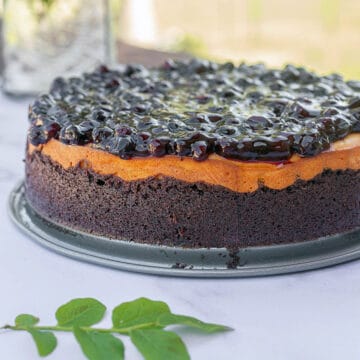
- Huckleberry cheesecake with brownie crust
For further information on the Huckleberry plant, check out Britannica.com.
👩🏼🍳 Pro Tips
- The only way to make this huckleberry pie recipe even more incredible would be to take the time to make the crust from scratch (check out this pie crust recipe).
- Cover leftover pie with foil and store in the fridge for up to a week (if it lasts that long).
- If you prefer a regular pie instead of a lattice-topped pie, no problem! Just cover the filled pie crust with the top crust and crimp the edges. Make slits in the center for the steam to escape.
🥮 Other Pie Recipes
Be sure to try these other great pie recipes!
🍒 More Huckleberry Recipes

Did you make this recipe?
📖 Recipe
Would you like to save this recipe?

Huckleberry Pie Recipe
Ingredients
Equipment
Method
- Line the bottom of a 9" pie pan with one of the two pie crusts.
- In a large bowl, mix both sugars, tapioca, orange zest, orange juice, salt, and cinnamon, if using. Add fresh huckleberries (or frozen) and one shredded apple (optional) and mix gently to combine.
- Allow the filling to rest for 15 minutes. This will to allow the quick-cooking tapioca to activate.
- Meanwhile, on a lightly floured surface, slice the remaining pie crust into ¼" strips using a pastry wheel or a sharp knife.
- After fifteen minutes, pour pie filling into the prepared pie crust, then dot with butter.
- Arrange strips of dough in a lattice fashion over top of the pie and either tuck the ends of the strips under the bottom crust or fold the bottom crust over the strips and crimp.
- Cover pie edges with foil. Brush with 1 tablespoon milk or an egg wash. Sprinkle with 2 teaspoons sugar. Bake for an hour, or until the pie filling is bubbly and oozes out of the lattice crust, and top crust is golden brown. Remove foil during the last 15 minutes.
- Cool huckleberry pie before slicing. Top sliced pie with vanilla ice cream and enjoy!
Nutrition
Video
Notes
- See post for making crumb topped huckleberry pie.
- If using frozen huckleberries, quickly rinse off any ice that may have formed around the berries and drain them completely.
- The apple is used both as a filler and to thicken the huckleberry filling.
- If you prefer a regular pie instead of a lattice-topped pie, no problem! Just cover the filled pie crust with top crust and crimp edges. Make slits in the center for the steam to escape.
- The only way to make this huckleberry pie recipe even more incredible would be to take the time to make the crust from scratch (check out this pie crust recipe).
- Cover leftover pie with foil and store in the fridge for up to a week (if it lasts that long).
Liza says
Encore performance - my family loved this pie recipe so much that I made it again for Christmas Eve dinner tonight. I wish I could post a picture as it is deliciously messy looking with the juices bubbling all over the lattice. One note that I learned years ago, always pulverize the Minute Tapioca before mixing with the sugars and salt. I am making the huckleberry sauce recipe now to top the ice cream on the pie. Thank you!
Hilda Sterner says
Hi Liza,
Thank you so much for your review. I will have to try your trick for pulverizing the tapioca next time. That totally makes sense. Merry Christmas!!
Marc Kerner aka Glacier Guy says
Used Marie Callendar Frozen Pie Crust and it makes baking “ . . . as simple as pie!” We live in West Glacier Montana and pick Huckleberries in season freezing large quantities, eating large quantities, and carry Bear Spray just in case. Lots of hungry Bears feasting on Huckleberries, both kinds, Black & Grizzly Bears. Making your recipe as we speak and the aroma of the Crumble finishing on top is beyond wonderful. Headed down to the Hungry Horse Market to get the recommended Vanilla Ice Cream!
Hilda Sterner says
Hi neighbor! I'm in Lincoln county. Nothing better than Montana huckleberries. I usually freeze a bunch too except for last year, only got to go picking a few times. Enjoy every bite! 🥧
Rebecca says
Can this be made ahead of time and frozen? Wondering if it’s okay to freeze before baking or if I should freeze after I have baked it?
Hilda Sterner says
You can absolutely freeze huckleberry pie. For the best texture and flavor, freeze the pie unbaked: assemble it, wrap it tightly, and freeze it until solid, then thaw overnight in the fridge before baking. If the pie is already baked, you can still freeze it; just make sure it cools completely first. The crust won’t be quite as crisp after thawing, but it will still taste delicious. To serve, thaw in the fridge overnight and warm it in a 350°F oven for about 20 minutes.
Troy Dean says
this is going to be delicious
Hilda Sterner says
I'm going to have to agree with your there, Troy. Enjoy! ❤️
Leanne C says
Thanks Hilda for the reminder to let the tapioca soak 15 min, I have had trouble by rushing it and then it doesn't dissolve well if heated too quickly, and the 5 minutes it says on the box is not enough.
Wild huckleberries pack much more flavour punch than domestic blueberries, so while orange rind is great with blueberries, I prefer h.b. without.
I don't rinse frozen berries because any ice is from moisture inside the berry, and you will just wash away flavour. That liquid is good to soak the tapioca.
Apple is a great way to stretch precious h.b's 🙂 I used less sugar because my berries are fairly sweet.
I used a press-in butter crust, baked it empty and meanwhile gently simmered the berry mixture in a pot then added to the cooled crust, which makes for a crispier crust.
Hilda Sterner says
Thank you, Leanne, I appreciate your detailed review. I wish I had me a slice just about now! Enjoy your pie!🫐
Jen says
Ice on the berries isn’t necessarily from inside the berries. It’s also frozen condensation from the moisture in the air. BUT if any berries split while going through the picking or freezing process, you will def be washing away a bit of juice. Prob not much?
Robbie says
OMG, I used your filling recipe today for my first time trying a huckleberry pie and it was outstanding!! I used a pate sablee crust because it is very lightly sweetened to go with the tart huckleberries and it was sooo good. Definitely the most expensive pie I've ever made as we don't have huckleberries around my area, but I'm so glad I splurged and used your recipe!!!
Hilda Sterner says
Hi Robbie, what a sweet comment to wake up to! I'm so glad you enjoyed the pie. It is one of my favorites. I try to make it at least once or twice a year and save some huckleberries for other huckleberry recipes I like to make.
Kelly Methey says
This pie is delicious! Nothing beats your huckleberry pie recipe, so yummy!
Hilda Sterner says
Thank you, Kelly! I'm glad you enjoyed it! 🙂