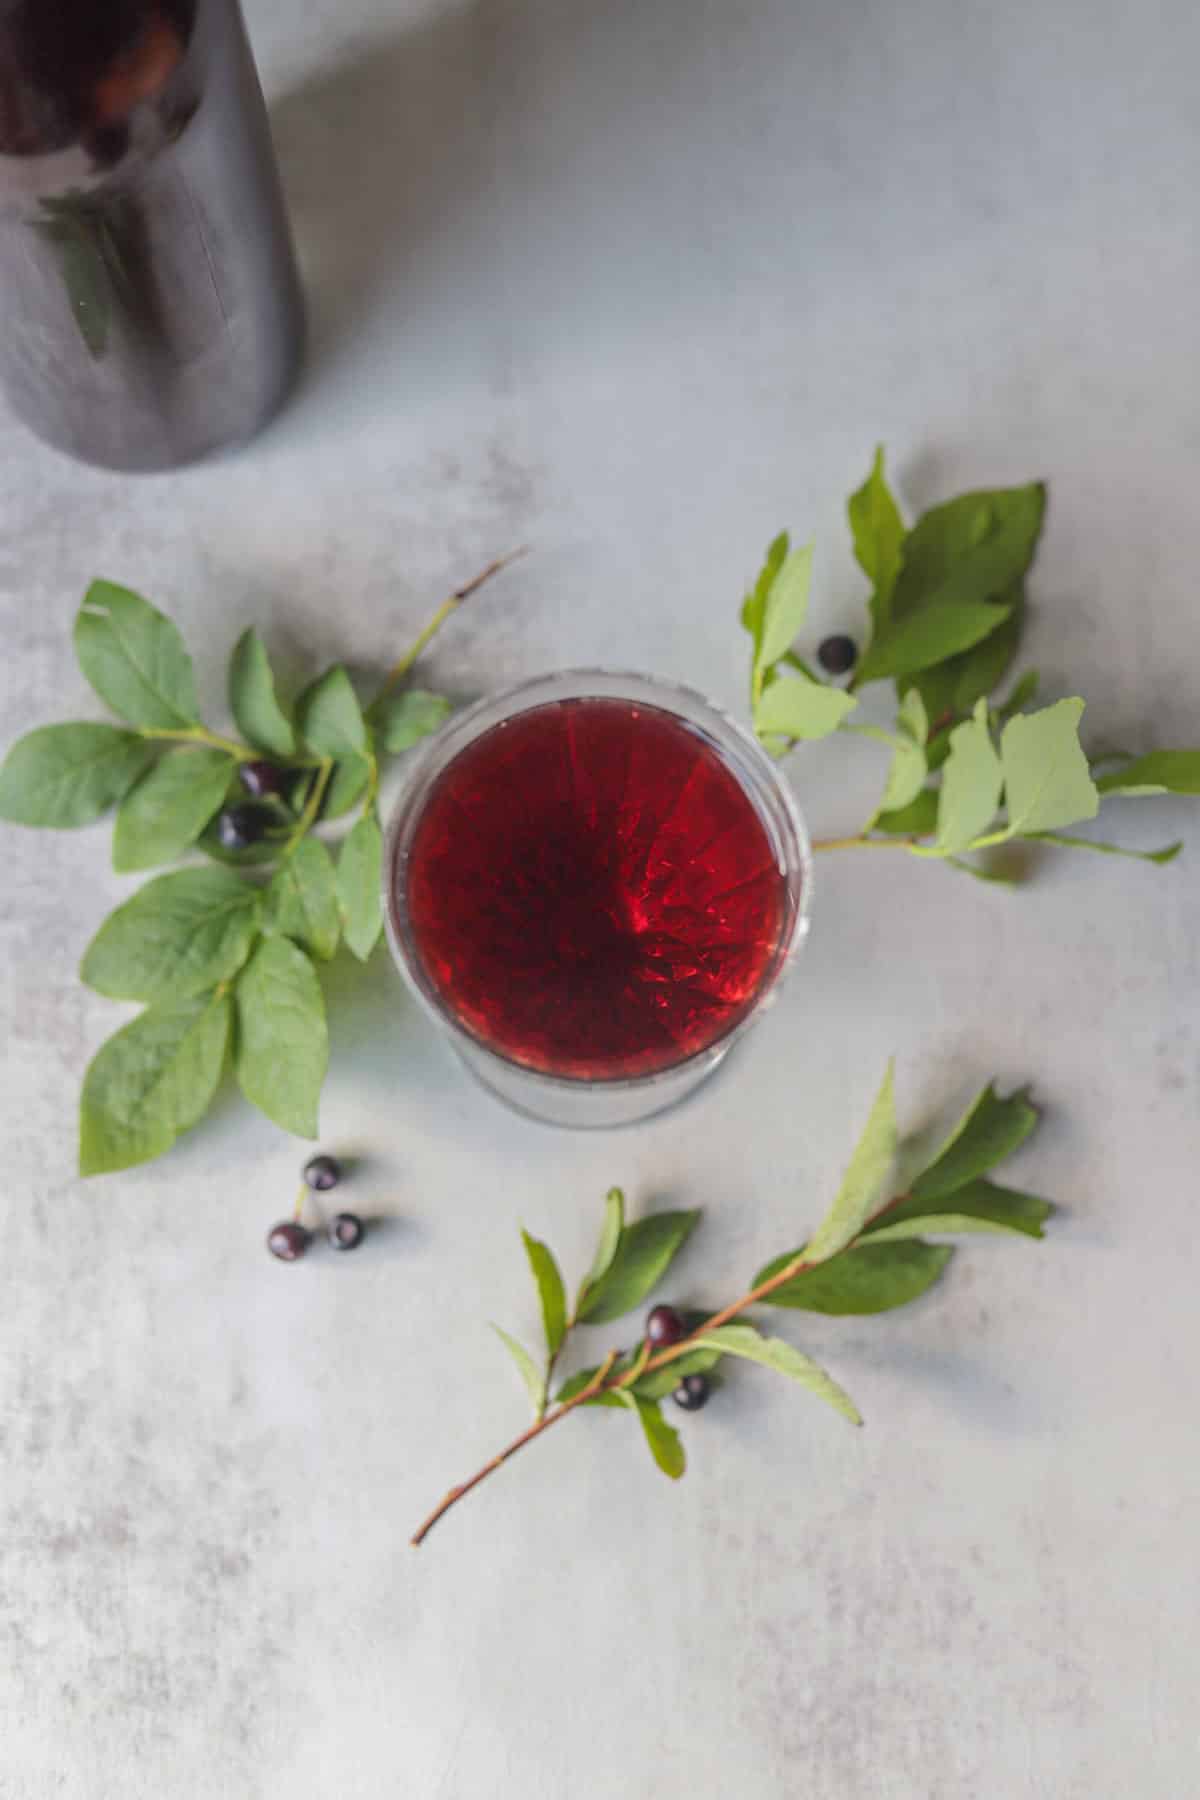
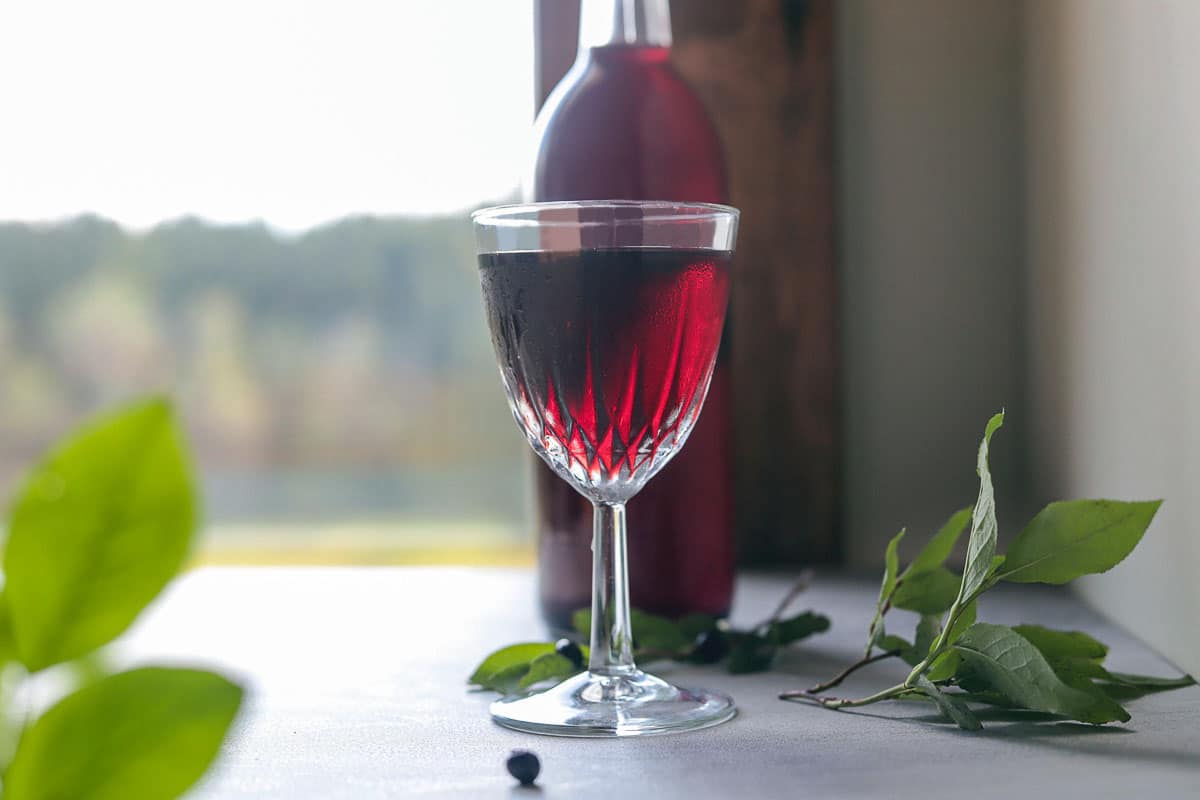
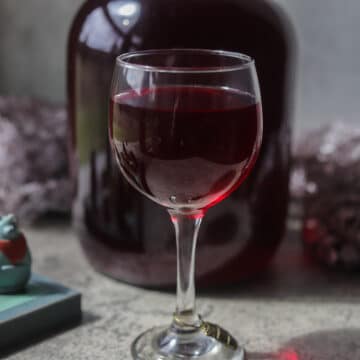
Homemade Blueberry wine or huckleberry wine is luscious and has an incredible dark color matched only by its wonderful, rich flavor. If you're a wine enthusiast, also try my chokecherry wine and my personal favorite, lilac wine!
Would you like to save this recipe?
This huckleberry-blueberry wine recipe post ended up being waaaaay longer than I could have ever imagined! I tried to cram as much information as I could to give you a successful wine-making experience.
The same recipe can be used to make huckleberry wine, blueberry wine, or this delicious huckleberry-blueberry wine, which uses a mixture of blueberries and huckleberries.
If you decide to skim the post or just look at the recipe card below the post, just know that you will miss some important information and tips!
Like the time I used a metal bar spoon to stir a crushed Campden tablet into my elderberry wine, which was in a carboy. The spoon knocked a hole into the side of the jar. I ended up with one gallon of elderberry wine all over my counters, cabinets, and inside my drawers... that might have made me cry.😭
I managed to save enough for 1 bottle, which I sent to my daughter. She said it was the best batch yet. More tears followed...
Lesson learned? Transfer the wine into a plastic bucket when stirring Campden tablets or syrup into the wine instead of stirring it directly into the carboy.
Jump to:
🧐 Why This Recipe Works
- This huckleberry-blueberry wine recipe is easy and fun to prepare.
- Winemaking is a totally rewarding hobby. I don't know about you, but I like a hobby that rewards me with wine!
- Once you get the supplies and chemicals you need, not only can you make this huckleberry-blueberry wine and other wines, including pomegranate wine, for a fraction of the cost of buying wine. All you will need to buy is fruit, sugar, and yeast.
- Homemade wine makes an excellent gift for any wine lover!
🔖 Ingredients & Substitutions
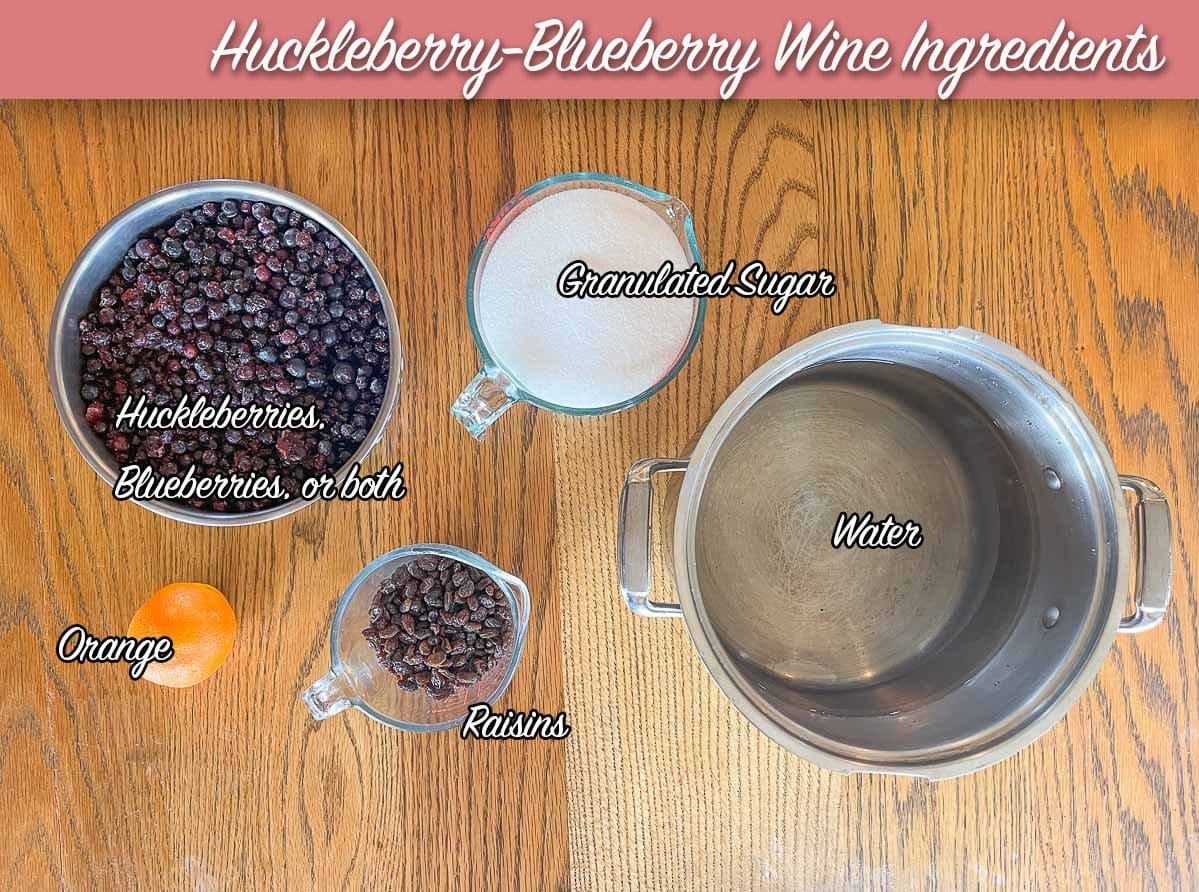
- Berries: To make this huckleberry wine recipe, you need 3 lbs of berries. You can use 3 lbs of huckleberries or blueberries. Since huckleberries were scarce this season and huckleberries and blueberries can be used interchangeably in recipes, I decided to use 1.5 lbs of huckleberries and 1.5 lbs of blueberries.
- Raisins: Raisins enrich the wine and give it body. I usually use black raisins, but I'm sure golden raisins would also work.
- Yeast: There are various types of yeast. I used Premiere Blanc, which has an alcohol tolerance of anywhere from 13-18% and is known to be vigorous. It is recommended for fruit wines. However, Premiere Classique is also a great option that produces a full-bodied wine, but its alcohol tolerance is lower at 13%. This means your wine's final alcohol level will not exceed 13%.
*See the recipe card at the bottom of the post for a full list of ingredients and exact measurements.
What's Included In A Wine-Making Kit?
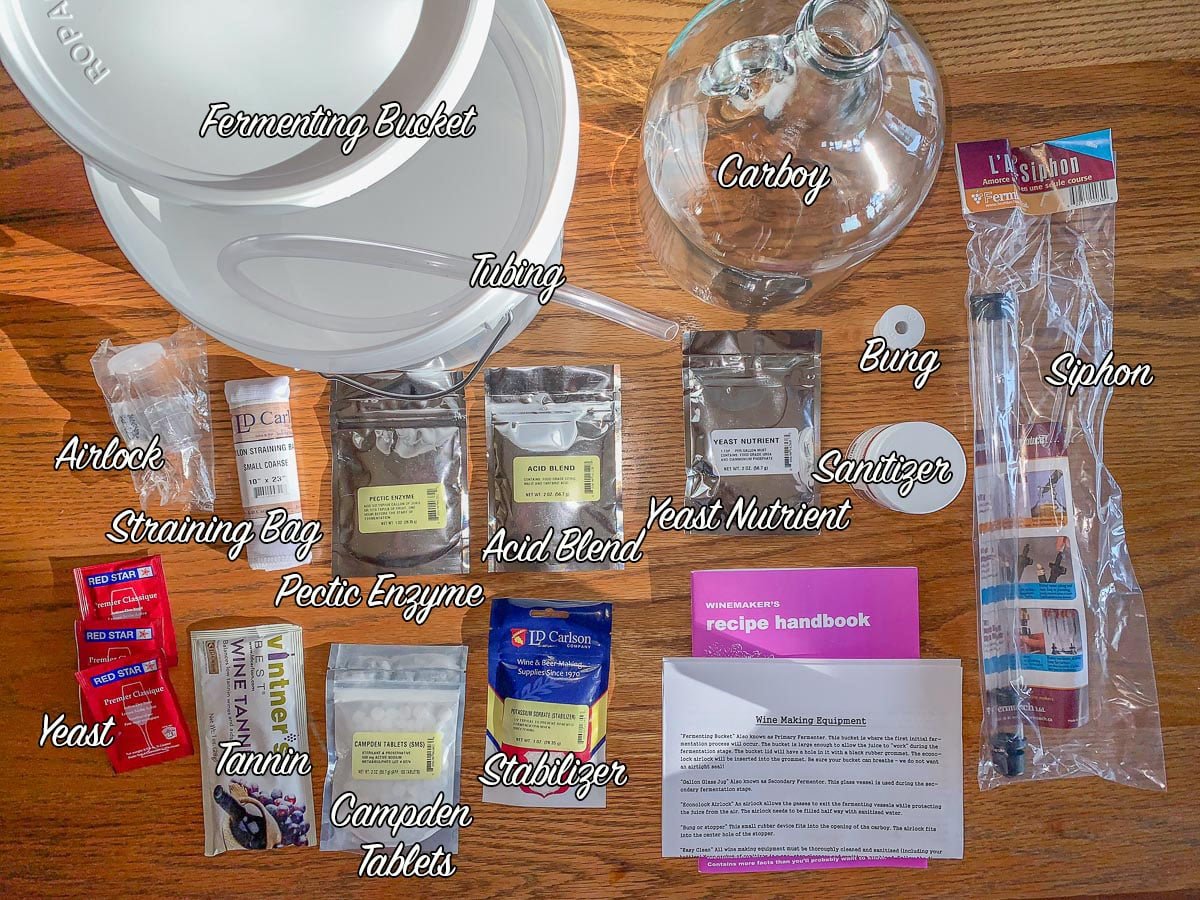
There are many wine-making kits available out there. I have found this wine-making kit to be the most affordable, and it has almost everything you need to make this huckleberry-blueberry wine recipe!
- Sanitizer: All of your equipment needs to be sanitized every time you make wine. You have various options, including a concentrated liquid sanitizer (Star San) or a powder that can be diluted in water (1-Step).
- Pectic Enzyme: Pectic enzyme is needed to break down the berries into a pulp and also aids in extracting the tannins from the fruit.
- Yeast Energizer: The yeast energizer feeds the yeast so that it can remain healthy throughout fermentation.
- Yeast Nutrient: Yeast nutrients provide the necessary nutrients for the yeast to ferment.
- Acid Blend: Acid blend is a mixture of 40% citric, 40% malic, and 20% tartaric acid and is used to increase the acidity of the wine.
- Tannin: Tannin improves the wine's flavor and adds an earthy flavor and astringency to the wine.
- Wine Stabilizer (Potassium Sorbate): Stabilizer is added when back-sweetening wine. It prevents renewed fermentation.
- Campden Tablets: Campden tablets contain Sodium Metabisulfite and are used to keep wild yeast and bacteria from growing in your wine. It also helps to keep the wine from oxidizing, which will affect both the color and flavor of the wine. The tablets need to be crushed and dissolved in the wine at the beginning and at bottling.
- 2 Gallon Plastic Fermenting Bucket: The primary fermentor is used for the first 5-7 days to get your fermentation/must going. Although it comes with a lid, I recommend covering it with a breathable fabric and securing it with a rubber band. The fabric keeps out the bacteria while allowing oxygen in to help the yeast get going.
- Strainer/Mesh Bag: You can add your fruit to a mesh bag while it's fermenting or just dump everything inside the primary fermentor bucket. If you decide to use the bag, you'll squeeze it to extract the fruit juice. You save the fruit solids that remain in the bag for your compost bin, or discard them. If you decide to add the fruit directly inside the primary fermentor, you will need to strain the contents of the bucket before transferring it to a carboy.
- 1 Gallon Jug: A one-gallon carboy, also called a demijohn, is used for fermenting and clearing the wine. Having 2 is ideal, especially when racking from one carboy to another.
- Mini Auto-Siphon & Tubing: The siphon and tubing are used when transferring the wine from one carboy into the next and also for bottling the wine. A bottling wand also comes in very handy, but is not required.
- Air Lock and Bung: The airlock goes into the bung, and the two together are used to cap the carboy when it is fermenting and when it is clearing. It keeps oxygen and bacteria from contaminating the wine while allowing the CO2 to escape.
- Wine Making Recipe Book: I love the recipe book included in this kit. It has an incredible number of wine recipes you can try. It's what I used to learn how to make homemade wine before I started to come up with my own wine recipes.
Also Nice to Have
The next items aren't absolutely necessary to have, but once you're hooked on making homemade wine, you'll find the following very handy!
- Hydrometer & Test Tube: A hydrometer is used to figure out the wine's alcohol by volume. This is done by taking readings of the specific gravity or SG at the beginning and end of the fermentation process.
- Funnel: You'll need a funnel for straining the fruit, especially if you don't use a mesh bag. I like this funnel.
- Jug: A small creamer like this one comes in handy when taking SG readings.
- Bar Spoon: A long bar spoon is perfect for stirring the crushed Campden tablets and syrup into the wine (when back sweetening).
- Bottles/Corks/Corker: Most people begin by bottling their wine in flip-top bottles. However, as they continue to make wine they usually end up purchasing wine bottles, corks, and a corker.
🍷 How To Make Blueberry Wine
Day One
NOTE: Before beginning any fermentation process, you need to sanitize all of your equipment, work area, and hands. You can find out how here.
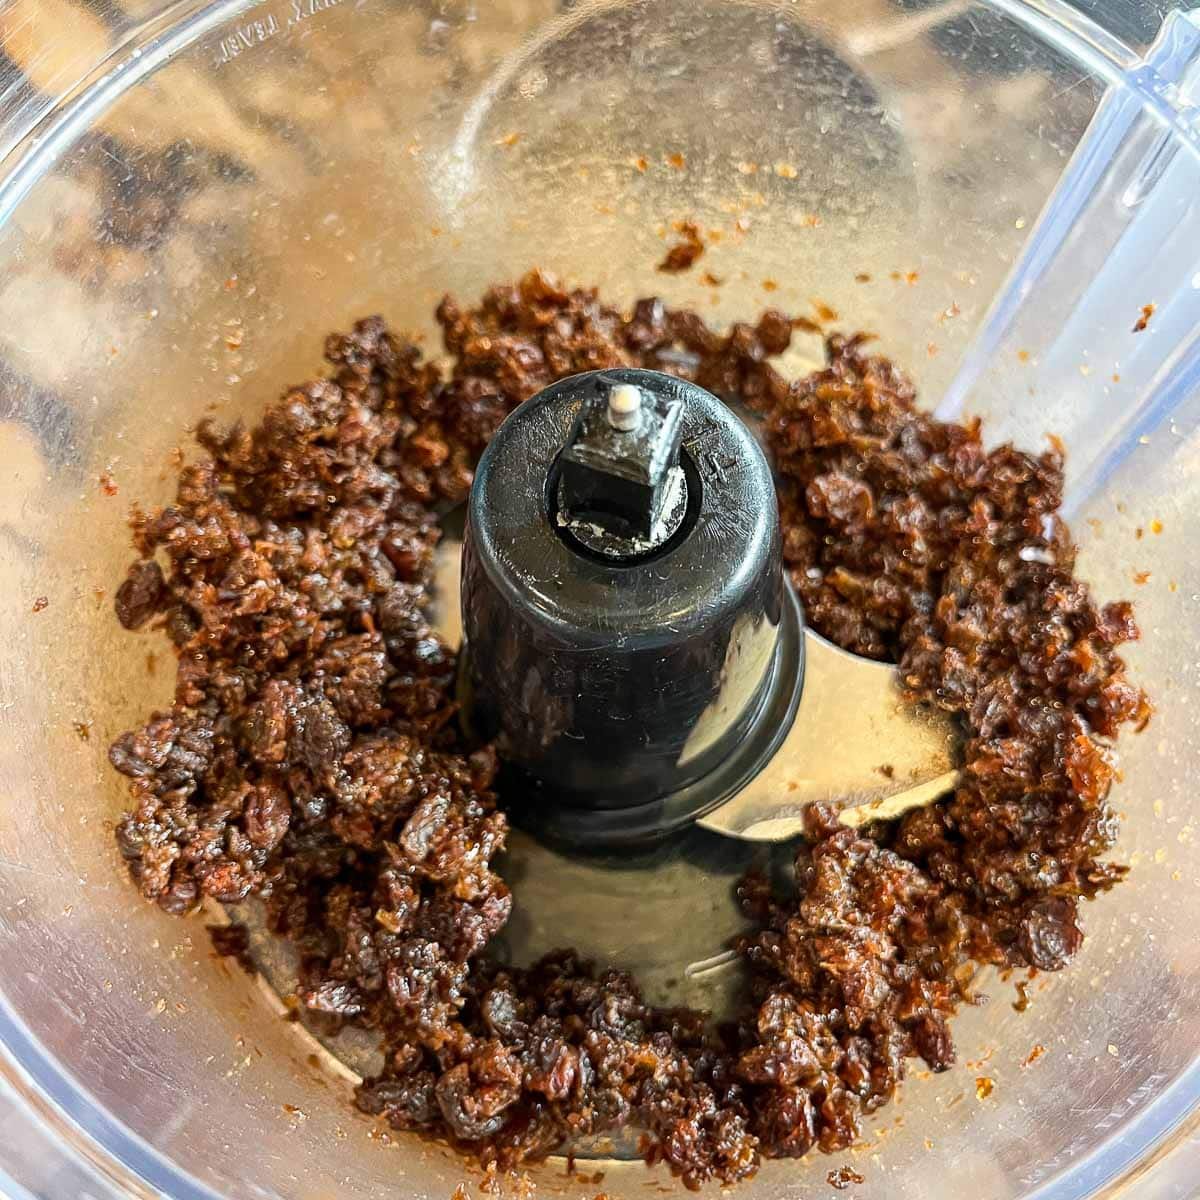
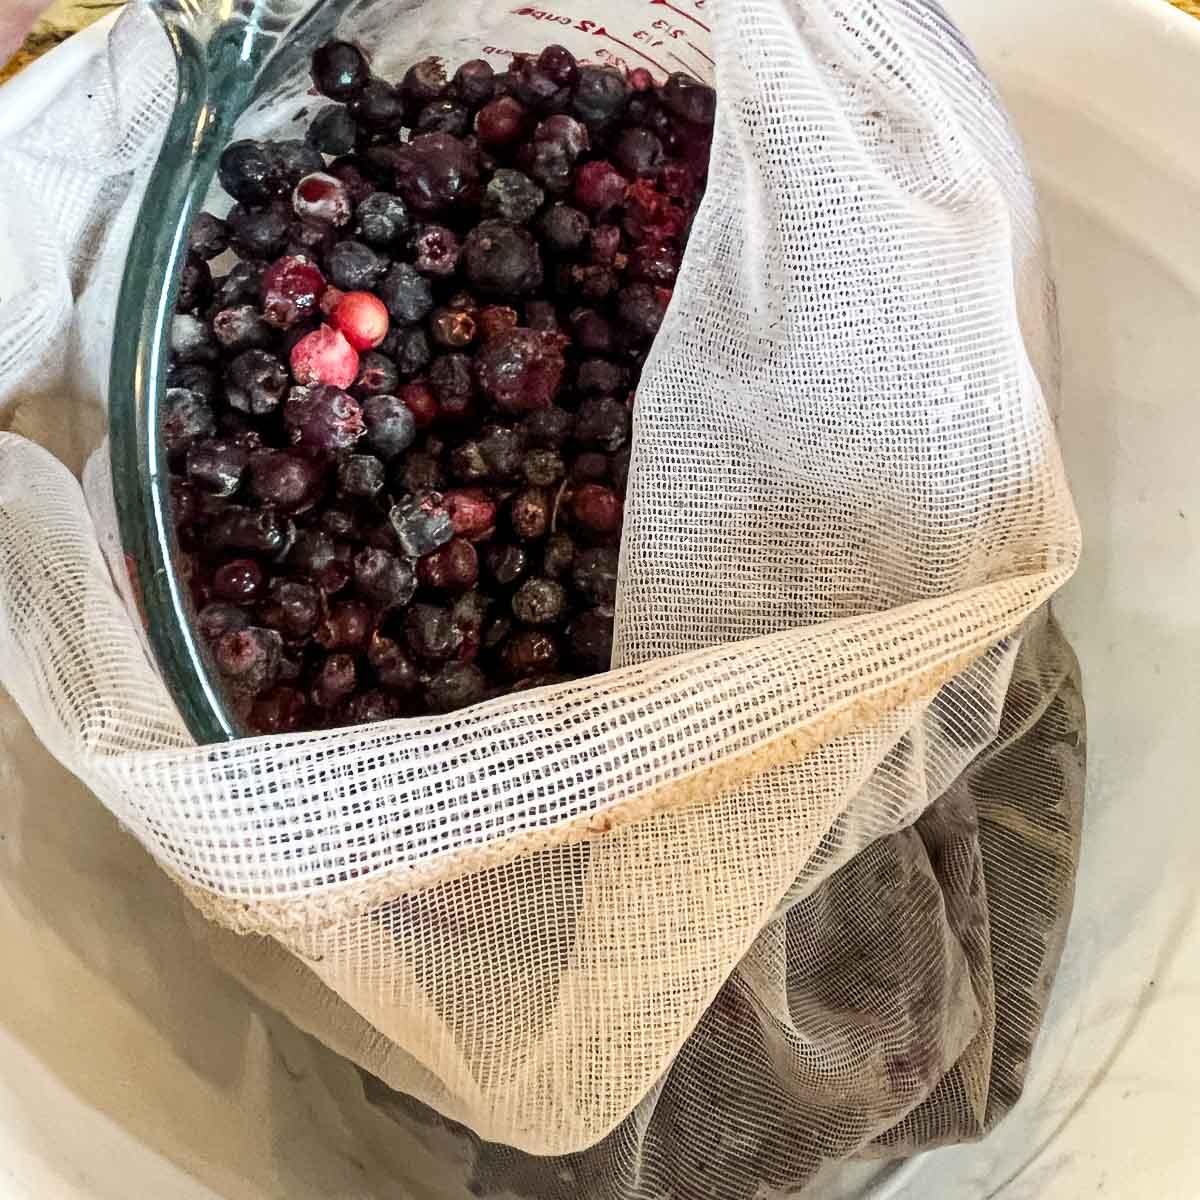
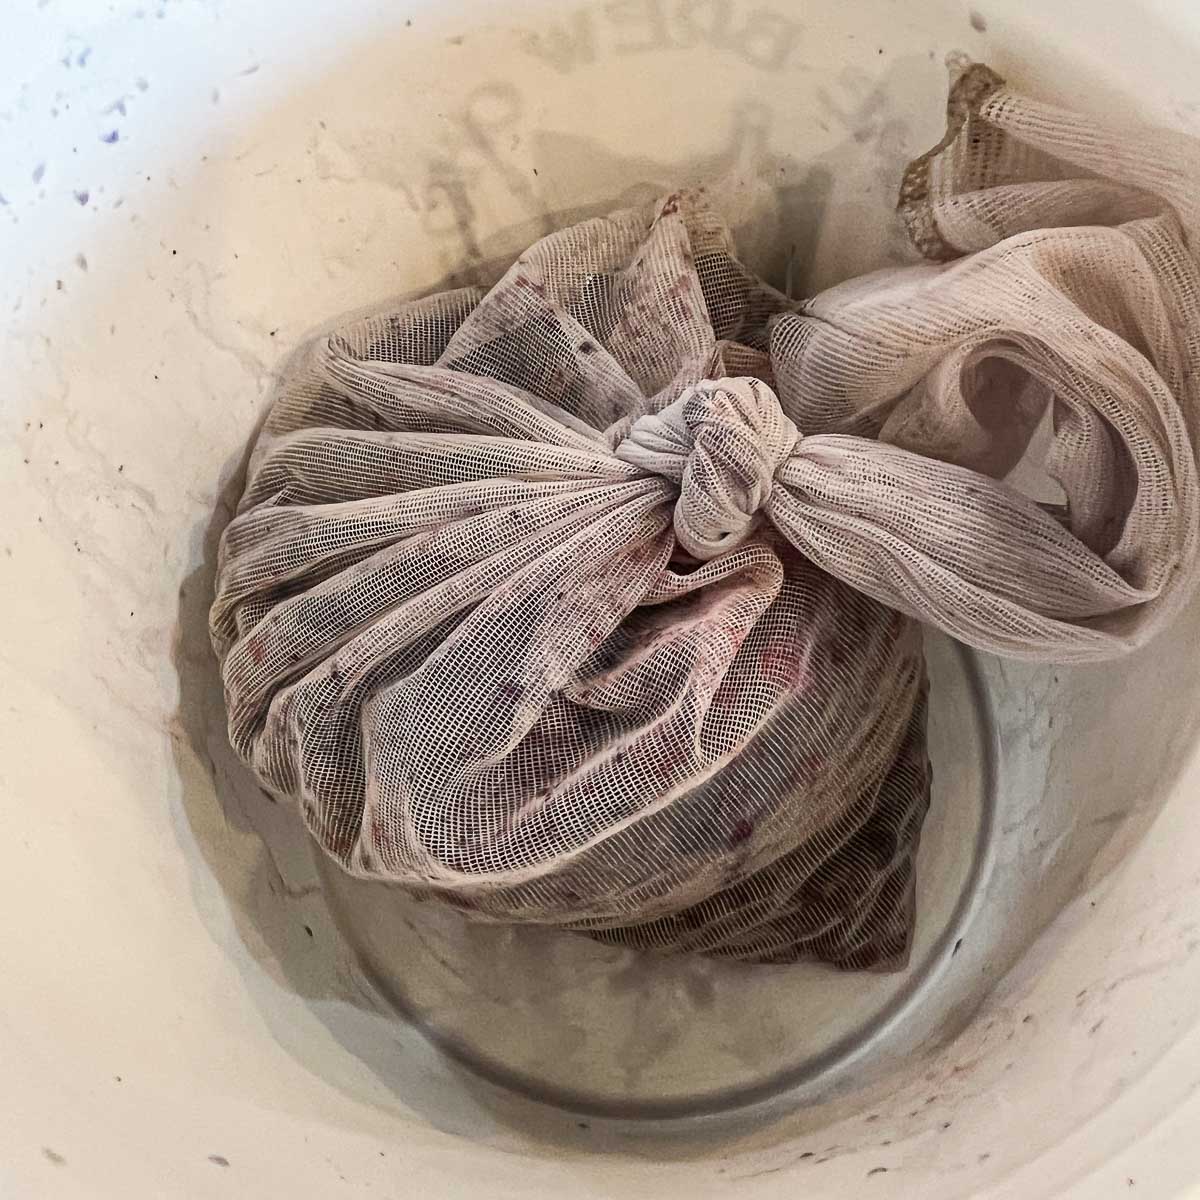
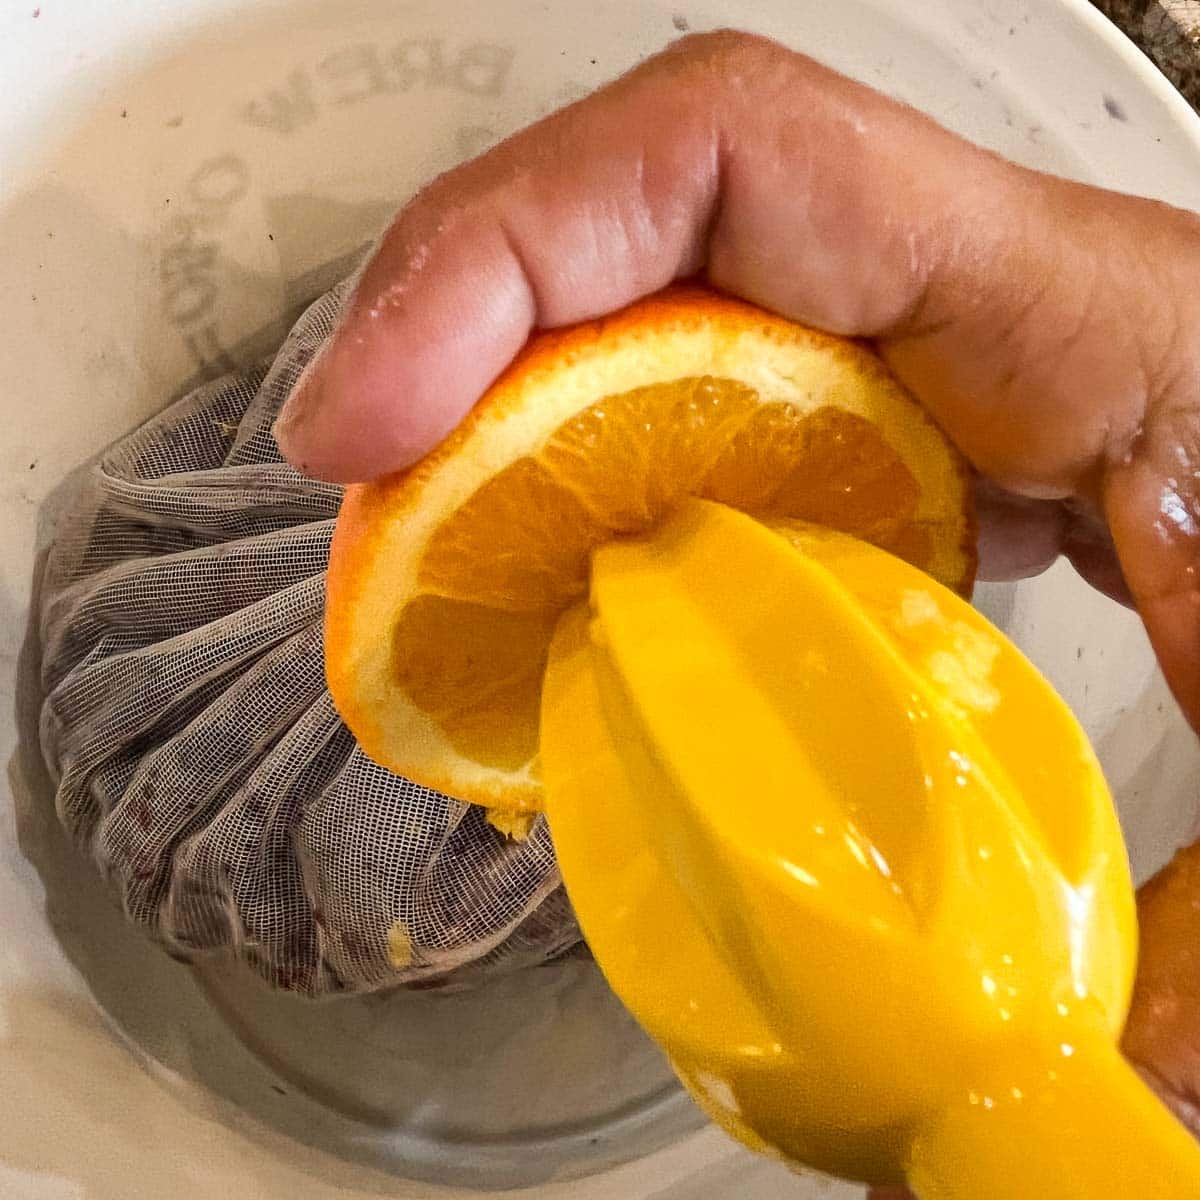
Step 1: Chop raisins by hand or use a food processor and add either directly to the fermentor bucket or into a large mesh bag. Add frozen huckleberries and blueberries. If using a mesh bag, tie the bag to keep the raisins and berries contained. Add the juice of one orange.
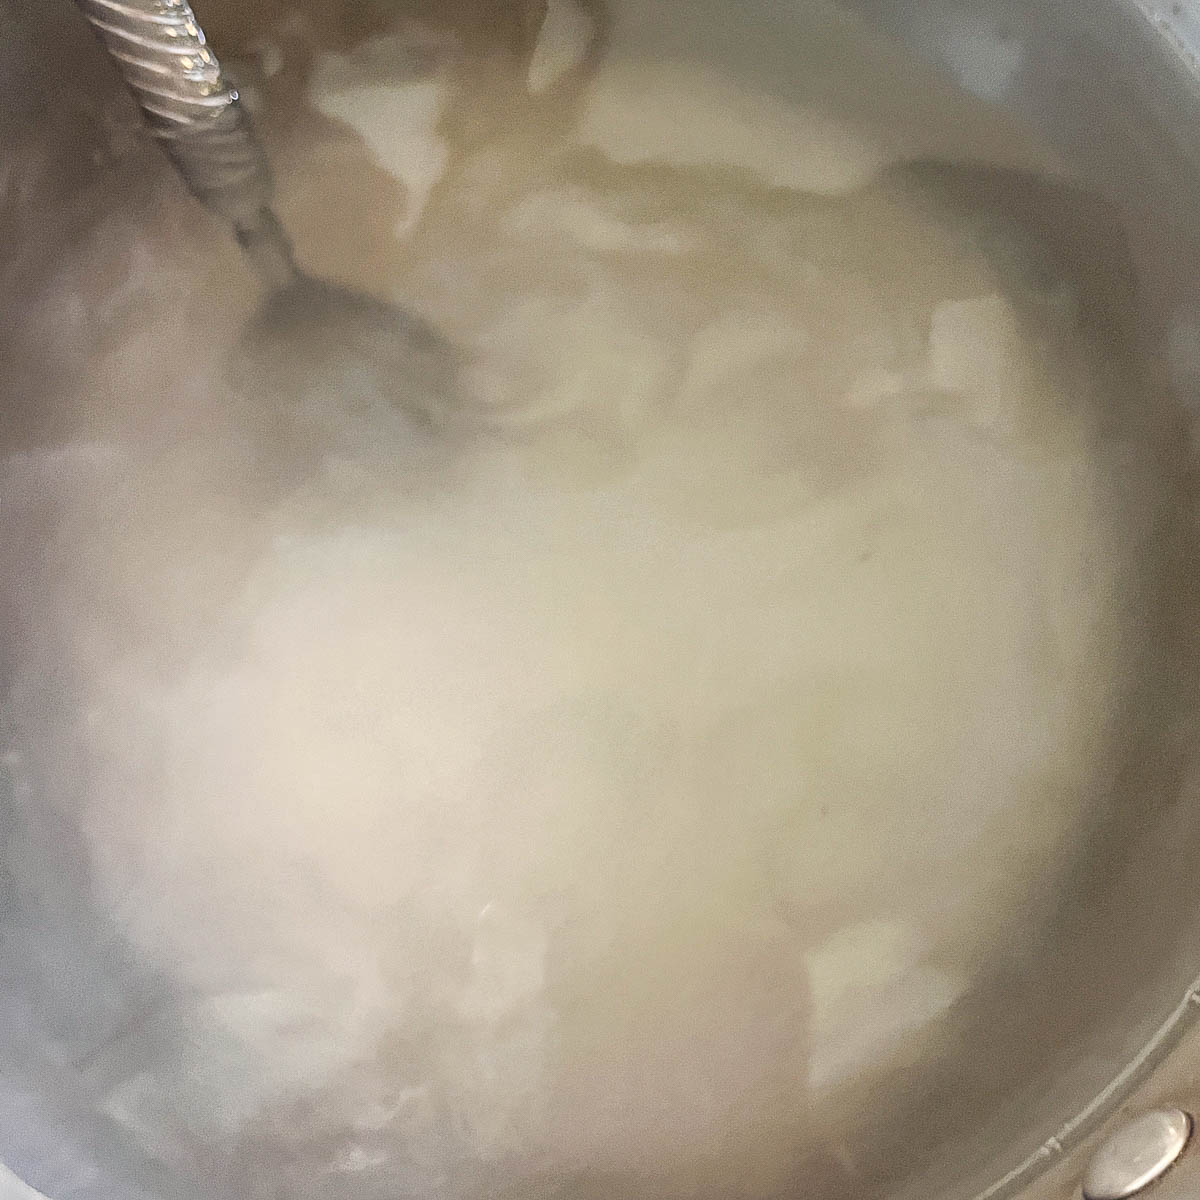
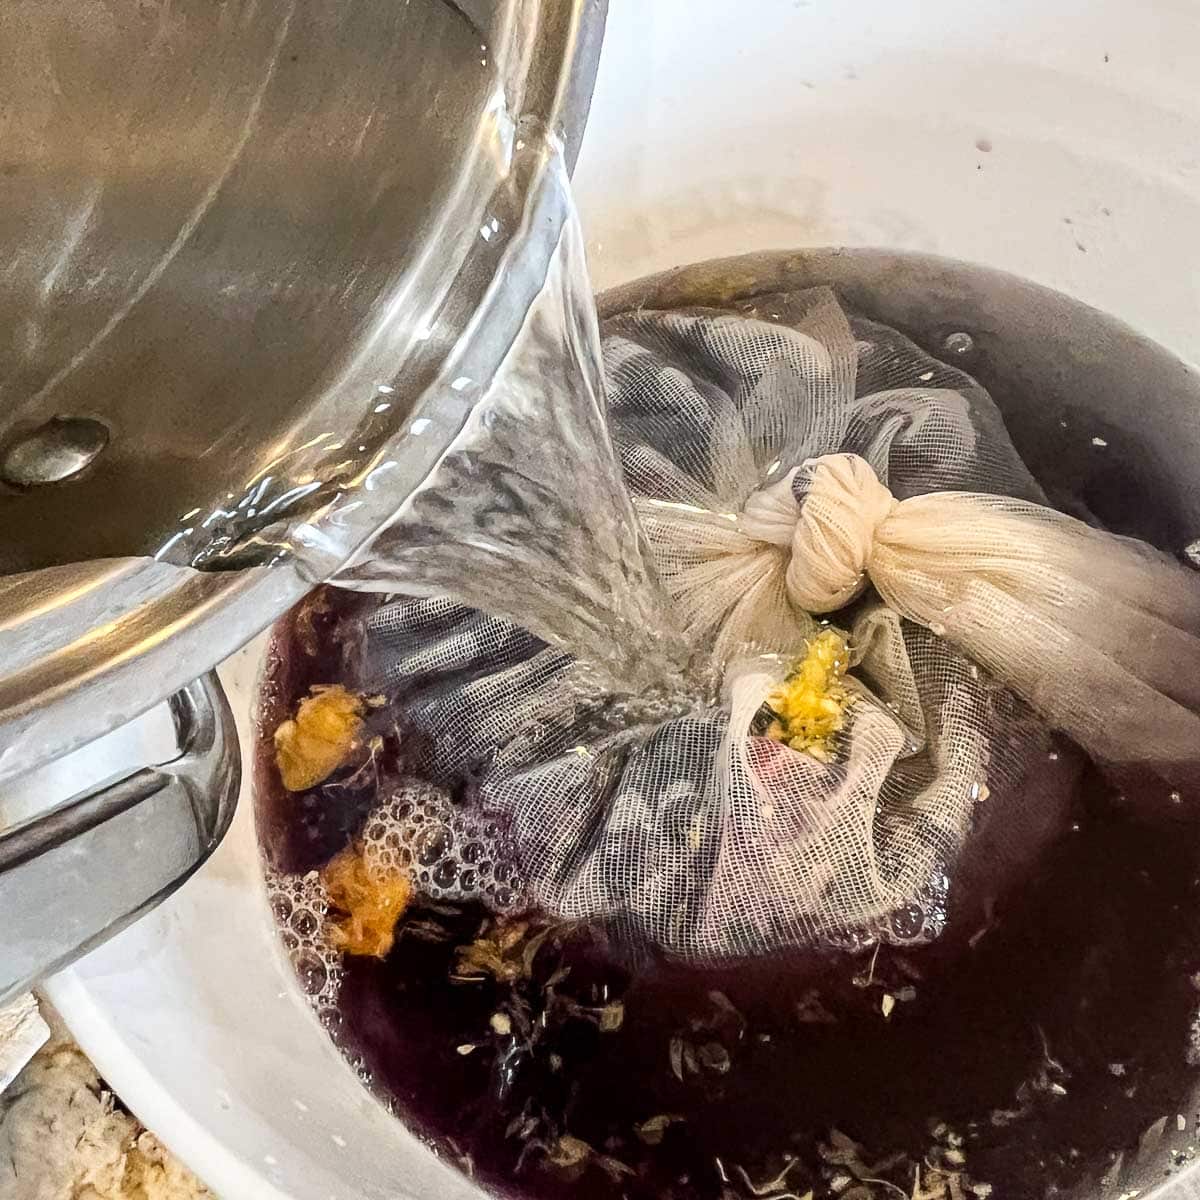
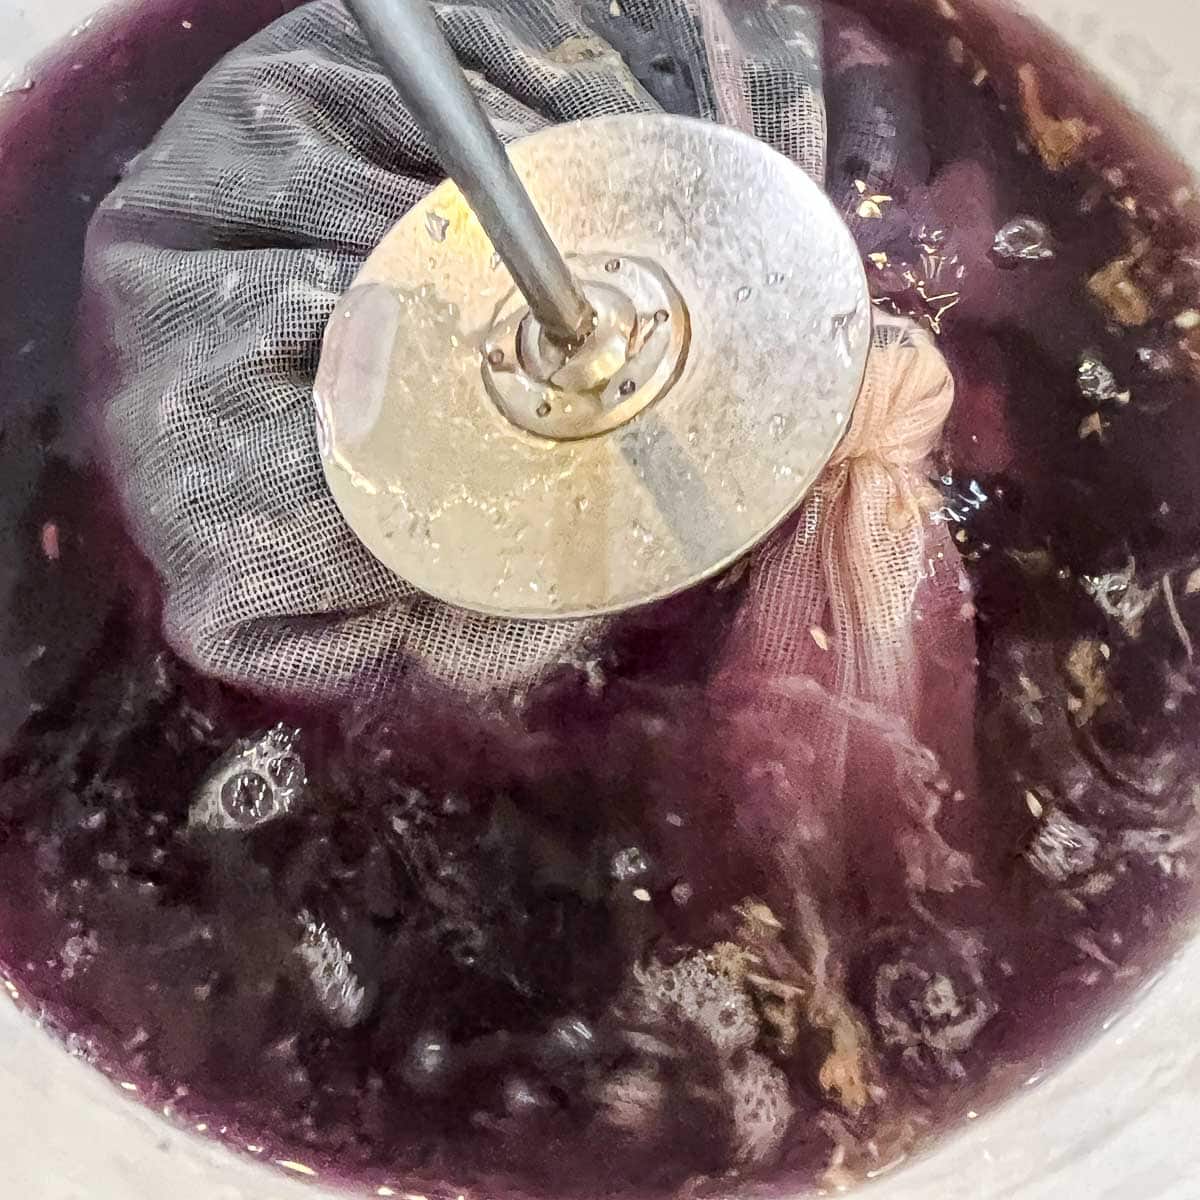
Step 2: Add sugar to a large stockpot and cover with 1 gallon of water. Heat and stir until the water is hot and the sugar dissolves. Carefully pour the syrup over the berries and raisins. Mash the fruit using a potato masher to extract their juices. Allow the juice to come to room temperature.
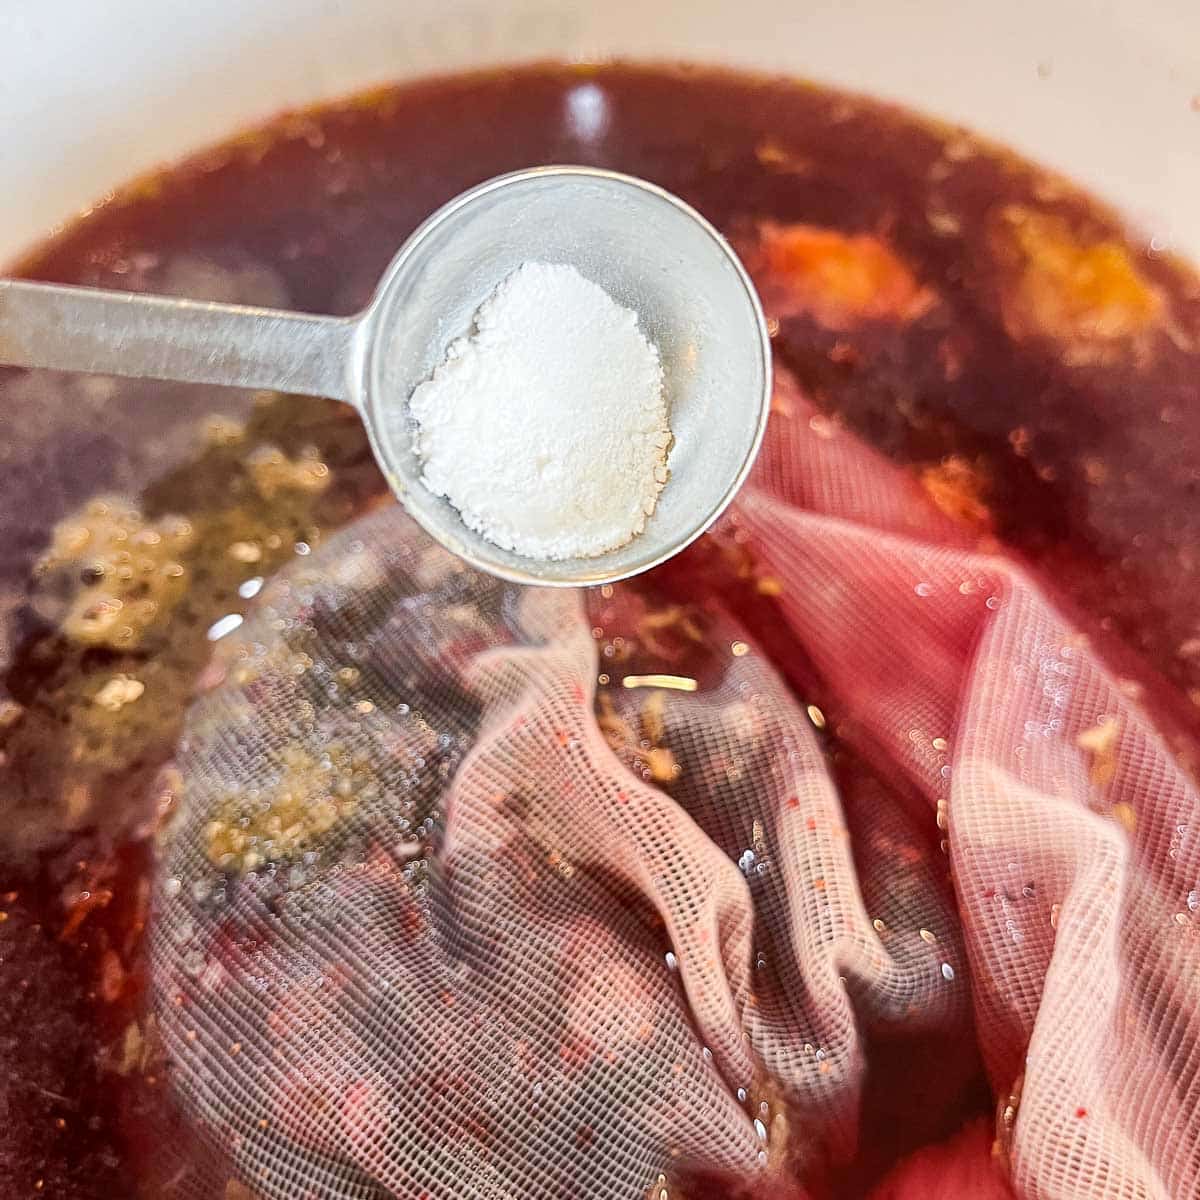
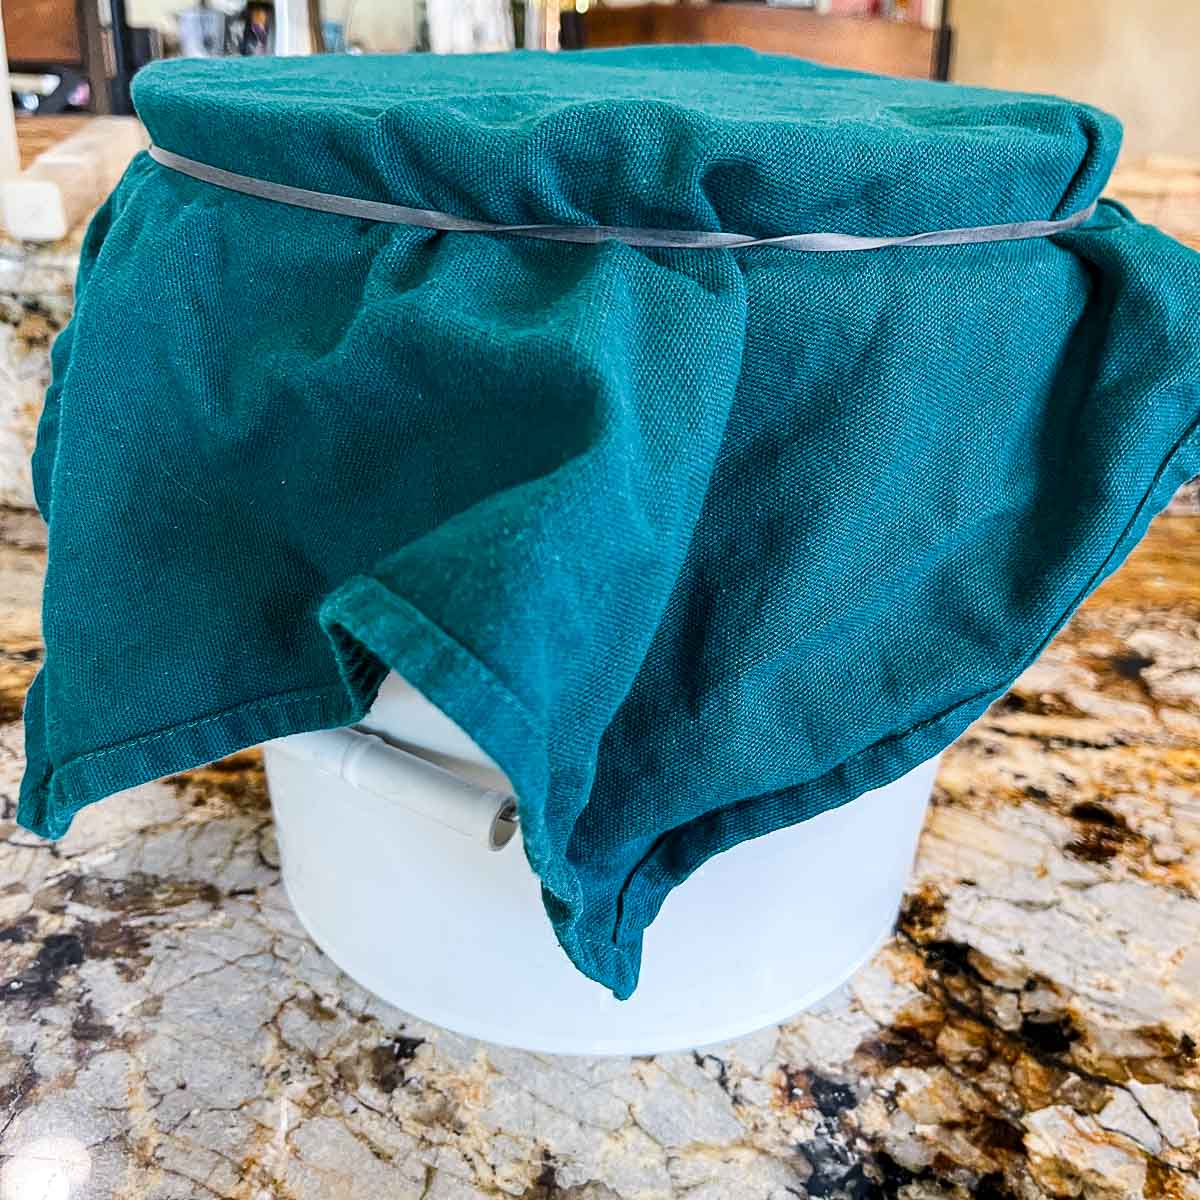
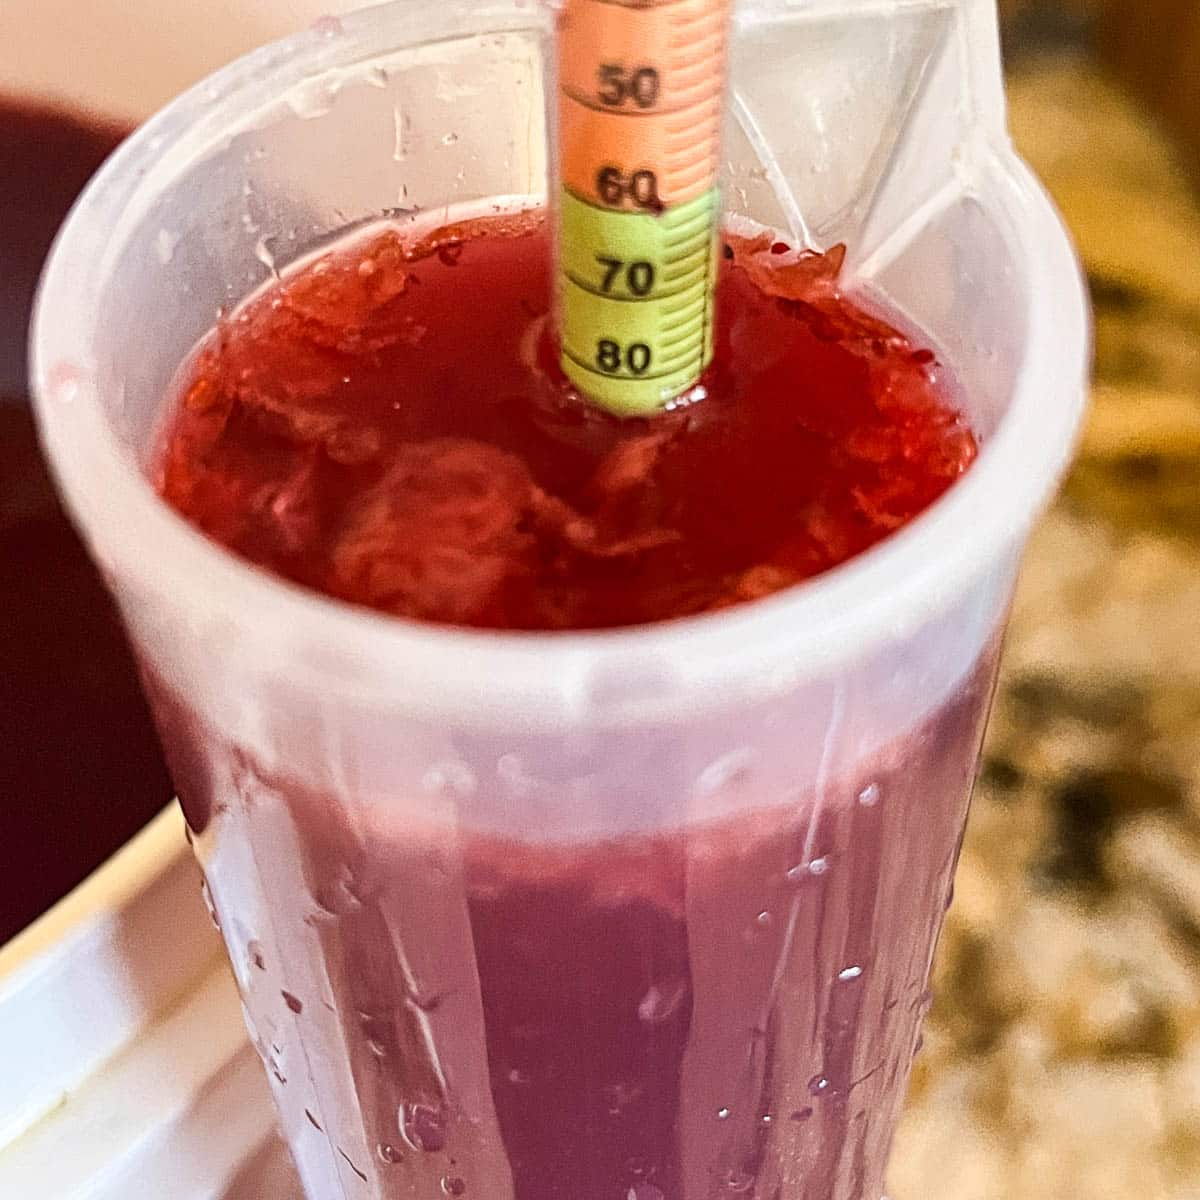
Step 3: Next, add acid blend, tannin, pectic enzyme, and 1 crushed Campden tablet to the primary fermenter. Take the initial SG reading with a hydrometer. Cover the primary fermentation container with breathable fabric and use a rubber band to fasten it into place. Set the bucket aside for 24 hours.
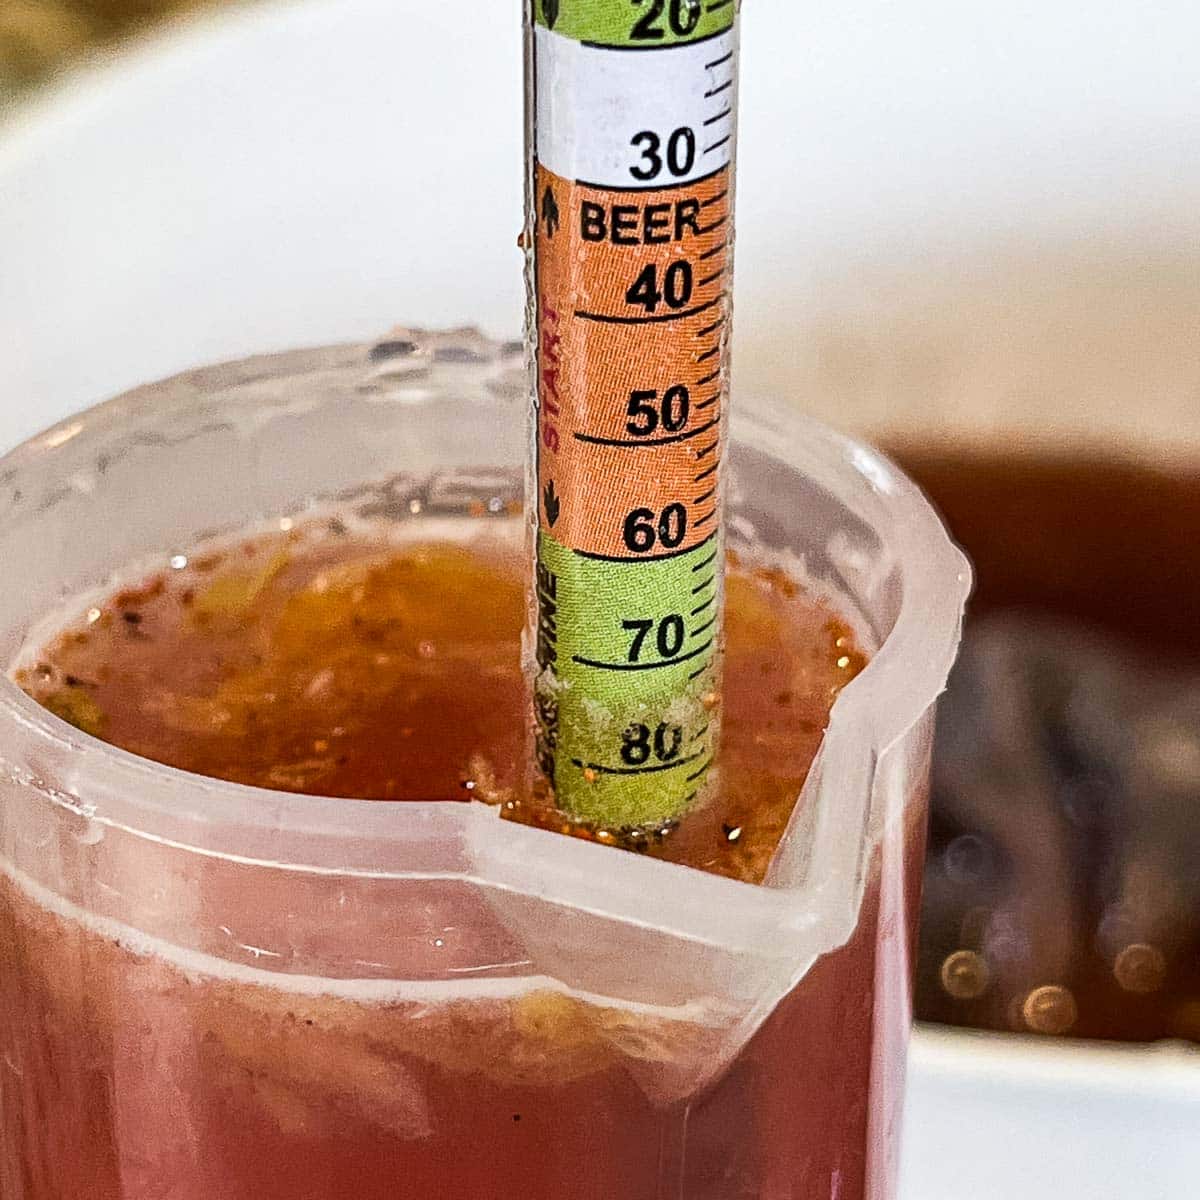
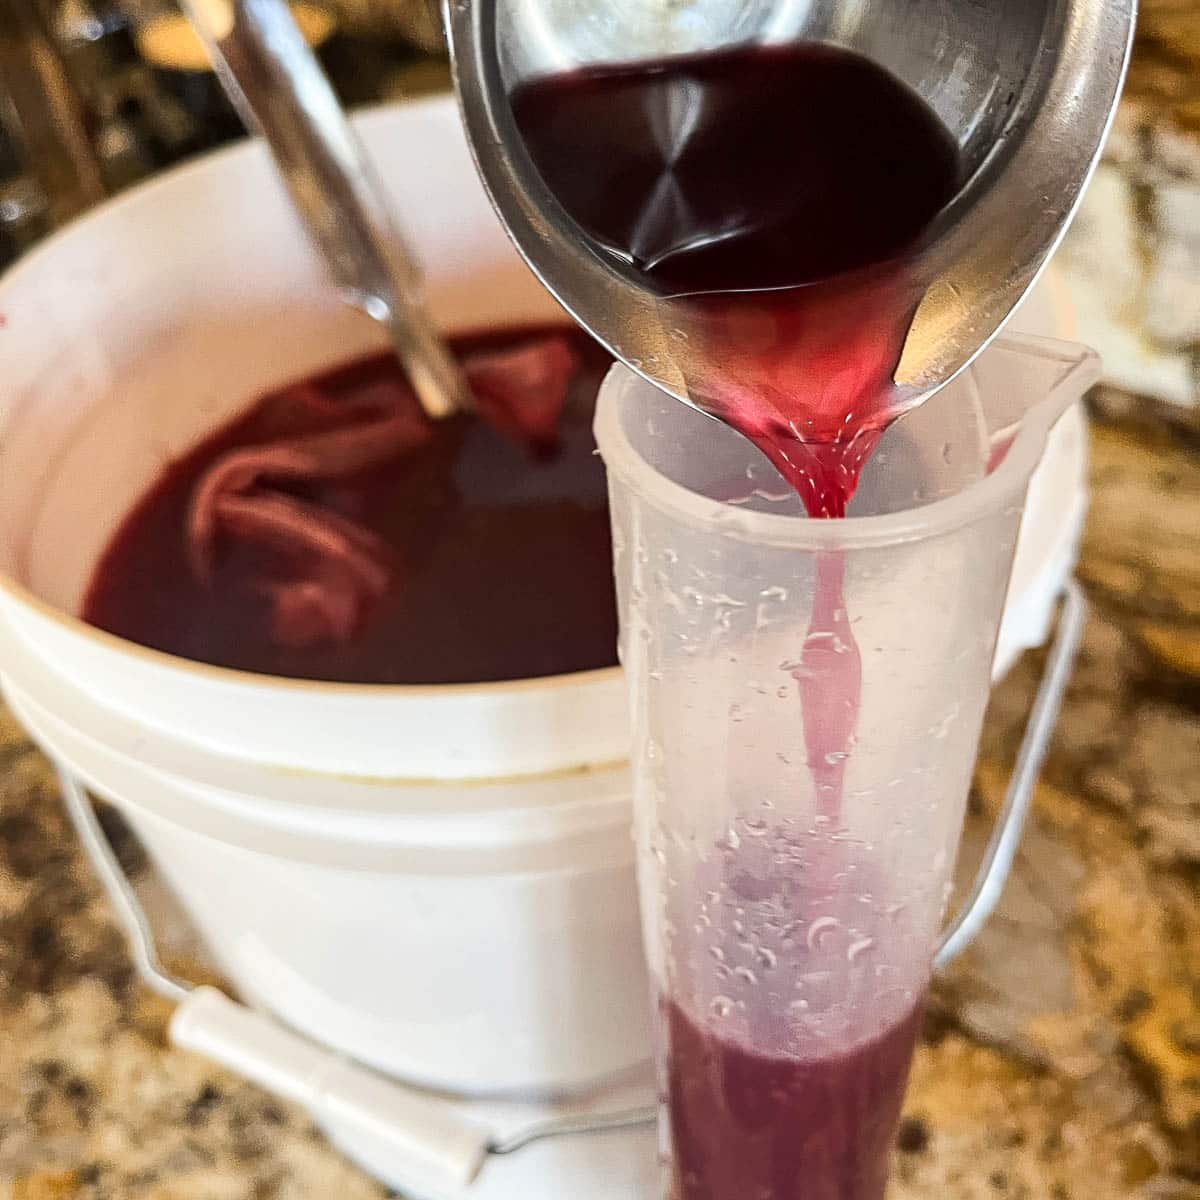
Pro Tip: If you plan on figuring out the final ABV (alcohol by volume) take the initial specific gravity (SG) reading using a hydrometer. Mark it down in a notebook or a wine journal. My initial specific gravity reading was 1.090. Here's how to read a hydrometer.
Day Two
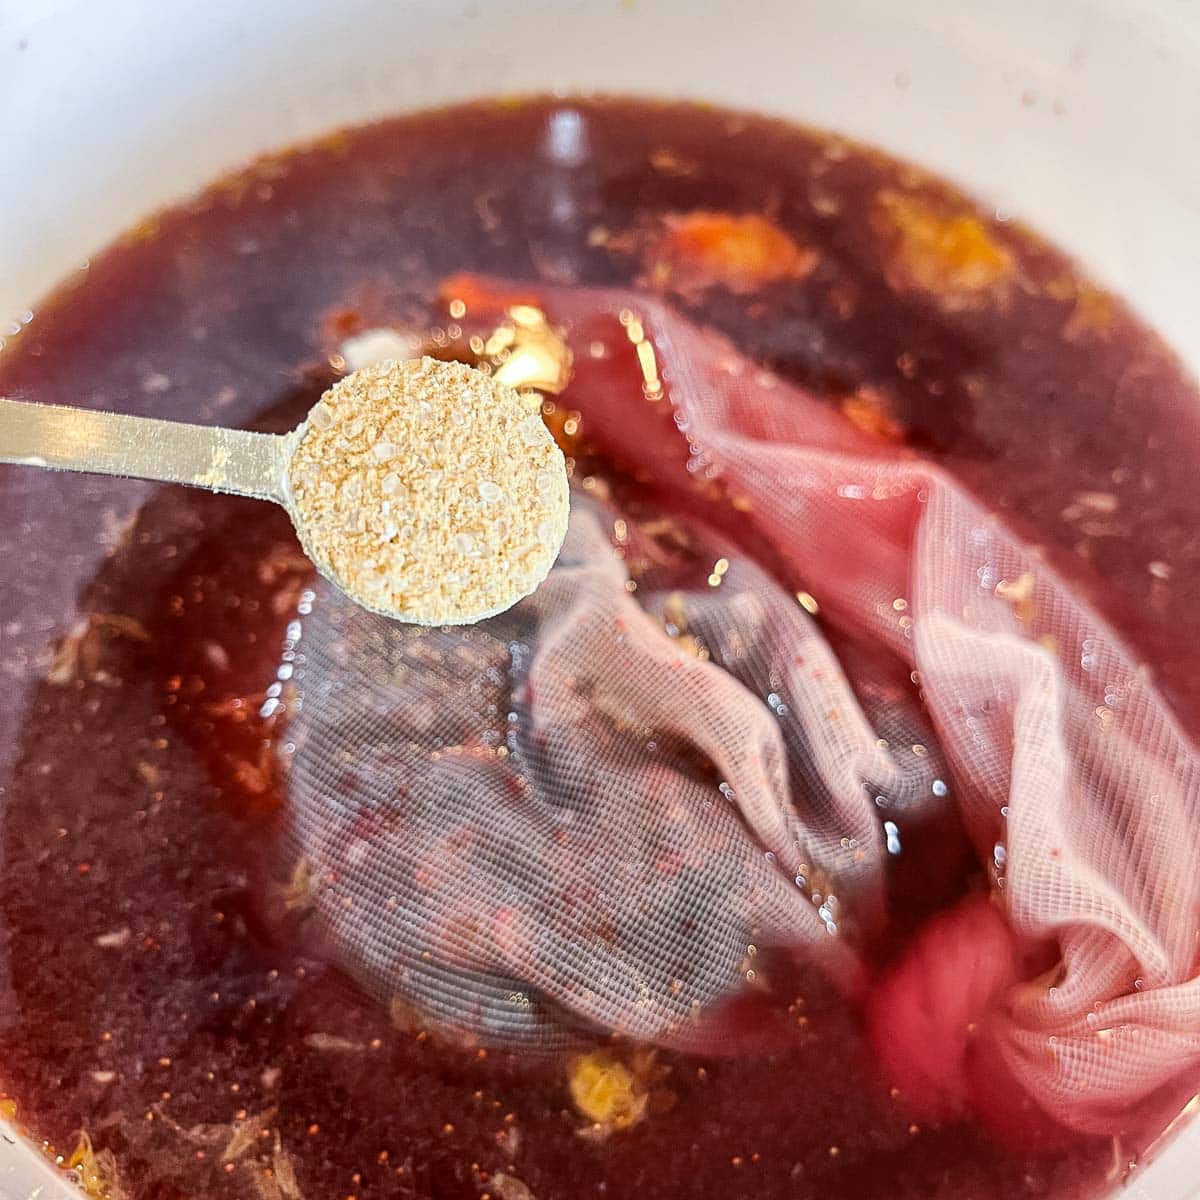
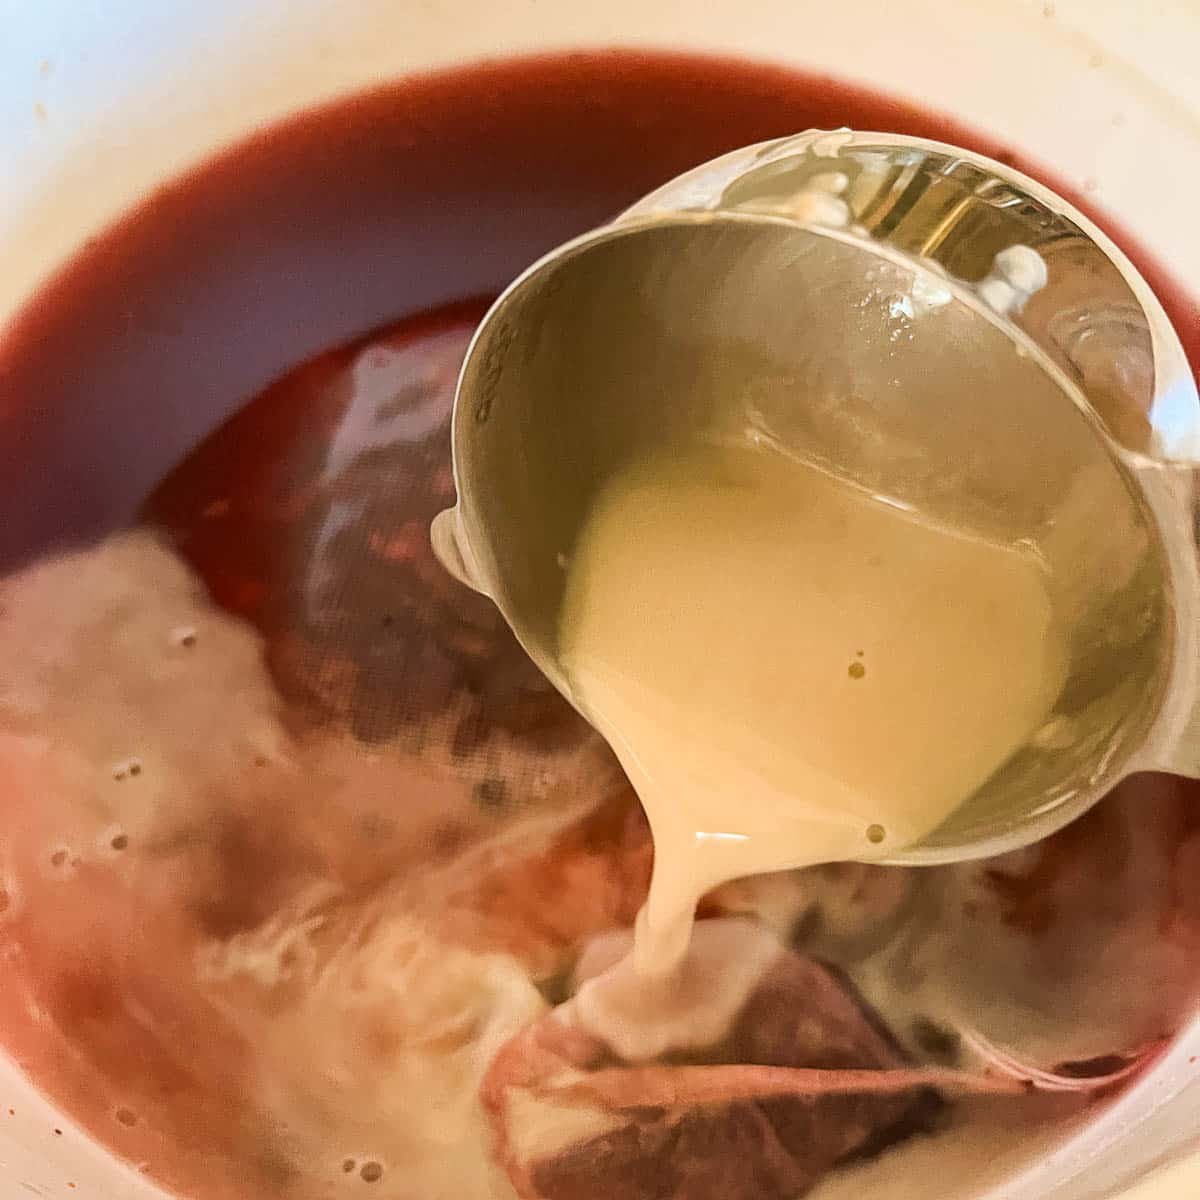
Follow the instructions on the yeast packet to activate it. Since 1 packet is enough for 5 gallons, I only use ½ of the packet and save the rest for the next batch. Once active, add yeast and energizer to the "must" (unfermented fruit juice before it's converted to wine). Cover again and set aside.
Day Three +
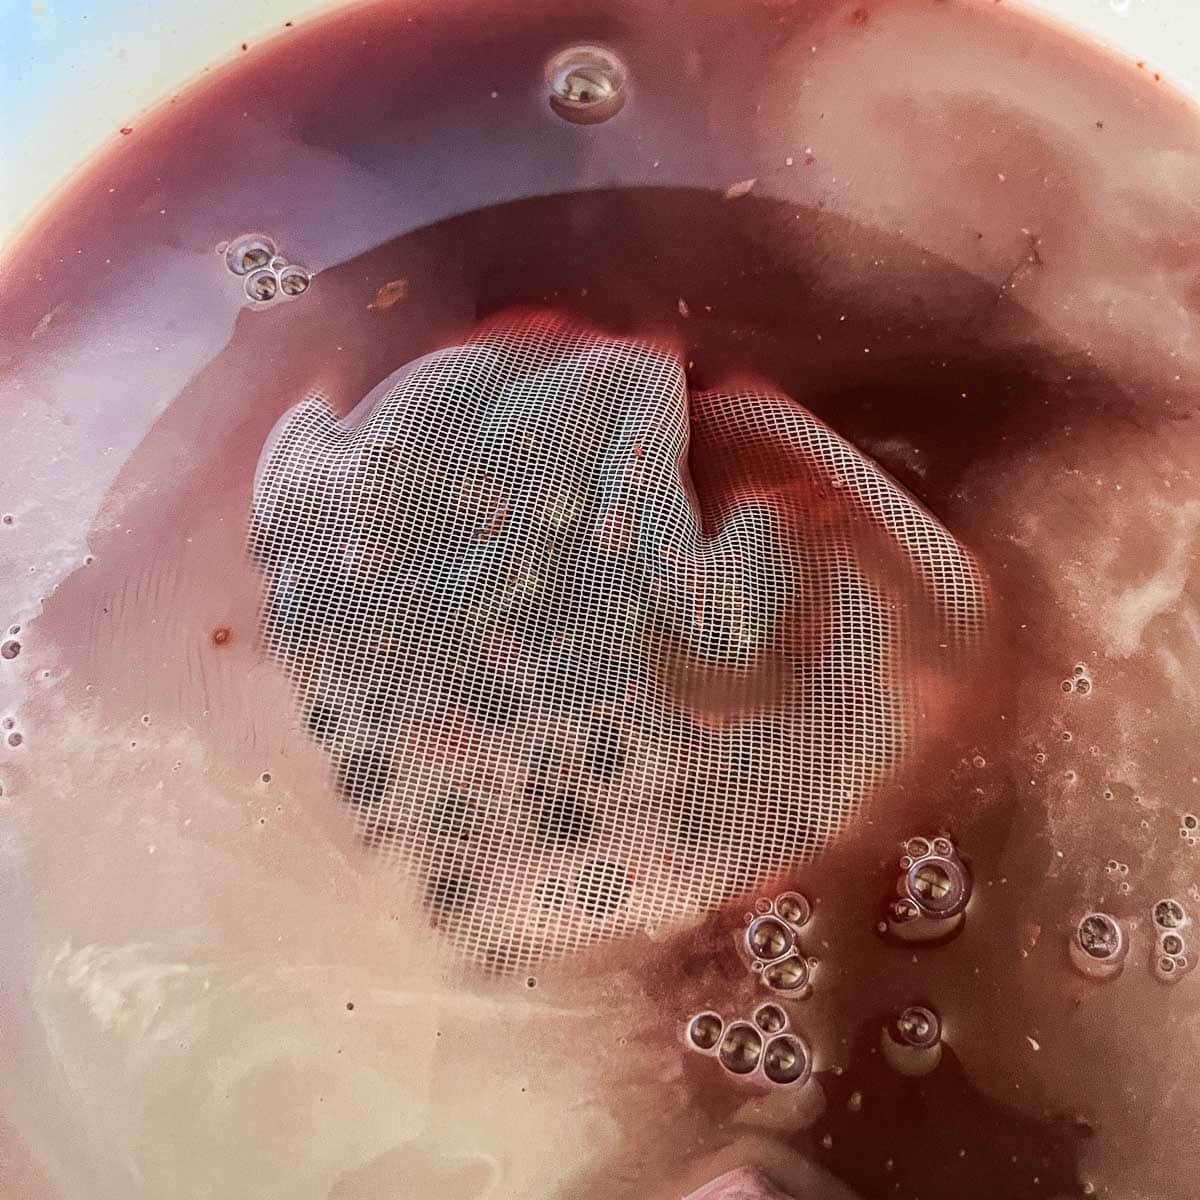
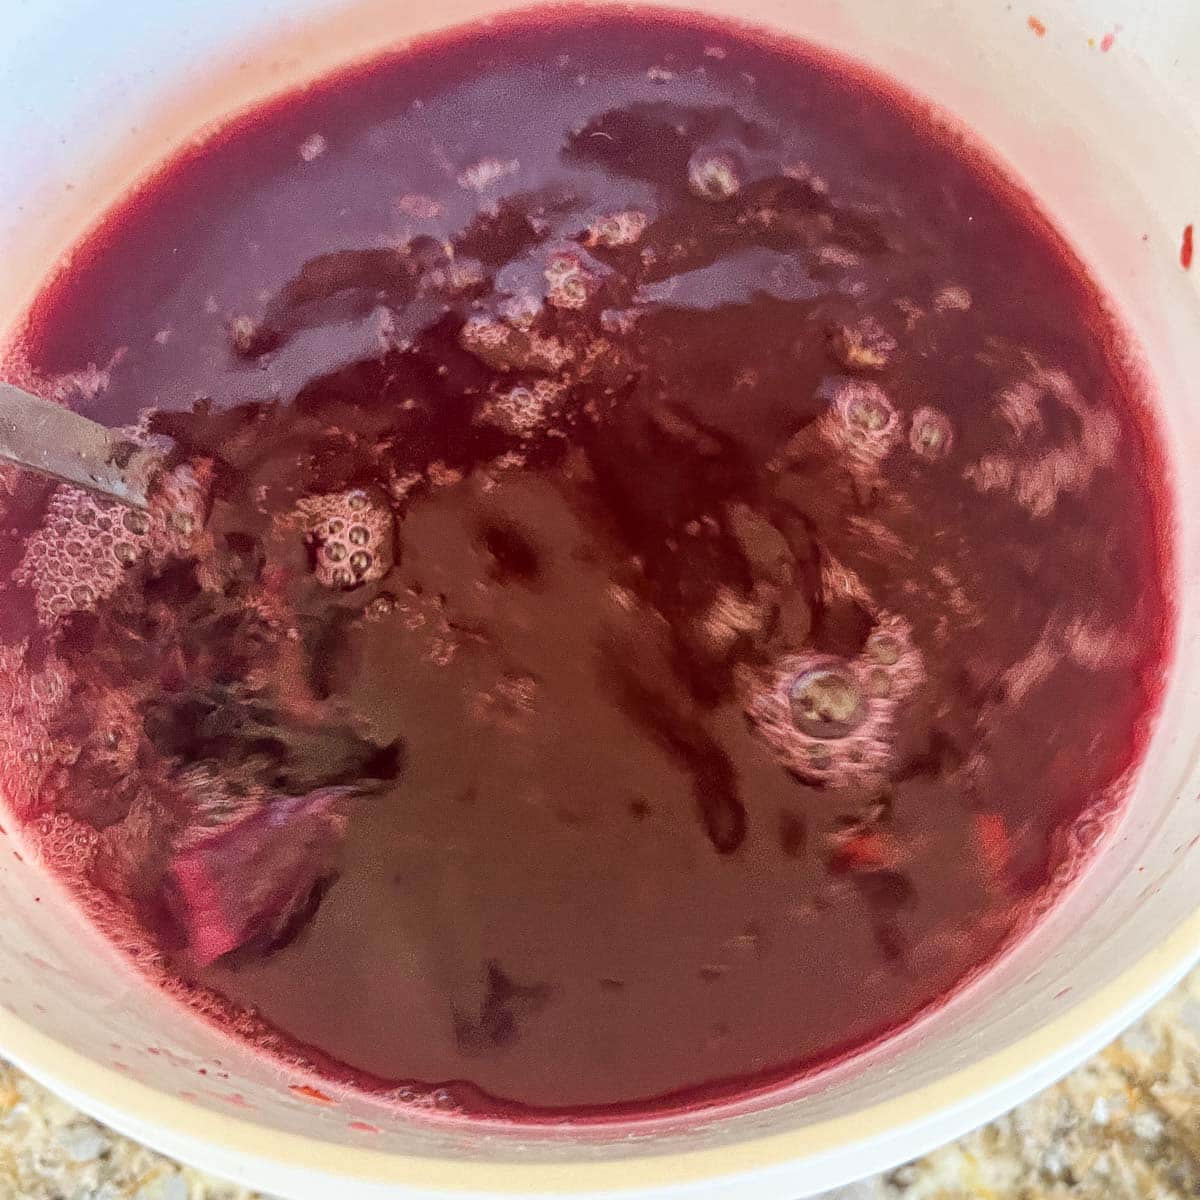
Step 1: Stir daily and take the SG reading, and record it. It should begin fermenting in 1-3 days, which will be evident by the bubbles. When it reaches a specific gravity of 1.030 (it could take anywhere from 3-7 days), it's time to "rack the wine" (transfer it to a carboy).
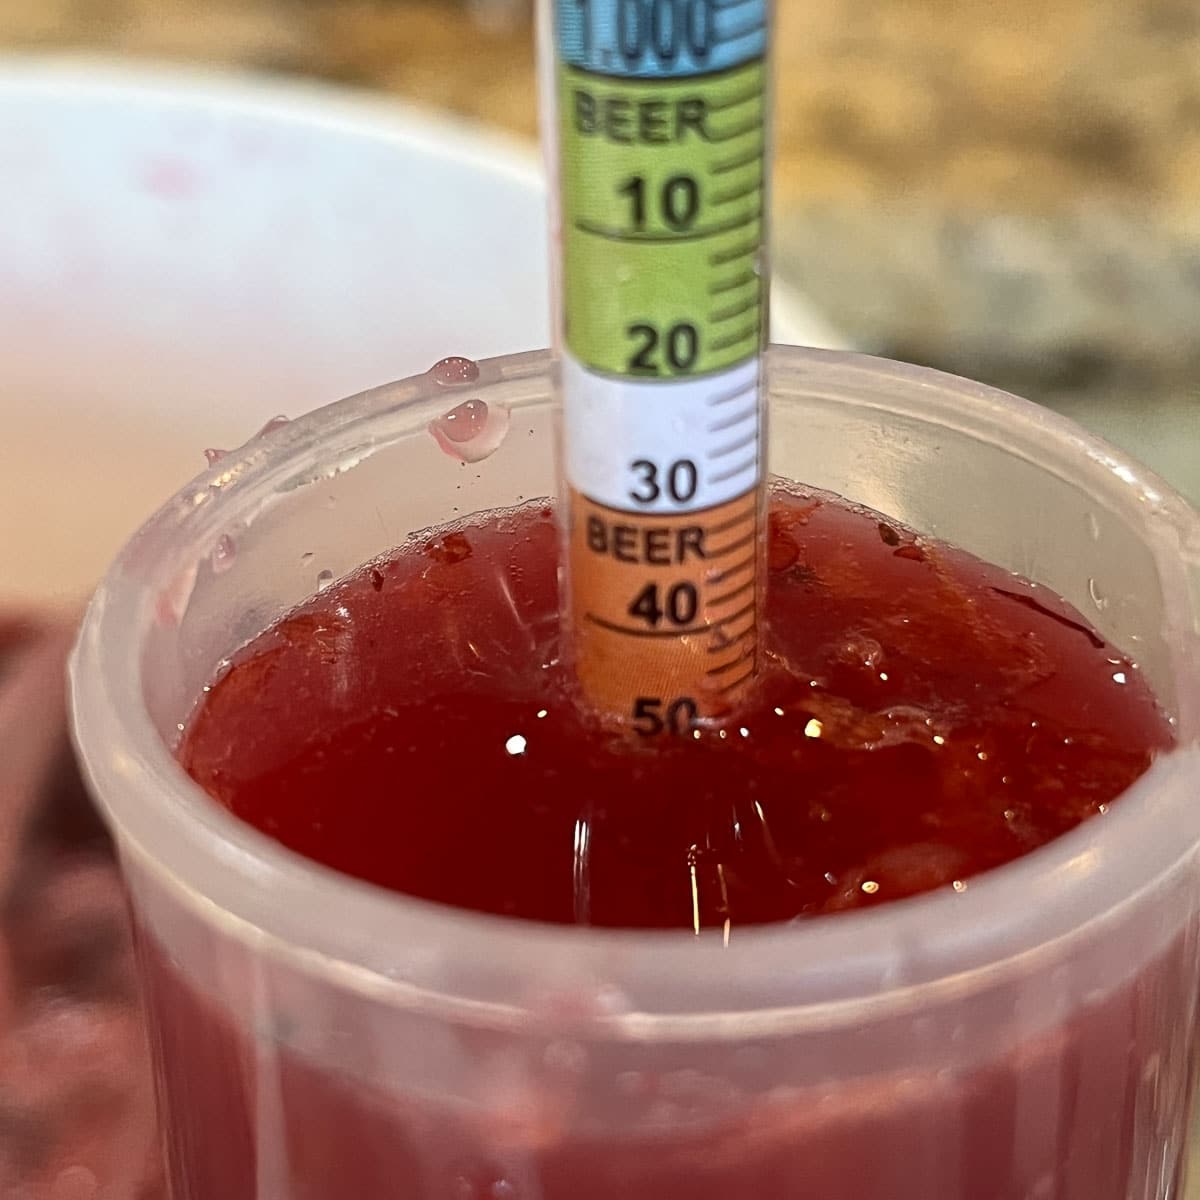
Pro Tip: If the SG reading registers past 1.030, for example, 1.020, no big deal, just rack the wine into a carboy. If you don't have a hydrometer, rack it after 5-7 days.
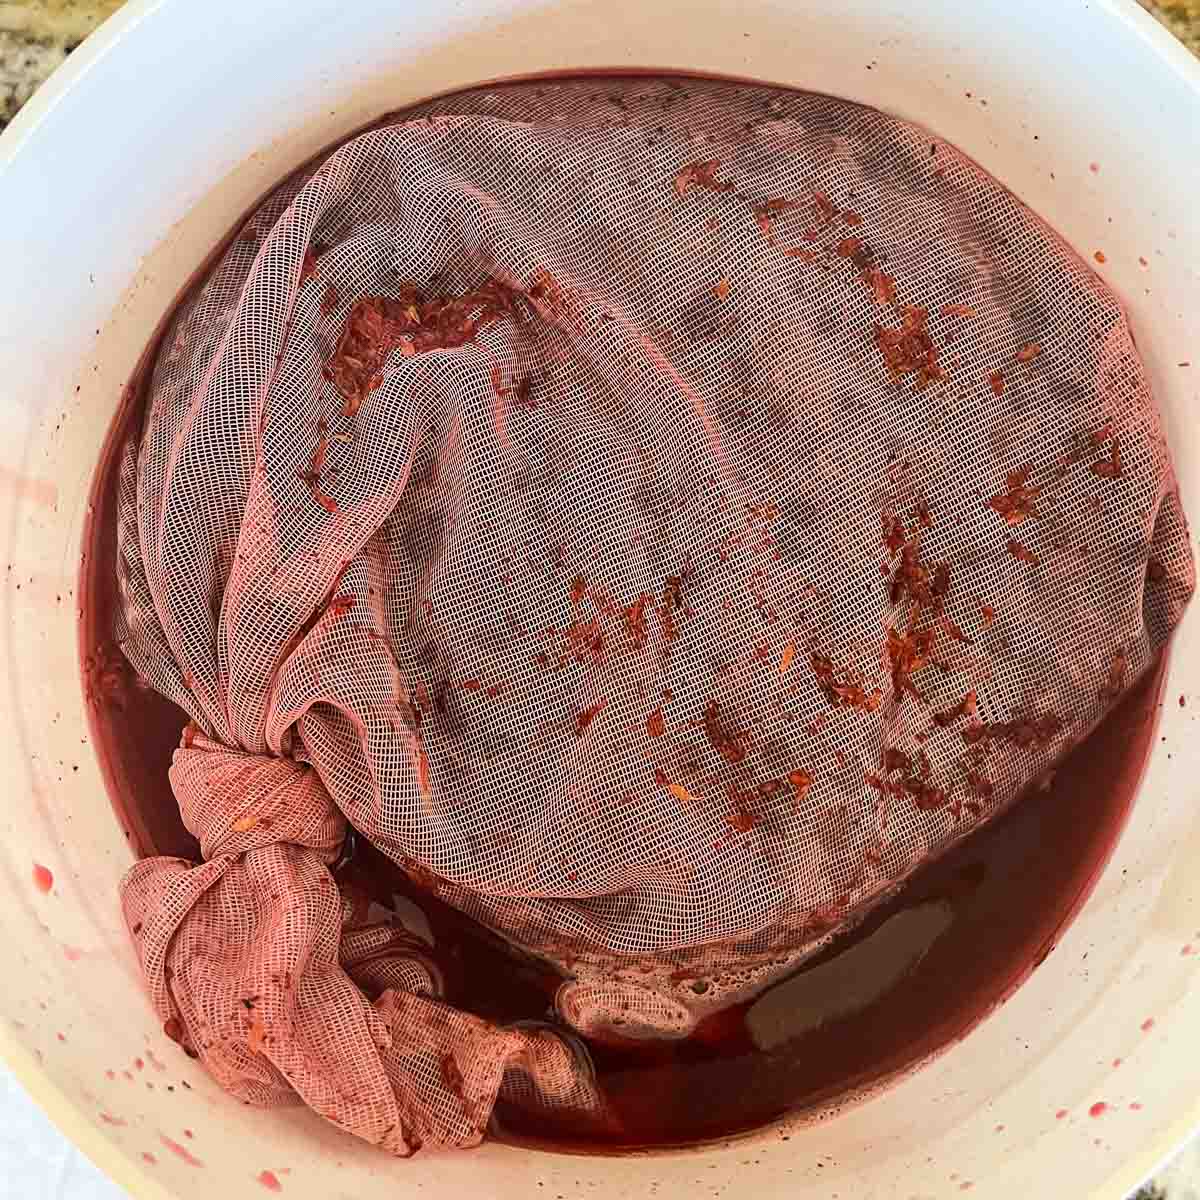
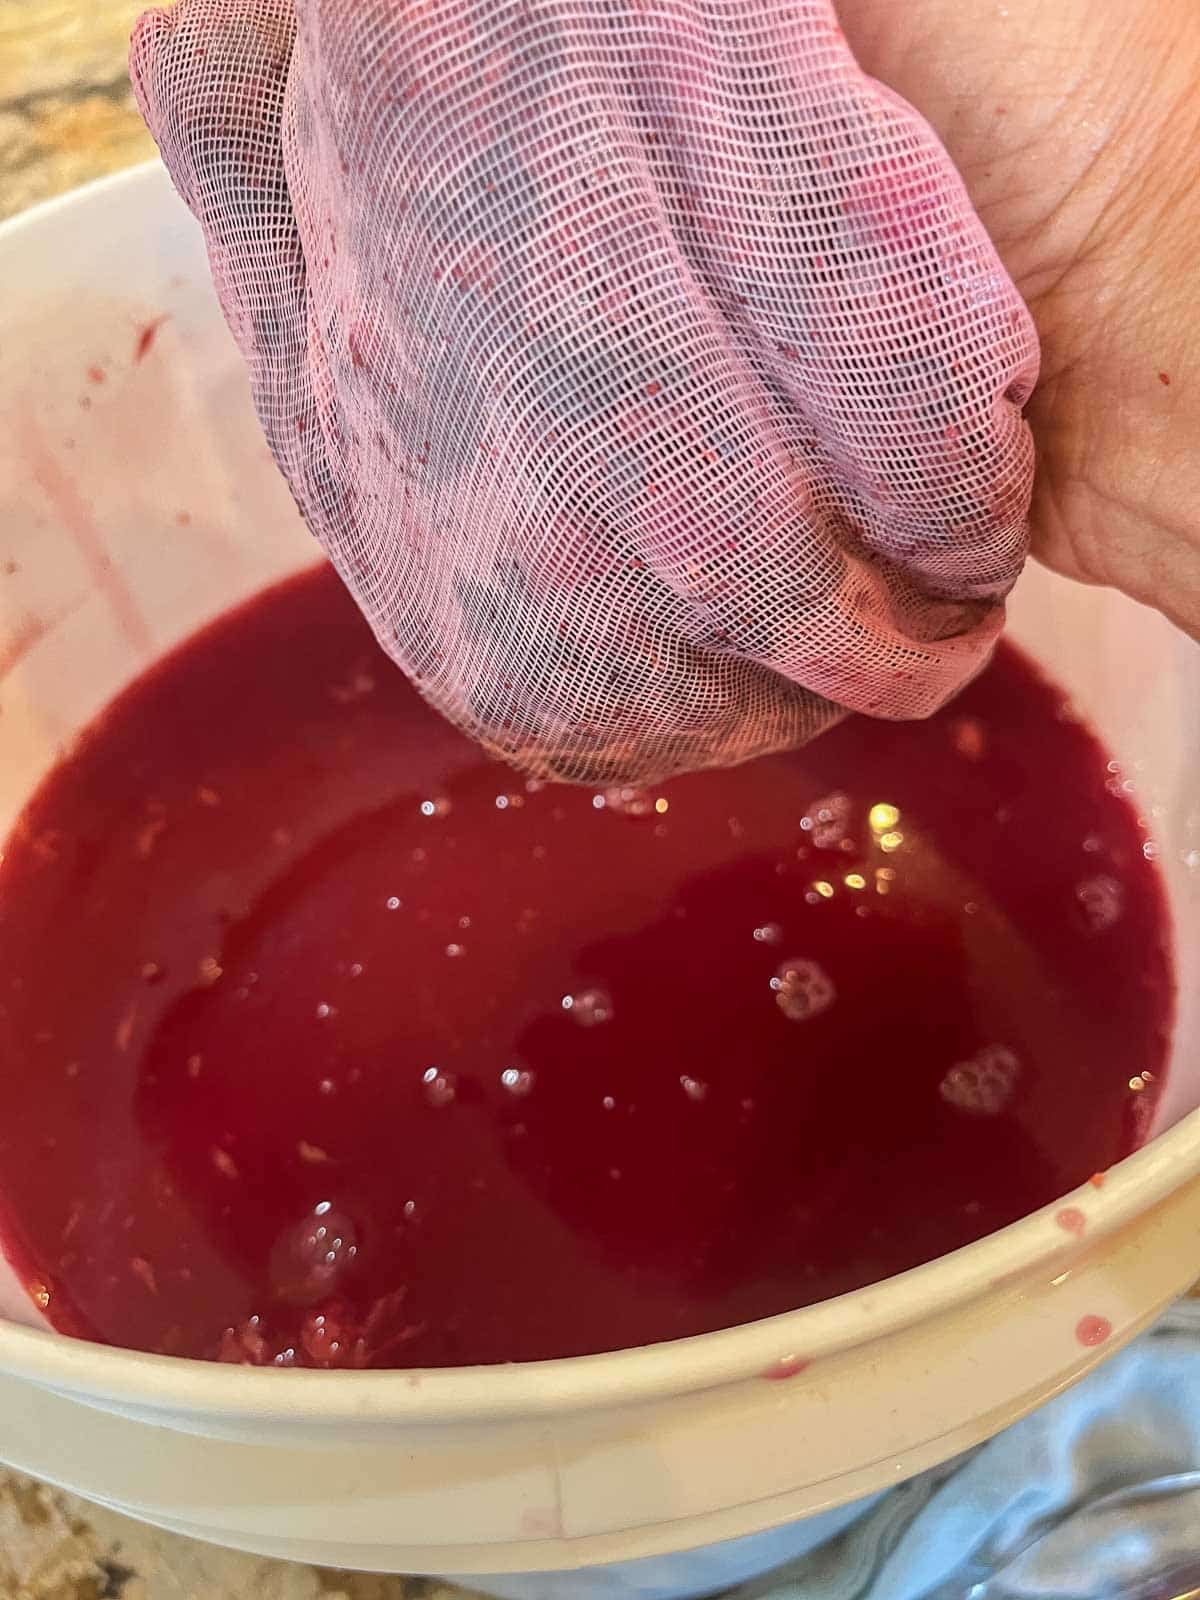
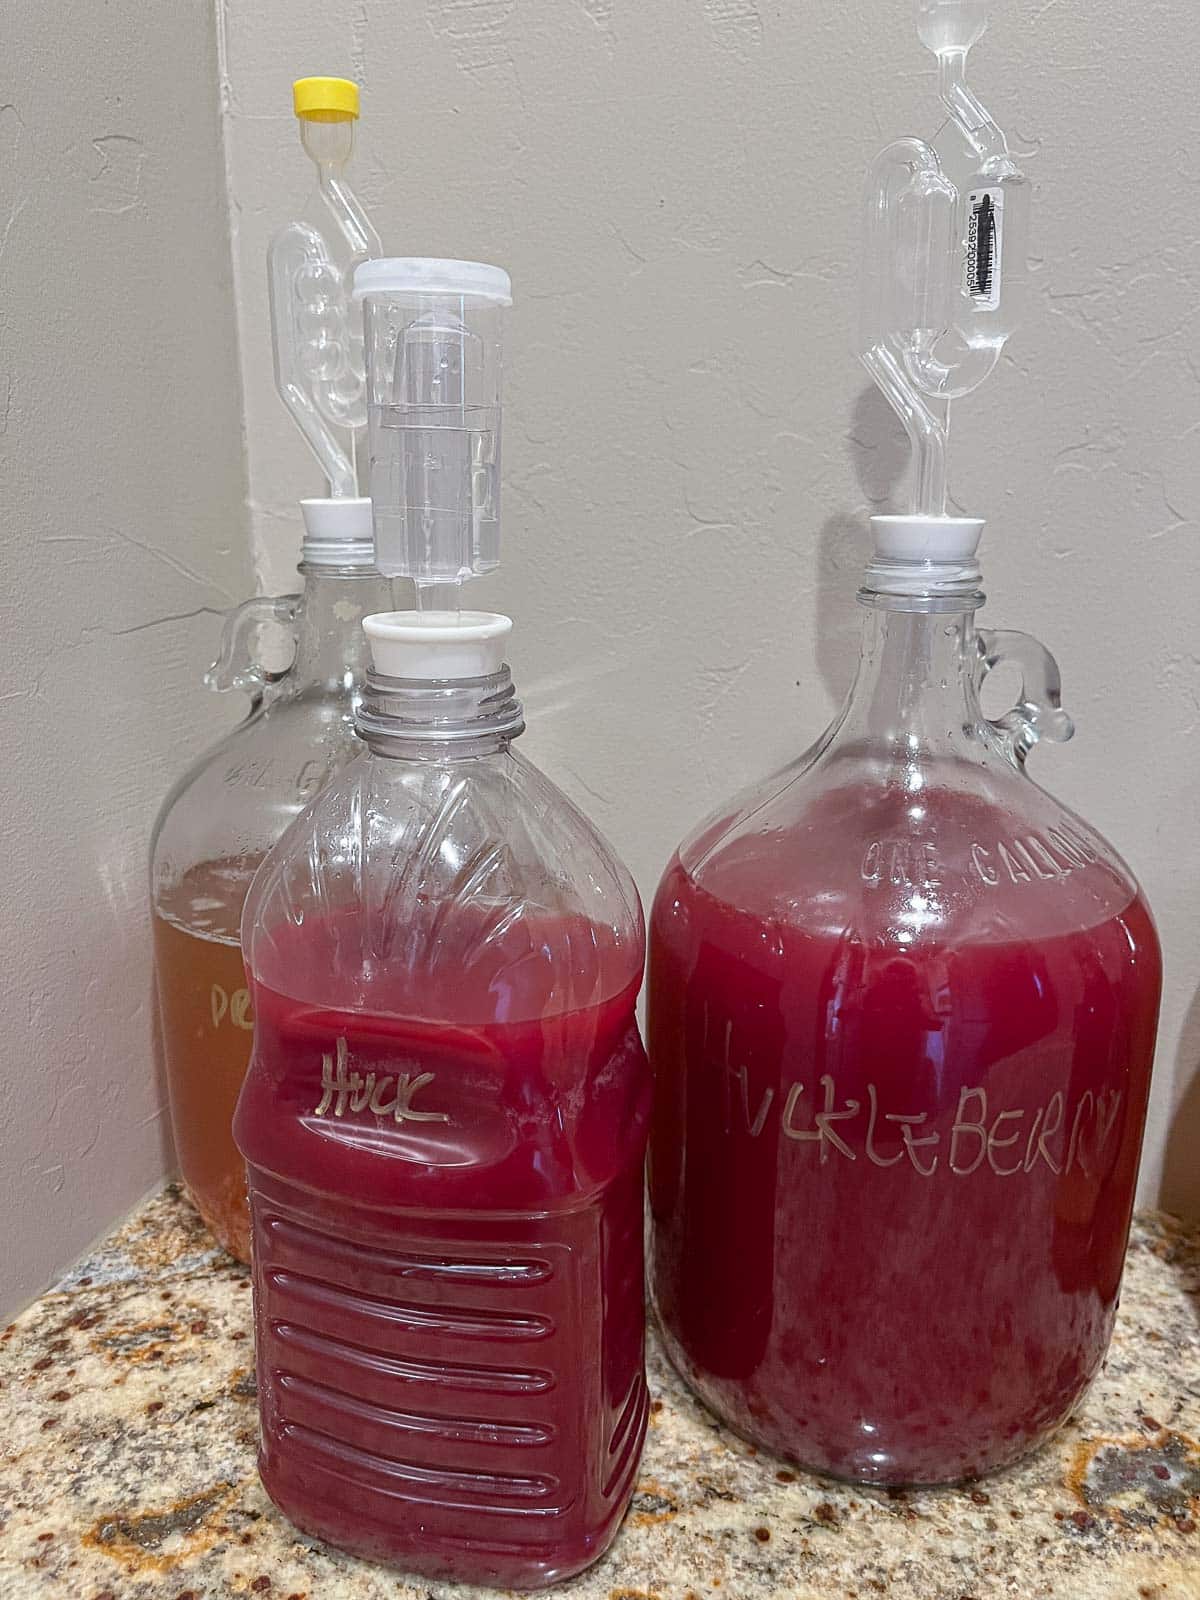
Step 2: Strain and squeeze the juice out of the fruit in the straining bag. Save the berries for your compost bin. Transfer the wine to a one-gallon carboy. I use a funnel with a strainer to do this. Don't overfill the carboy. Leave plenty of room for fermentation and bubbling.

Pro Tip: Pour any extra wine into a smaller bottle and top with an airlock. Juice bottles work great for this! Once you rack the wine into a clean carboy to clear, you can use the extra wine in the juice bottle to top off the wine in the carboy.
Step 3: Fit a sanitized bung into the opening of the bottle/bottles. Fill the airlock halfway with sanitizer solution or water and fit it into place. Store the carboy somewhere away from heat and direct sunlight. It will begin to bubble when fermentation starts, usually within a few hours.
Pro Tip: The best temperature for fermenting wine is between 68-89 degrees F.
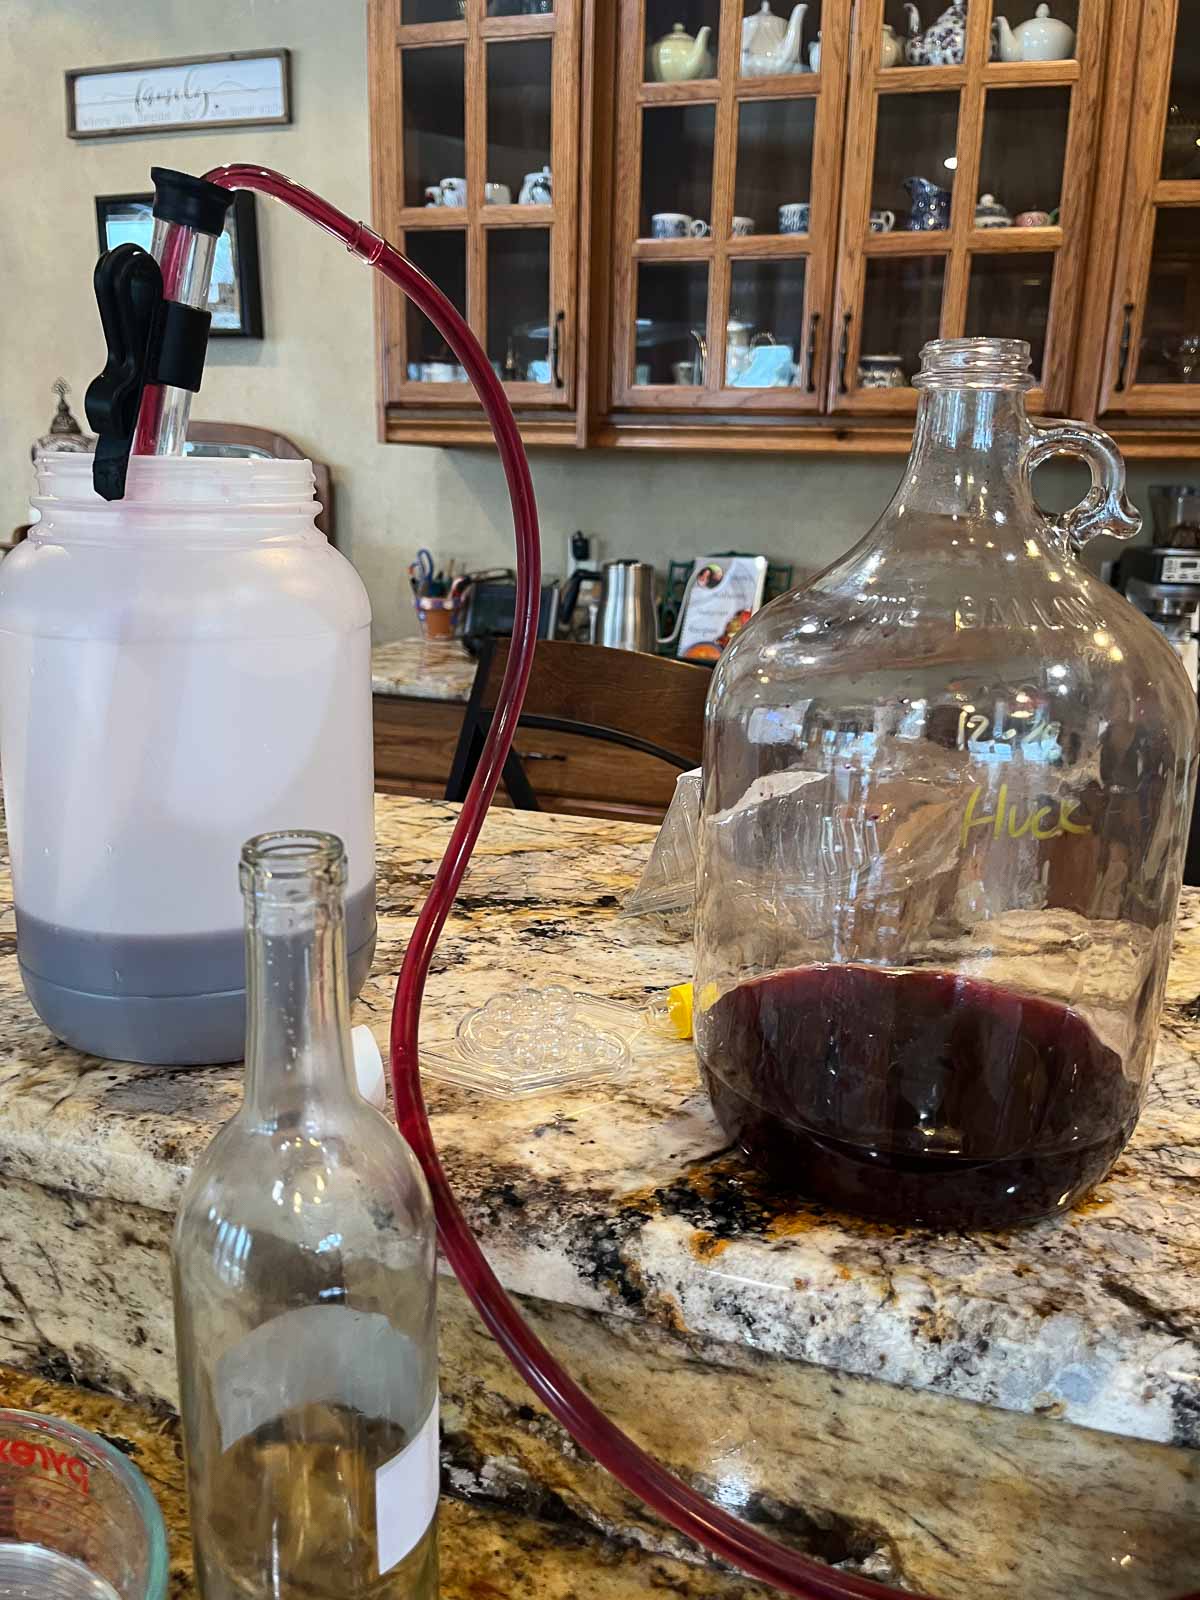
Step 4: After 3 weeks to a month, use a siphon to transfer the wine into a clean plastic jug or fermentor bucket. Leave the sediment and cloudy wine at the bottom of the carboy behind. Add one crushed Campden tablet to the wine and stir to dissolve. Transfer the wine into a clean carboy. Allow the wine to clear anywhere from 1 to 3 months.
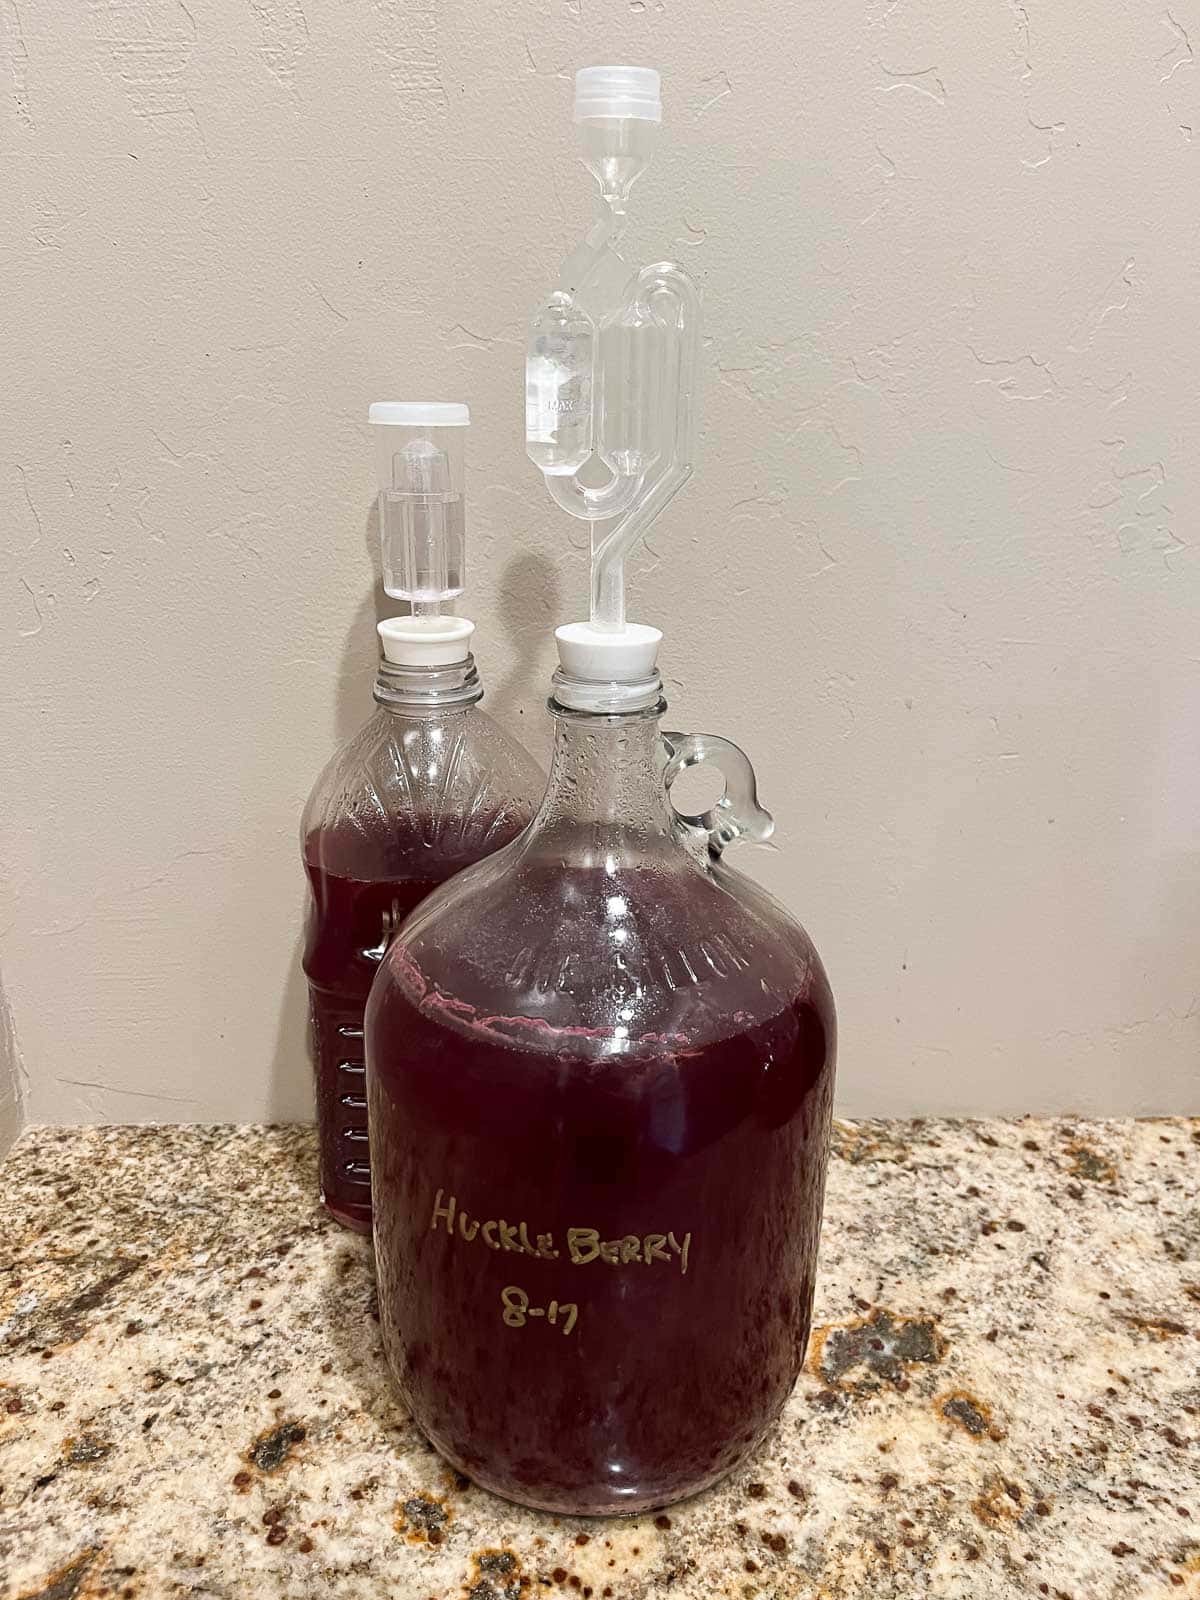
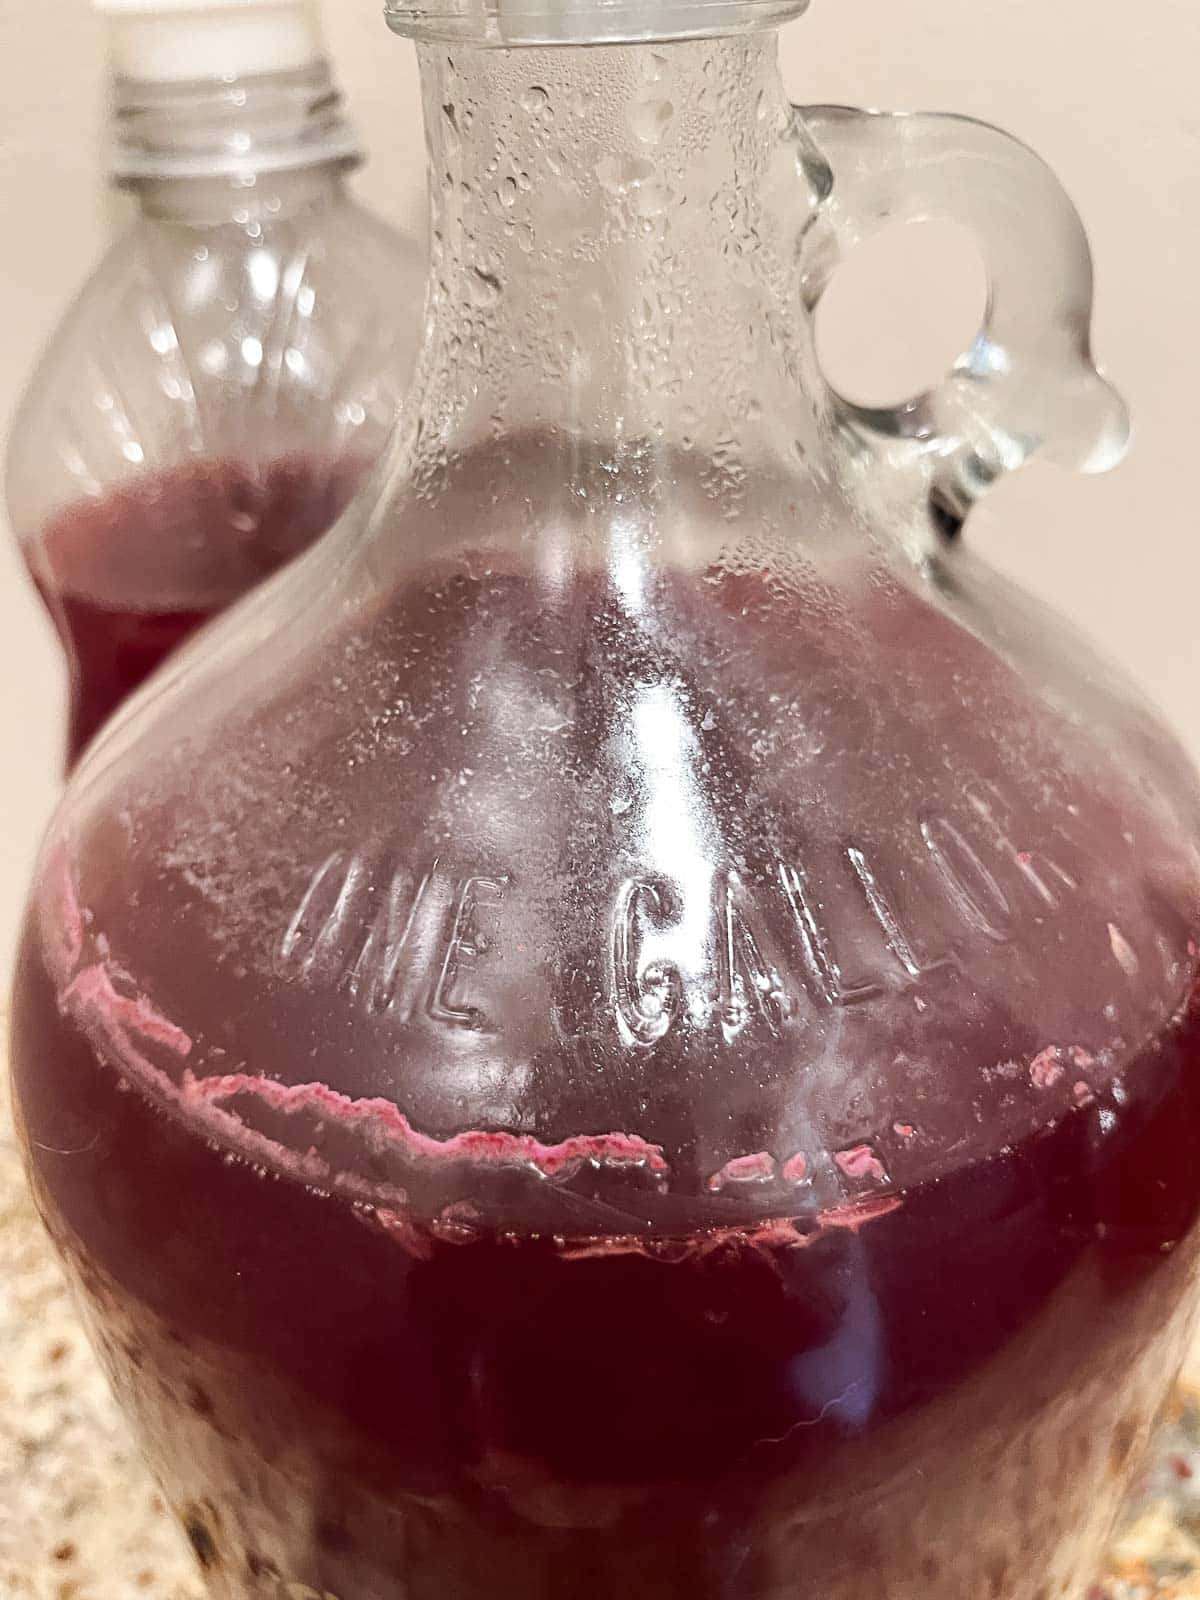
Pro Tip: If you notice a crusty ring around the top of the bottle, don't panic, it's just a krausen line, which is totally normal! Also, it is helpful to write the name of the wine and the date it was racked on the bottle, so you don't have to search for your wine journal for that information.
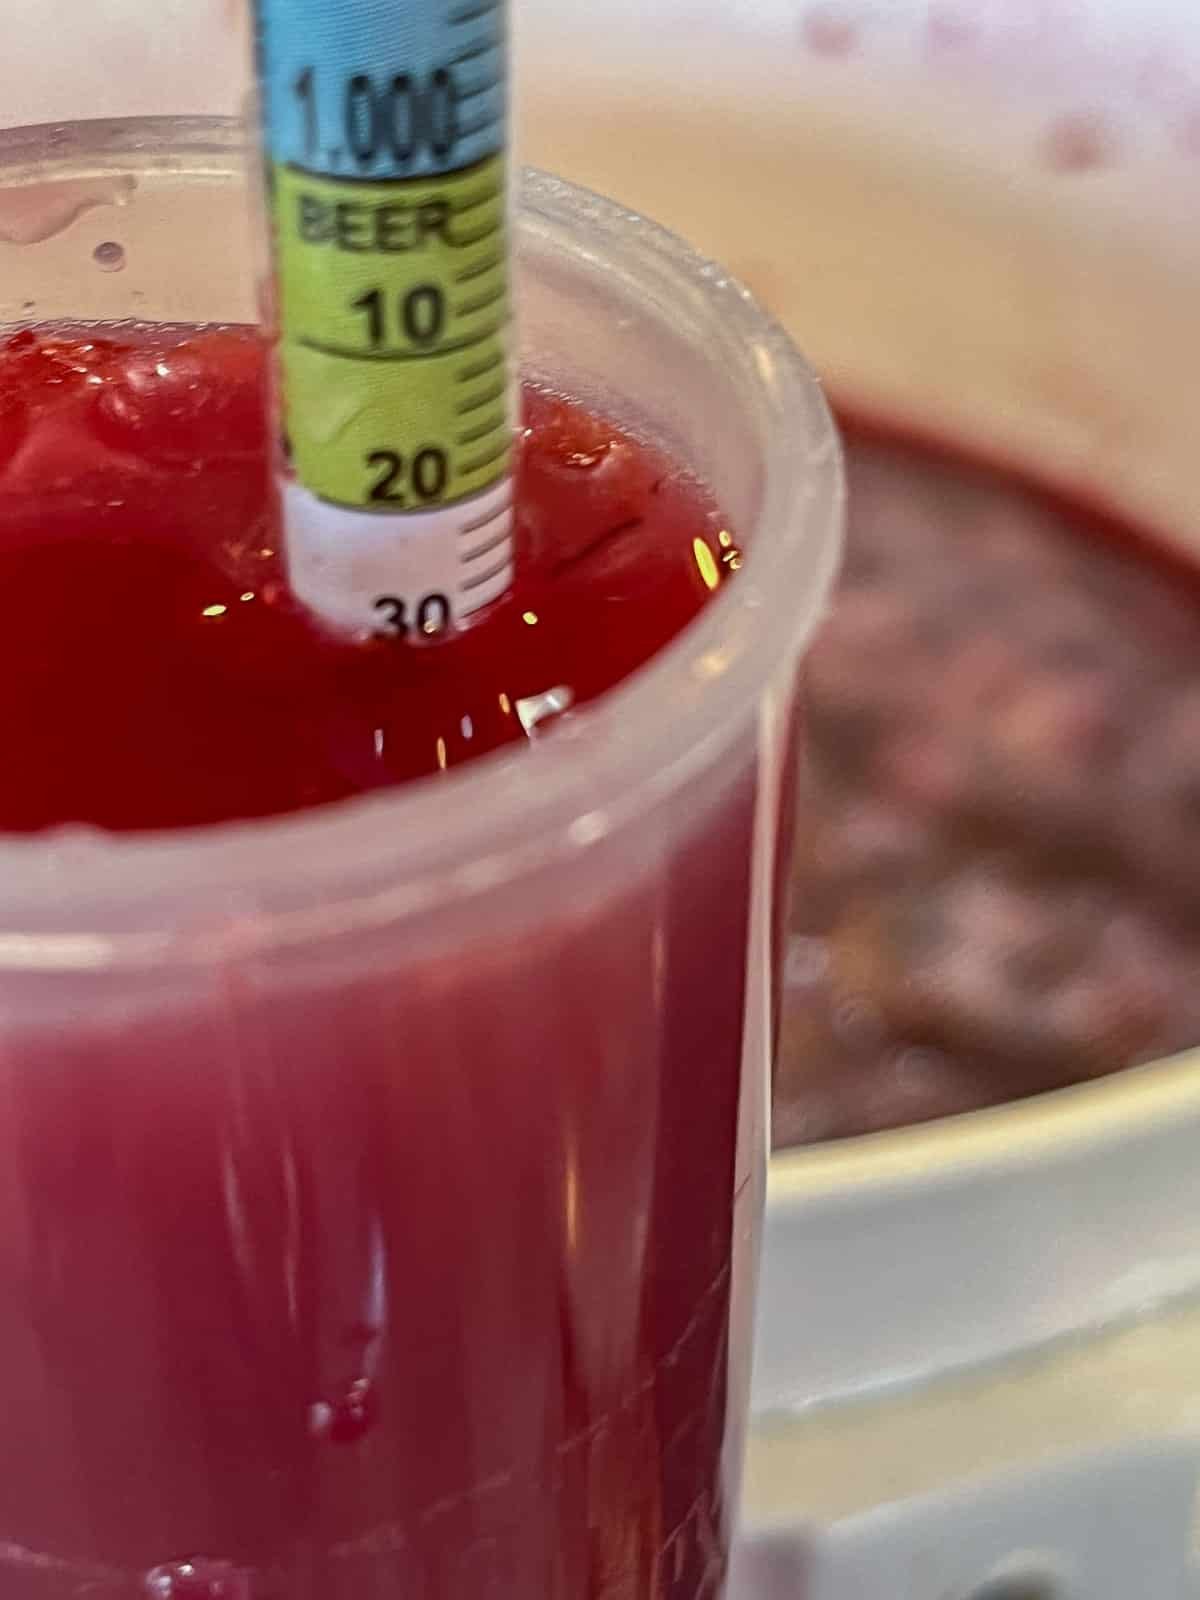
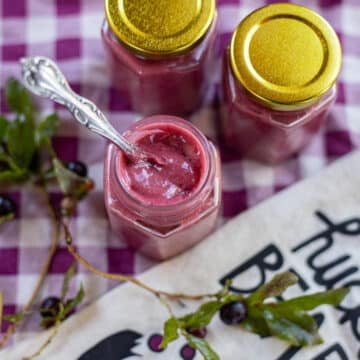
Step 5: Once the wine is completely clear, take a final SG reading to determine the alcohol percentage. If you don't like dry wine, it may need sweetening. If it's too dry, add anywhere from a ¼ cup to a ⅓ cup of huckleberry syrup, juice, or simple syrup. Give it a taste and add more if needed. Add another crushed Campden tablet (to keep the wine from oxidizing) and a ½ teaspoon of stabilizer (to prevent refermentation). Stir thoroughly!
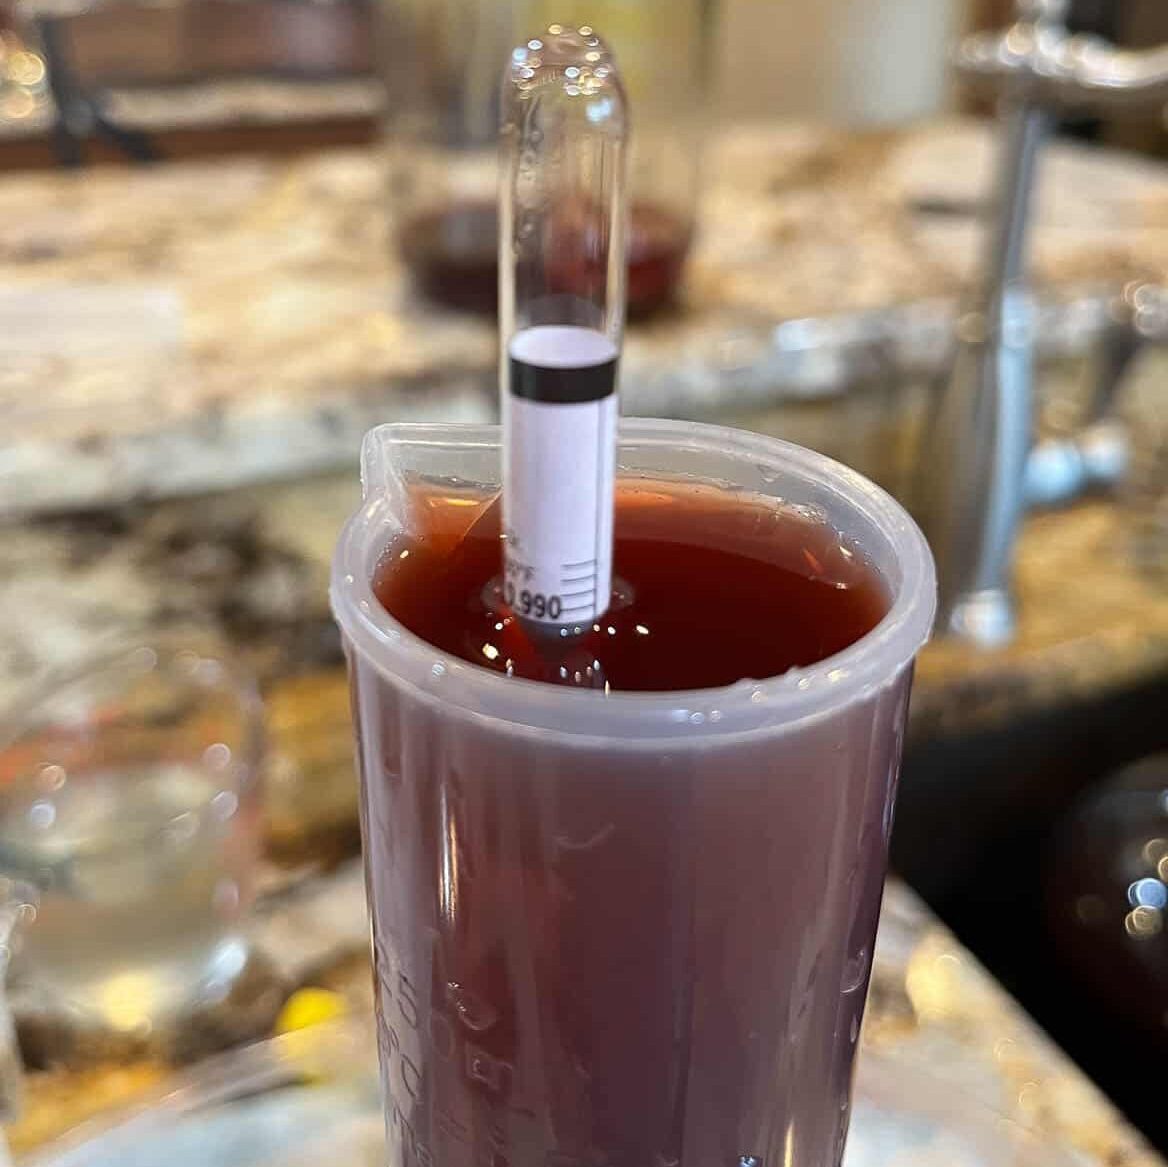
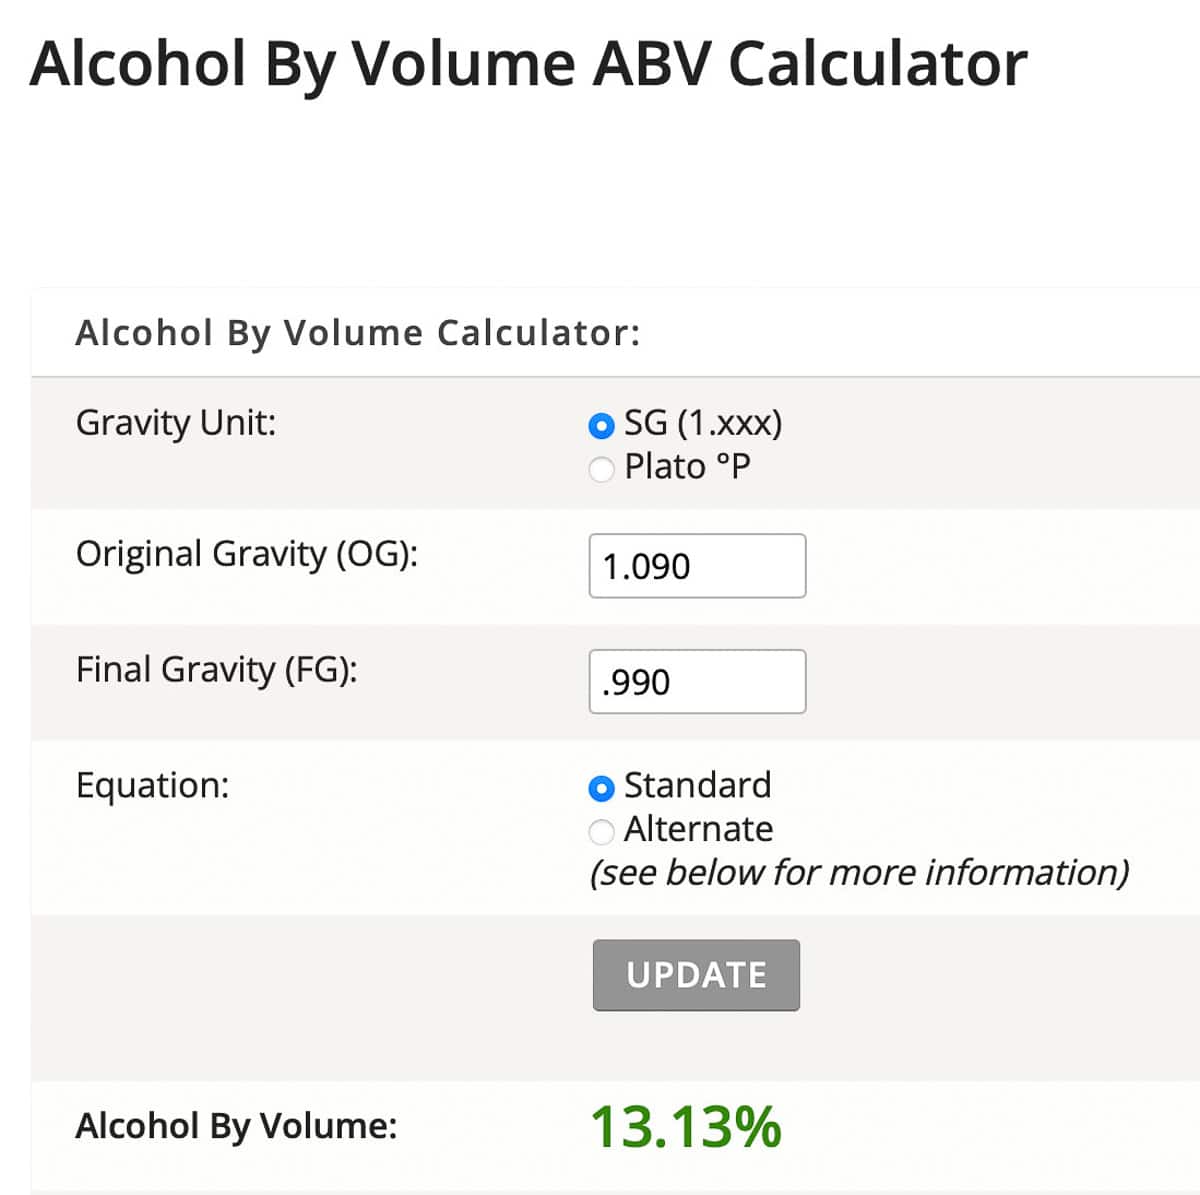
Pro Tip: Use an ABV Calculator to calculate the alcohol percentage using the initial SG reading and the final one. My huckleberry wine's final ABV was 13.13%.
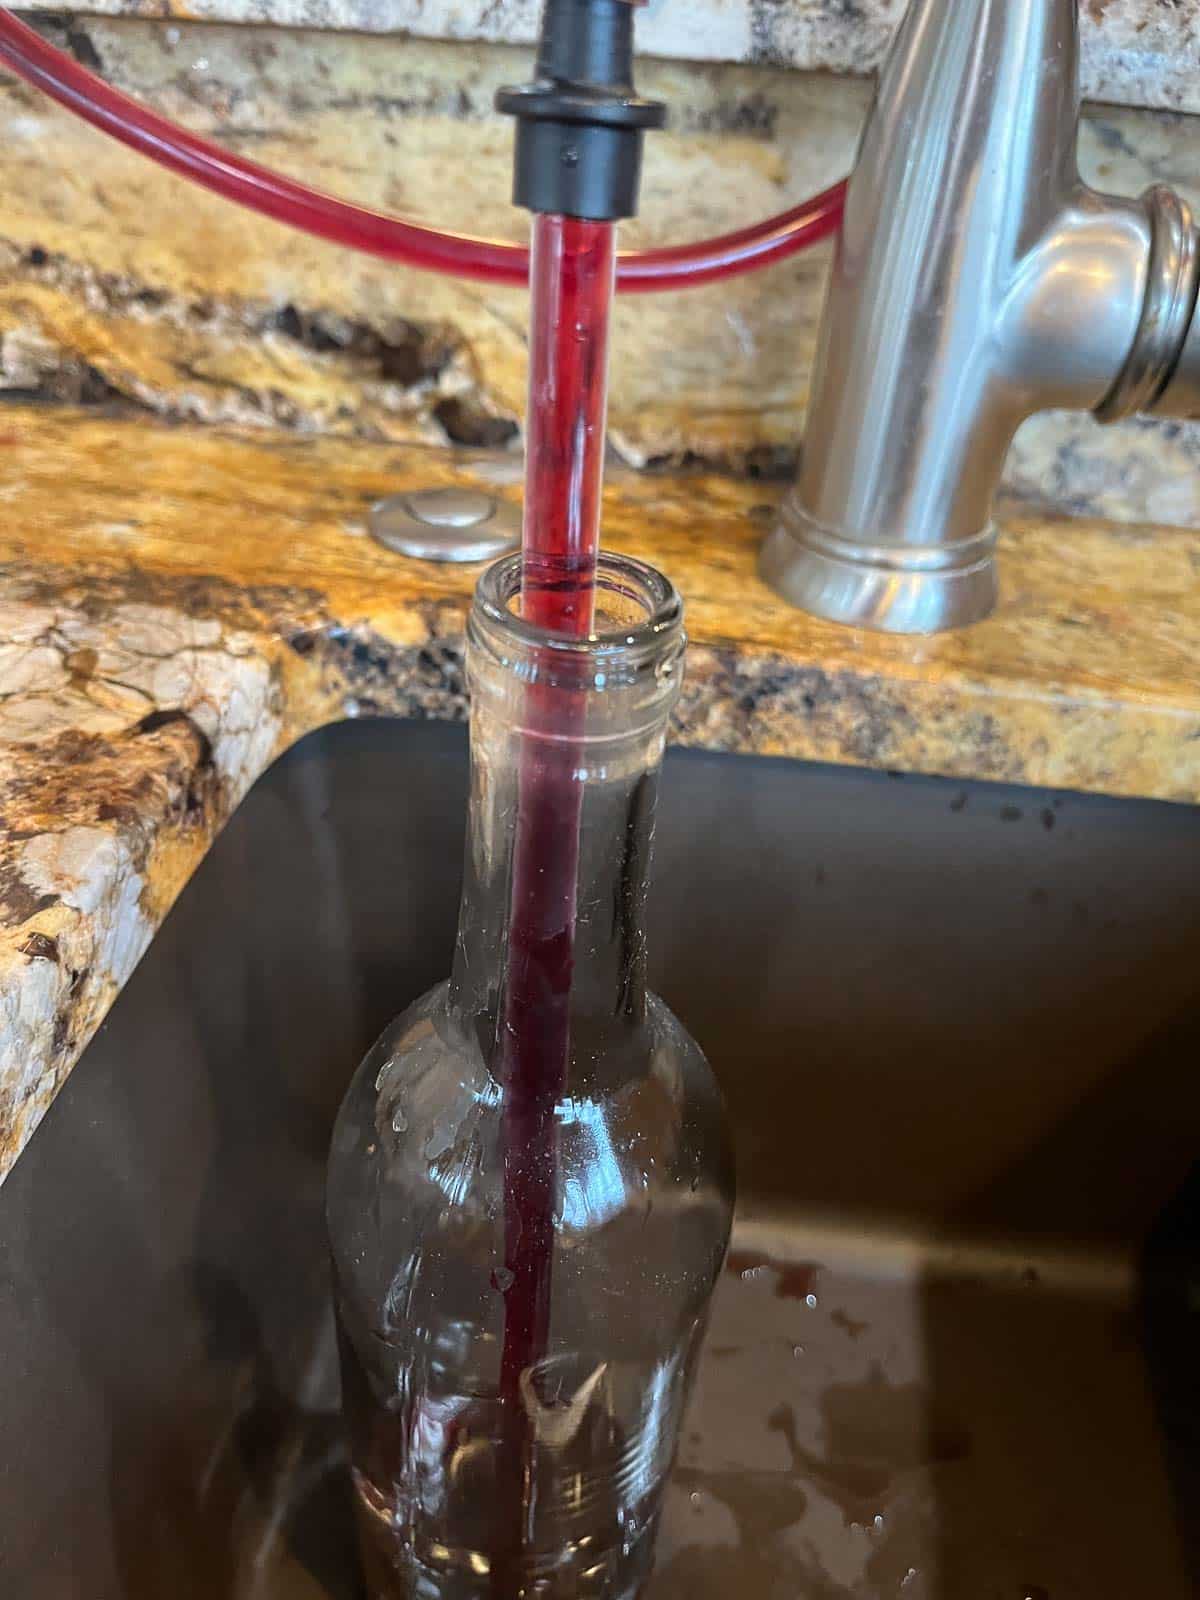
Step 6: Use a siphon with a bottling wand (if you have one) to transfer the wine into sterilized bottles. Label the wine bottles with the type of wine, the date it was bottled, and the wine's alcohol content.
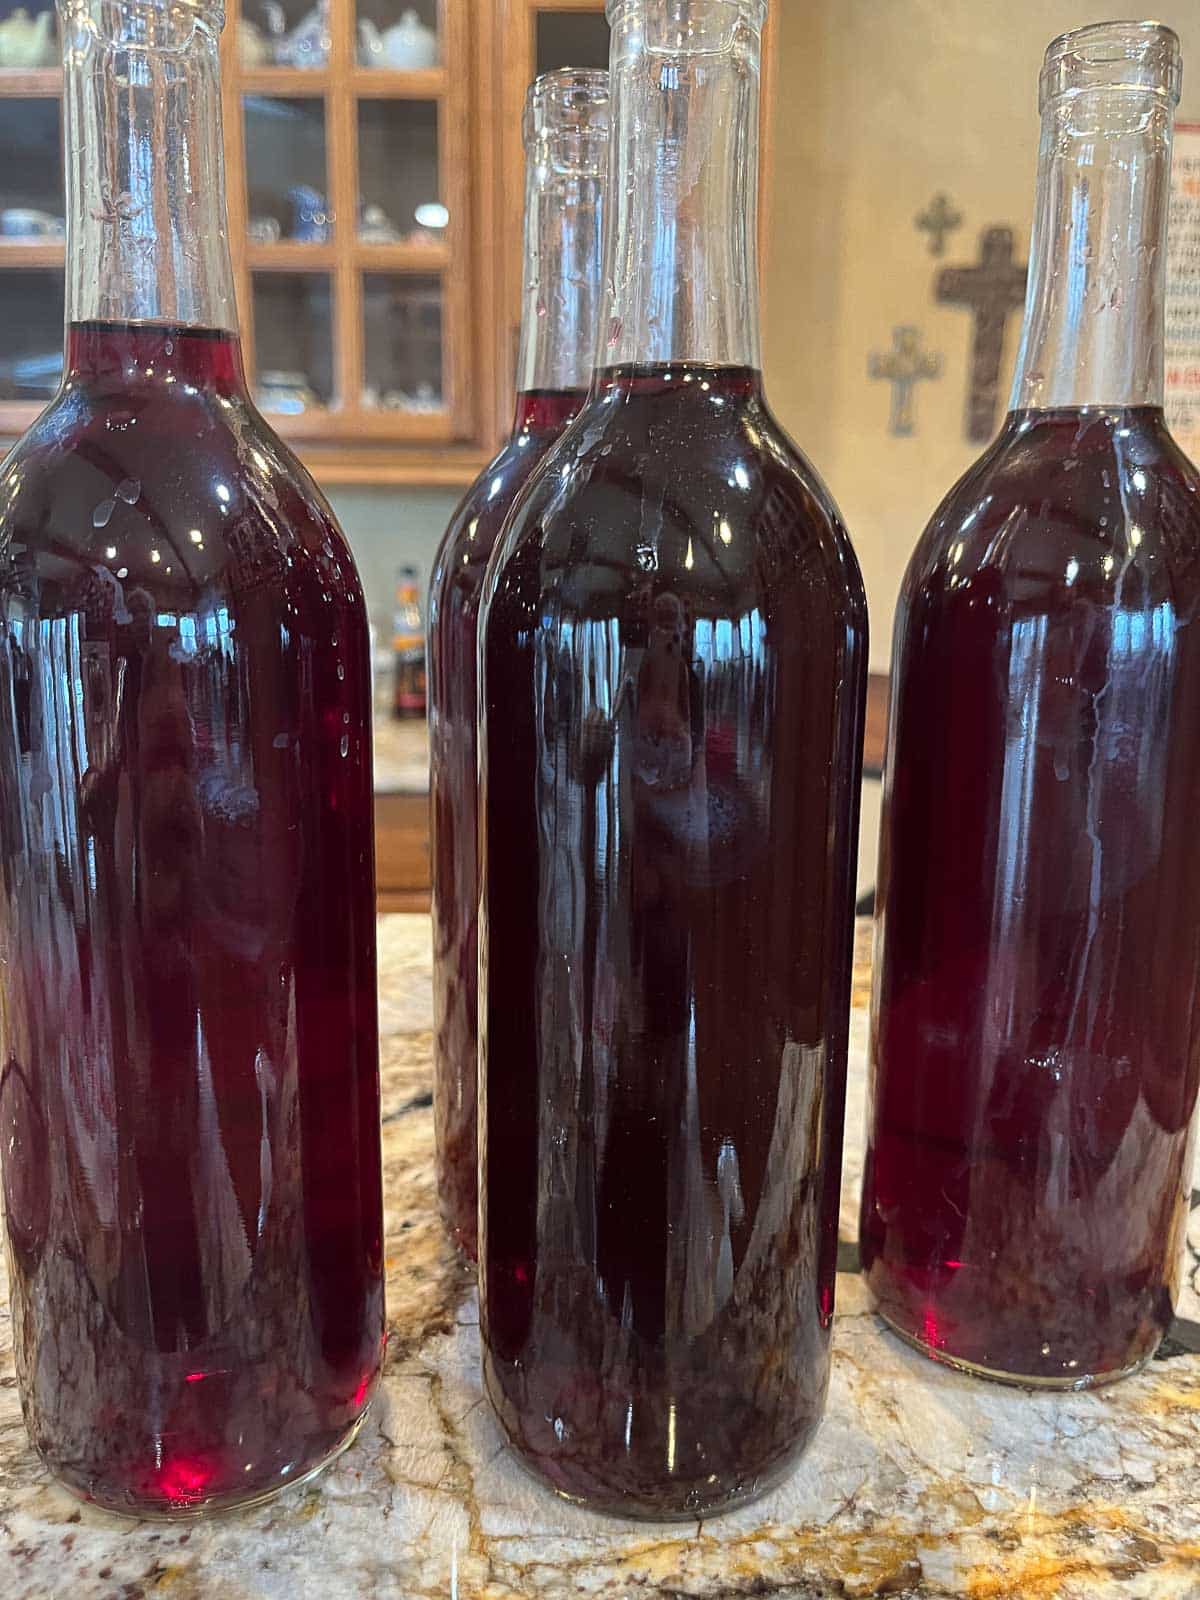
The longer you allow the huckleberry wine to age, the better it will be. Try to wait at least 3 months before tasting it, but a year would be even better!
If you're interested in more yummy wine recipes, learn how to make Glühwein (German mulled wine) from Kate at weeatatlast.com!
🤷🏻♀️ Recipe FAQs
There are a few different blueberry wines available, including Barefoot Blueberry Fruitscato and Stella Rosa Blueberry. However, another option is to make homemade blueberry wine. Homemade blueberry wine is not only easy to make but very delicious!
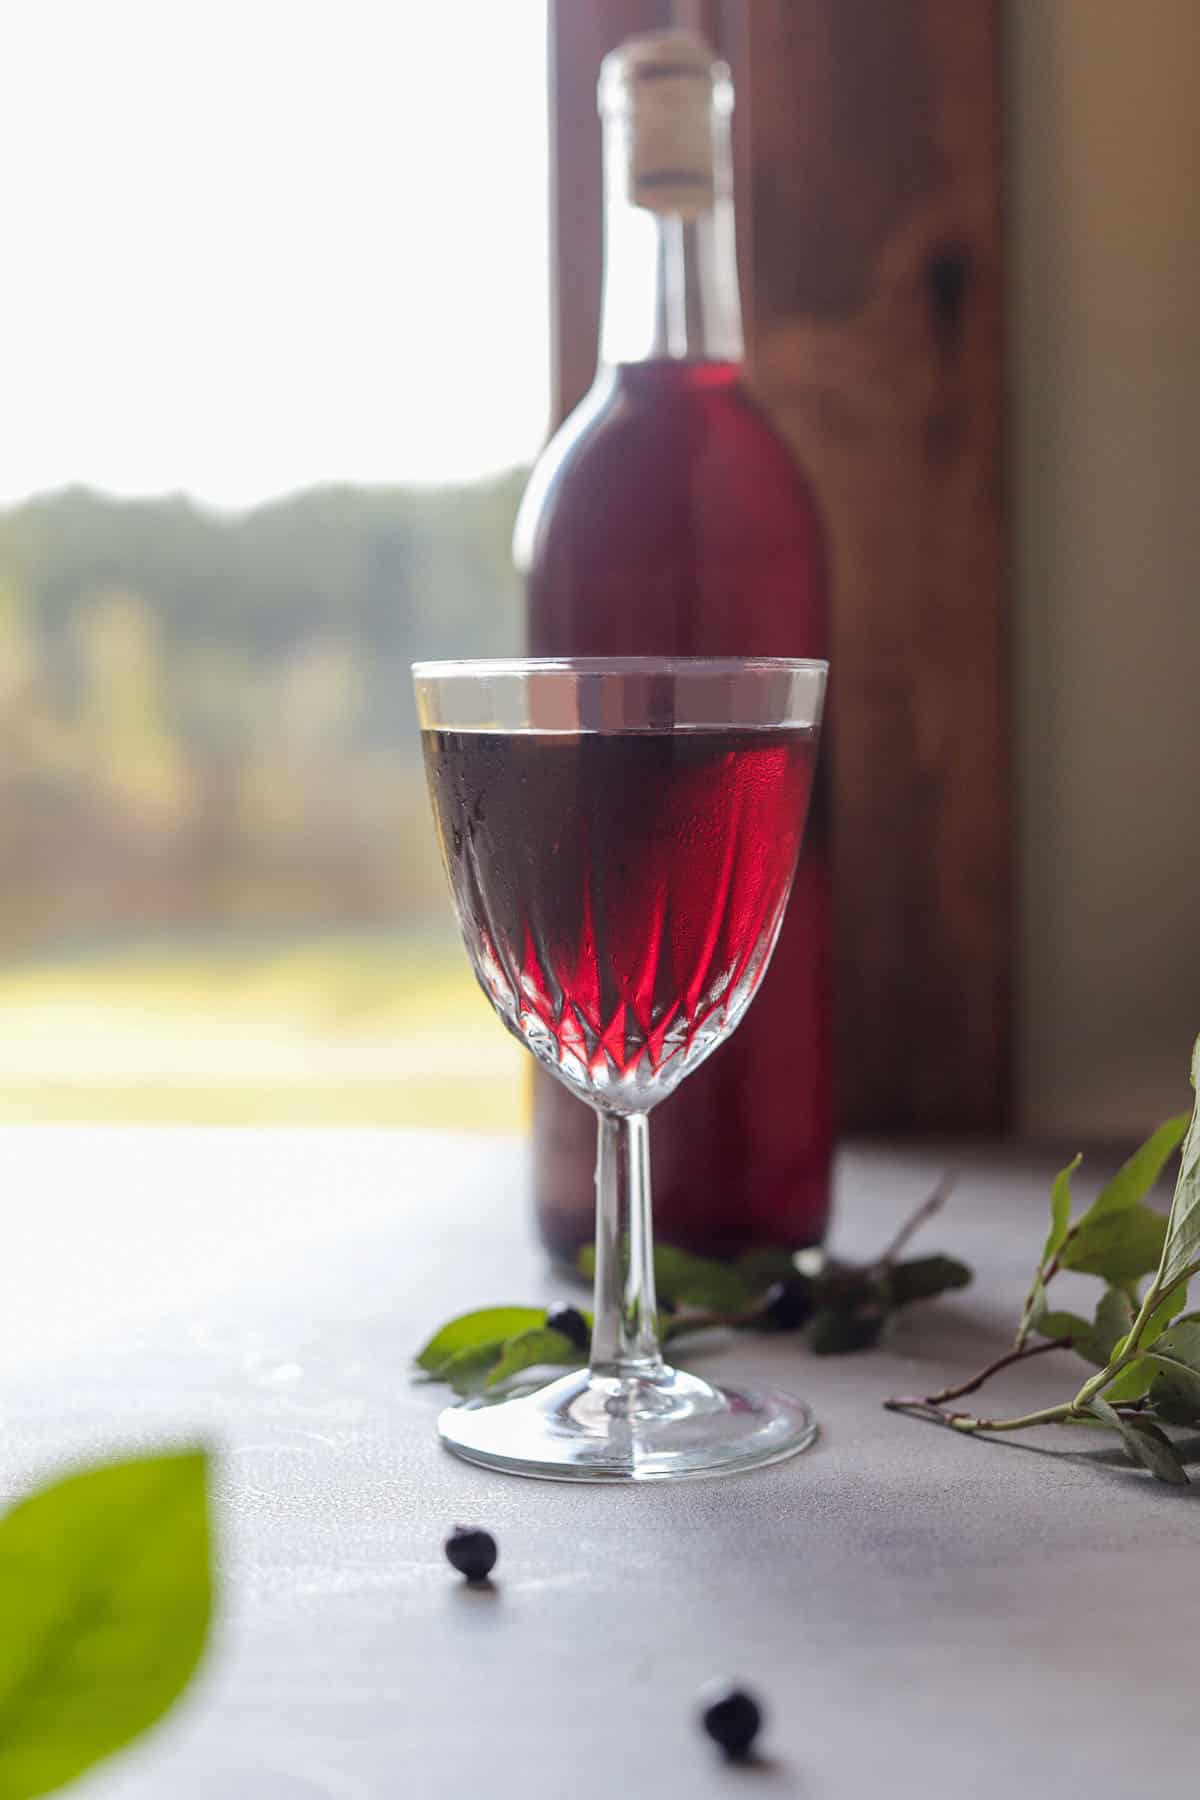
Blueberry wine is a semi-sweet, fruity wine and has a smooth finish.
To make one gallon of blueberry wine, which will yield 5 bottles of blueberry wine, you will need 3 pounds of blueberries.
There are a few huckleberry wines on the market, including Mission Mountain Huckleberry Mountain (very sweet and doesn't necessarily taste like huckleberries), Ste Chapelle Special Harvest Soft Huckleberry (fruity and sweet), and Latah Creek Huckleberry d'Latah (my favorite, stronger huckleberry flavor, sweet, and refreshing). However, I've yet to find a huckleberry wine that tastes better than homemade huckleberry wine!
👩🏼🍳 Pro Tips
- You can make this huckleberry-blueberry wine recipe as is, or you can use 1 lb. huckleberries, 1 lb. serviceberries, and 1 lb. blueberries.
- Although you can use fresh blueberries and huckleberries, if possible, use frozen berries instead. The fruit's cell walls break down more easily when frozen, which allows them to release more juice.
- When re-racking the wine, add the sediment at the bottom of the carboy to your compost bin, or dilute it with water and use it to water your plants.
- Don't fill the wine bottles all the way up to the neck. Leave room for the corks. Alternatively, you can use flip-top bottles.
- The advantage of using a bottling wand is that it keeps the wine from spilling out of the tube. The wand is activated when pressure is applied to the bottom.
- When bottling the huckleberry-blueberry wine, you may end up with a bottle that's not all the way full. Save the extra wine in the fridge to enjoy. It won't be as good as aged wine, but it should still be good enough to drink. You can also add it to homemade spaghetti sauce.
- Huckleberry-blueberry wine goes great with cheese, desserts, and chocolate!
- The formula for figuring out the ABV: Original gravity reading - final gravity reading x 131.25 = ABV.
🫐 Related Recipes
If you enjoy this huckleberry/blueberry wine recipe, you'll want to check out these other recipes, too!

Did you make this recipe?
📖 Recipe
Would you like to save this recipe?

How To Make Huckleberry Or Blueberry Wine
Ingredients
Method
- Before beginning any fermentation process, you need to sanitize all of your equipment, work area, and hands.
- Chop raisins by hand or use a food processor and add either directly to the fermentor bucket or into a large mesh bag. Add frozen huckleberries and blueberries. If using a mesh bag, tie the bag to keep the raisins and berries contained in the bag. Add the juice of one orange.
- Add sugar to a large stockpot and cover with 1 gallon of water. Heat and stir until the water is hot and the sugar dissolves. Carefully pour the syrup over the berries and raisins. Mash the fruit using a potato masher to extract their juices. Allow the juice to come to room temperature.
- Next, add acid blend, tannin, pectic enzyme, and 1 crushed Campden tablet to the primary fermenter. Take the initial SG reading with a hydrometer. Cover the primary fermentation container with breathable fabric and use a rubber band to fasten it into place. Set the bucket aside for 24 hours.
- Follow the instructions on the yeast packet to activate it. Since 1 packet is enough for 5 gallons, I only use ½ of the packet and save the rest for the next batch. Once active, add yeast and energizer to the "must" (unfermented fruit juice before it's converted to wine). Cover again and set aside.
- Stir daily and take the SG reading and record it. It should begin fermenting in 1-3 days which will be evident by the bubbles. When it reaches a specific gravity of 1.030 (it could take anywhere from 3-7 days) it's time to "rack the wine" (transfer it to a carboy).
- Strain and squeeze the juice out of the fruit in the straining bag. Save the berries for your compost bin. Transfer the wine to a one-gallon carboy. I use a funnel with a strainer to do this. Don't over-fill the carboy. Leave plenty of room for fermentation and bubbling.
- Fit sanitized bung into the opening of the bottle/bottles. Fill the airlock halfway with sanitizer solution or water and fit it into place. Store the carboy somewhere away from heat and direct sunlight. It will begin to bubble when fermentation starts, usually within a few hours.
- After 3 weeks to a month, use a siphon to transfer the wine into a clean plastic jug or fermentor bucket. Leave the sediment and cloudy wine at the bottom of the carboy behind. Add one crushed Campden tablet to the wine and stir to dissolve. Transfer the wine into a clean carboy. Allow the wine to clear anywhere from 1 to 3 months.
- Once the wine is completely clear, take a final SG reading to determine the alcohol percentage. If you don't like dry wine, it may need sweetening. If it's too dry, add anywhere from a ¼ cup to a ⅓ cup of huckleberry syrup, juice, or simple syrup. Give it a taste and add more if needed. Add another crushed Campden tablet (to keep the wine from oxidizing) and a ½ teaspoon of stabilizer (to prevent refermentation). Stir thoroughly!
- Use a siphon with a bottling wand (if you have one) to transfer the wine into sterilized bottles. Label the wine bottles with the type of wine, the date it was bottled, and the wine's alcohol content.
- The longer you allow the huckleberry wine to age the better it will be. Try to wait at least 3 months before tasting it but it's amazing after 12 months.
Nutrition
Notes
- Check out many more tips within the post!
- You can make this huckleberry-blueberry wine recipe as is or you can use 1 lb. huckleberries, 1 lb. serviceberries, and 1 lb. blueberries.
- Although you can use fresh blueberries and huckleberries, if possible, use frozen berries instead. The fruit's cell walls break down easier when frozen, which allows them to release more juice.
- When re-racking the wine, add the sediment at the bottom of the carboy to your compost bin, or dilute it with water and use it to water your plants.
- Don't fill the wine bottles all the way up the neck. Leave room for the corks. Alternatively, you can use flip-top bottles.
- The advantage of using a bottling wand is that it keeps the wine from spilling out of the tube. The wand is activated when pressure is applied to the bottom.
- When bottling the huckleberry-blueberry wine, you may end up with a bottle that's not all the way full. Save the extra wine in the fridge to enjoy. It won't be as good as aged wine, but it should still be good enough to drink. You can also add it to homemade spaghetti sauce.
- Huckleberry-blueberry wine goes great with cheese, desserts, and chocolate!
- The formula for figuring out the ABV: Original gravity reading - final gravity reading x 131.25 = ABV.
Chris Basham says
Do you have a link where the wine making kit can be purchased for the huckleberry wine? Also can I use huckleberry syrup if I dont have huckleberrys?
Thank You,
Hilda Sterner says
Hi Chris, You can technically make wine with huckleberry syrup, but it’s not ideal. Wine fermentation relies on the natural sugars, acids, tannins, and wild yeasts found in the fruit. Syrup is usually cooked down and often contains added sugar, which can throw off the fermentation process and result in a wine that’s overly sweet, flat in flavor, or doesn’t ferment properly.The wine-making kit is the one I recommend: https://amzn.to/4a7VfPt
Barry says
how do you filter your wine? I tried coffee filters, 4 times on some muscadine wine and there's still sediment in the bottle.
Hilda Sterner says
What stage are you at? When you transfer from one carboy to the next, you'll leave the sediment at the bottom of the bottle and suction only the clear wine (above the sediment) into another carboy. This process gets repeated monthly (or longer) until there is no sediment on the bottom of the carboy, then you're ready to bottle.
Kelly Methey says
This is a great post with lots of information on delicious wine making.
I can attest to the deliciousness of this wine, it’s beautiful color and presentation. I highly recommend this recipe to anyone that wants to learn to make wine or just drink this amazing, homemade wine.
Hilda Sterner says
Thanks, appreciate the comment and review!