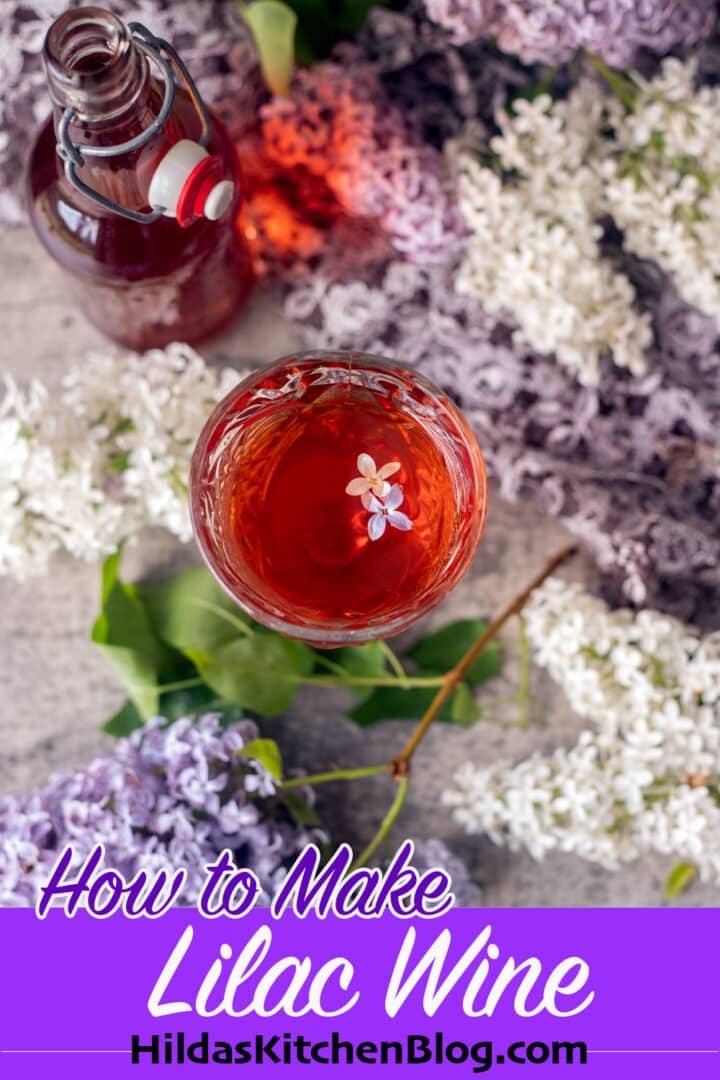
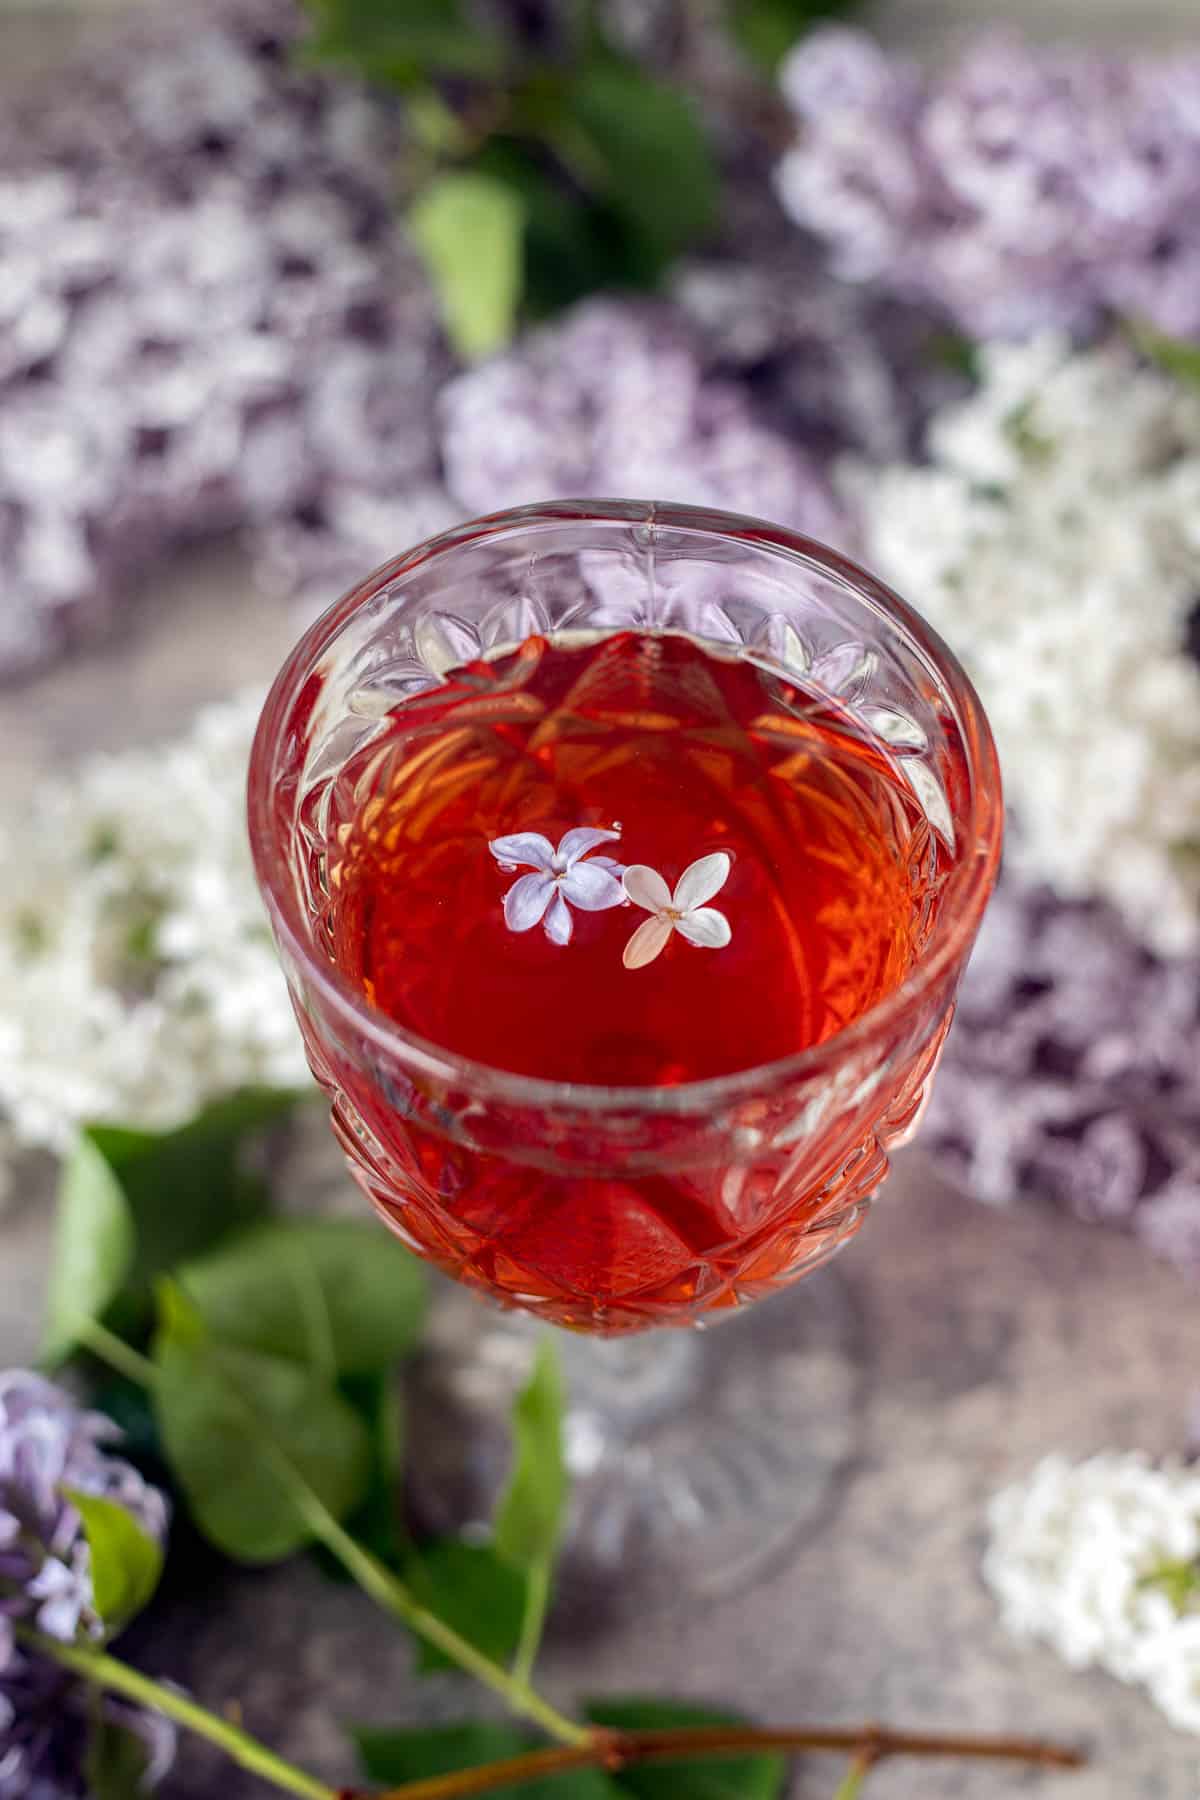
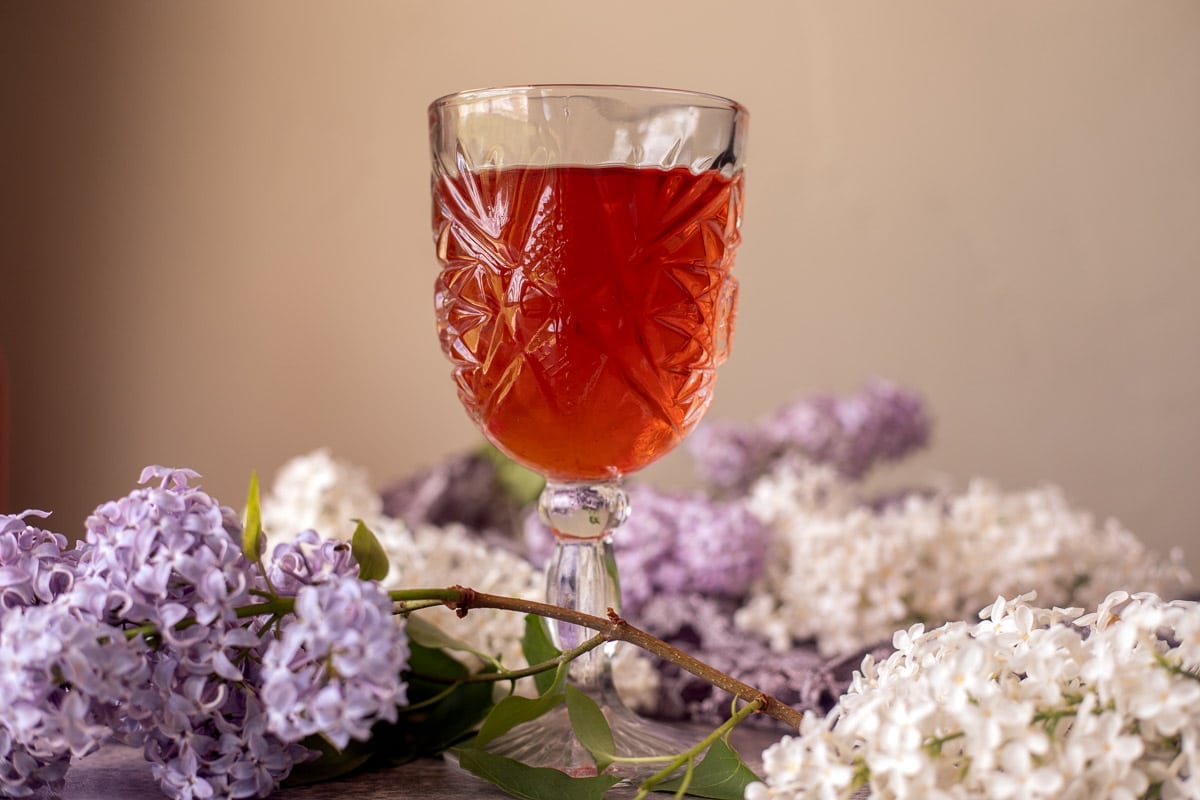
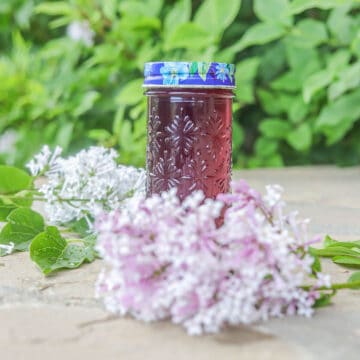
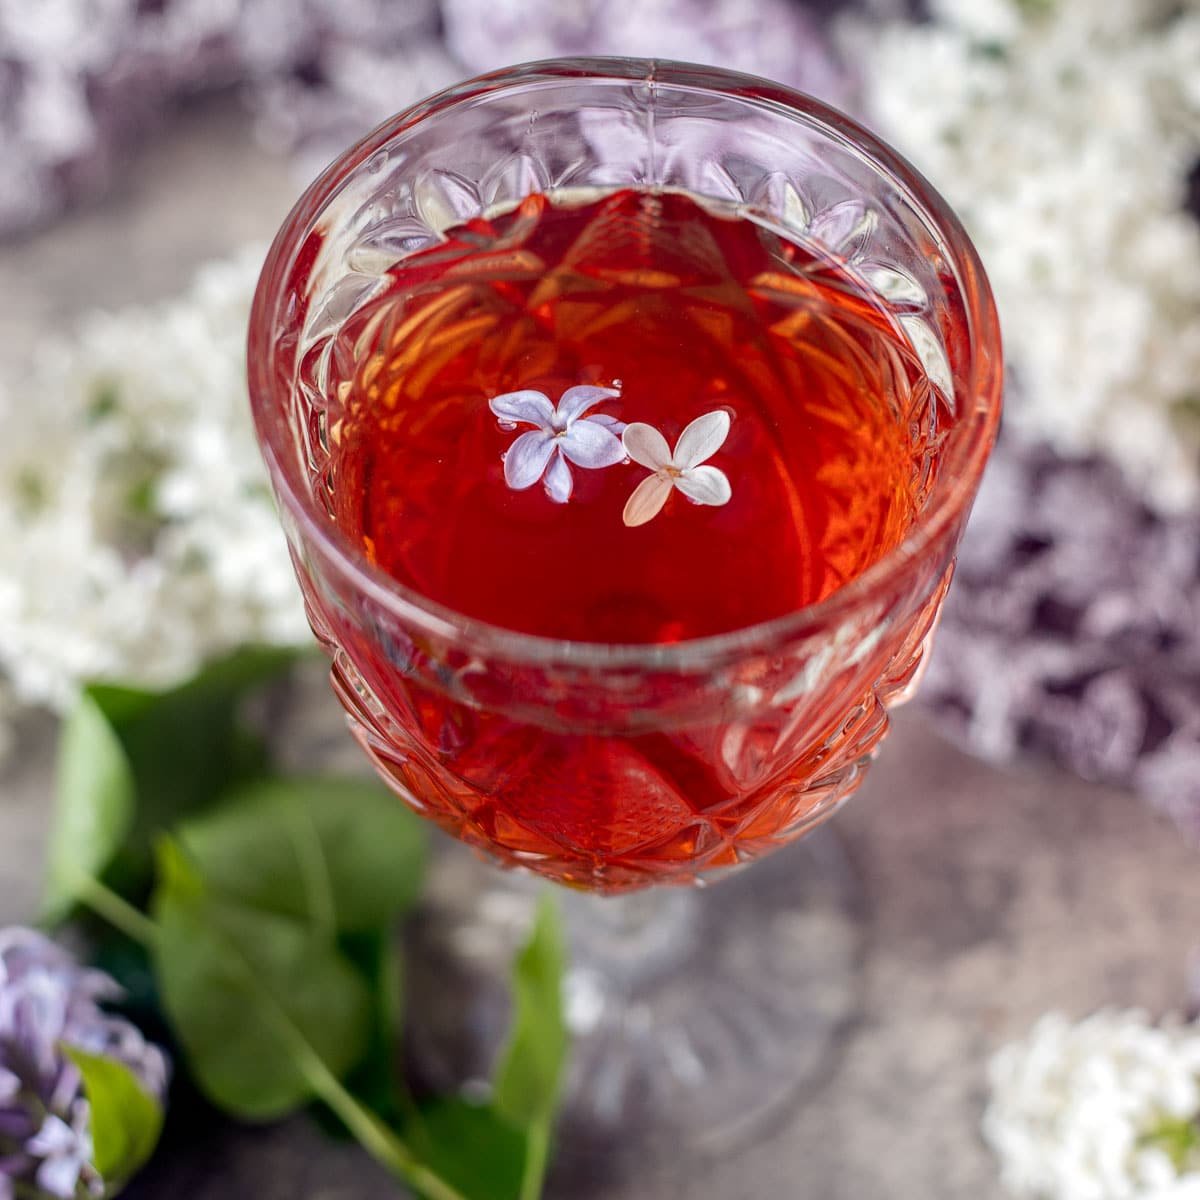
Lilac Wine is light, fruity, slightly sweet, and has an amazing floral scent! My lilac wine recipe also contains fresh plums and plum preserves which give the lilac wine both body and a gorgeous color. The result is nothing short of spectacular!
Would you like to save this recipe?
I've been fermenting wines now for a couple of years and have successfully made chokecherry wine, huckleberry wine, elderberry wine, pomegranate wine, and many others. My favorite, by far, is lilac wine!
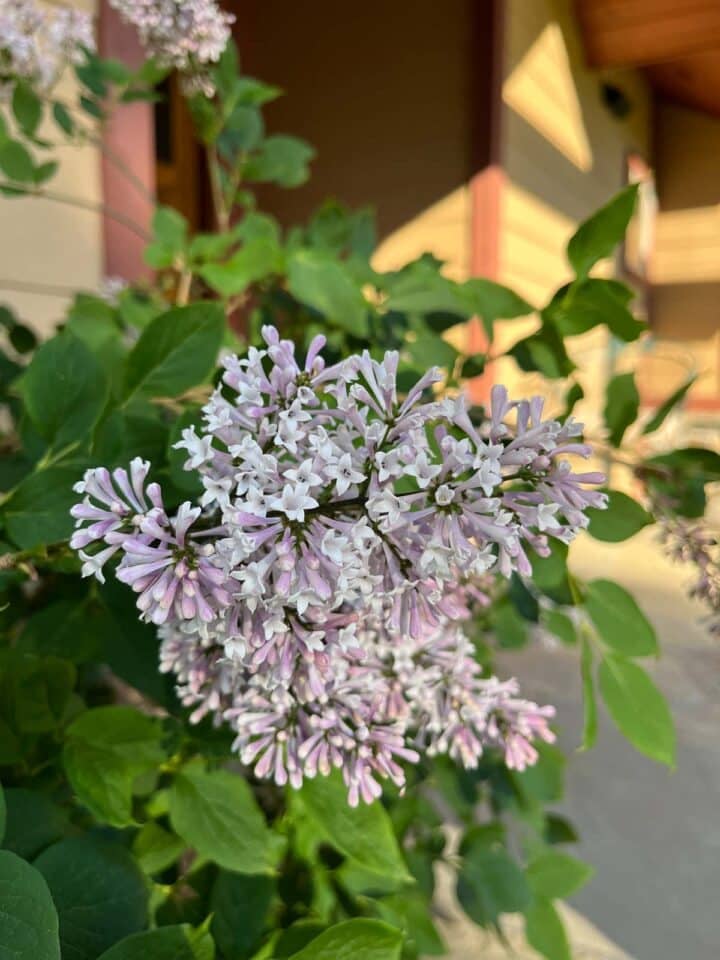
Over the years, I've made a few different batches of lilac wine to perfect the recipe. I documented every one of the recipes with detailed instructions. I even tried different varieties of lilacs, from common lilacs to Miss Kim lilacs (which is a Korean variety and my personal favorite).
This lilac wine recipe is from the batch that had a combination of Miss Kim lilacs & plums, which was the best batch by far! So, if you like light, fruity, and slightly sweet wines, you have to try this lilac scented homemade wine!
Jump to:
🧐Why This Recipe Works
- This lilac wine recipe will teach you everything you need to know about making lilac wine, even if you are a beginner!
- Lilac wine is hard to find, luckily it's easy to make.
- This delicious wine makes a wonderful and unique gift to any wine enthusiast!
- This lilac wine recipe can be enjoyed a few months after it's bottled.
🛒What You Need For This Recipe
🔖Recipe Ingredients & Substitutions
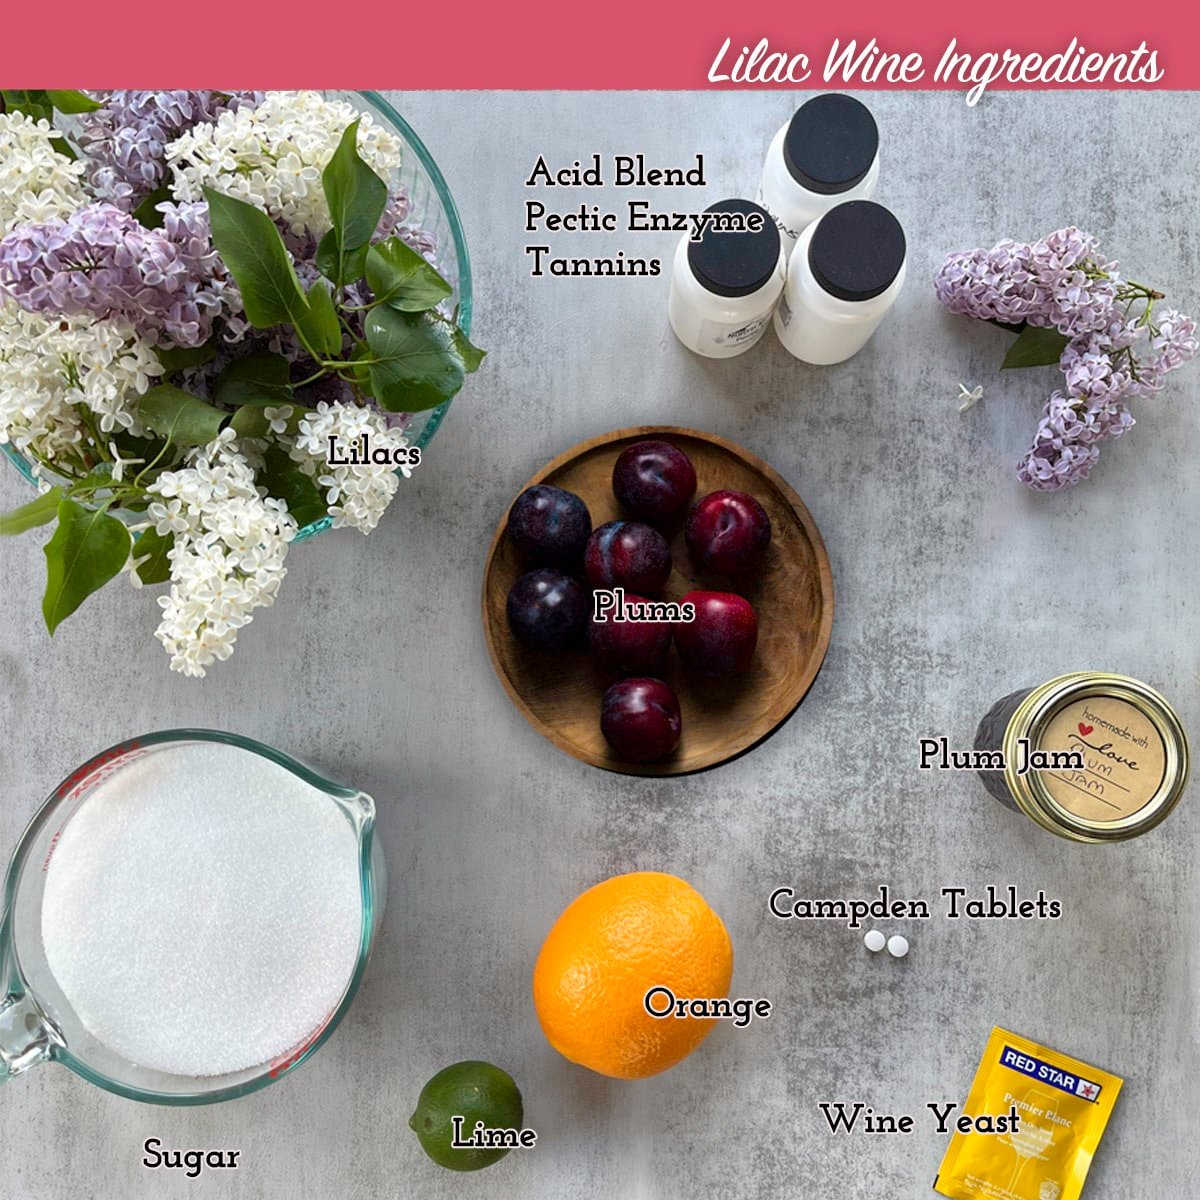
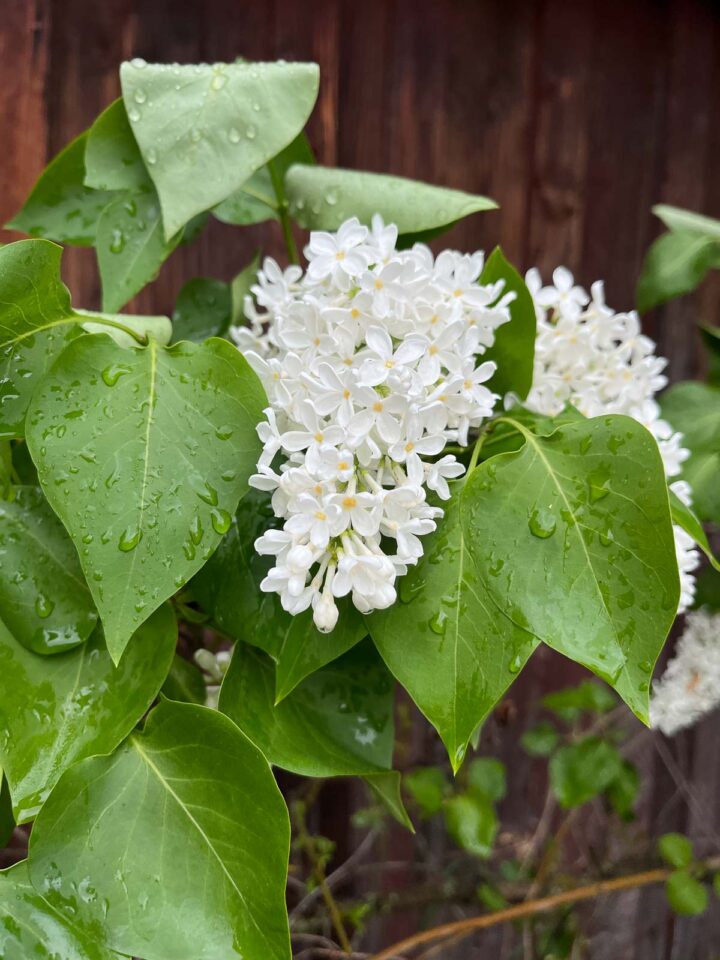
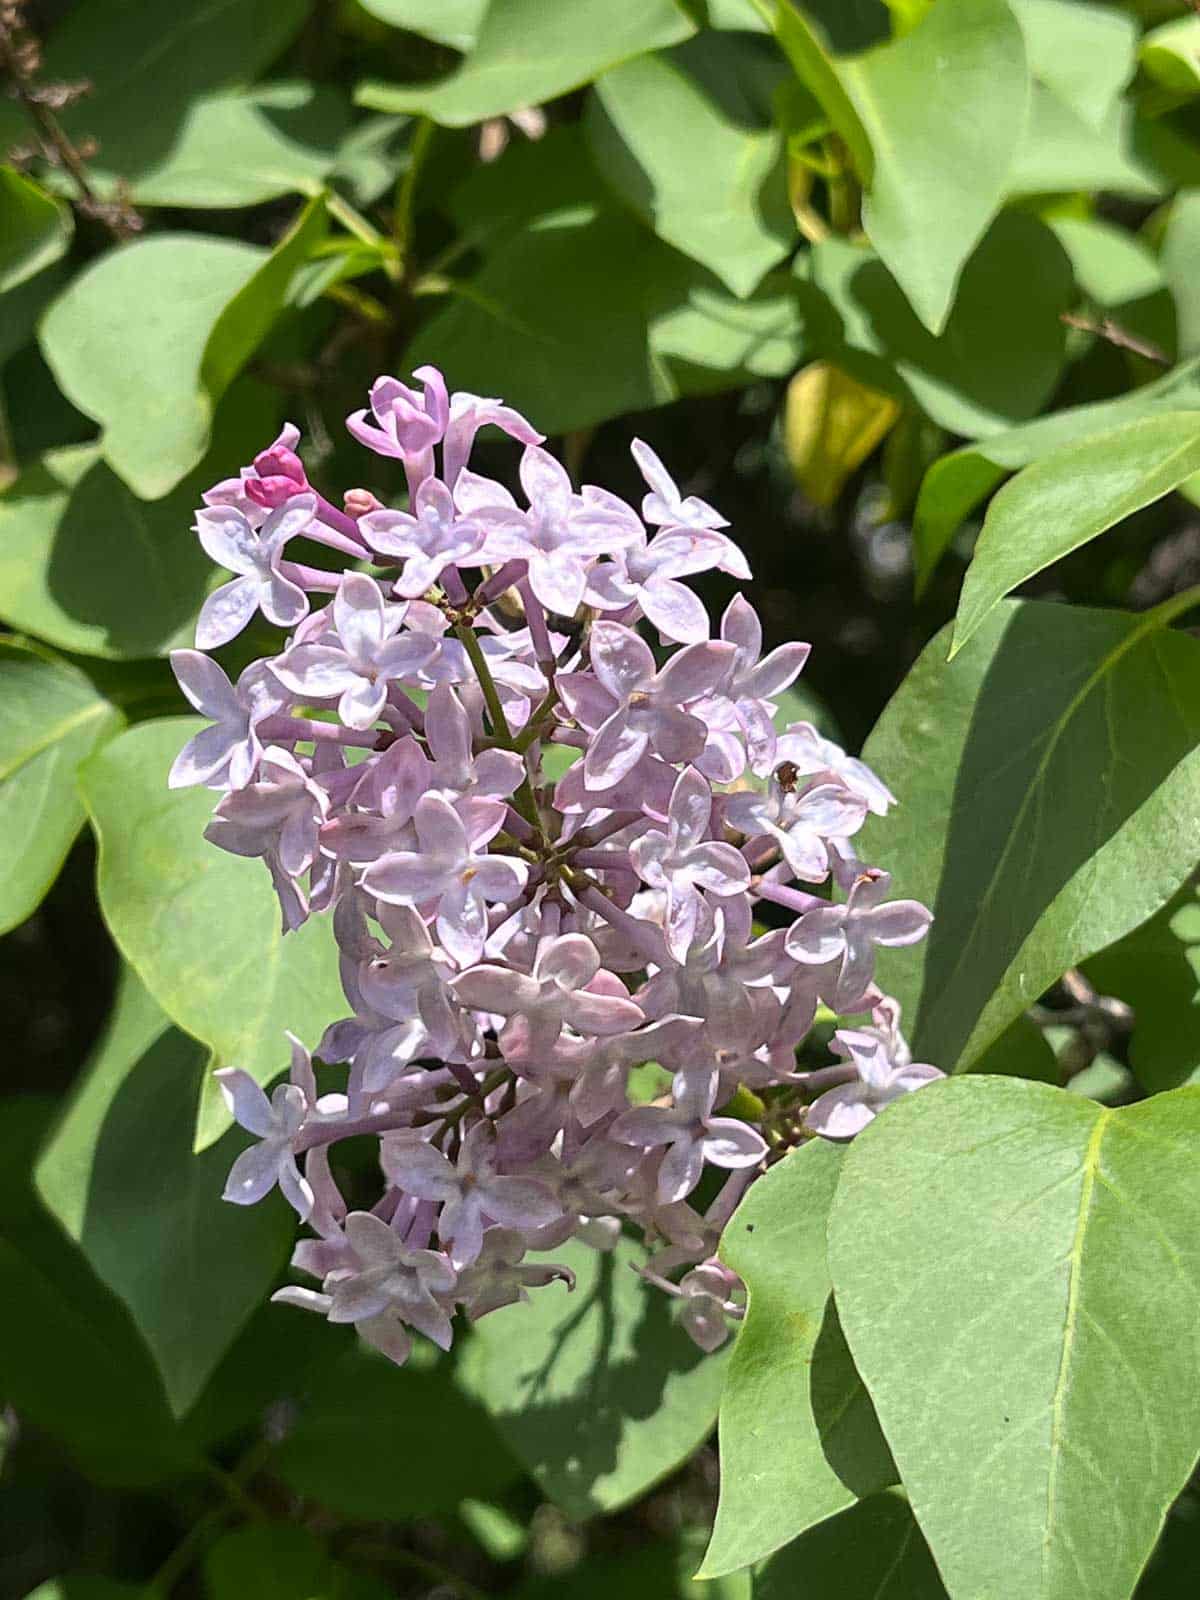
- Lilacs: Eight cups of fresh, fragrant lilac flowers. There are many varieties that you can try. My favorite is Miss Kim.
- Plums: To add body and a lovely color to the wine, we'll be adding 1 pound of chopped plums.
- Plum Preserves: To increase the initial SG reading (which will result in a higher alcohol content when your wine is ready to rack) I also added 1 jar of plum preserves. You can try substituting peach jam, or strawberry fig preserves.
- Sugar: You'll need 2 ½ lbs of granulated sugar. Don't confuse that with 2 ½ cups of sugar, yes, I've made that mistake before. 🤦🏽♀️
- Yeast: I prefer to use premier blanc which is considered a champagne yeast but is also perfect for fruit wines. It has a high alcohol tolerance which means it produces a higher percentage of alcohol at the end.
- Yeast Nutrient: Yeast nutrient nourishes the yeast so that it stays healthy throughout the fermentation process.
- Acid Blend: Acid blend adds needed acidity to the wine.
- Campden Crush Tablets: Campden crush tablets kill off any potentially harmful bacteria and keep wild yeast at bay.
- Syrup: If you like your wine dry, you won't need to add anything to the cleared wine. However, if you prefer your wine a little sweeter, mix ¼ cup to ½ cup of lilac syrup to sweeten the wine. Although you can use simple syrup, I prefer to add lilac syrup, which further enhances the wine's lilac flavor.
- Stabilizer: Stabilizer is needed only if the wine is back sweetened. It keeps the wine from re-fermenting when syrup is added.
🍷Helpful Wine-Making Tools
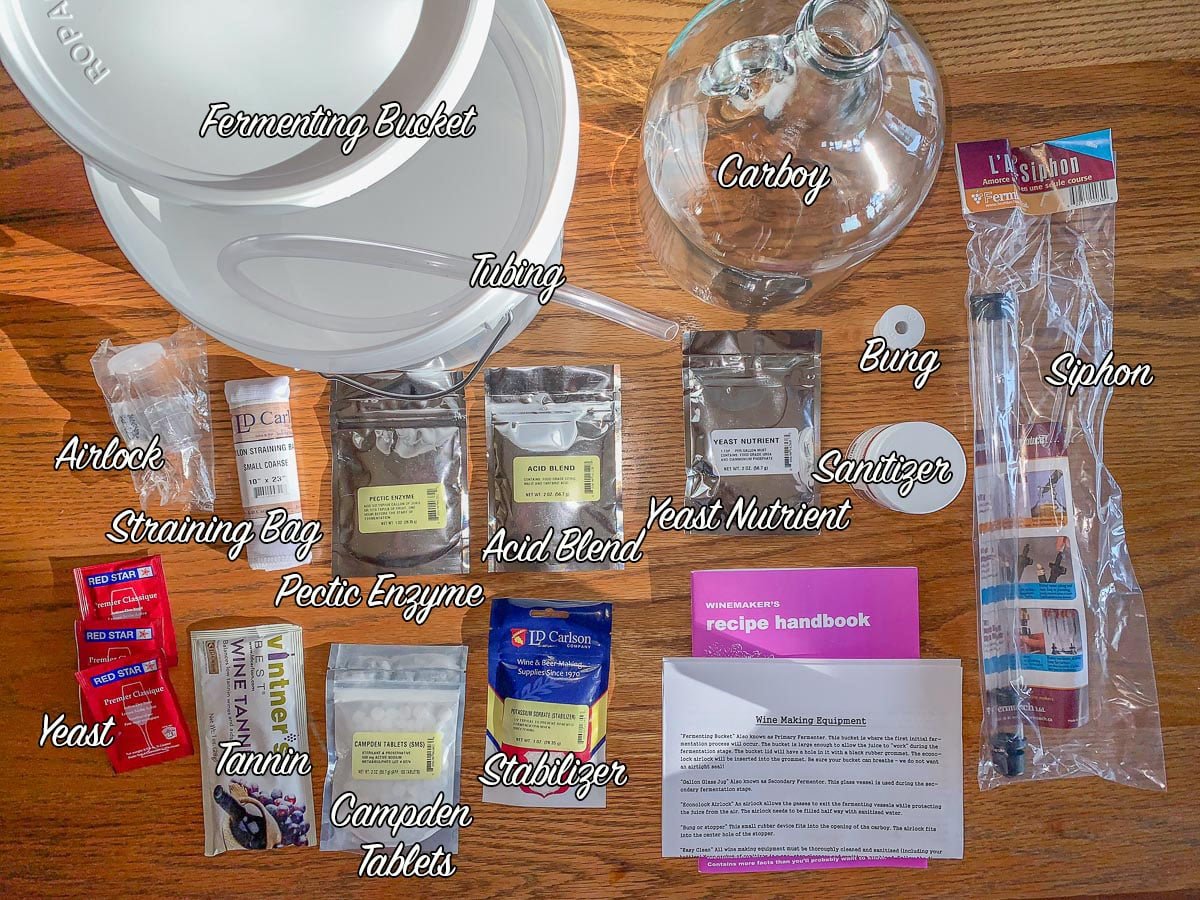
- Sanitizer: All of your equipment needs to be sanitized every time you make wine. You have various options including a concentrated liquid sanitizer (Star San) or a powder that can be diluted in water (1-Step).
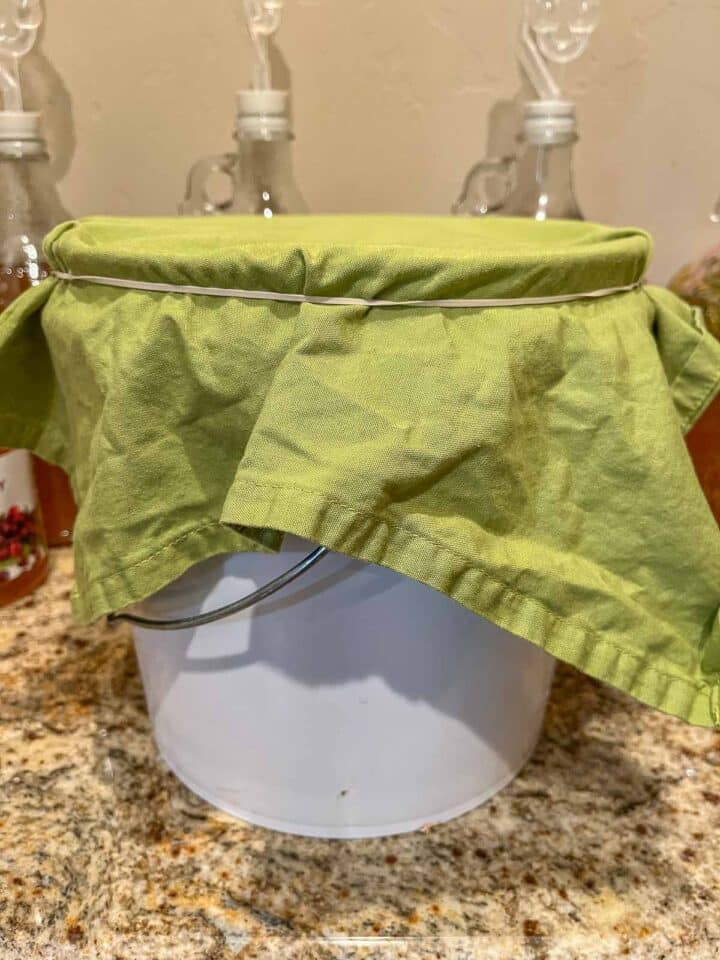
- 2 Gallon Plastic Fermenting Bucket: Known as the "primary fermentor " this bucket is used for the first 5-7 days to get your fermentation/must going. Although it comes with a lid, I recommend covering it with a breathable fabric and securing it with a rubber band. The fabric keeps out the bacteria while allowing oxygen in to help the yeast get started.
- Strainer/Mesh Bag: You can add your fruit to a mesh straining bag while it's fermenting or just dump everything inside the primary fermentor bucket. If you decide to use the bag, you'll squeeze the bag to extract the fruit juice and toss the solids that remain in the bag. If you decide to add the fruit directly inside the primary fermentor, you will need to strain the contents of the bucket before transferring it to a carboy.
- 1 Gallon Jug: You will need at least 1 one-gallon carboy, also called a demijohn, which is used for fermenting and clearing the wine. Having 2 is ideal, especially when racking from one carboy to another.
- Mini Auto-Siphon & Tubing: The siphon and tubing are used when transferring the wine from one carboy to the next and also for bottling the wine. A bottling wand also comes in very handy but is not required. It keeps the wine from flowing out of the tube until the bottom of the wand touches a solid surface (like the bottom of a wine bottle) before it starts to flow.
- Air Lock and Bung: The airlock and bung are used to cap the carboy when it is fermenting and when it is clearing. The airlock keeps oxygen and bacteria from contaminating the wine while allowing the CO2 to escape.
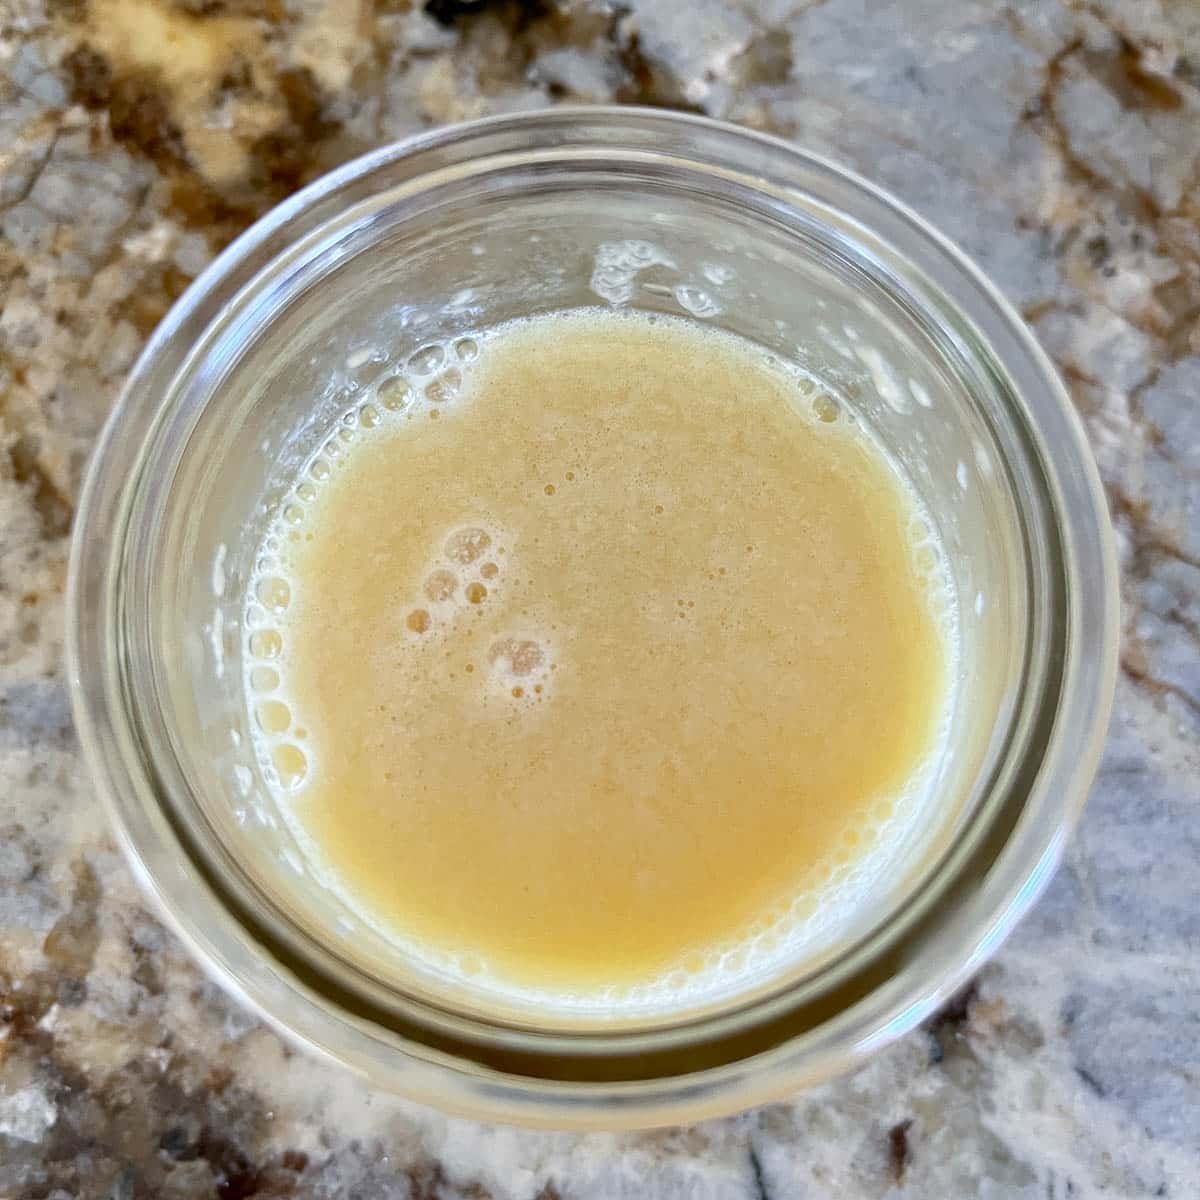
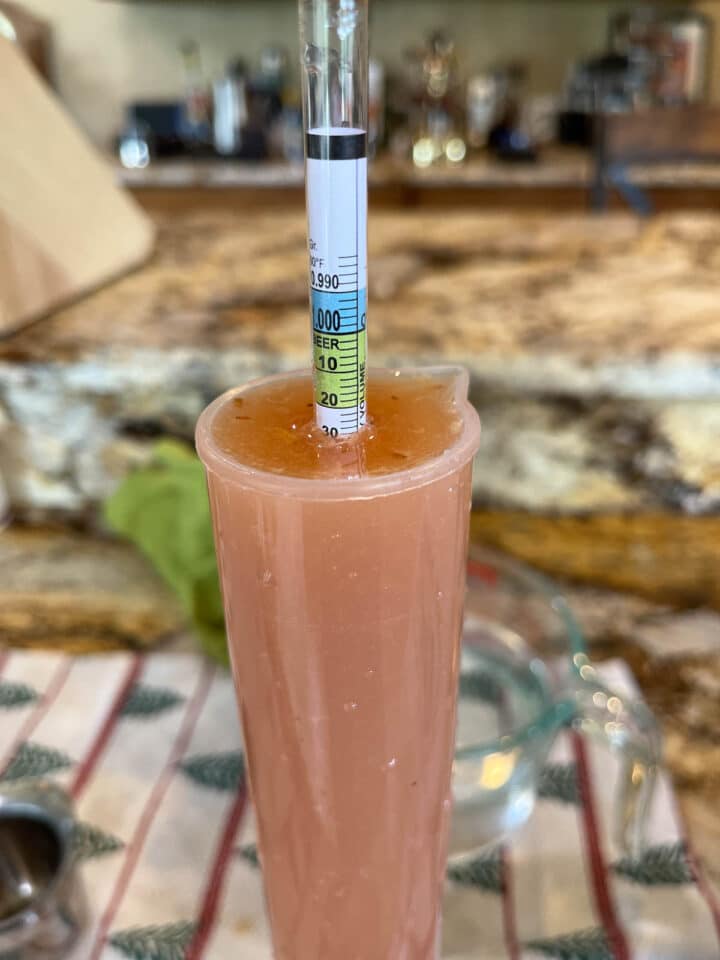
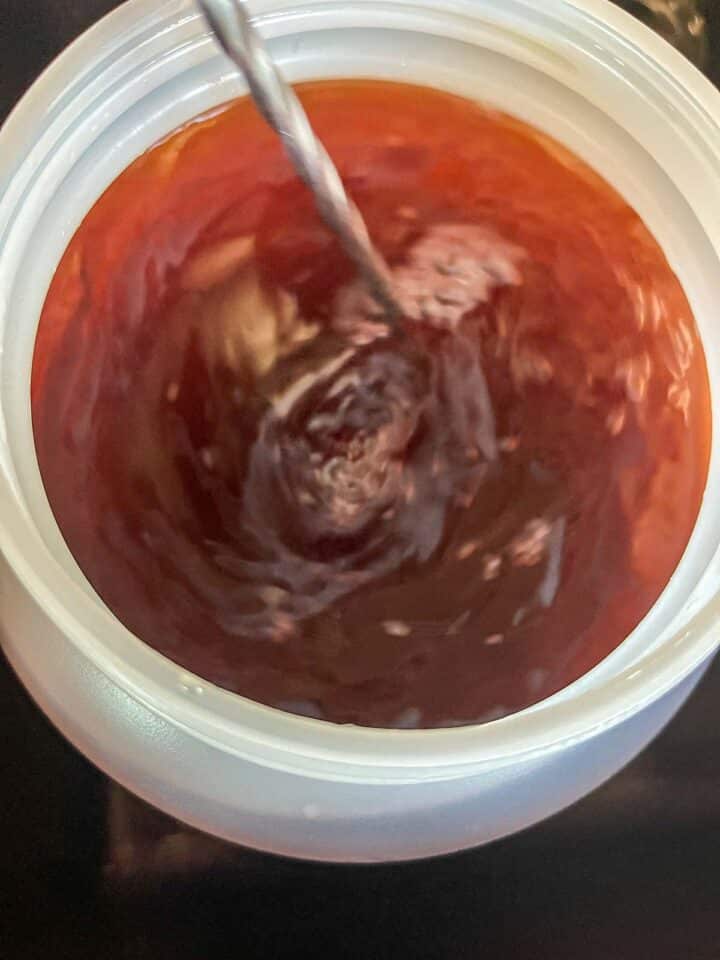
- Hydrometer & Test Tube: A hydrometer is used to calculate the amount of alcohol your finished wine contains. This is done by pouring a sample of the wine into a test tube and taking readings of the specific gravity or SG at the beginning, during, and at the end of the fermentation process. The numbers are entered into an ABV calculator, which tells you the alcohol amount of your finished wine.
- Funnel: You'll need a funnel for straining the fruit, especially if you don't use a mesh bag. I like this funnel.
- Jug: A small creamer like this one comes in handy when taking SG readings.
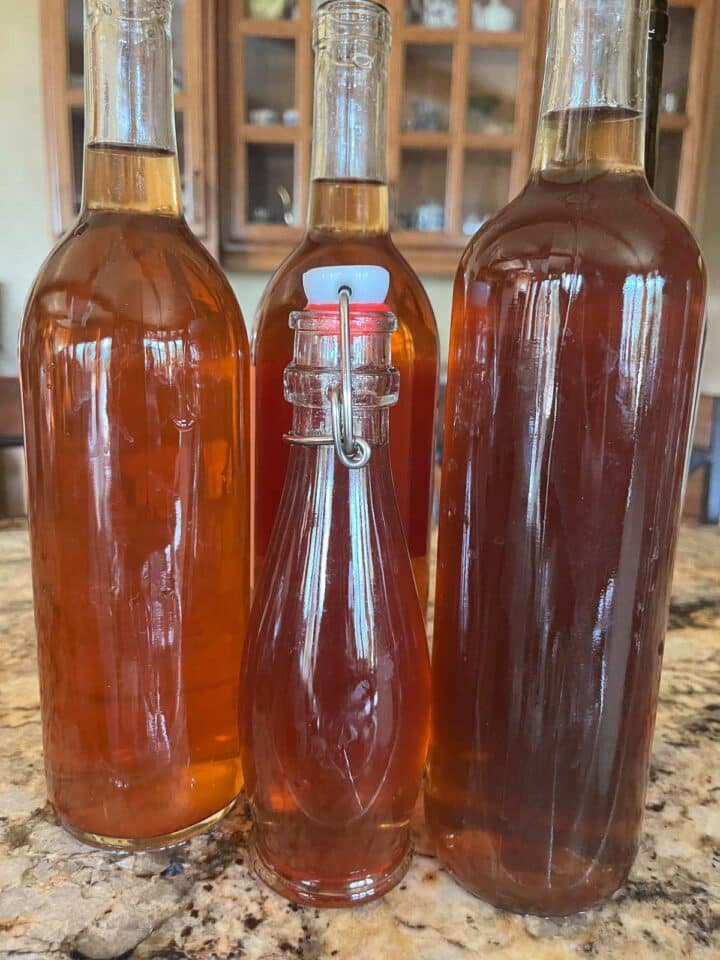
- Bottles/Corks/Corker: Most people begin by bottling their wine in flip-top bottles. However, as they continue to make wine they usually end up purchasing wine bottles, corks, and a corker.
🌸How to Make Homemade Lilac Wine
Day One
Before beginning any fermentation process, you need to sanitize all of your equipment, work area, and hands.
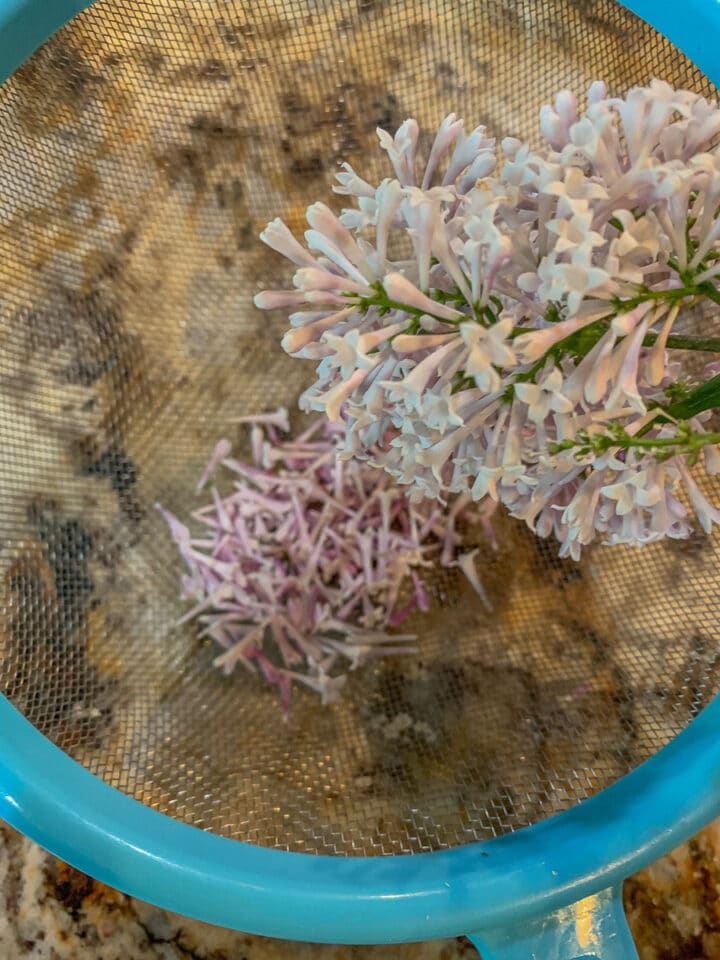
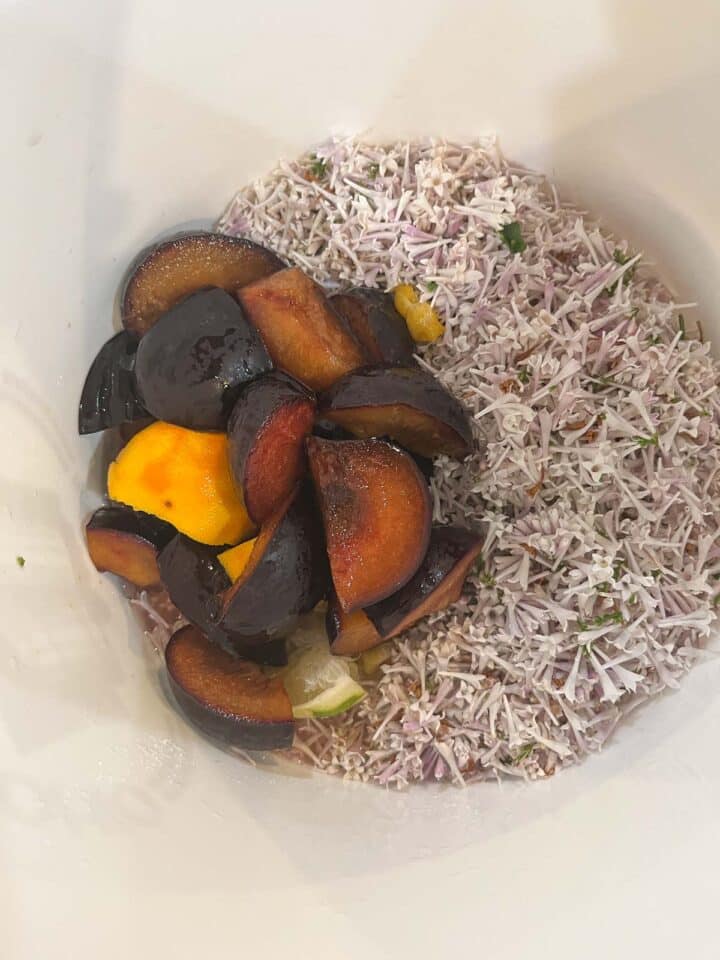
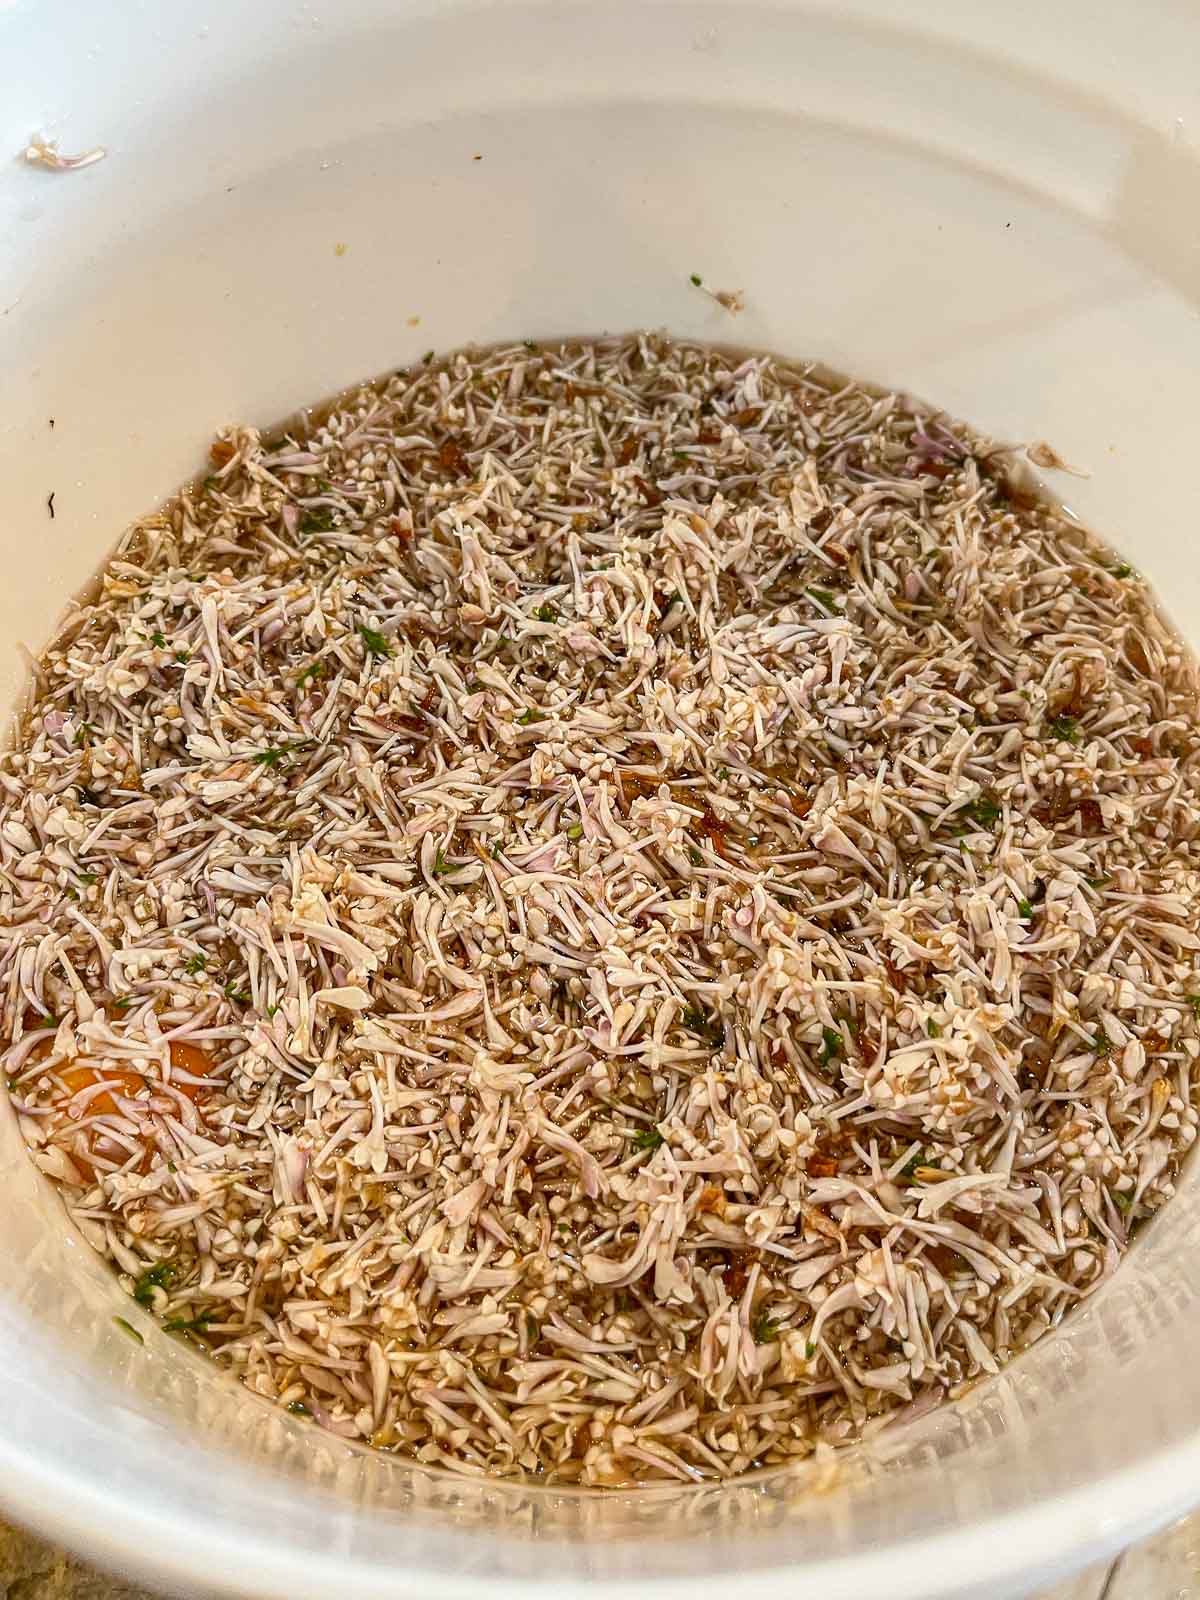
Step 1: Pick fresh lilacs and pluck the lilac flowers off of the stems. Continue until you have 8 cups of blossoms. Quickly rinse to remove dust, debris, and tiny insects.
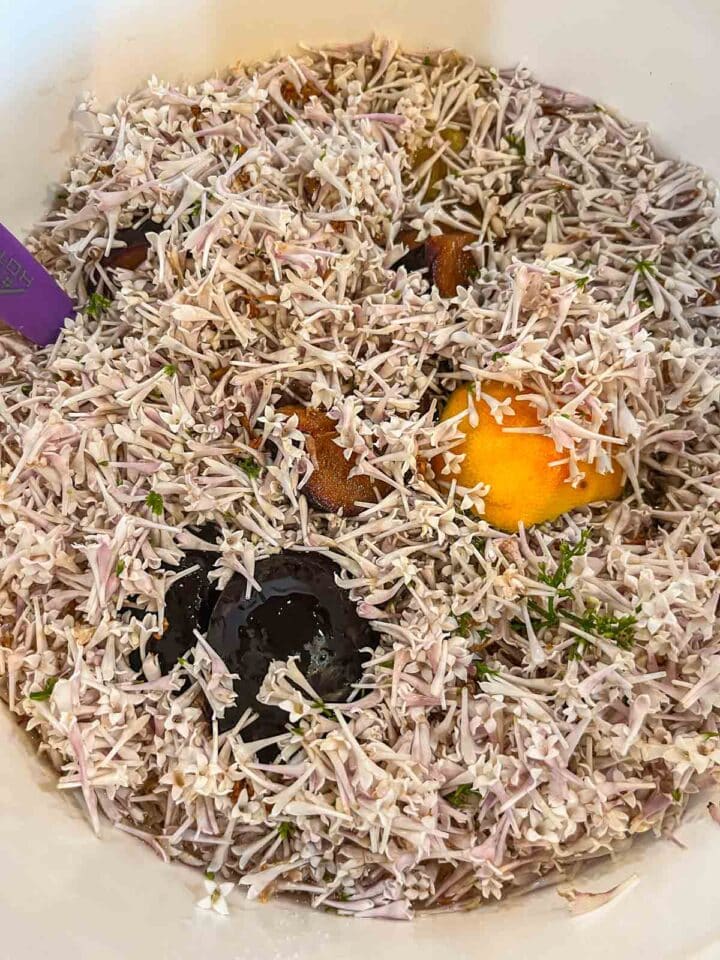
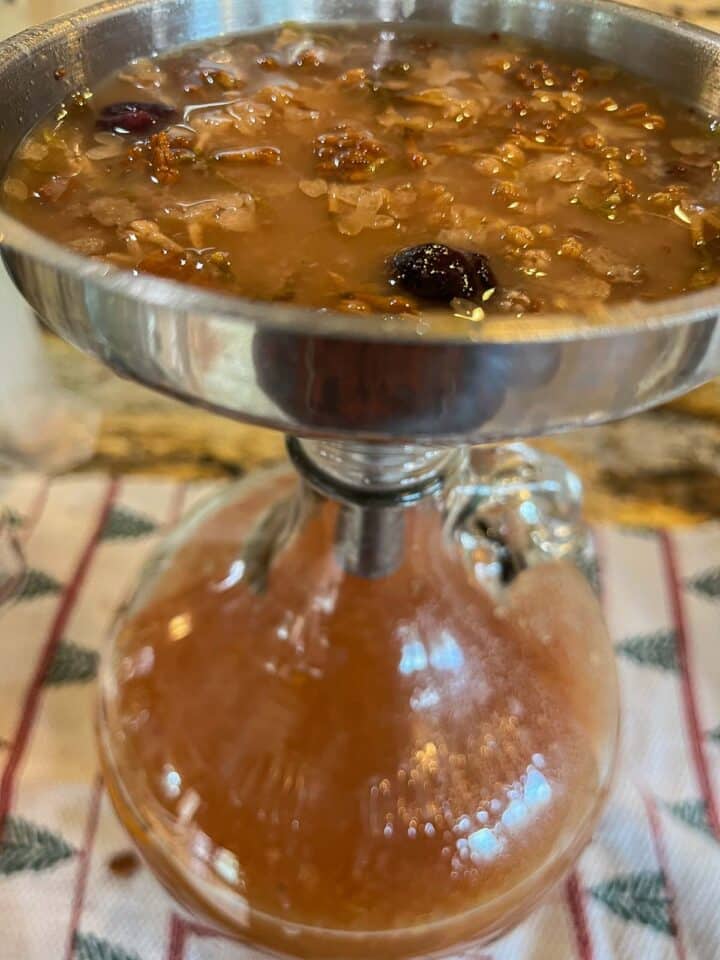
Step 2: Add the lilac blossoms to the fermentor bucket along with the chopped plums. Slice orange and lime in half. Squeeze juice into the bucket and toss in the rest.

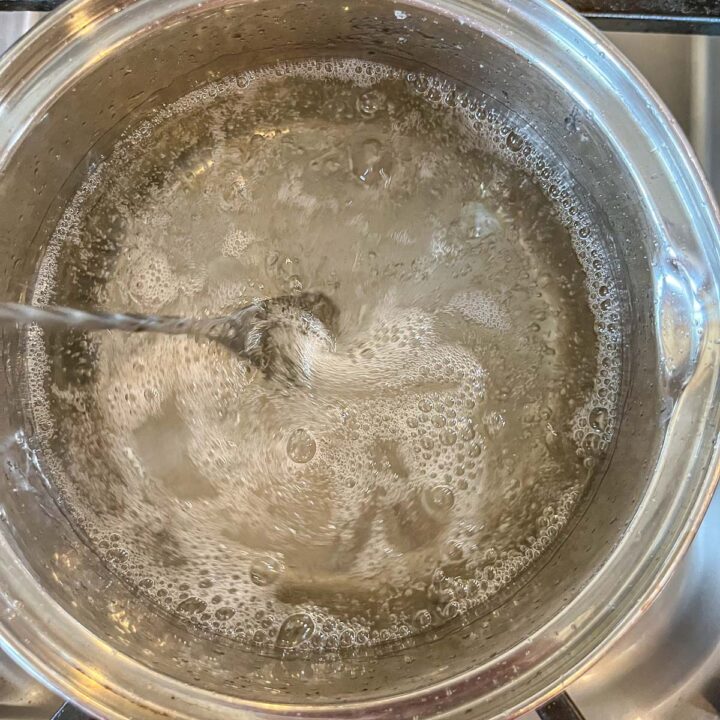
Step 3: Add sugar to a large stockpot and cover with 1 gallon of water. Heat and stir until the water is hot and the sugar dissolves. Carefully pour the syrup into the fermentor bucket. When the syrup cools off, mash the contents of the bucket using a potato masher to extract their flavor.
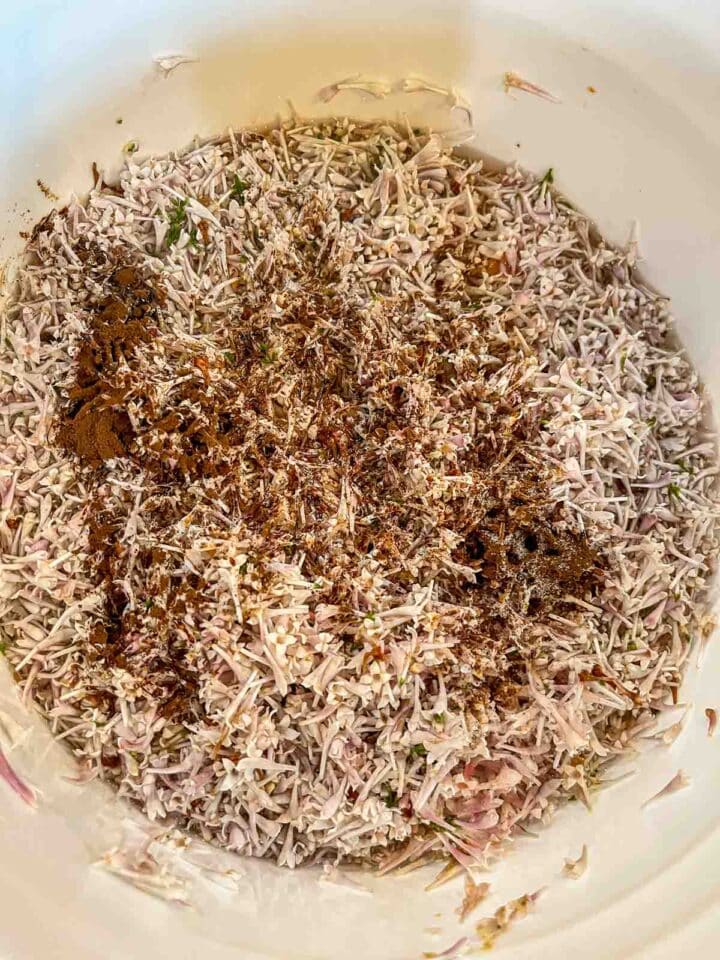
Step 4: Next, add plum jam, acid blend, tannin, pectic enzyme, and 1 crushed campden tablet to the primary fermenter. Stir thoroughly then take the initial SG reading with a hydrometer and record it into your wine log. Cover the primary fermentation container with breathable fabric and use a rubber band to fasten it into place. Set the bucket aside for 24 hours.
Day Two
Follow the instructions on the yeast packet to activate the yeast (this ensures the yeast is still good). Once active, add yeast to the "must" (unfermented fruit juice before it's converted to wine). Cover again and set aside.
Pro Tip: Since 1 packet of wine yeast is enough for 5 gallons, I only use ½ of the packet and save the rest for the next batch.
Day Three & Beyond
Step 1: Stir daily and take the SG reading and record it. It should begin fermenting in 1-3 days which will be evident by the bubbles. When it reaches a specific gravity of 1.030 (it could take anywhere from 3-7 days) it's time to "rack the wine" (transfer it to a carboy).
Pro Tip: If the fermentation never starts, you can add ½ teaspoon of yeast energizer, which helps to get stuck fermentation going.
Step 2: Strain and squeeze the juice out of the lilacs and fruit. Save the solids for your compost bin. Transfer a sterilized one-gallon carboy. I use a funnel with a strainer to do this. Don't over-fill the carboy. Leave plenty of room for fermentation and bubbling.

Step 3: Fit sanitized bung into the opening of the bottle. Fill the airlock halfway with sanitizer solution or water and fit it into place. Store the carboy somewhere away from heat and direct sunlight. It will begin to bubble when fermentation starts, usually within a few hours. If you end up with extra wine, you can clear it in a smaller bottle, as long as the bung can fit into the opening.

Pro Tip: To keep the bung from popping out from the pressure caused by active fermentation, it's helpful if the rim of the carboy and the bung are both dry. Use a clean washcloth or paper towel to do this.
Step 4: Within a few days, you'll notice that the sediment will settle to the bottom of the carboy as the wine begins to clear. Allow the wine to clear in a cool location, away from direct sunlight, for one month.
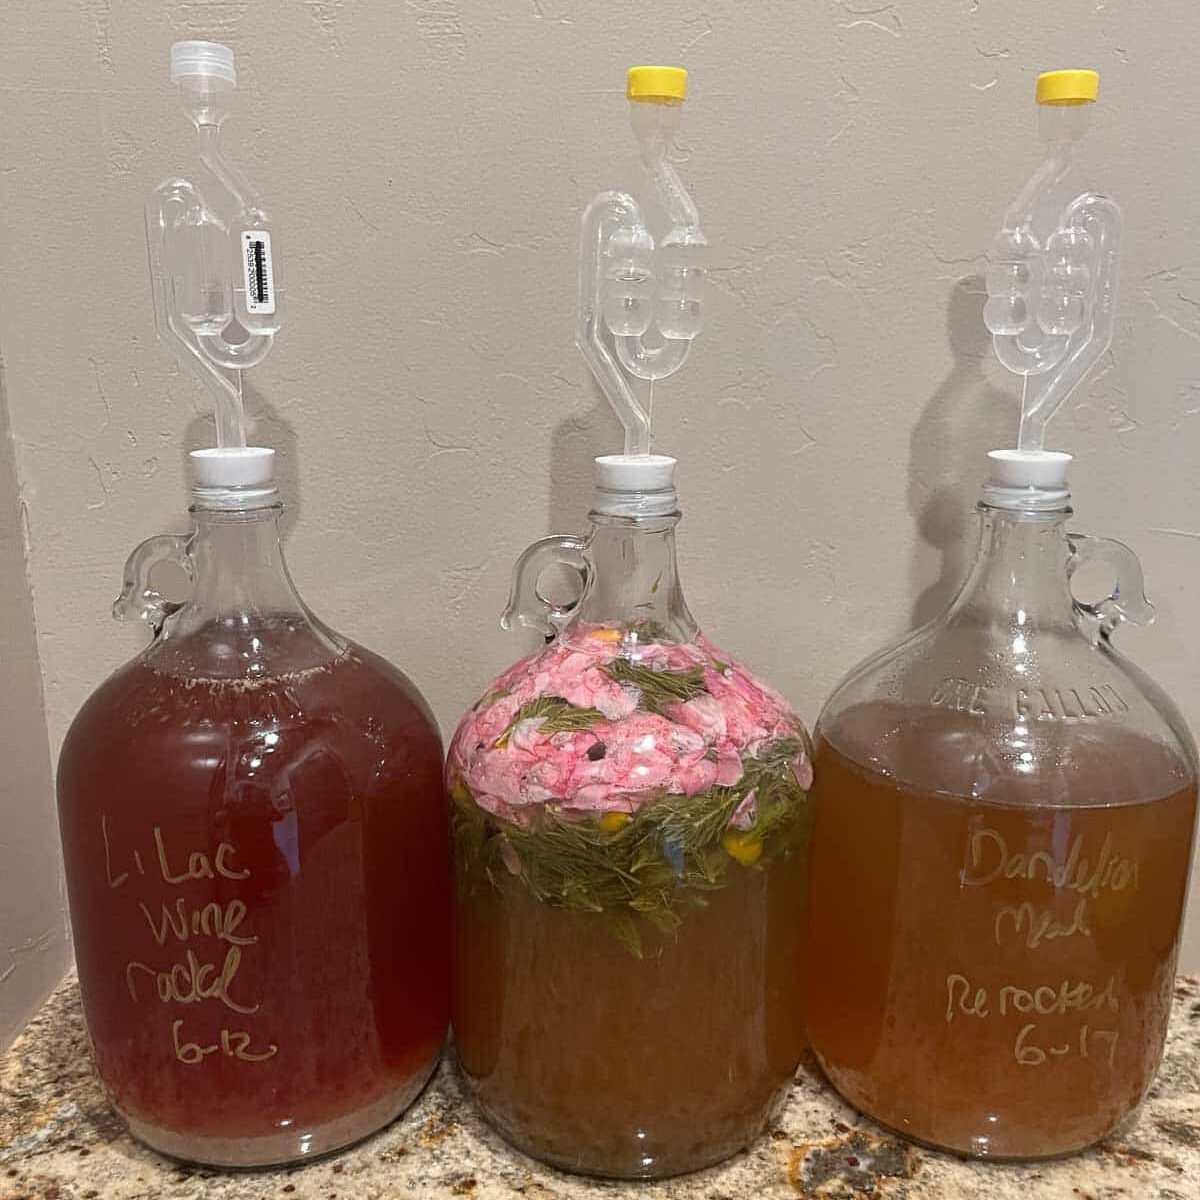
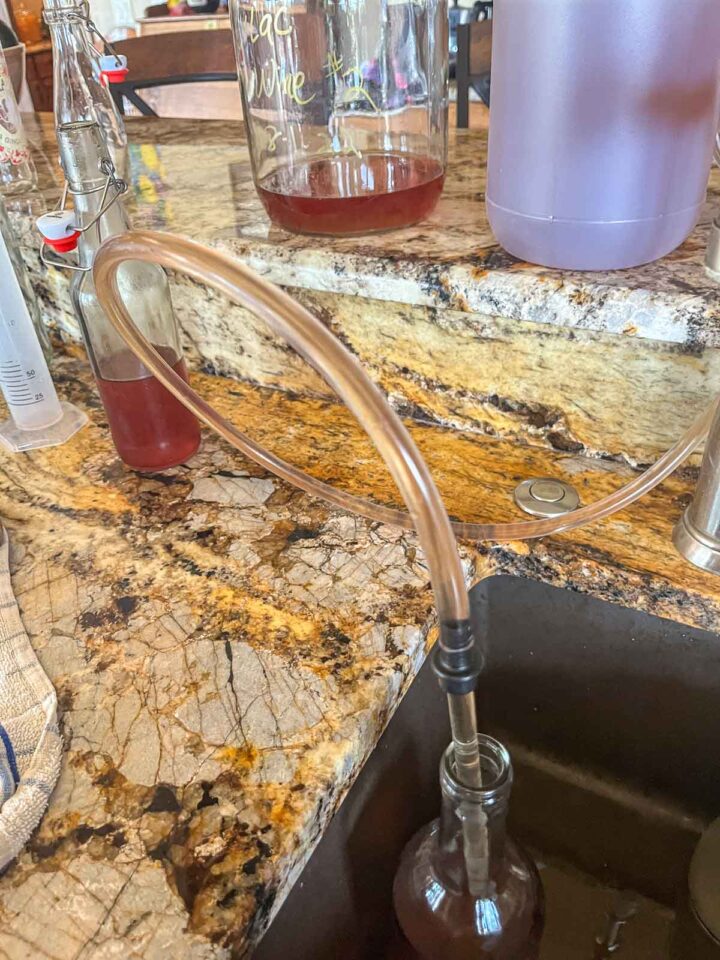
Step 5: Use a siphon to transfer the wine into a clean plastic jug or fermentor bucket. Leave the sediment and cloudy wine at the bottom of the carboy. Transfer the rest of the wine into a clean carboy. Allow the wine to clear anywhere from 1 to 3 months longer.
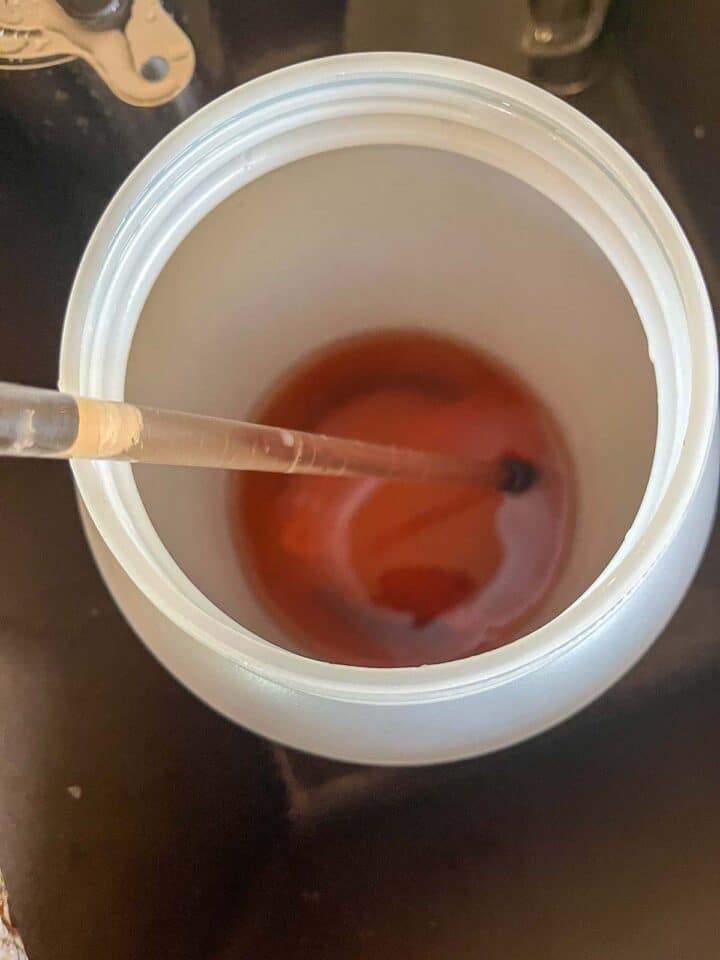

Step 6: Once the wine is completely clear, take a final SG reading and note in your log. Use an ABV calculator to determine the alcohol percentage and jot down.


Step 7: Taste the wine, to see if it needs sweetening. If it's too dry, add anywhere from a ¼ cup to a ½ cup of lilac syrup. Give it a taste and add more if needed. Add a crushed campden tablet (to keep the wine from oxidizing). If you sweeten it, add ½ teaspoon of stabilizer (to prevent re-fermentation). Stir thoroughly!

Step 8: Use a siphon with a bottling wand (if you have one) to transfer the wine into sterilized bottles. Label the wine bottles with the type of wine, bottling date, and alcohol percentage.
Allow the wine to age a minimum of 3 months before enjoying! Promise me you'll listen to Lilac Wine when you enjoy your first glass. If you can find the Nina Simone version, even better! I can't help but listen (or sing) that song every time I have a glass.

🤷🏻♀️Recipe FAQs
Lilac wine is light, smooth, and sweet. It's easy to drink and has floral notes and the scent of lilacs.
Lilac wine does, in fact, contain alcohol. The alcohol percentage can range between 11%- 13% by volume.
Lilacs are edible, but don't necessarily taste great as is. Lilac blossoms can be candied which is one way to make them taste better.
Besides displaying lilacs in a vase and enjoying their beauty and fragrance, lilacs can be used to make lilac sugar, lilac syrup, jam, and lilac wine! The delicate flowers can be used to decorate baked goods as well.
As long as you begin with fresh, fragrant lilac blossoms, the color really doesn't matter. If you have a variety of lilacs available to you, use a combination of the blossoms.
👩🏼🍳Pro Tips
- When re-racking the wine, add the sediment at the bottom of the carboy to your compost bin, or dilute it with water and use it to water your plants.
- Don't fill the wine bottles all the way up the neck. Leave room for the corks. Alternatively, you can use flip-top bottles.
- The advantage of using a bottling wand is that it keeps the wine from spilling out of the tube. The wand is activated when pressure is applied to the bottom.
- When bottling lilac wine, you may end up with a bottle that's not all the way full. Save the extra wine in the fridge to enjoy. It won't be as good as aged wine, but it should still be good enough to drink.
- This lilac wine recipe goes great with cheese, desserts, and chocolate!
- This is the formula for figuring out the alcohol by volume or ABV: Original gravity reading - final gravity reading x 131.25 = ABV.
🍇Related Recipes
If you enjoy this lilac wine recipe, give these other recipes a try!
Did you make this recipe?
📖 Recipe
Would you like to save this recipe?
How To Make Lilac Wine
Ingredients
Method
- Before beginning any fermentation process, you need to sanitize all of your equipment, work area, and hands.
- Pick fresh lilacs and pluck the lilac flowers off of the stems. Continue until you have 8 cups of blossoms. Quickly rinse to remove dust, debris, and tiny insects.
- Add the lilac blossoms to the fermentor bucket along with the chopped plums. Slice orange and lime in half. Squeeze juice into the bucket and toss in the rest.
- Add sugar to a large stockpot and cover with 1 gallon of water. Heat and stir until the water is hot and the sugar dissolves. Carefully pour the syrup into the fermentor bucket. When the syrup cools off, mash the contents of the bucket using a potato masher to extract their flavor.
- Next, add plum jam, acid blend, tannin, pectic enzyme, and 1 crushed Campden tablet to the primary fermenter. Stir thoroughly then take the initial SG reading with a hydrometer and record it into your wine log. Cover the primary fermentation container with breathable fabric and use a rubber band to fasten it into place. Set the bucket aside for 24 hours.
- Follow the instructions on the yeast packet to activate the yeast (this ensures the yeast is still good). Once active, add yeast to the "must" (unfermented fruit juice before it's converted to wine). Cover again and set aside.
- Stir daily and take the SG reading and record it. It should begin fermenting in 1-3 days which will be evident by the bubbles. When it reaches a specific gravity of 1.030 (it could take anywhere from 3-7 days) it's time to "rack the wine" (transfer it to a carboy).
- Strain and squeeze the juice out of the lilacs and fruit. Save the solids for your compost bin. Transfer a sterilized one-gallon carboy. I use a funnel with a strainer to do this. Don't over-fill the carboy. Leave plenty of room for fermentation and bubbling.
- Fit sanitized bung into the opening of the bottle. Fill the airlock halfway with sanitizer solution or water and fit it into place. Store the carboy somewhere away from heat and direct sunlight. It will begin to bubble when fermentation starts, usually within a few hours. If you end up with extra wine, you can clear it in a smaller bottle, as long as the bung can fit into the opening.
- Within a few days, you'll notice that the sediment will settle to the bottom of the carboy as the wine begins to clear. Allow the wine to clear in a cool location, away from direct sunlight, for one month.
- Use a siphon to transfer the wine into a clean plastic jug or fermentor bucket. Leave the sediment and cloudy wine at the bottom of the carboy. Transfer the rest of the wine into a clean carboy. Allow the wine to clear anywhere from 1 to 3 months longer.
- Once the wine is completely clear, take a final SG reading and note in your log. Use an ABV calculator to determine the alcohol percentage and jot down.
- Taste the wine, to see if it needs sweetening. If it's too dry, add anywhere from a ¼ cup to a ½ cup of lilac syrup. Give it a taste and add more if needed. Add a crushed campden tablet (to keep the wine from oxidizing). If you sweeten it, add ½ teaspoon of stabilizer (to prevent re-fermentation). Stir thoroughly!
- Use a siphon with a bottling wand (if you have one) to transfer the wine into sterilized bottles. Label the wine bottles with the type of wine, bottling date, and alcohol percentage.
- Allow the wine to age a minimum of 3 months before enjoying! Promise me you'll listen to Lilac Wine when you enjoy your first glass. I can't help but listen (or sing) that song every time I have a glass.
Nutrition
Notes
- Since 1 packet of yeast is enough for 5 gallons, I only use ½ of the packet and save the rest for the next batch.
- If the fermentation never starts, you can add ½ teaspoon of yeast energizer, which helps to get stuck fermentation going.
- To keep the bung from popping out from the pressure caused by active fermentation, it's helpful if the rim of the carboy and the bung are both dry. Use a clean washcloth or paper towel to do this.
- When re-racking the wine, add the sediment at the bottom of the carboy to your compost bin, or dilute it with water and use it to water your plants.
- Don't fill the wine bottles all the way up the neck. Leave room for the corks. Alternatively, you can use flip-top bottles.
- The advantage of using a bottling wand is that it keeps the wine from spilling out of the tube. The wand is activated when pressure is applied to the bottom.
- When bottling your lilac wine, you may end up with a bottle that's not all the way full. Save the extra wine in the fridge to enjoy. It won't be as good as aged wine, but it should still be good enough to drink.
- Lilac wine goes great with cheese, desserts, and chocolate!
- This is the formula for figuring out the alcohol by volume or ABV: Original gravity reading - final gravity reading x 131.25 = ABV.
Kelly Methey says
This wine is a treat for your senses! First the luscious smell then the taste hits your mouth as the sweet, flavorful liquid goes down. It’s a very nice experience, who knew lilac wine was a thing? Hilda, that’s who! You go girl!
Hilda Sterner says
Haha, yes, me and Nina Simone! Listen to her lilac wine song, it's the best!
Layla says
recipe for lilac syrup?
Hilda Sterner says
Here you go: https://hildaskitchenblog.com/recipe/how-to-make-delicious-lilac-syrup/