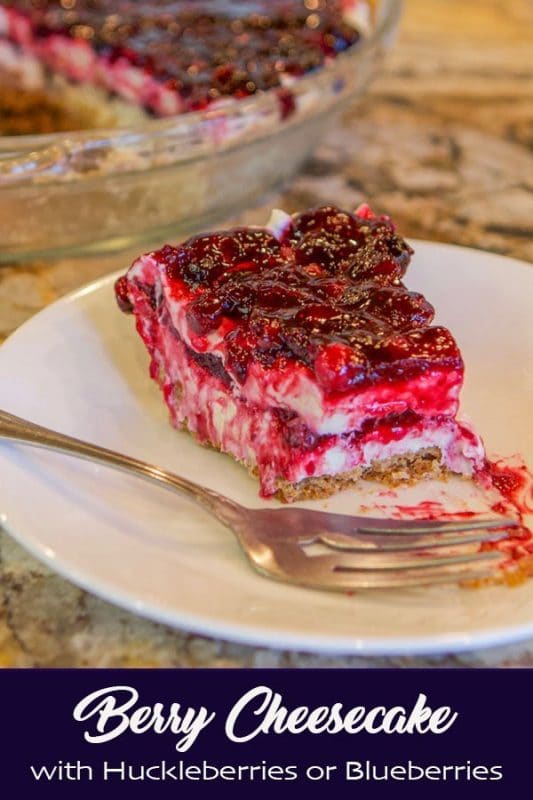
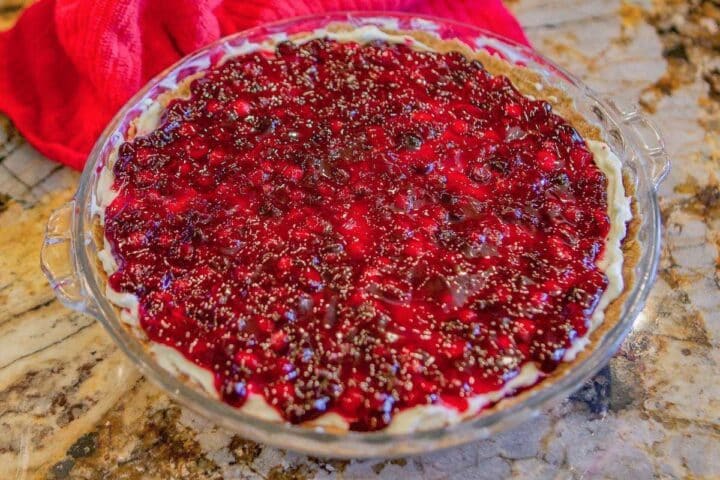
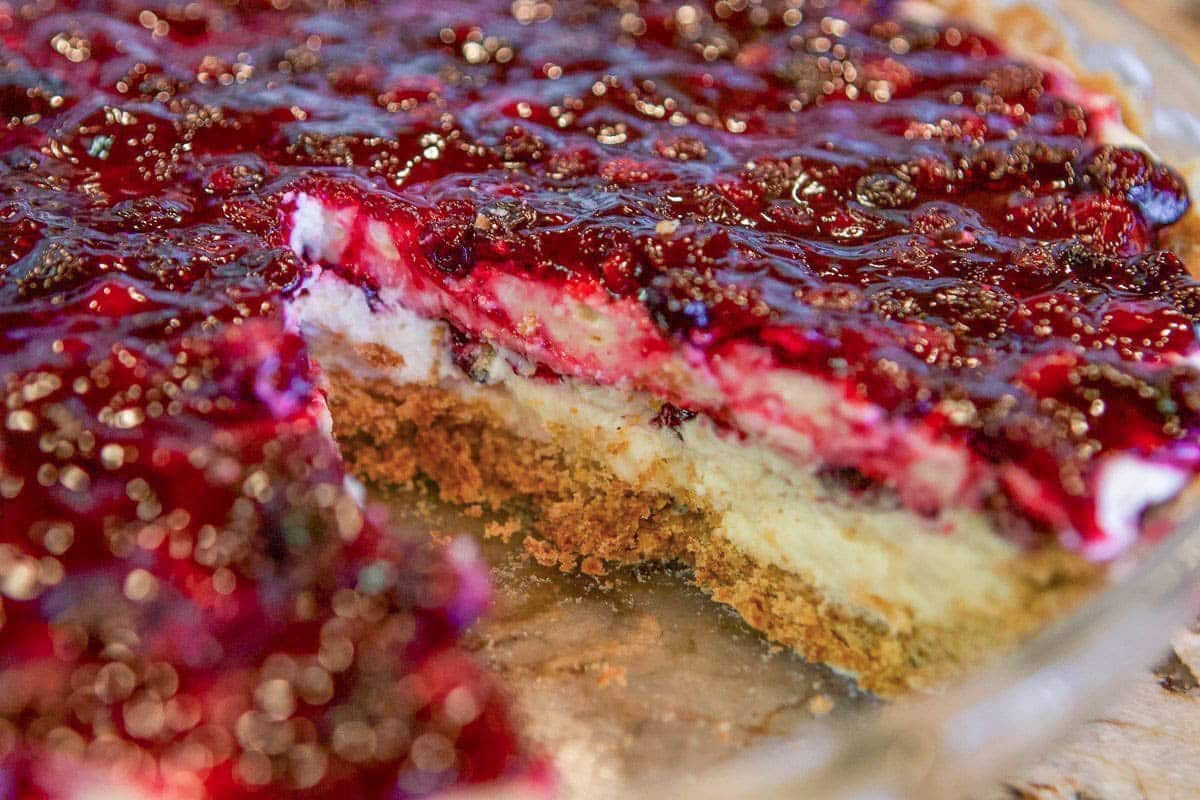
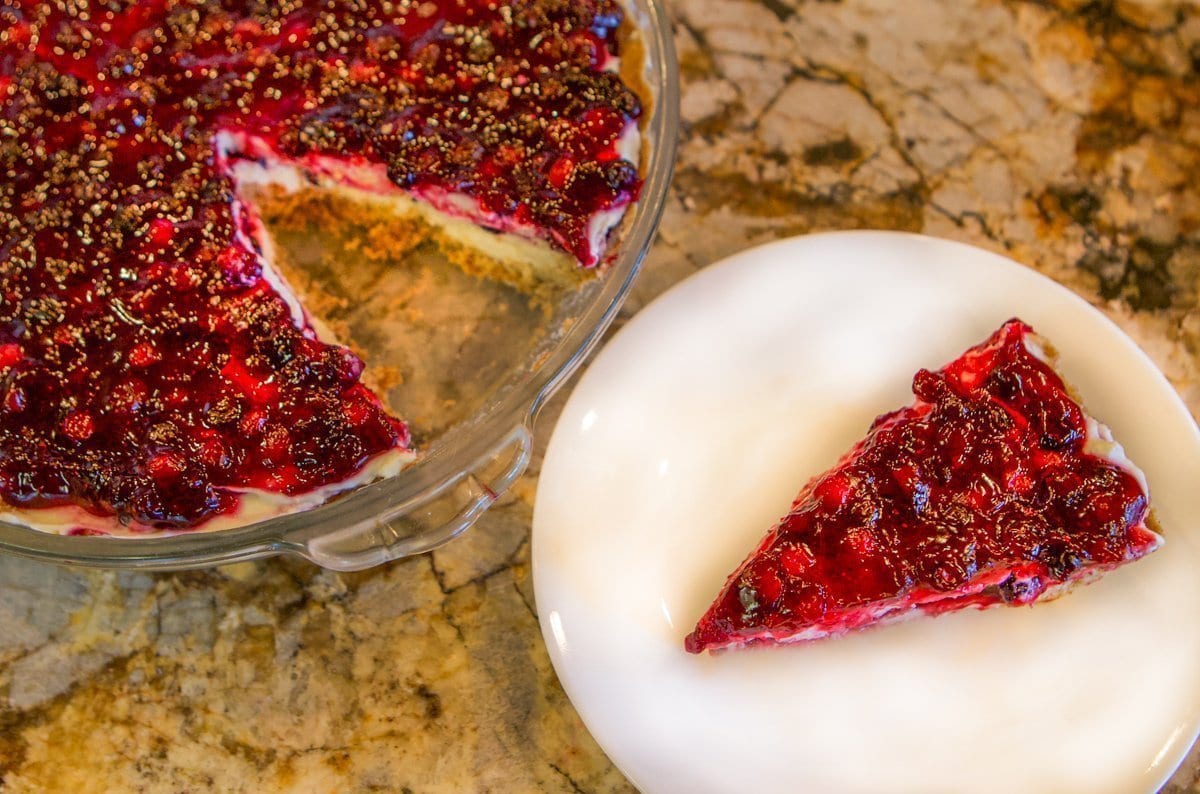
A delicious no-bake Berry Cheesecake made with layered berries and and a cream cheese-whipped cream filling. When it comes to no-bake cheesecakes, I'm usually not a big fan. I prefer the more dense texture of baked cheesecakes like my Loquat Cheesecake, for example. But then I tried this Berry Cheesecake (or Huckleberry Cheesecake to be exact), let's just say my
Would you like to save this recipe?
I'm calling this a "Berry" Cheesecake, but the original recipe uses huckleberries. I realize that huckleberries are not available to everyone, especially my San Diego and Chicago friends and family.
Huckleberries are also super expensive. A local market here in Montana is selling them for $18 for a quart-size bag. It's not even a full bag for crying out loud! So by all means, use blueberries as an alternative.
My neighbor, Neil, mentioned a huckleberry cheesecake that his wife Gail makes. This was while we were huckleberry picking on Mt. Marston. No, I won't tell you the exact location, so don't ask!
Neil affectionately nicknamed this huckleberry Cheesecake "Huckleberry Delight." I love that name, don't you? When I asked Gail for the recipes, she told me to google "That Huckleberry Recipe."
According to the contributor, Just Janie, her sister, Suzie, found the recipe in a Twisp/Methow Valley WA newspaper in the 1980s, or even earlier.
So I'm not sure who to give the credit to for this amazingly delicious berry cheesecake, but whoever you are, THANK YOU!
🥧 How to Make This Recipe
Preheat oven to 350-degrees F.
Begin by making the crust, or use a pre-made graham cracker crust.
Prepare Pie Crust
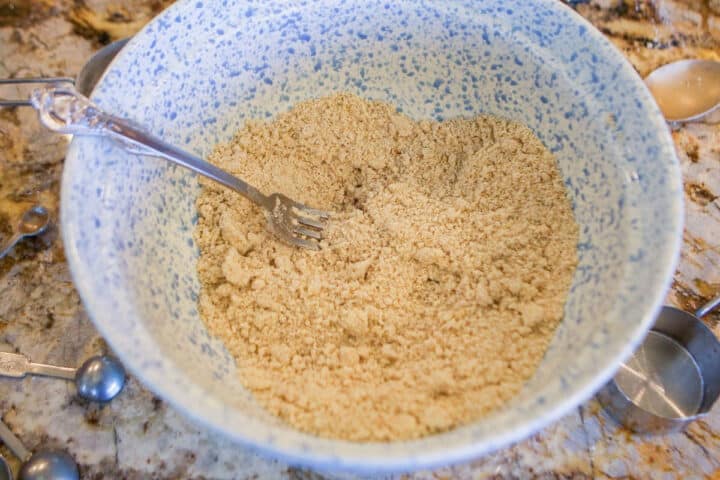
Step 1: Combine flour, brown sugar, walnuts, and spices. Cut in butter until crumbly.
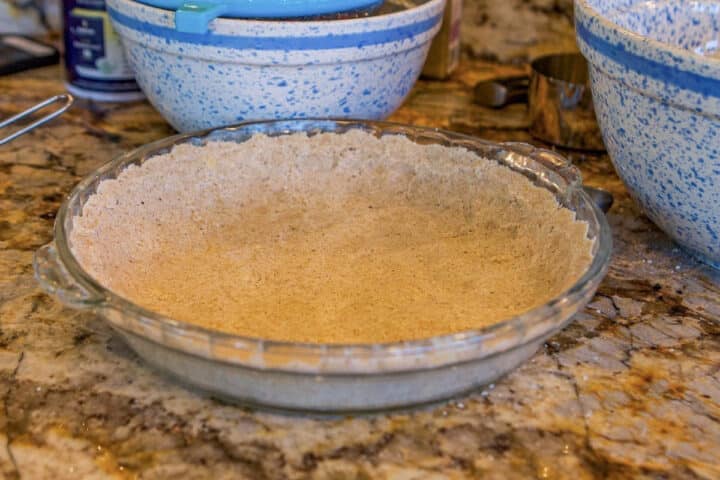
Step 2: Press into a pie dish. Bake for 12 minutes, or until nicely browned.
Prepare Huckleberry Topping
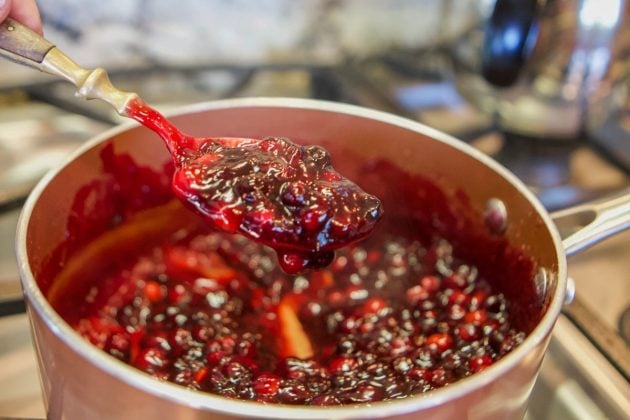
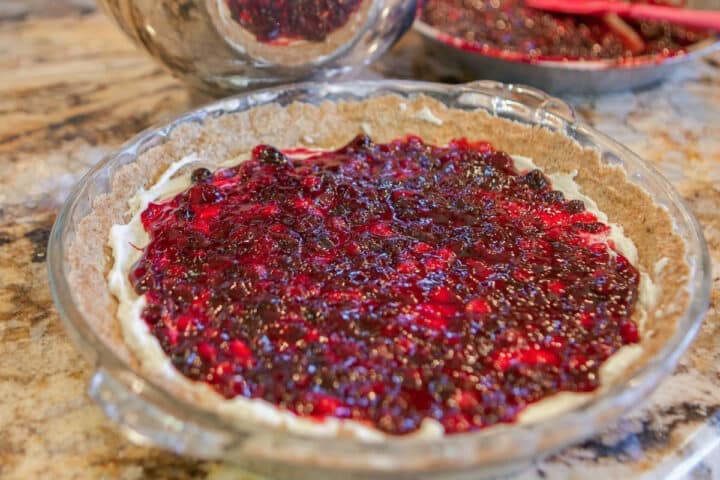
Step 3: Combine sugar, cornstarch, and spices in a saucepan. Add water and stir until smooth, then add the berries and lemon juice. Bring to a boil.
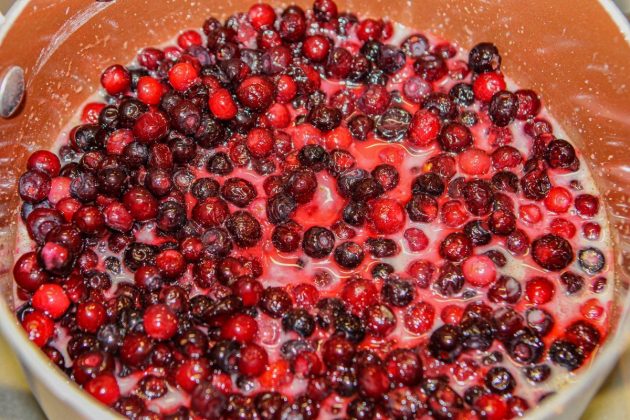
Step 4: Simmer for a few minutes or until thickened, then set aside to cool.
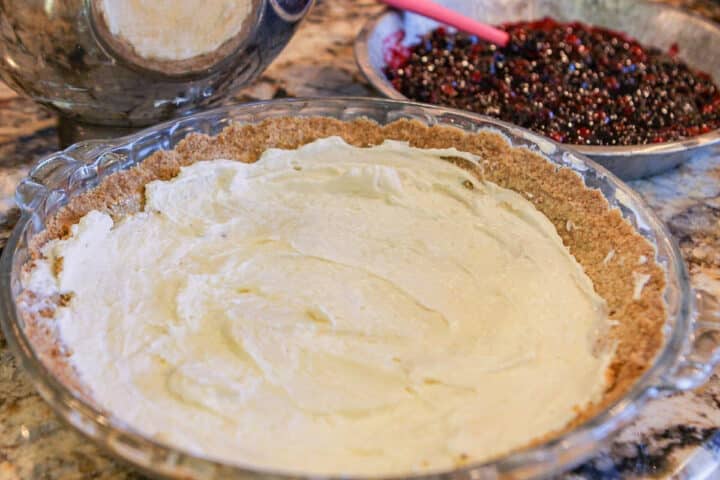
Cream Cheese Batter
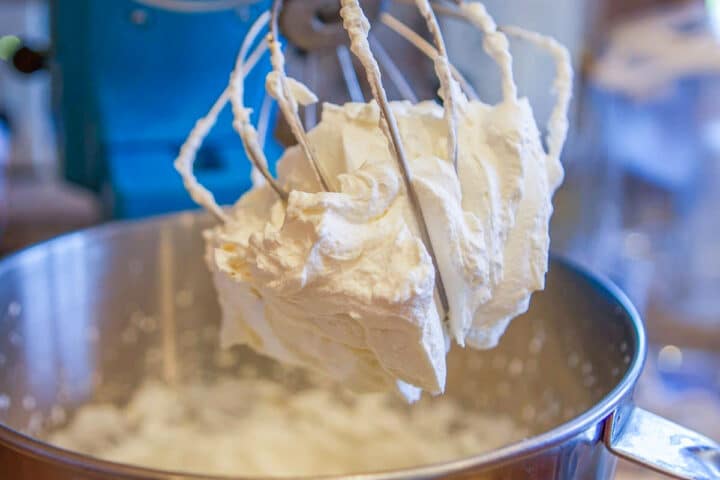
Step 5: Add cold whipping cream, vanilla, and powdered sugar to a cold mixing bowl. Beat at low speed, then increase to medium-high until soft peaks form.
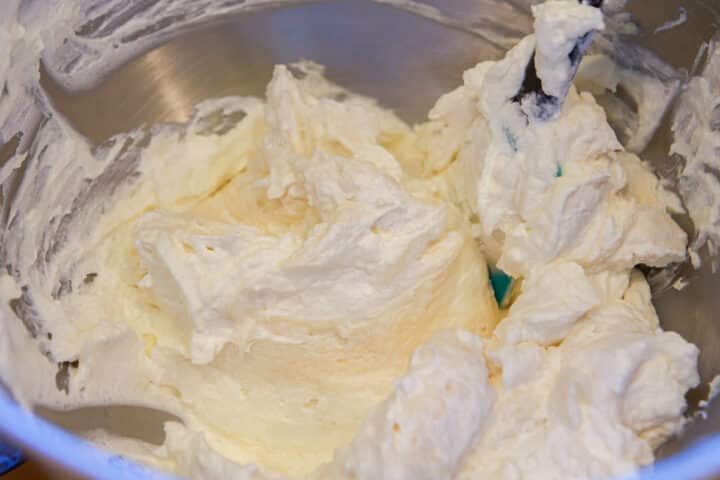
Step 6: Remove whipped cream from the mixing bowl and wipe clean. Add softened cream cheese, sugar, and vanilla. Beat until fluffy, then fold the cream cheese mix into the whipped cream.
Berry Pie Assembly
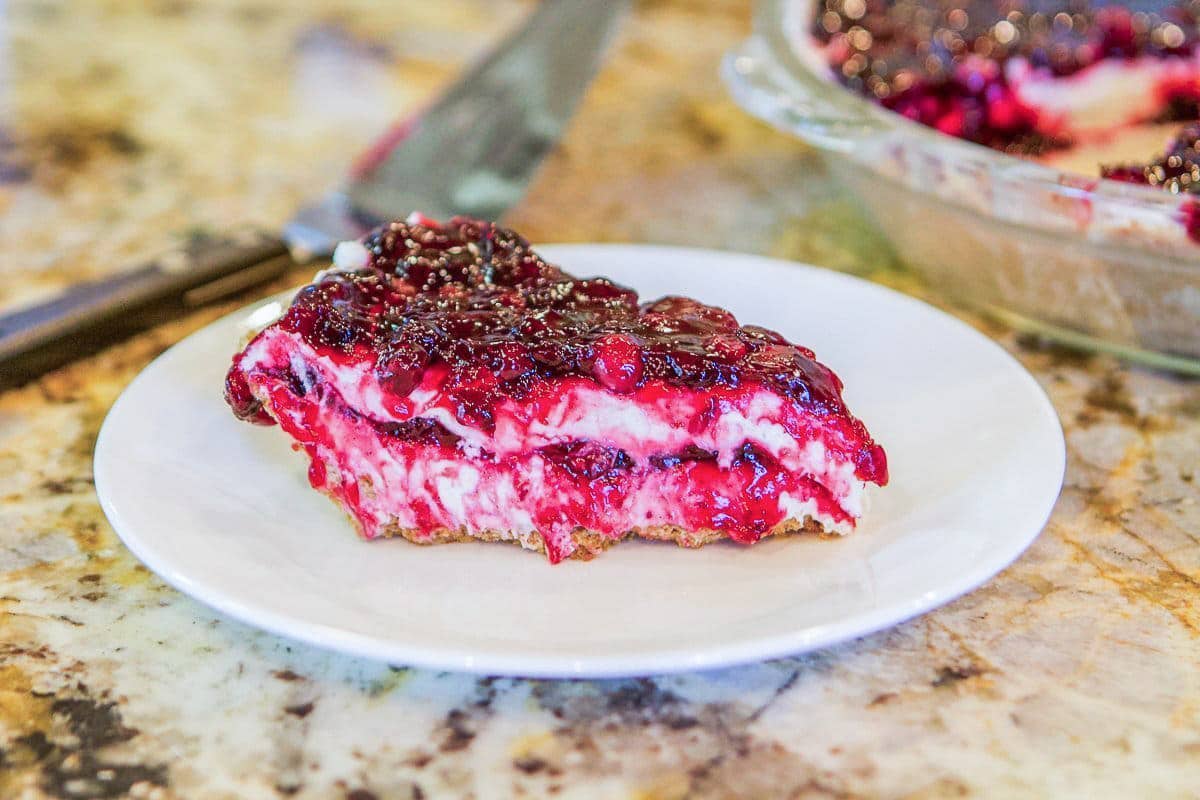
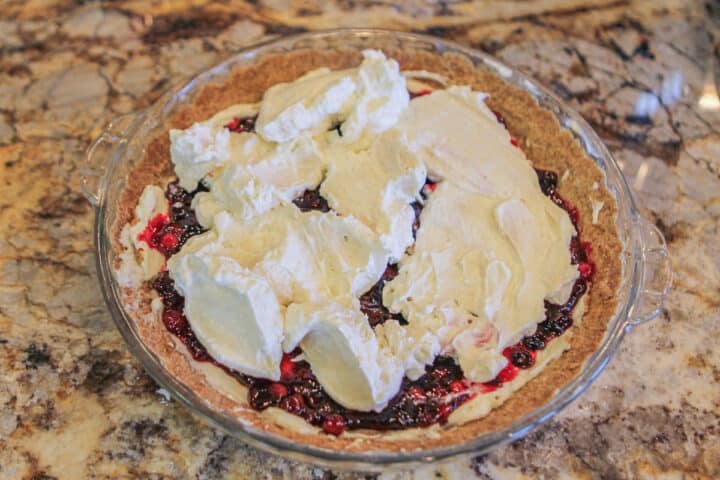
Step 7: Layer cream cheese mixture and berry mixture in cooled crust, ending with the berries on top.
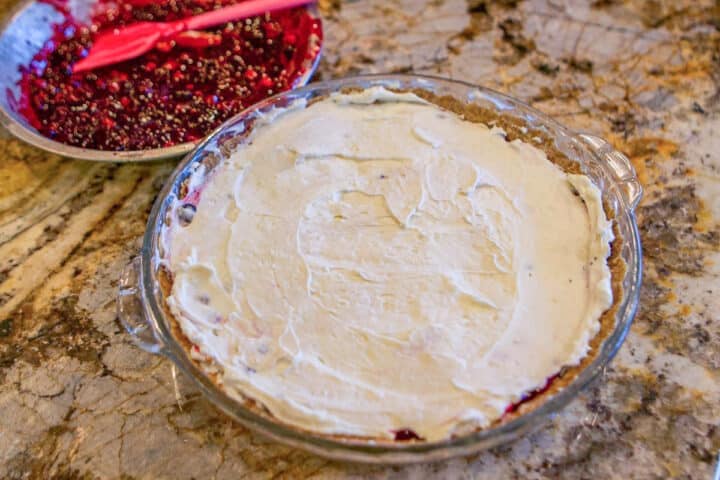
Step 8: Refrigerate for at least 4 hours, or until set.
Pro Tips
- Instead of making your own crust, use a premade cheesecake crust, such as Honey Made Graham Cracker Crust. Similar crusts come in many great flavors like chocolate, shortbread, and pecan.
- Another way to save time is to use whipped topping instead of making your own whipped cream from scratch.
- If you're in a real hurry, you can skip layering the cream cheese and berry filling. Simply pour the cream cheese filling into the prepared crust and top with the cooled berry filling.
🍮 Related Recipes

Did you make this recipe?
📖 Recipe
Would you like to save this recipe?
Berry Cheesecake (huckleberry or blueberry)
Ingredients
Equipment
Method
- Preheat oven to 350 degrees F.
- Combine flour, brown sugar, walnuts, and spices. Cut in butter until crumbly.
- Press into a pie dish. Bake for 12 minutes, or until nicely browned.
- Combine sugar, cornstarch, and spices in a saucepan. Add water and stir until smooth, then add the berries and lemon juice. Bring to a boil.
- Simmer for a few minutes or until thickened, then set aside to cool.
- Add cold whipping cream, vanilla, and powdered sugar to a cold mixing bowl. Beat at low speed, then increase to medium-high until soft peaks form.
- Remove whipped cream from the mixing bowl and wipe clean. Add softened cream cheese, sugar, and vanilla. Beat until fluffy, then fold the cream cheese mix into the whipped cream.
- Layer cream cheese mixture and berry mixture in cooled crust, ending with the berries on top.
- Refrigerate for at least 4 hours until set.
Nutrition
Notes
- Instead of making your own crust, use a premade cheesecake crust, such as Honey Made Graham Cracker Crust. Similar crusts come in many great flavors like chocolate, shortbread, and pecan.
- Another way to save time is to use whipped topping instead of making your own whipped cream from scratch.
- If you're in a real hurry, you can skip layering the cream cheese and berry filling. Simply pour the cream cheese filling into the prepared crust and top with the cooled berry filling.
Kathy Fisher says
Living in huckleberry country I've tried many different huckleberry pies. And, this is by far the best.
Kourtney Reynolds says
I still dream about this cheesecake! I tasted it, fresh from Hilda's Montana kitchen, loaded with huckleberries! It was sweet but not too sweet, a great crust that melted in your mouth, not too heavy, not too light. Perfection! I may have snuck out of bed for a midnight snack of it, if Winston was not on guard. Devine! Would not have guessed this was a no-bake cheesecake. I am planning to make this, but using blueberries since huckleberries are nowhere to be found. Thank you Hilda!
SHALA CARTER says
Now, this looks like something I could handle. 🙂 Making cheesecake is one of my favorite things to do; although my Dad always griped because I made the crust "too thick." There is no such thing as graham cracker crust that is too thick!
Tami Hastings says
I have to brag! I was privileged to be able to enjoy this pie 1st hand , when I was visiting Hilda and my brother! It is sooo YUMMY! My waistline is proof that everything Hilda makes is YUMMY! Love you Hilda, you are perfect in every way!
HildaSterner says
Haha, I've reached Winston status? Awesome! Glad you enjoyed it, sis. Come back soon!XO
Kathy Fisher says
This is my new favorite huckleberry dessert. I made it with whipping cream - do yourself a favor and use the real thing. And I love the combination of cream cheese and whipped cream - yum. It is soooo good. And the crust is amazing. I will use this crust recipe with other desserts. I am done with graham cracker crust. Sadly I am out of huckleberries for this season. But, there's always blueberries - just not quite as good. Thank you Hilda for this great recipe. It's a taste of heaven. I highly recommend it.
HildaSterner says
Thanks, Kathy, I appreciate the review! Like I keep telling you and Kelly, come over for a slice before it's gone! 😉
Caroline says
Oh my gosh!! The best tasting huckleberry cheesecake I've ever had. All I can say is WOW! The cheesecake was so smooth and melts in your mouth! Very Happy Happy Mouth!
Hilda Sterner says
Thanks, Caroline! I appreciate the review and am glad you enjoyed it! 😘
Kelly Methey says
I love, love, love this cheesecake! It is crazy delicious, creamy and oh so rich. I am now dreaming of it and must make it. I guess I will take a trip to the mountain top to gather huckleberries, if the bears haven’t eaten them all!
Thank you, Hilda, for another fantastic recipe!
HildaSterner says
Girl, come on over and bring Kathy. Quick, before Scott eats it all!