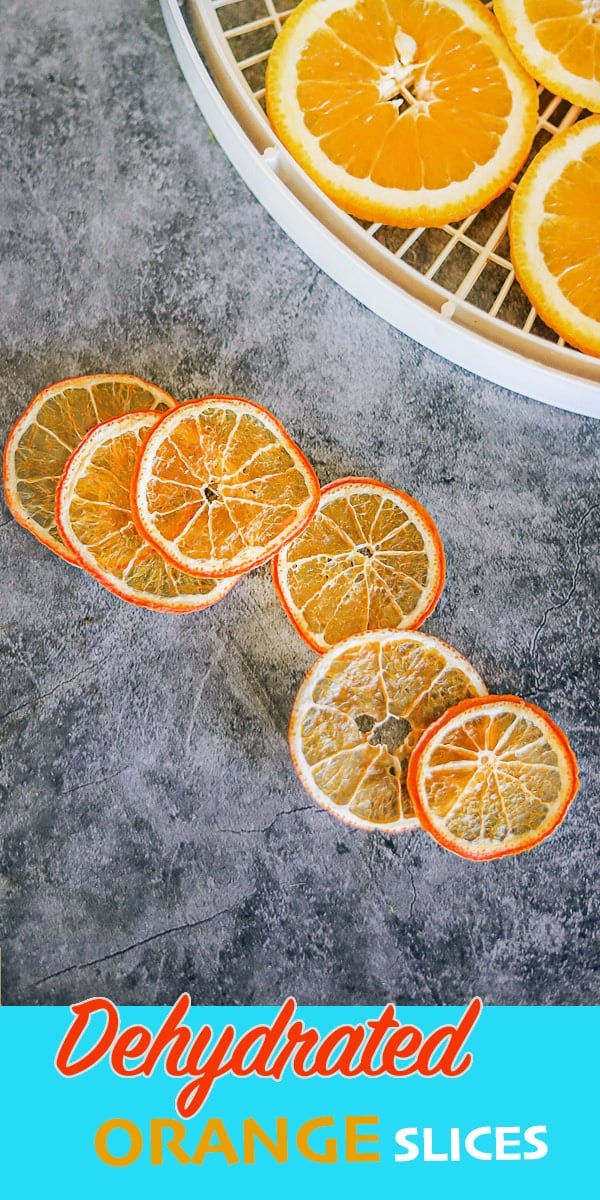
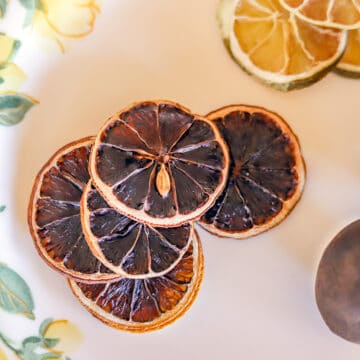
If you've never made dehydrated oranges, you're in for a treat! Unlike other dried fruits, dried orange slices can be used as embellishments on gifts, to add flavor to soups and drinks, used in mulling spices, or added to a fall charcuterie board.

Would you like to save this recipe?
I feel silly even calling this a "recipe." After all, it has one single ingredient, fresh oranges! However, I also don't want anyone out there to miss out on this cool way of preserving citrus, especially oranges.
When I first started dehydrating fruit, I gifted my niece some dehydrated orange slices when I visited them in Chicago. Ninva loved them so much that she and my sister got on their laptop and ordered a food dehydrator right then and there.
Judging by their reaction, I figured there are others out there that need to be shown how easy it is to dehydrate oranges. Dried orange slices have a long shelf life and also make a great pick-me-up snack! And once you have a dehydrator, you can make pineapple chips, dehydrated apple chips, dehydrated watermelon jerky, dried lemons, and so much more!
Jump to:
😍 Why You'll Love This Recipe
- If you don't have a dehydrator and don't want to purchase one, I also provide instructions for drying orange slices in the oven.
- If you hike or do other outdoor activities, dried orange slices can be tossed in a ziplock bag and taken along for a quick boost of energy.
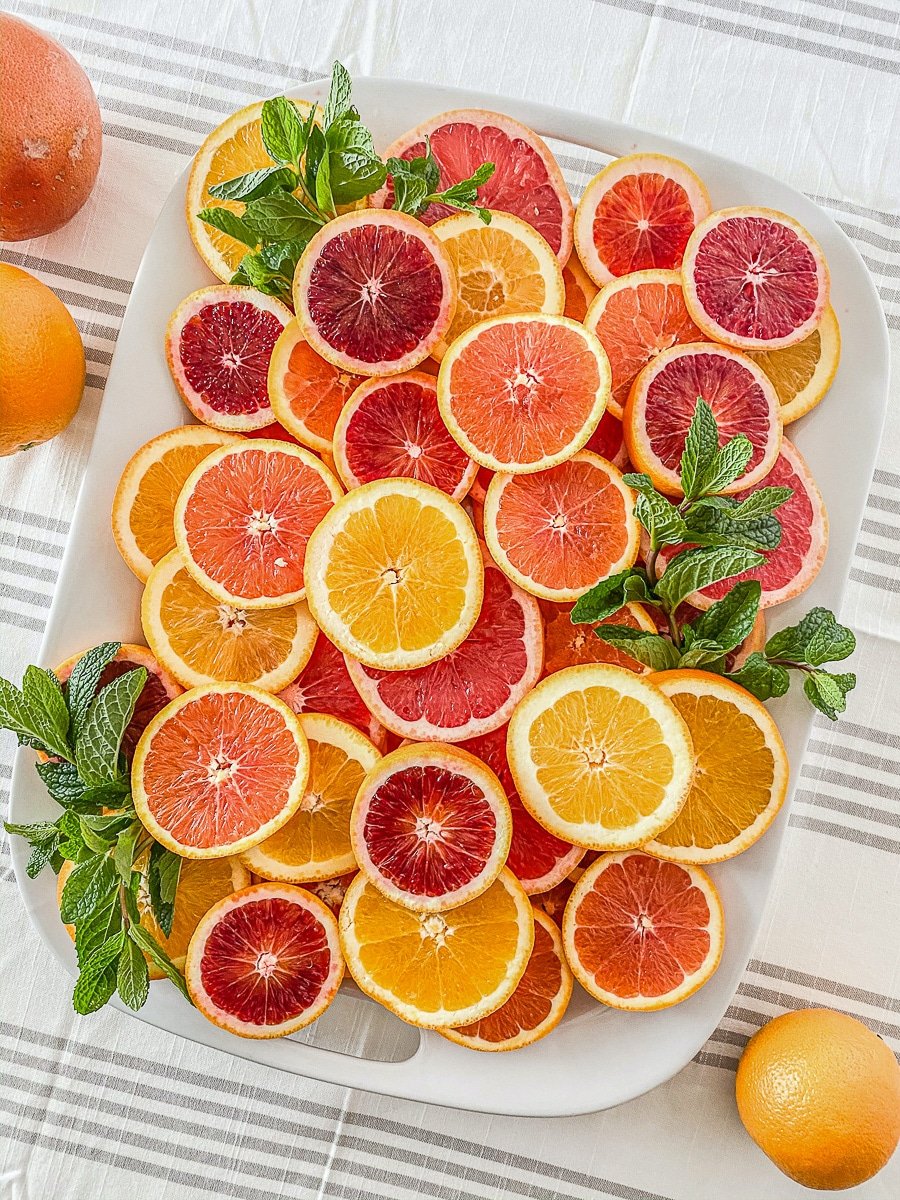
- This dried oranges recipe can be applied to various citrus, including limes, lemons, tangelos, and my personal favorite, blood oranges. So if you grow citrus and can't eat the fruit fast enough, now you can dehydrate them and enjoy them all year long!
🔖 Ingredients & Substitutions

- Oranges - Seedless oranges are best to dehydrate. Not only are they easy to cut with a Mandoline, but the orange slices come out prettier, and you won't have large holes in the slices where the seeds were. It also helps if the oranges are small rather than large so that they can fit on the surface of the mandoline blade.
- Other Citrus Fruit - This method of dehydrating oranges can also be applied to other citrus fruits, for example, lemons, limes, tangerines, and grapefruit.
🔪 Helpful Tools
- You will need a dehydrator to dehydrate the orange slices.
- Although not absolutely required, a mandolin slicer makes slicing the oranges so much easier.
- If you don't have a mandoline, a sharp knife is helpful.
🍊 How to Make Dehydrated Orange Slices
Time needed: 3 hours and 5 minutes
How to Dehydrate Orange Slices
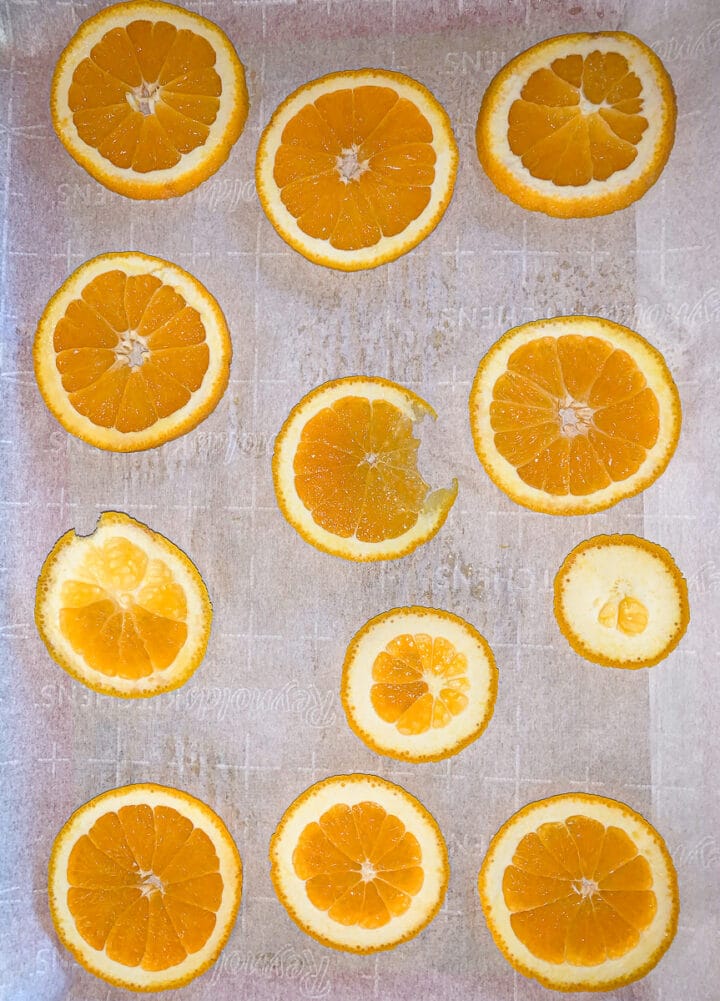
- Slice Oranges
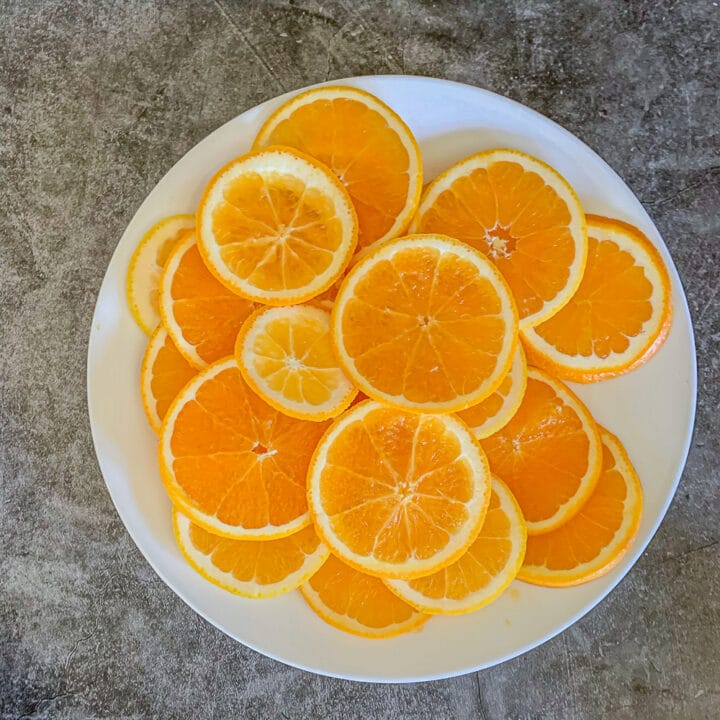
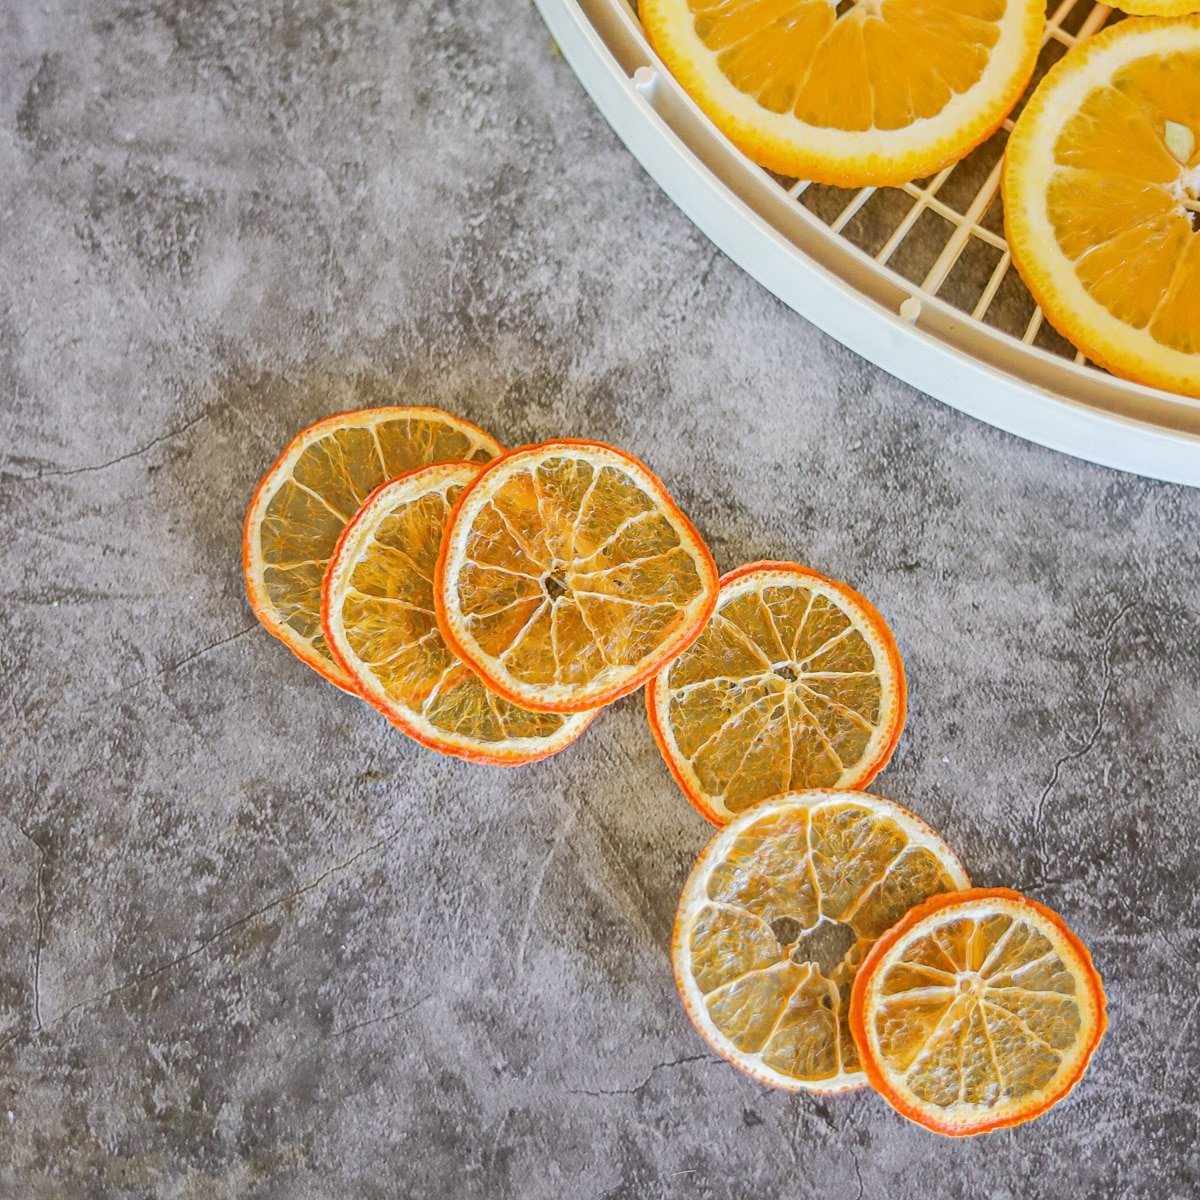
Slice oranges with a mandoline so that they are anywhere from ⅛" to ¼" in thickness. Keep in mind that the thinner they are, the less time they'll need to dehydrate.

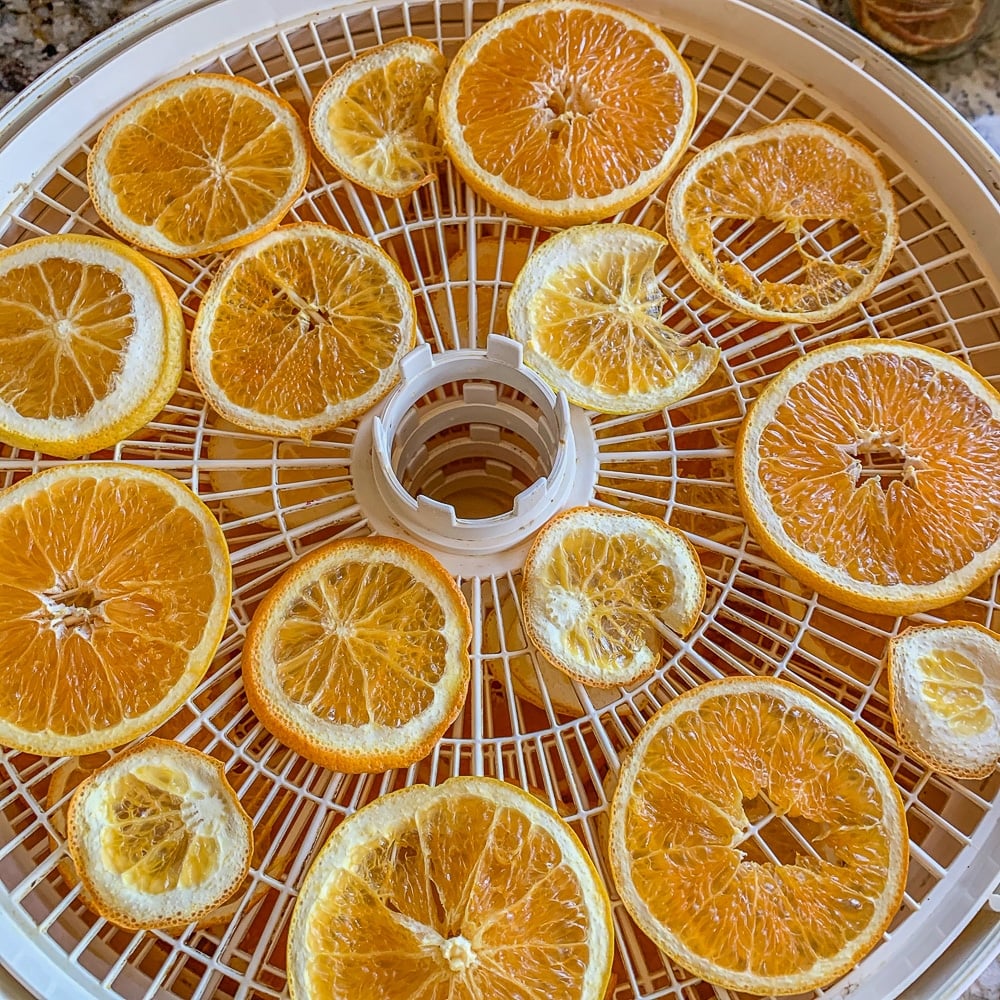
- Arrange Orange Slices
Arrange orange slices on the dehydrator trays, leaving room for air circulation.

- Set Temperature
Set the dehydrator to 135 degrees (fruit/vegetable setting). Start checking the orange slices after 2 hours. Sometimes it's helpful to flip the orange slices to the other side halfway through the process.
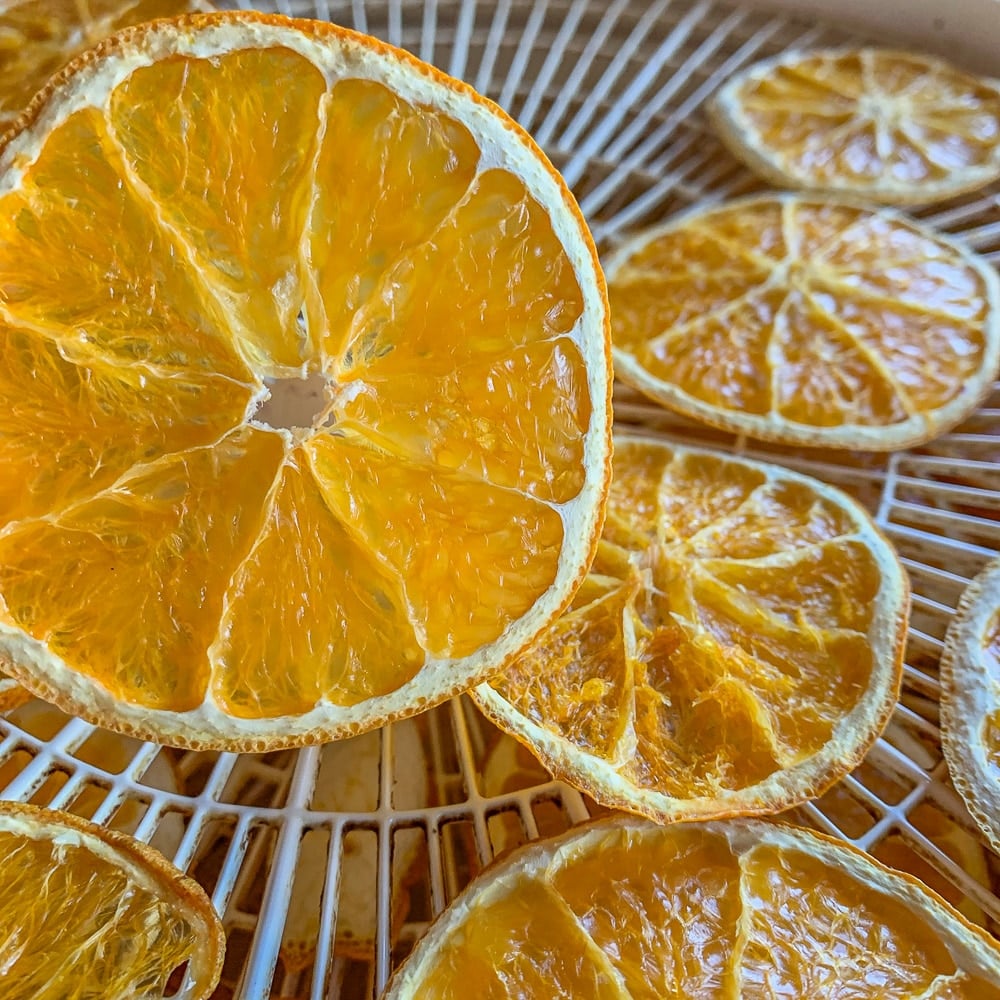
- Dehydrating Time
Depending on the thickness of the slices, it can take anywhere from 3 to 7 hours for the slices to completely dry.
- Cool and Store
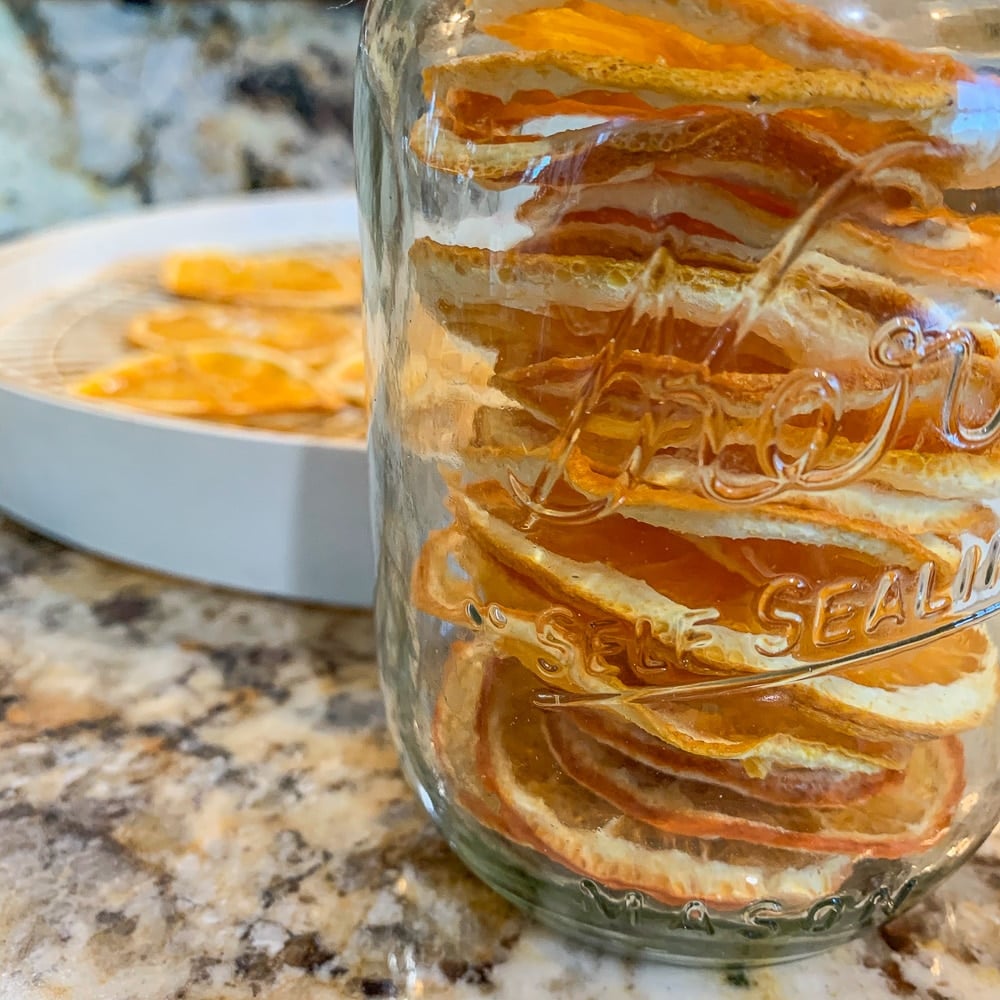
Once the orange slices are completely dehydrated and no moisture remains, cool them completely, then store them in mason jars.

🎛 How to Dry Oranges Using the Oven
Step 1: Slice the oranges into thin slices (⅛" to ¼") in thickness.
Step 2: Arrange in a single layer on a baking sheet lined with parchment paper.
Step 3: If you want to make the orange slices even sweeter, you can sprinkle the slices with some brown sugar and your favorite spices. If you know me at all, you know that I used cardamom.
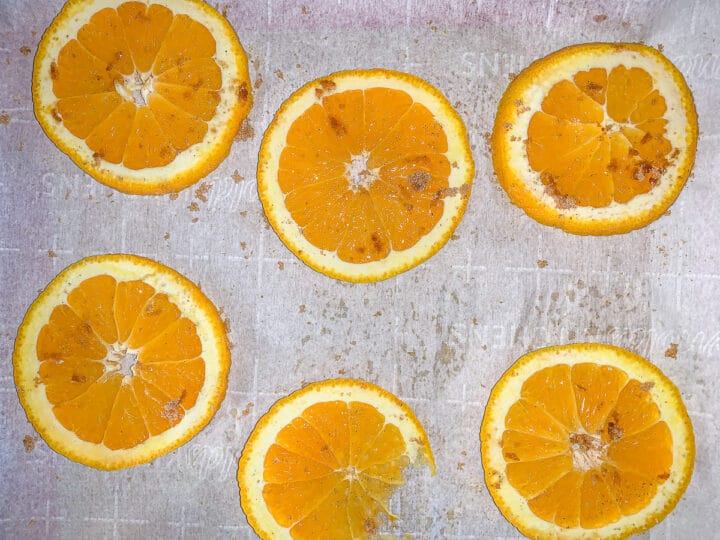
Step 4: Bake the orange slices in the oven at 200 degrees F for 3 to 4 hours, depending on their thickness, until the orange slices feel dry and not tacky.
🤷🏻♀️ Recipe FAQs
Yes, of course, you can! Dried oranges have an intense citrusy flavor and can be eaten as a healthy snack.
Orange slices can take anywhere from 3 to 12+ hours. The drying time will depend on the thickness of the orange slices and the temperature setting chosen.
If you are in a hurry, you can choose a higher setting on your dehydrator and slice the oranges thinner. If you have the patience of Job, you can use a lower setting. This can take up to 12 or more hours to dry them completely.
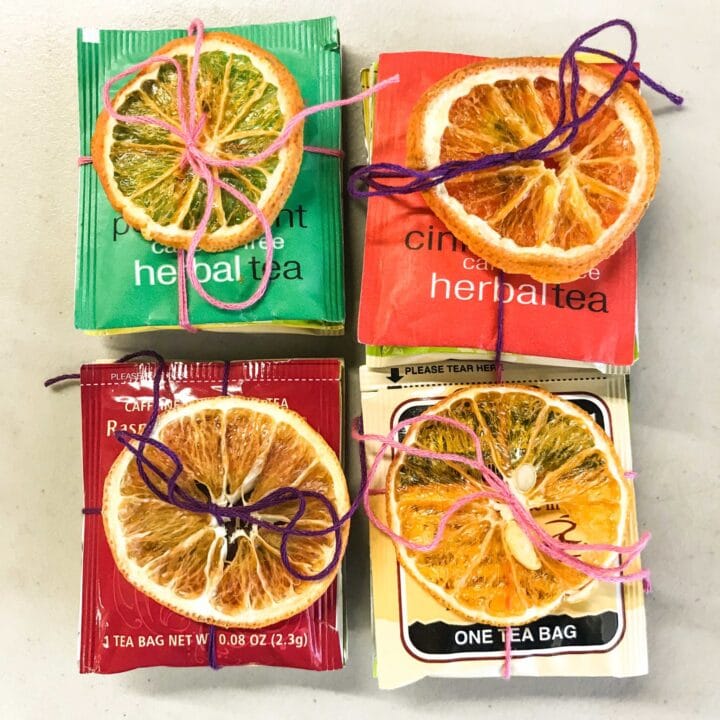
Use dried orange slices as holiday decorations, especially as garland, in a wreath, or to decorate your Christmas tree. You can also use the dried orange slices in a potpourri mix.
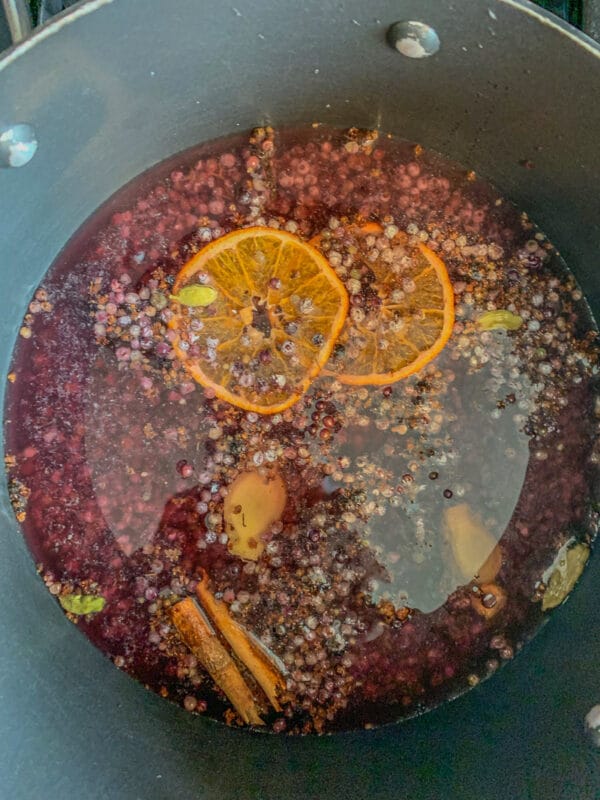
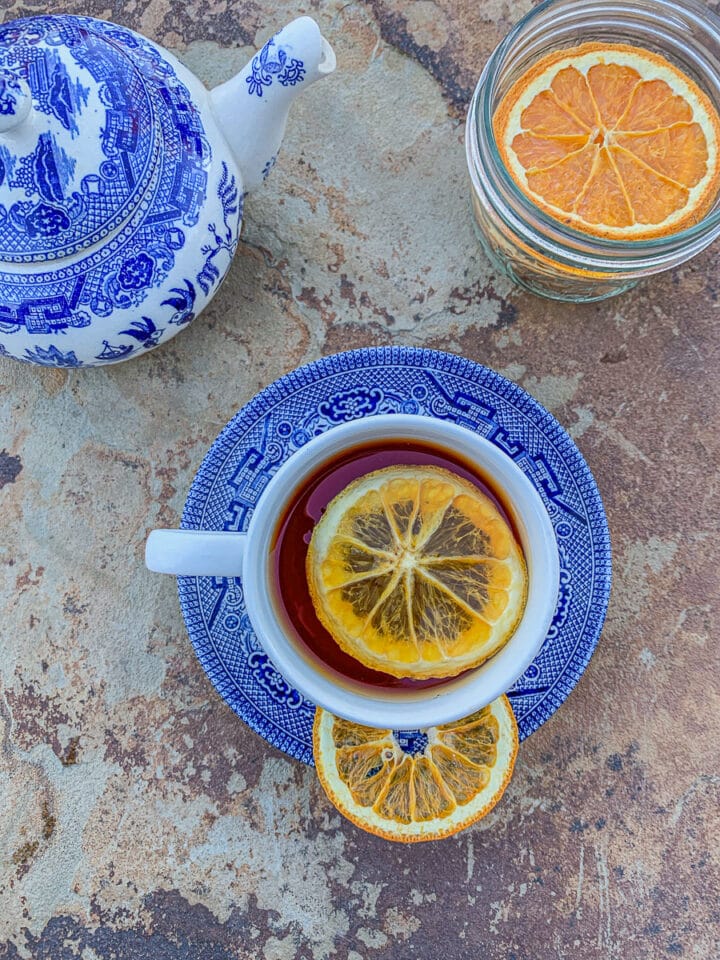
Another option is to add orange slices to a simmer pot, soups, stews, or syrups. You can also use the dehydrated orange slices in beverages. Finally, make a slit on one end of the slice and slip it over the rim of your favorite cocktail.
I've had dried orange slices last for years when stored in an airtight container or a mason jar. I usually run out of orange slices before they go bad. As long as the oranges are dried properly, they should last for years.
Make sure the oranges are not tacky in any way after dehydrating them. You may want to condition them before storing them. To do this, check the jar throughout the week to make sure the orange slices stay crisp and dry and don't show any signs of mold. If they begin to get soft or stick together, they need to be dried further.
Yes, you can make oven-dried orange slices. Slice the oranges into thin slices (⅛" to ¼") and arrange them in a single layer on a cookie sheet lined with parchment paper. Bake in the oven at 200 degrees F for 3 to 4 hours.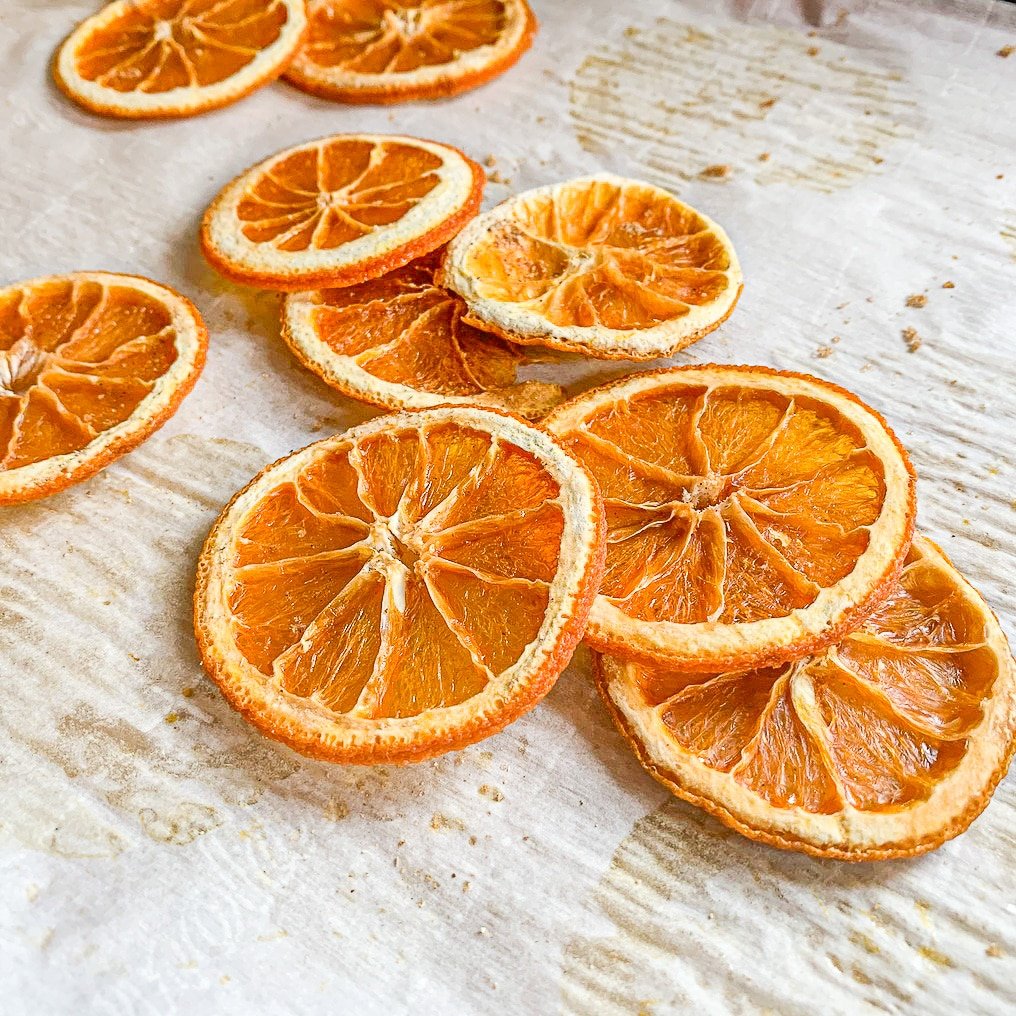
You may also want to try my candied orange slices recipe!
🥘 How to Use Dehydrated Oranges
As I've already mentioned, dehydrated oranges have so many uses. They are easy to prepare and naturally delicious! Here are just a few possibilities:
- Add them to zucchini stew or any stew that calls for lemons.
- Dried oranges are perfect in iced tea or samovar tea.
- Flavor ice water by adding a few dehydrated orange slices.
- Dried orange slices are a match made in heaven in most cocktails. I even add them to a glass of huckleberry wine.
- Use a few dehydrated orange slices to flavor lavender syrup or an elderberry shrub.
- You can also use the orange slices along with cinnamon sticks to embellish gifts and to make a garland for the holidays.
👩🏼🍳 Pro Tips
- Whenever possible, use firm oranges. They are easier to slice, especially when using a mandoline, and will require less drying time if they're not overly juicy.
- Another reason to use small oranges when possible is that once the oranges are dried, they can fit inside the mason jars more easily, including jars with regular-sized mouths.
- Blood oranges are by far the most beautiful when dehydrated. If you can get your hands on some, I highly recommend it!
- Although it's often suggested that you should dehydrate oranges at a lower temperature for a longer length of time, I prefer using the fruit setting, which is 135 degrees F. Instead of taking 12 hours or longer, the dehydrating time can be cut down to 3 to 6 hours, depending on how thick the orange slices are.
- I also dry the end pieces that I slice off the oranges and use them to make orange powder, which I substitute in the place of orange zest in baked goods.
🍎 More Dehydrator Recipes


Did you make this recipe?
📖 Recipe
Would you like to save this recipe?
Dehydrated Oranges (dehydrator and oven directions)
Ingredients
Equipment
Method
- Slice oranges with a mandoline so that they are anywhere from ⅛" to ¼" in thickness. Keep in mind the thinner they are the less time they'll need to dehydrate.
- Arrange orange slices on dehydrator trays, leaving room for air circulation.
- Set the dehydrator to 135 degrees F (fruit/vegetable setting). Start checking the orange slices after 2 to 3 hours.
- Depending on the thickness of the slices, it can take anywhere from 3 to 7 hours for the slices to completely dry. Sometimes it's helpful to flip the orange slices over to the other side halfway through the process.
- Slice the oranges into thin slices (⅛" to ¼") in thickness.
- Arrange in a single layer on a cookie sheet lined with parchment paper.
- Bake in the oven at 200° F. for 3 to 4 hours, depending on the thickness.
Nutrition
Notes
- Whenever possible, use firm oranges. They are easier to slice, especially when using a mandoline, and will require less drying time if they're not overly juicy.
- Another reason to use small oranges when possible is once the oranges are dried, they can fit inside the mason jars easier including jars with regular-sized mouths.
- Blood oranges are by far the most beautiful when dehydrated. If you can get your hands on some, I highly recommend it!
- Although it's often suggested that you should dehydrate oranges at a lower temperature for a longer length of time, I prefer using the fruit setting which is 135 degrees F. Instead of taking 12 hours or longer, the dehydrating time can be cut down to 3 to 6 hours depending on how thick the orange slices are. I also dry the end pieces that I slice off of the oranges and use them to make orange powder which I substitute in the place of orange zest in baked goods.
Lisa Hernandez says
Can I use these on a cake?
Hilda Sterner says
Absolutely!
Dee says
What a wonderful way to make hiking sweetly enjoyable! Thank you
Hilda Sterner says
Thanks, Dee. I appreciate your review.
Jeanette says
I've been wanting to try this. Thank you for all the great information.
Hilda Sterner says
Thank you, Jeanette, I appreciate it!
CJ says
Thank you Hilda's Kitchen for the wonderful tips on how to dehydrate the oranges... someone gave me a whole box and it's just me and didn't want to waste any.... I love this. MUCH APPRECIATED.
Hilda Sterner says
Thank you CJ!
Conny says
Hi thanks for all the good advice. I want to use my orange slices to decorate the Christmas tree and some garland but I do not want to draw any bugs to my tree. Will these dried oranges attract bugs?
Hilda Sterner says
Hi Conny,
I've never had an issue with bugs being attracted to the orange slices. Just make sure they are completely dehyrdeted and no longer tacky.
Sharon says
Can I dehydrate orange sections instead of using a mandolin and make slices?
Hilda Sterner says
Hi Sharon, I've never dehydrated orange sections and would imagine it would take quite a while to do. If you don't have a mandolin to make the slices you can use a sharp knife, as long as the oranges aren't too juicy.