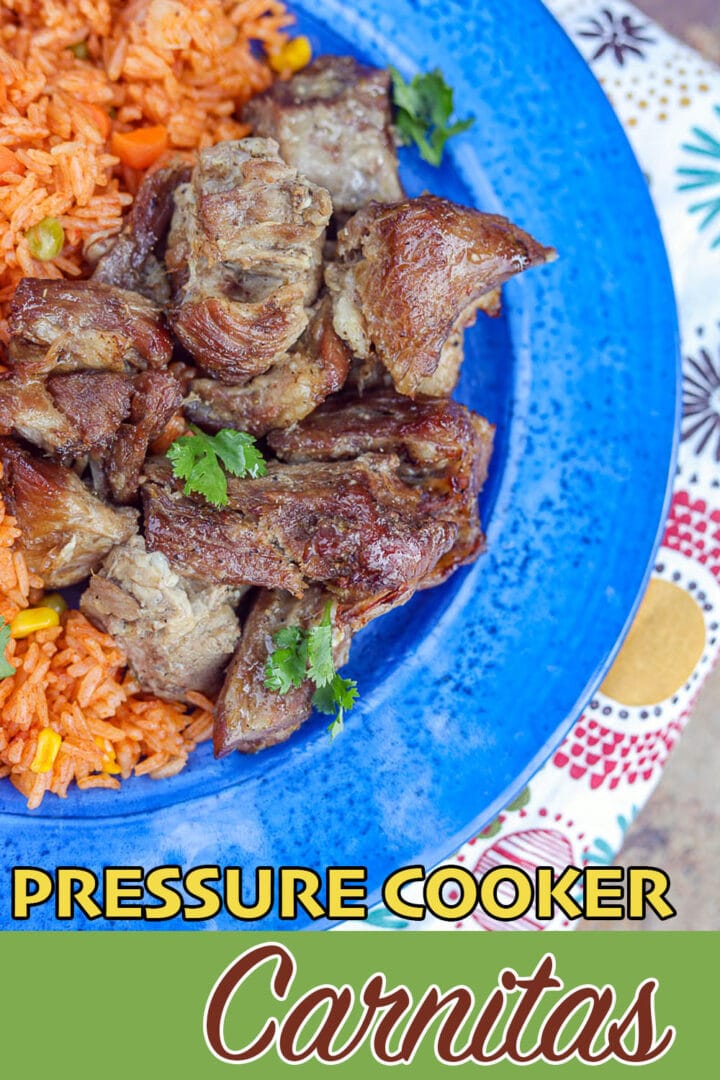
Perfectly seasoned, tender Pressure Cooker Carnitas with irresistible crispy edges. Unlike the traditional Carnitas which take hours to prepare, this flavorful Carnitas recipe is prepared in a pressure cooker in under an hour! Serve with Spanish rice, tacos, or add to your Mexican breakfast burritos!

Would you like to save this recipe?
About a month ago, my son, Scotty, decided he was going to make "authentic Carnitas." This meant cooking the cubed pork in lard. Not just one pound, or two, or three, but FOUR pounds of lard! Yes, the carnitas were good, but the idea of cooking the fatty pork in a large pot of lard was not very appealing. Not to mention, I want to live long enough to see my future grandchildren someday.
Unlike Scotty, I don't mind cutting corners or changing a recipe for the better, even if it means it's no longer "authentic." My Carnitas recipe is prepared in a pressure cooker (I used my Ninja Foodi). And guess what? I did not need to add an ounce of lard. Yet it tasted as authentic as the Carnitas served at our favorite Mexican restaurant in San Diego.
Jump to:
😍 Why You'll Love This Recipe
- This Pressure Cooker Carnitas recipe takes less than an hour to prepare, which is a fraction of the time it takes to make slow cooker carnitas!
- My recipe uses simple ingredients and comes out fall-apart tender every single time!
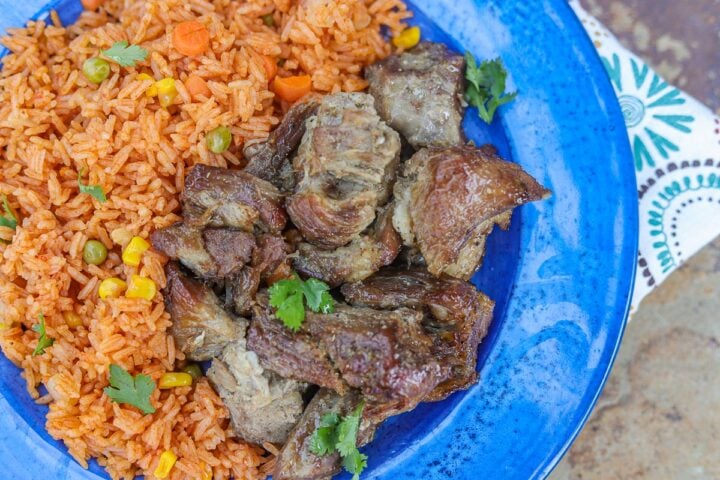
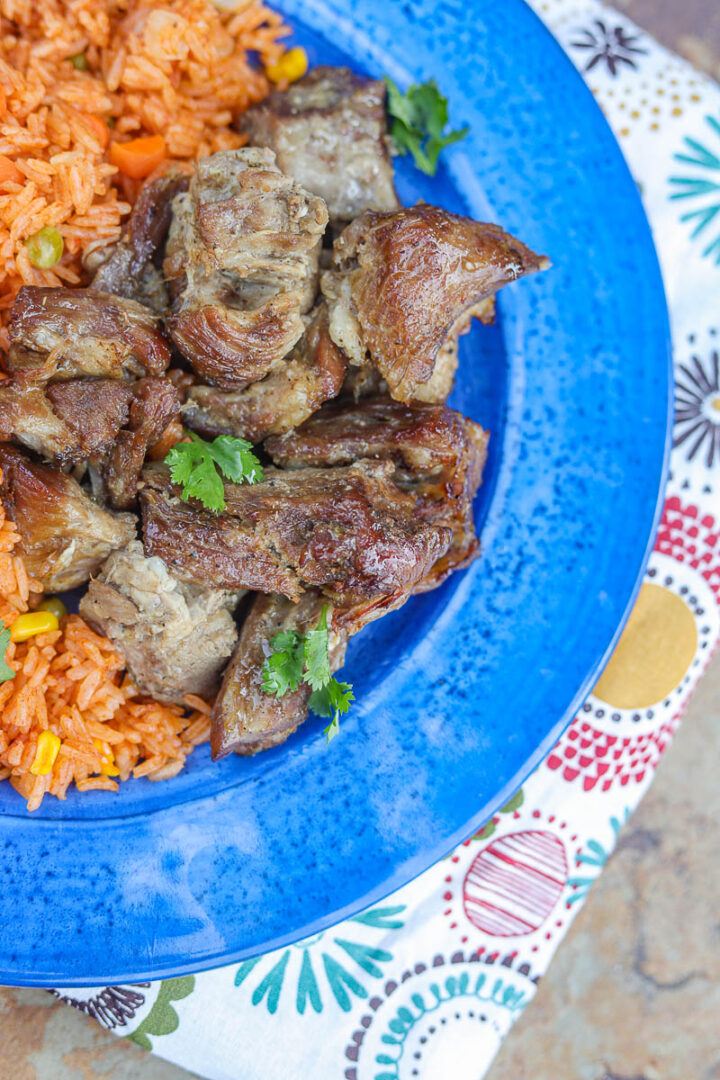
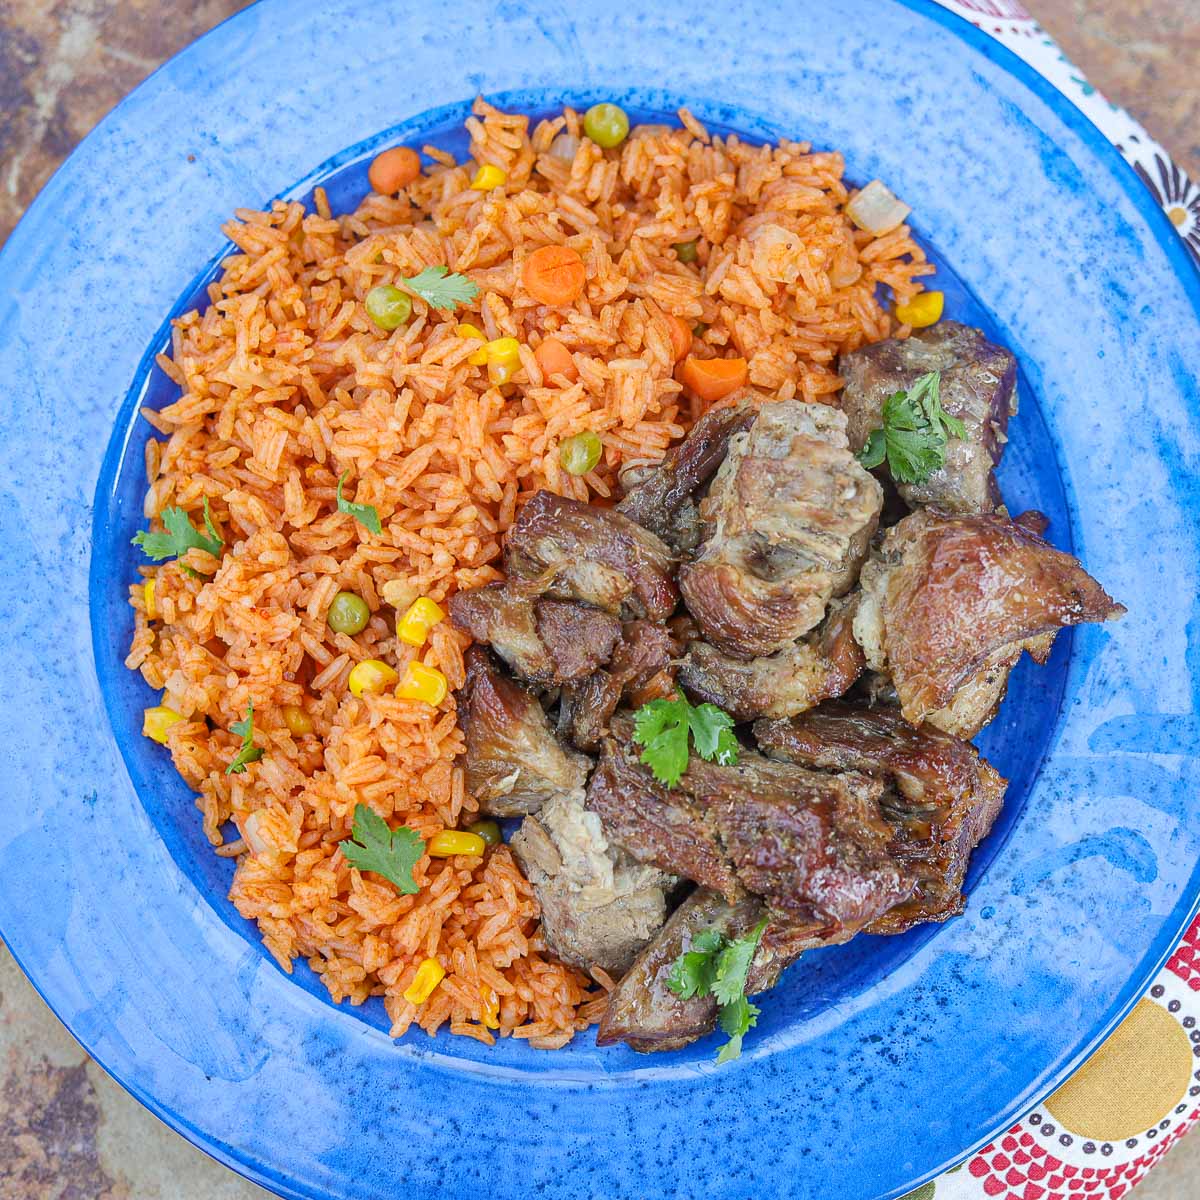
- The Carnitas can be served over rice, shredded in tacos, burritos, and enchiladas, or as part of a Mexican rice bowl. This means you can enjoy the carnitas for days as leftovers!
🔖 Ingredients & Substitutions
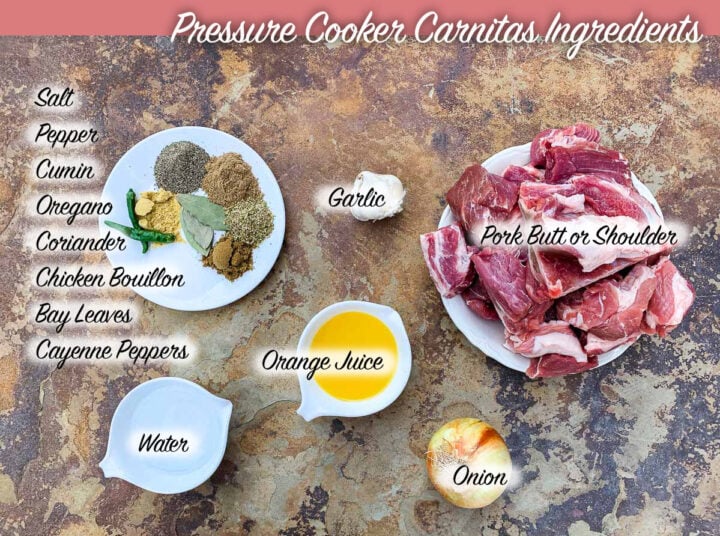
- Pork Butt or Shoulder - Use a fatty cut of meat like pork butt or shoulder. This will ensure tender and delicious Carnitas. Boneless country-style pork ribs can also be used and are usually cheaper than a full roast.
- Orange Juice - Besides bottled orange juice, you can use freshly squeezed oranges. After juicing the orange, add the remaining orange halves in with the other ingredients. You can also add dehydrated orange slices if you have them. You can also add a little lime juice if you'd like!
- Chicken Bouillon - To make the broth, use powdered bouillon or cubes. You can also use canned chicken or beef broth. Or use plain water or Mexican beer. If you replace the broth, add an additional teaspoon of salt.
- Cayenne Peppers - I used fresh cayenne peppers because that's what I was growing in my garden. You can use a teaspoon of crushed red pepper or a few jalapenos or serrano peppers. To keep the Carnitas mild, don't add the peppers.
*See the recipe card for exact measurements.
🔪 Helpful Tools
I used my Ninja Foodi to prepare this recipe. An Instant Pot should also work, but you will have to broil the pork in the oven.
🍖 How to Make Pressure Cooker Carnitas
Step 1| Add Meat to Pressure Cooker
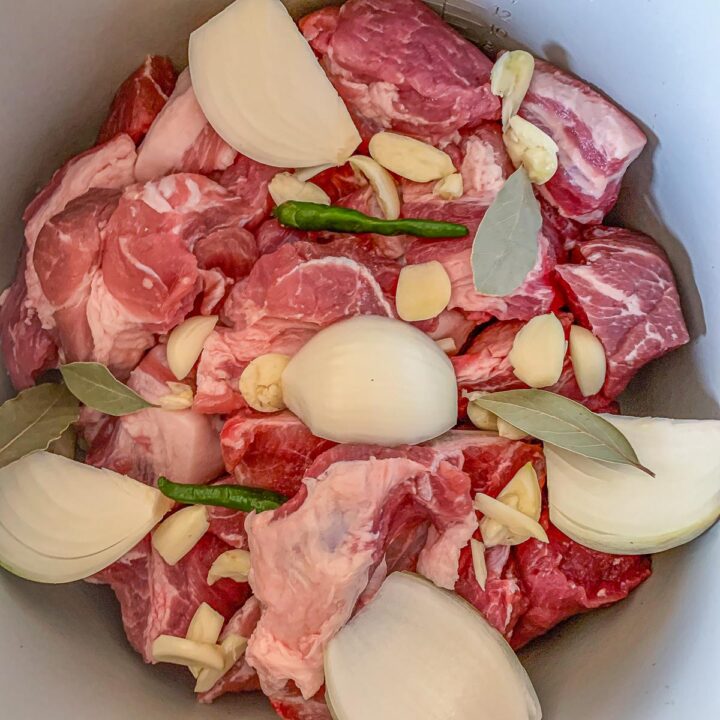
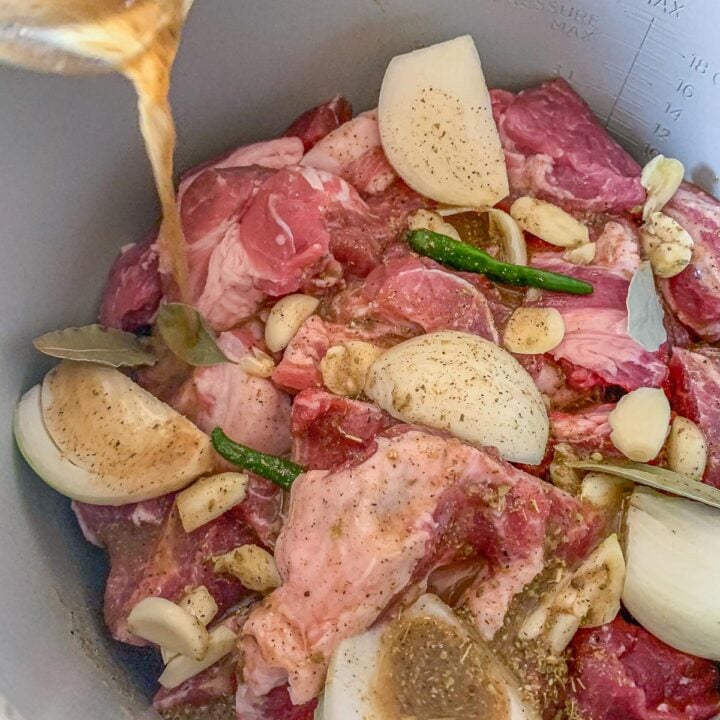
Chop meat into 3" pieces and add to your pressure cooker. Top with a quartered onion, crushed garlic, bay leaves, and spicy peppers.
Step 2| Prepare Cooking Liquid
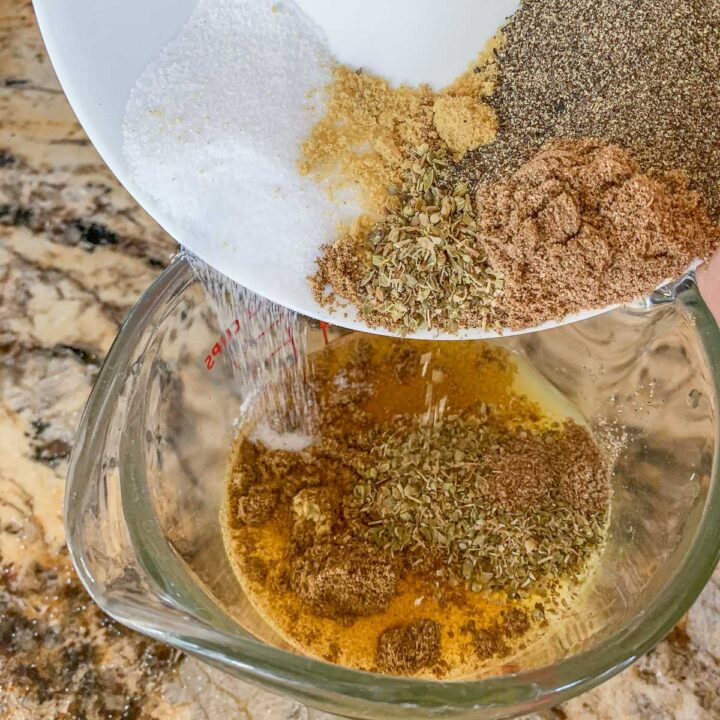
Combine water (beef or chicken broth or beer) and orange juice in a large measuring cup. Add all the remaining spices and whisk to incorporate.

Step 3| Add Liquid and Seal
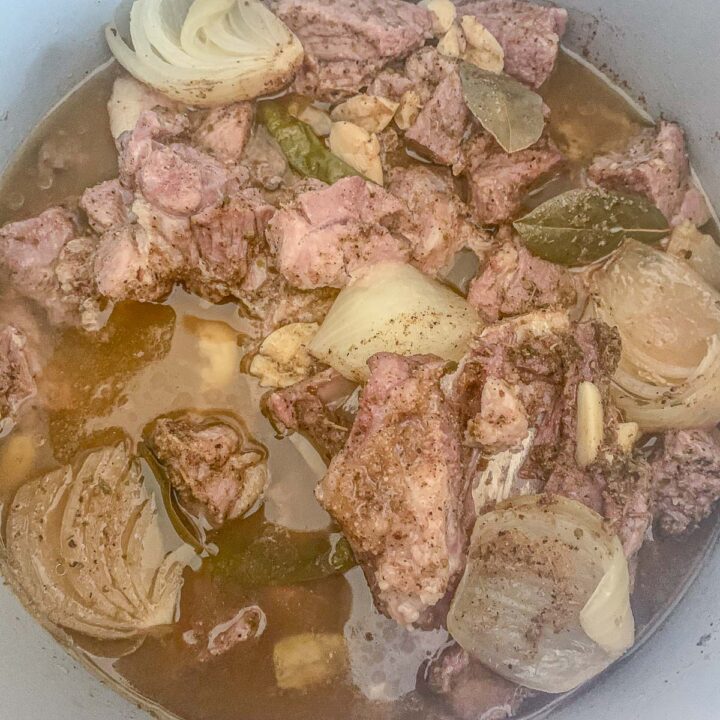
Pour liquid over the pork. If some of the spices remain in the cup, swirl a ¼ cup of water into the cup and pour it into the pot. Cover the pot with the lid and set the valve to "seal."
Step 4| Set to Seal and Cook
Turn the pressure cooker on and choose "Pressure." Set the timer to "20 minutes." It will take approximately 15 minutes for the pressure cooker to seal.
Step 5| Shred Pork
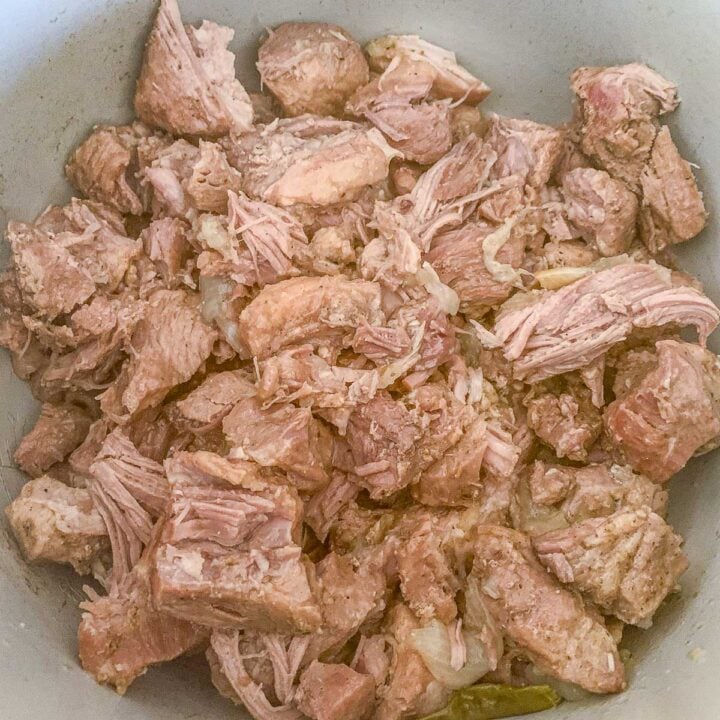
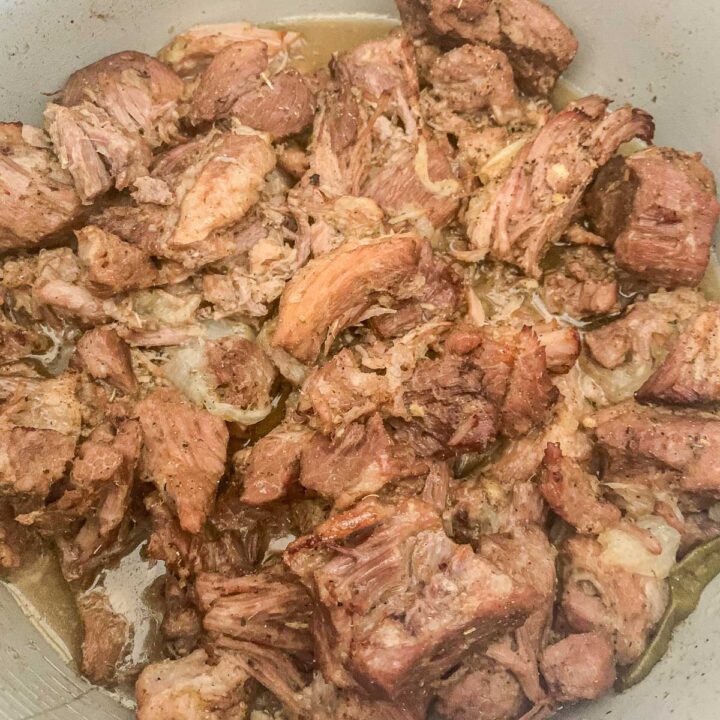
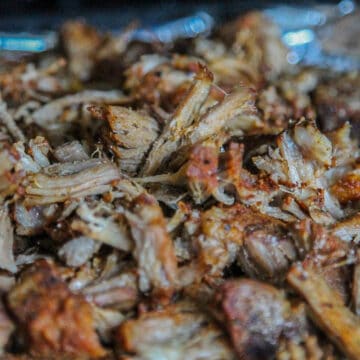
After 20 minutes, do a Natural Release for 15 minutes. If the pin doesn't drop, release the remaining pressure and carefully remove the lid. Remove the chunks of pork with a slotted spoon and partially shred with two forks or bear claws.
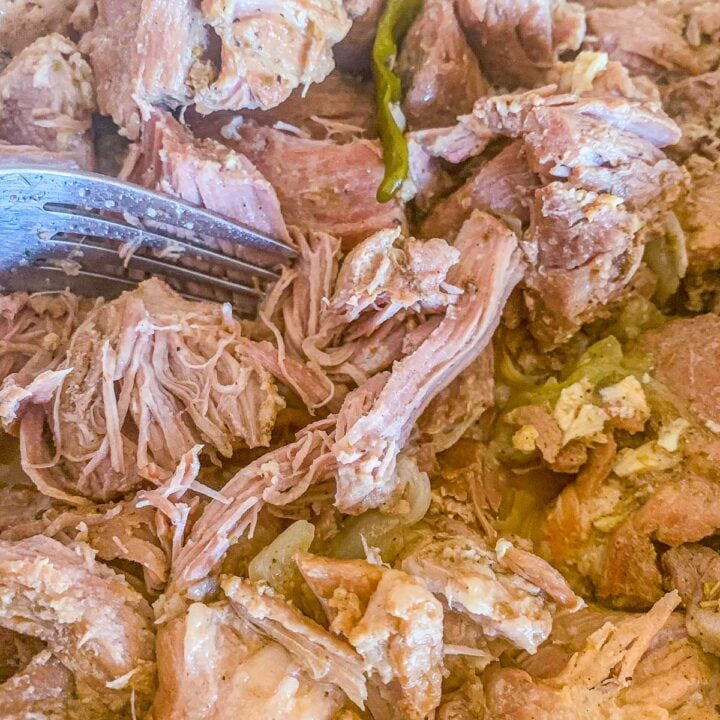
Pro Tip: Don't over-shred the meat. You don't want your carnitas a consistency similar to this Instant Pot Pork Butt, you should still have some bigger chunks of pork.
Step 6| Crisp/Broil Pork
Pour liquid into a large measuring cup and set it aside. If using a Ninja Foodi, place the pork back into the pot and pour 1 cup of the broth over it. Air Crisp at 400 degrees F for approximately 5 minutes. Otherwise, add shredded pork to a pan, pour 1 cup of cooking liquid over it, and broil until slightly crispy around the edges.
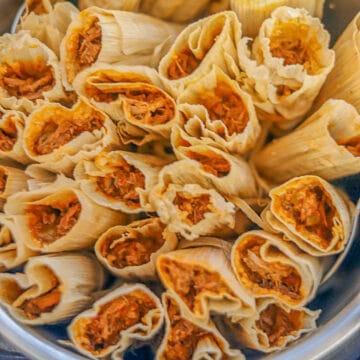
Serve carnitas in corn tortillas, over nachos, with Instant Pot Mexican rice, or rolled into a burrito. Don't forget to serve it with creamy guacamole, chopped onions and cilantro, and pico de gallo on the side!
🤷🏻♀️ Recipe FAQs
Once slow-cooked or cooked in an Instant Pot or Ninja Foodi, Carnitas can be made crisp by pouring some of the broth over them and broiling them. You can also use an air fryer or a hot cast-iron skillet.
The spices used to season carnitas are usually not the same as the spices used to season pulled pork. Another difference is that pulled pork is usually served with barbecue sauce, while carnitas is served with hot sauce, guacamole, and other Mexican fixings.
Finally, carnitas are served in larger chunks while pulled pork is totally shredded.
👩🏼🍳 Pro Tips
- Don't discard the bone from the roast, but add it with the pork cubes for a richer flavor.
- Brush the meat with the broth before serving. This not only adds more flavor but makes the carnitas glisten and look even more appetizing.
- Store leftovers in an airtight container in the refrigerator for up to a week.
- Carnitas freeze well. Place the cooked carnitas in a ziplock bag and make sure all the air is pressed out first. Freeze for up to three months. Thaw frozen carnitas in the fridge the night before you plan on serving them.
- You can reheat the carnitas in a microwave, in an air fryer, or in a pan.
🍲 Related Recipes

Did you make this recipe?
📖 Recipe
Would you like to save this recipe?
Pressure Cooker Carnitas
Ingredients
Equipment
Method
- Chop meat into 3" pieces and add to your pressure cooker. Top with a quartered onion, crushed garlic, bay leaves, and spicy peppers.
- Combine water (beef or chicken broth, or beer) and orange juice in a large measuring cup. Add all the remaining spices and whisk to incorporate.
- Pour liquid over the pork. If some of the spices remain in the cup, swirl a ¼ cup of water into the cup and pour it into the pot. Cover the pot with the lid and set the valve to "seal."
- Turn the pressure cooker on and choose "Pressure." Set the timer to "20 minutes." It will take approximately 15 minutes for the pressure cooker to seal.
- After 20 minutes, do a Natural Release for 15 minutes. If the pin doesn't drop, release the remaining pressure and carefully remove the lid. Remove the chunks of pork with a slotted spoon and partially shred with two forks or bear claws.
- Pour liquid into a large measuring cup and set it aside. If using a Ninja Foodi, place the pork back into the pot and pour 1 cup of the broth over it. Air Crisp at 400 degrees F for approximately 5 minutes. Otherwise, add shredded pork to a pan, pour 1 cup of cooking liquid over it, and broil until slightly crispy around the edges.
- Serve carnitas in corn tortillas, over nachos, Mexican rice, or rolled into a burrito. Don't forget to serve some creamy guacamole, chopped onions, cilantro, and pico de gallo on the side.
Nutrition
Video
Notes
- Don't discard the bone from the roast, but add it with the pork cubes for a richer flavor.
- Don't over shred the meat. You don't want your carnitas the consistency of pulled pork, you should still have some bigger chunks of pork.
- Brush the meat with the broth before serving. This not only adds more flavor but makes the carnitas glisten and look even more appetizing.
- Store leftovers in an airtight container in the refrigerator for up to a week.
- Carnitas freeze well. Place the cooked carnitas in a ziplock bag and make sure all the air is pressed out first. Freeze for up to three months. Thaw frozen carnitas in the fridge the night before you plan on serving them.
- You can reheat the carnitas in a microwave, in an air fryer, or in a pan.
Swen E Nater says
Made this morning exactly as presented, with the exception that I cooked for one hour rather than 20 minutes and allowed cooker to cool before opening. The verdict is, 5 stars. Tender meat that still has integrity to produce chunks, and the balance of spices and other flavors seems to be perfect as I can taste everything, but nothing dominates. Two recommendations: Thow in orange skins and reduce salt to a scant 1 TBS. Well done.
Hilda Sterner says
Thank you, Swen! I do like your suggestion, I do that sometimes as well, and I've been adding a lime too!
Hungry4Hucks says
Okay, so I'll try just about anything once. Being a traditionalist myself, I can relate to your son. I love authentic carnitas, but if you're concerned about your health moderation is wise. You have blown me away with the Ninja Foodi technique. I would have never guessed it would turn out as good as it did. Best part is you can make it as crisp as you want with air frying. Nobody questioned whether it was cooked in lard or not. It came out flawless. Thank you.
Hilda Sterner says
Thank you, I am so glad you liked the carnitas. Enjoy!