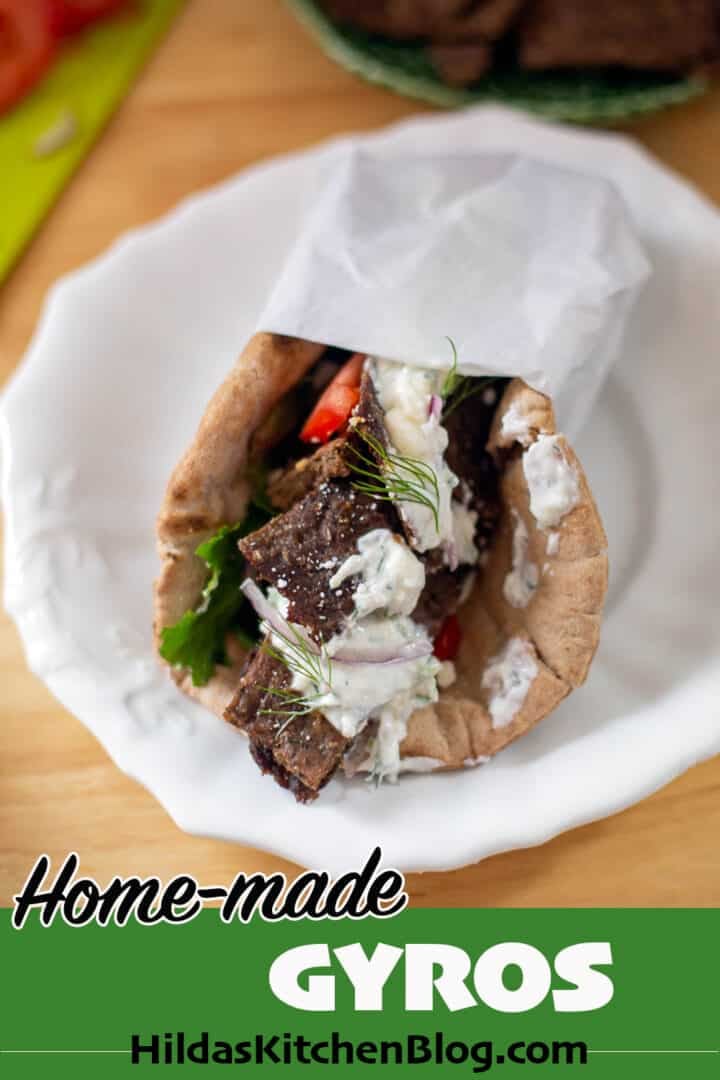
This Greek Gyro Pita recipe has an authentic flavor and takes less than 10 minutes to cook! I use my own gyro seasoning which has just the right spice blend to make this homemade gyro meat taste like the real deal. Feel free to use lamb, beef, chicken, or pork gyros to make this and serve it in freshly baked pita pockets or with this Greek cucumber salad!
Would you like to save this recipe?
This flavorful gyro meat has the perfect texture and can be enjoyed in a variety of ways. Don't judge me, but I've even added it to my ramen bowls with fantastic results! 🙃
Gyros is not to be confused with souvlaki (see my chicken souvlaki recipe), which is similar to Middle Eastern Shish kabobs. Souvlaki is prepared with marinated chunks of beef, pork, or chicken which are threaded onto skewers, then grilled.
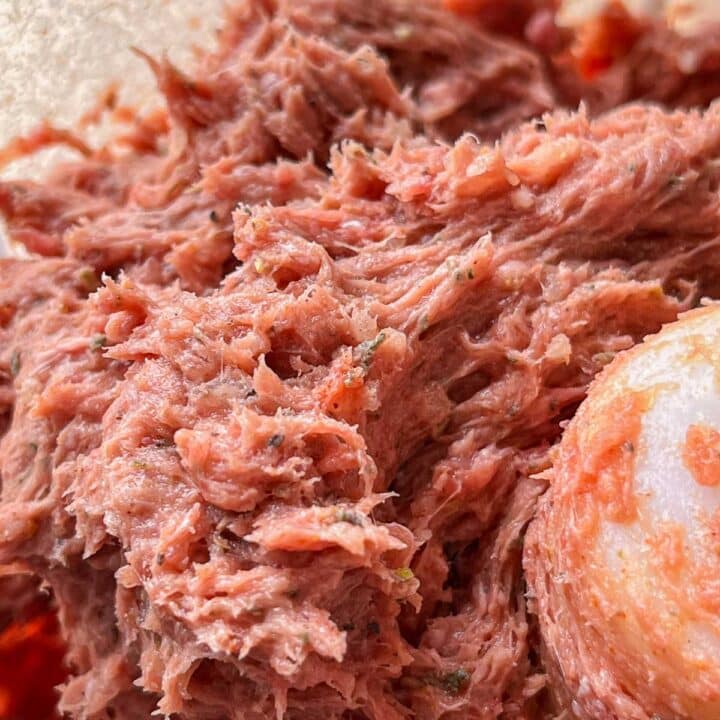
Gyro meat, on the other hand, is prepared with a highly seasoned meat mixture that's ground into a paste and formed into a gyro meat cone over a rotating spit. As the meat is roasted, it is shaved off into strips and served in Greek pita bread/flatbread or as a gyro plate with a salad and fries.
Now, before we go any further, I want to make sure you know how to pronounce the name of this popular Greek dish so you don't sound like a rookie! The "G" in Gyros is pronounced like "Y", so "Gyro" is pronounced like "Yee-ro", and the plural "Gyros" is pronounced "Yee-ros." Now, on to the recipe!
If you have leftover gyro meat, use it to make gyros pizza!
Jump to:
😍 Why You'll Love This Recipe
- Gyro meat has an amazing flavor and is keto-friendly & low in carbs!
- Gyros is easier to prepare than most people think.
- Unlike many gyro recipes that require 45+ minutes to cook, my gyros recipe is ready in under 10 minutes! This makes gyro pitas ideal for a quick & delicious meal!
- The gyro meat mixture can be prepared ahead of time and frozen until you're ready to make lamb, beef, or pork gyros.
- Leftover cooked gyros freeze well. Make several batches and freeze one for another time.
- Gyro meat goes great in egg breakfast sandwiches, too! In fact, the taste is similar to basturma, the popular Iraqi breakfast sausage.
🔖 Ingredients & Substitutions
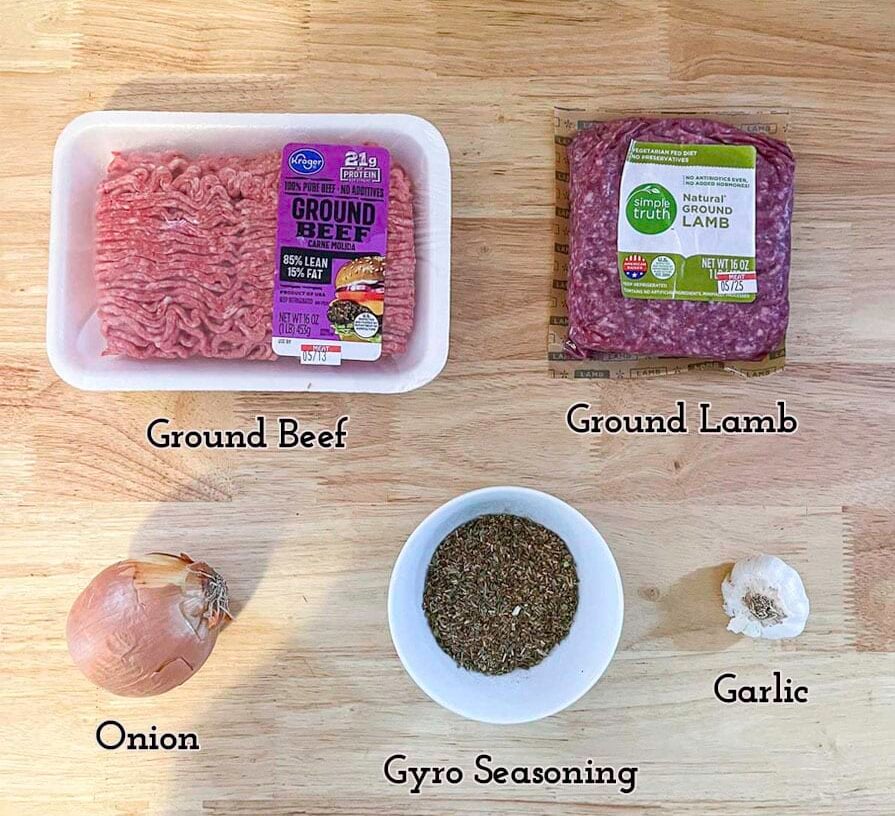
- Meat: I like to use a combination of ground beef and ground lamb. Pork or chicken can also be used.
- Onion: One medium yellow onion.
- Garlic: You'll need four fresh cloves of garlic.
- Seasoning: One batch of my homemade gyro seasoning.
Gyro Seasoning Ingredients
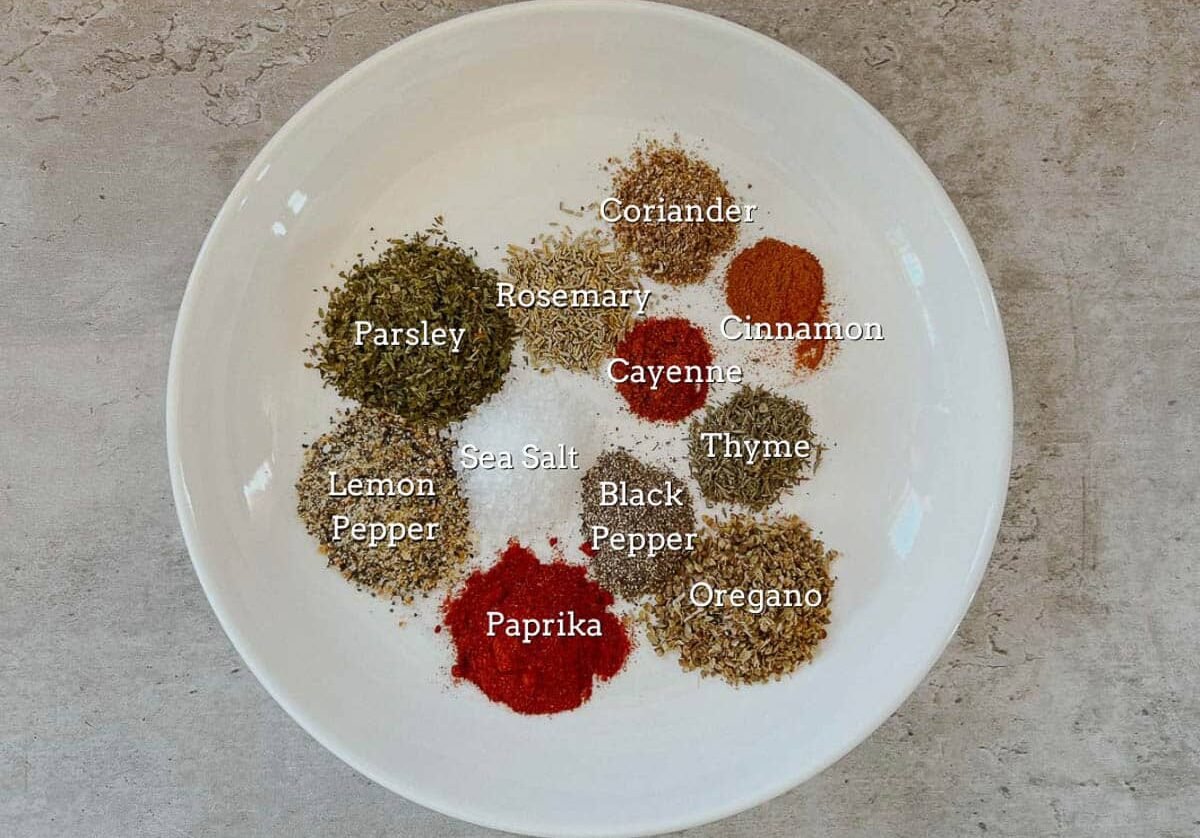
My Gyro seasoning is prepared with rosemary, parsley, thyme, oregano, coriander, cinnamon, sea salt, black pepper, paprika, lemon pepper, and cayenne (optional). The lemon pepper can be substituted with 1 teaspoon of lemon juice added to the meat mixture. Check out my gyro seasoning recipe for exact seasoning measurements!
🍖 How to Make Gyros At Home
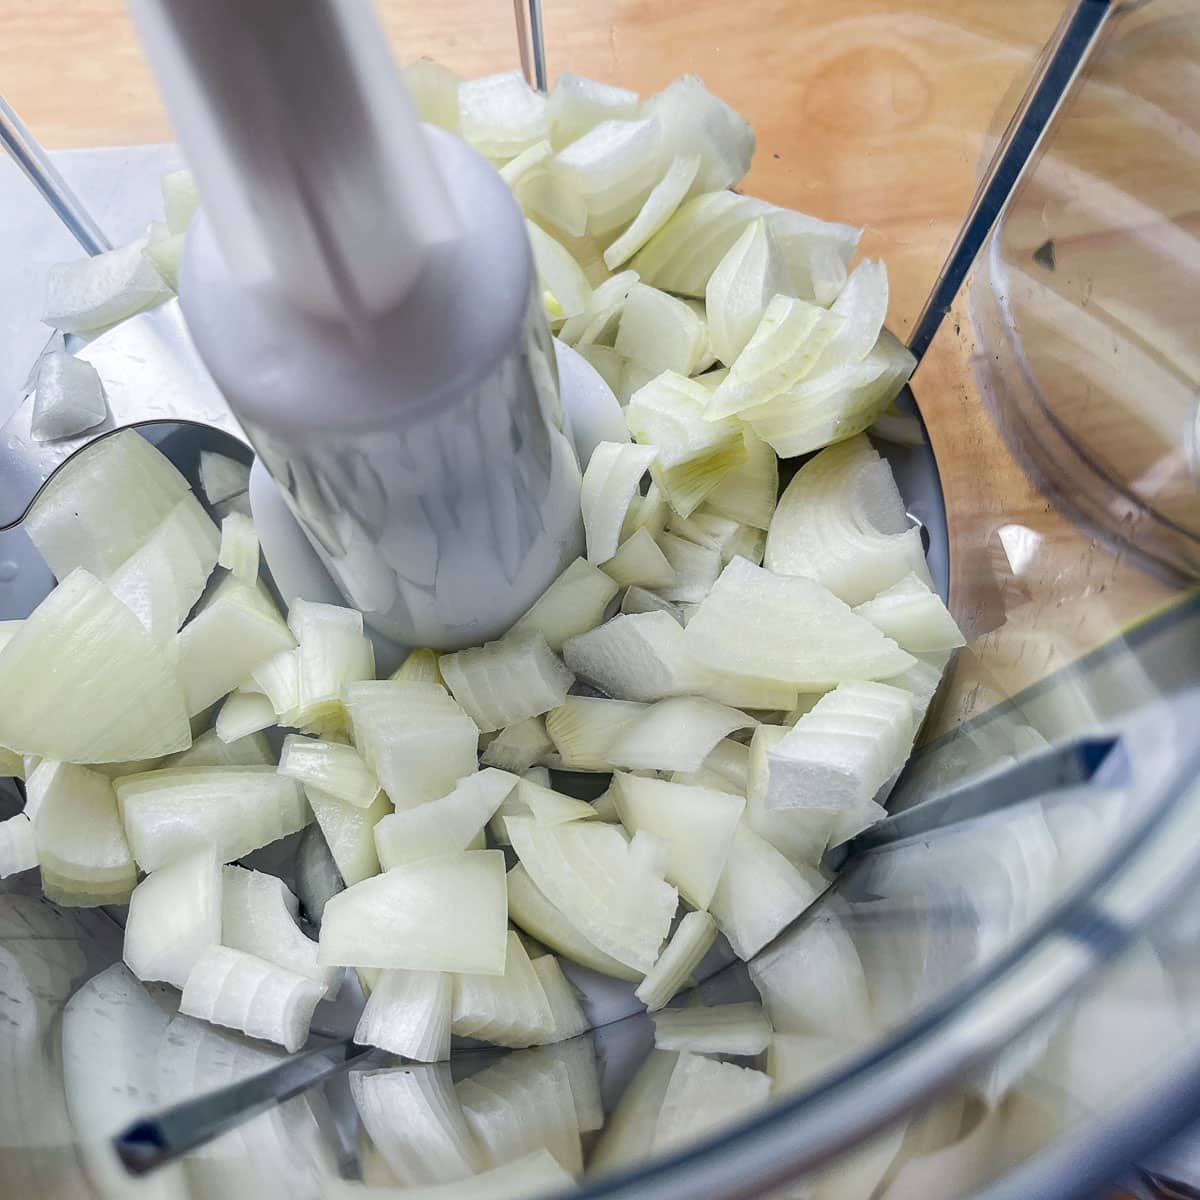
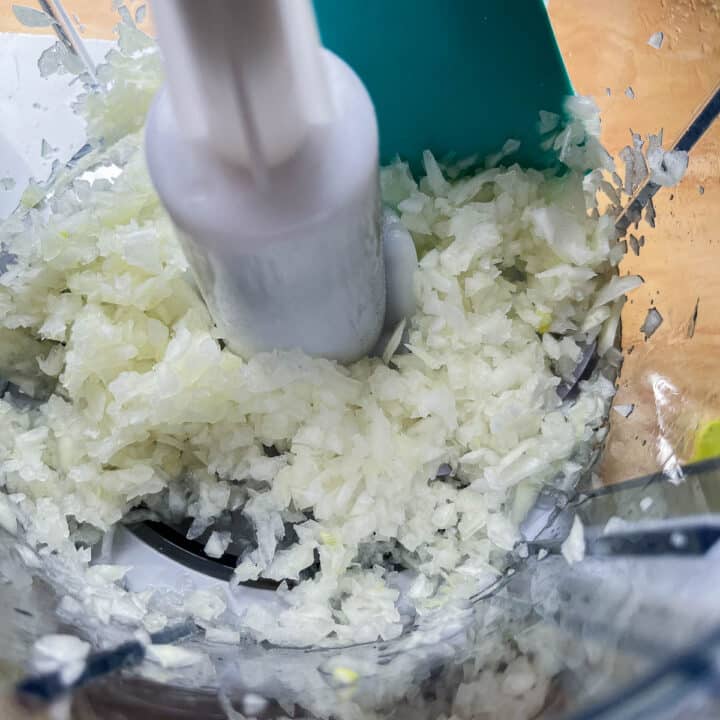
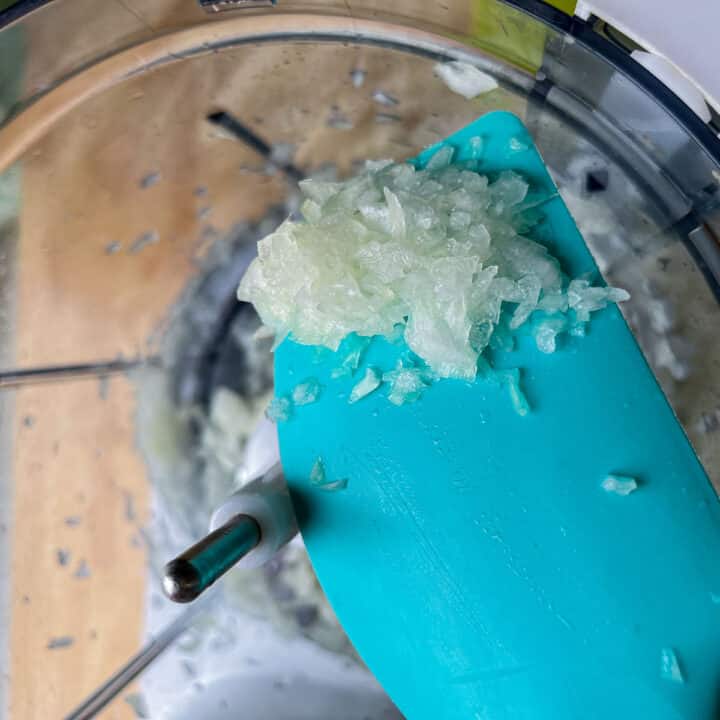
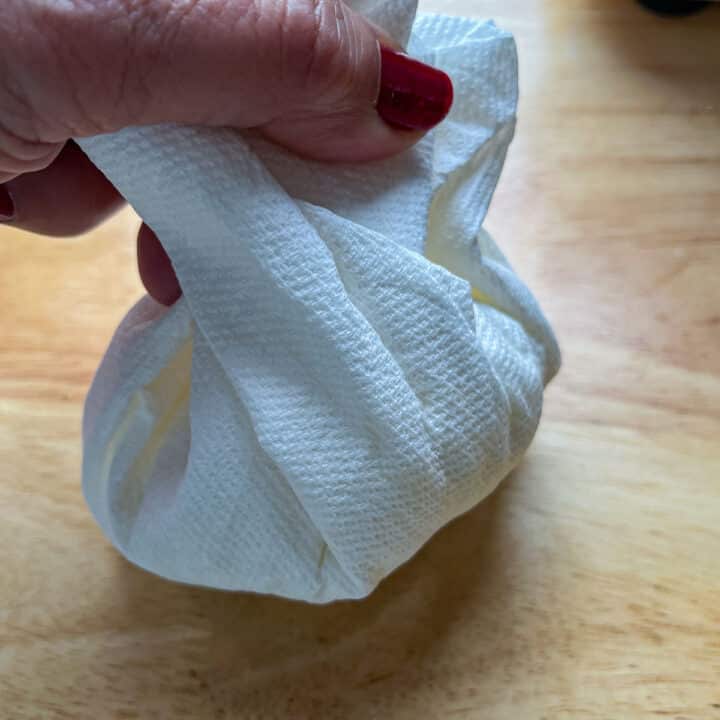
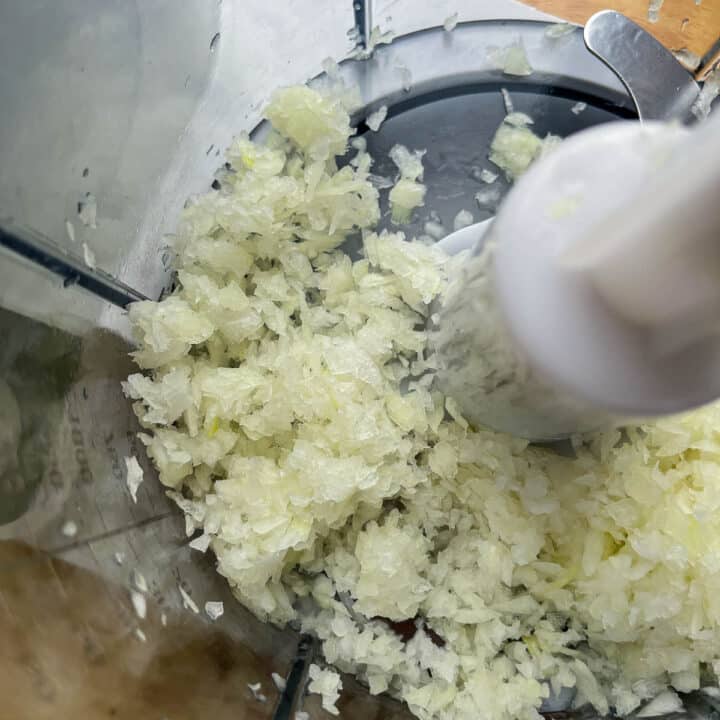
Step 1: Chop onion and add to a food processor. Process until the onions are very fine. Add onions to a fine mesh sieve, dishcloth, or double-layered paper towel. Squeeze out as much onion juice as possible, then add onion back into the food processor.

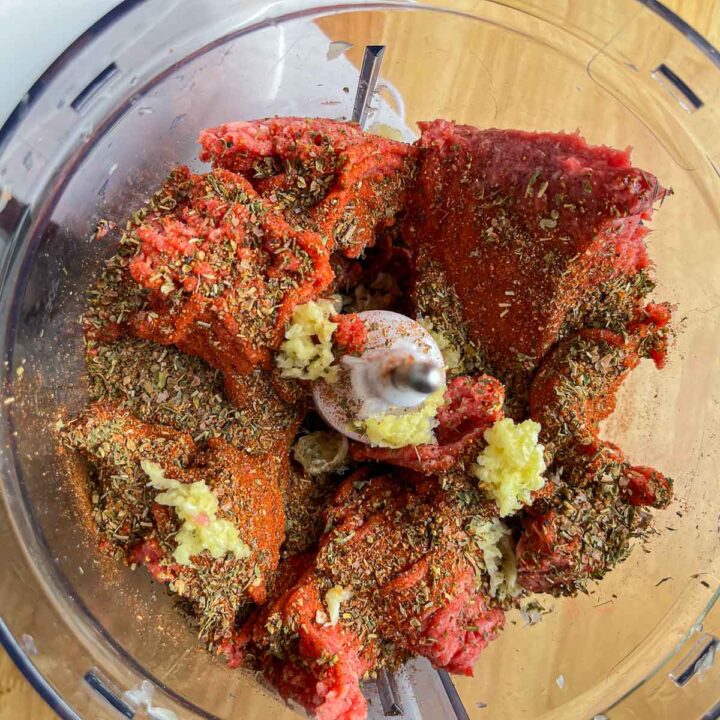
Step 2: Add ground beef and lamb to the food processor along with crushed garlic and gyro seasoning. Pulse the food processor until the meat is pulverized and has a paste-like consistency. You should not be able to see onion pieces.
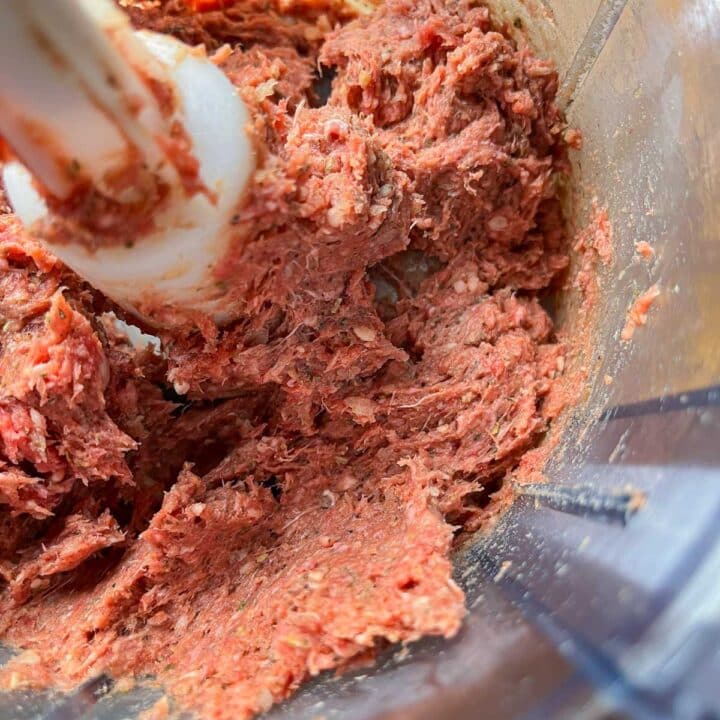
Pro Tip: It may be easier to grind the meat in a few batches so that it doesn't tax the food processor's motor. Stop and scrape the sides of the bowl as needed. If you don't have a food processor, you can run the meat through a meat grinder a few times.
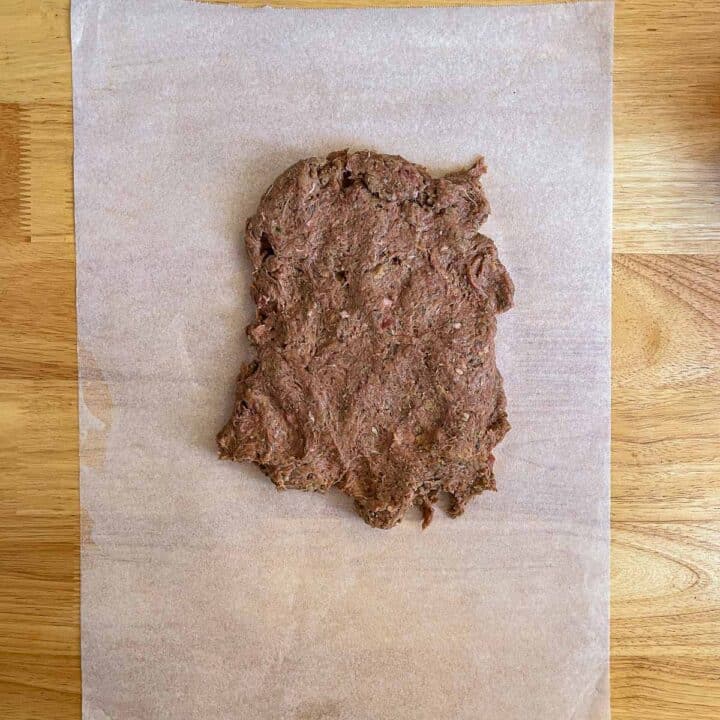
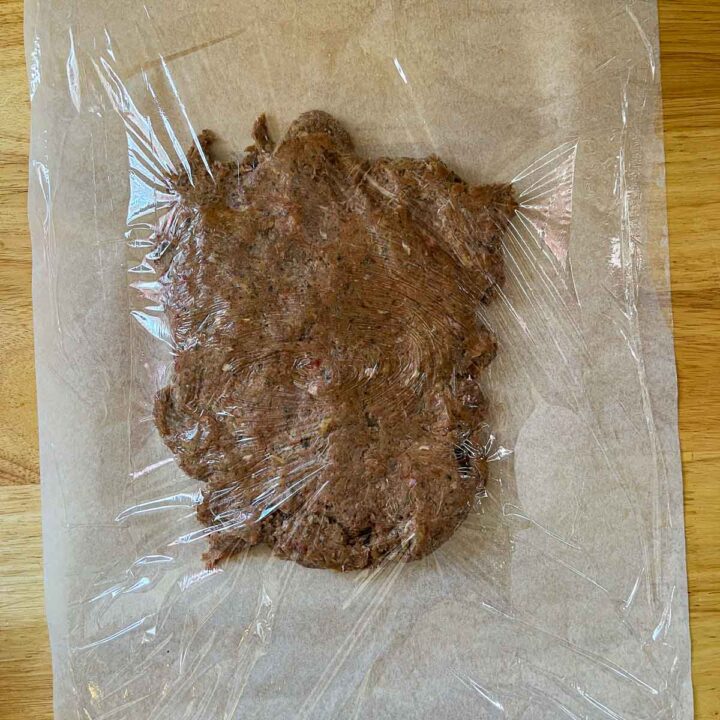
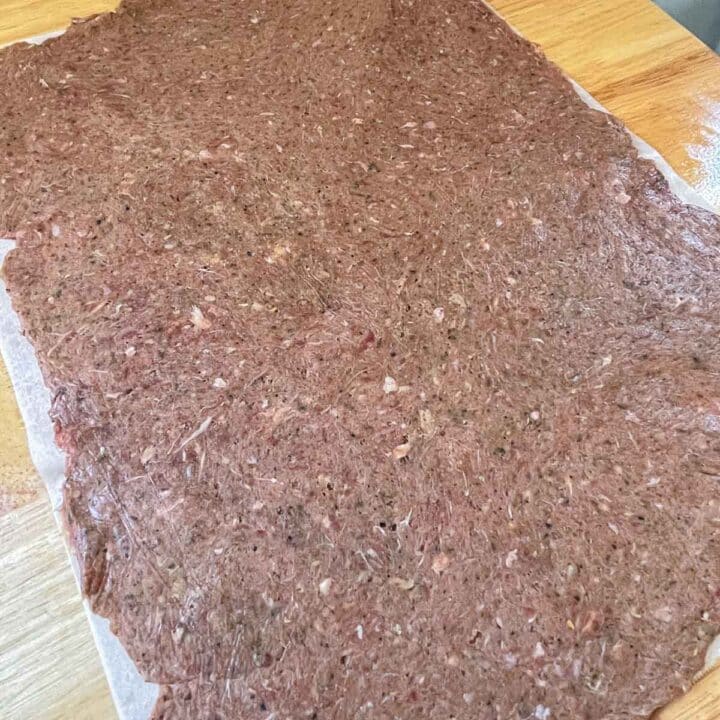
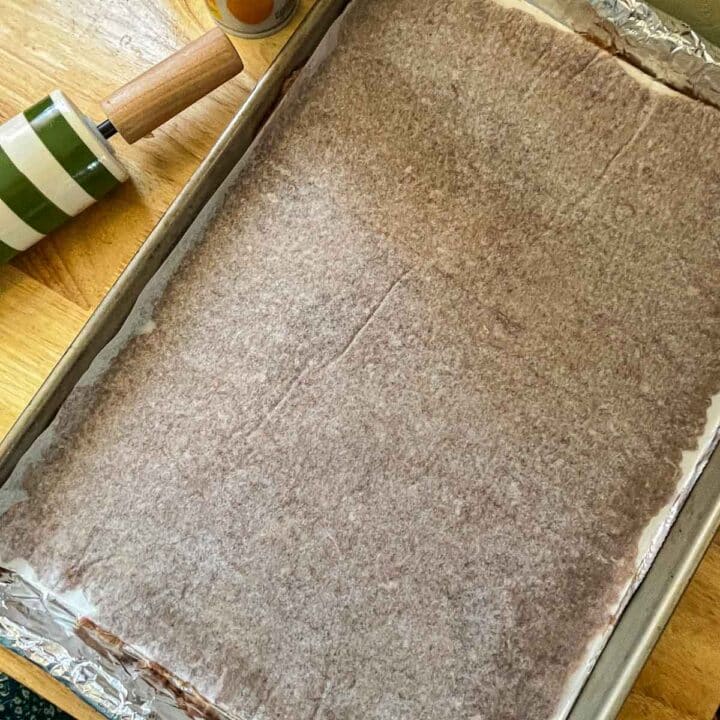
Step 3: Place a sheet of parchment paper (the same size as your sheet pan) on your work surface. Add half of the meat mixture to the center of the parchment paper. Cover with the same size sheet of Saran Wrap. Use a rolling pin to roll out the gyros mixture into a thin, even layer.
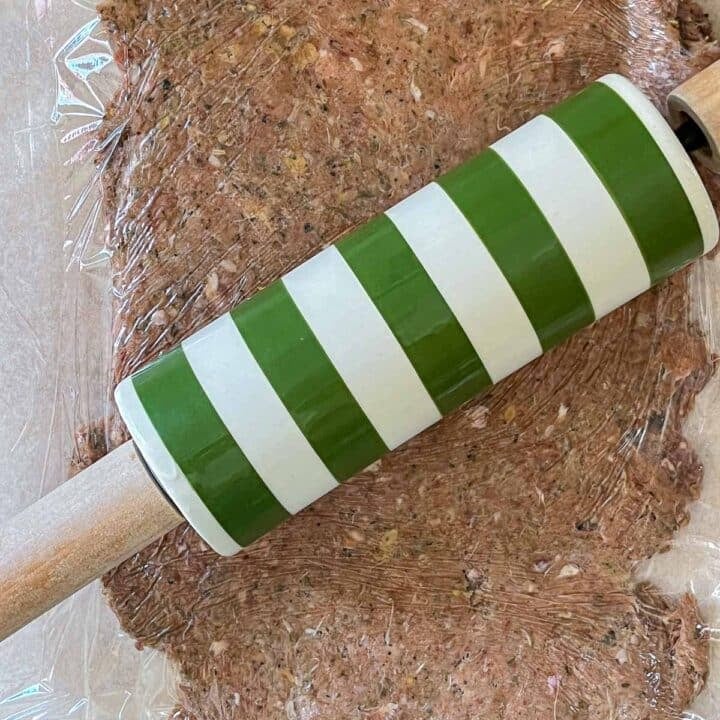

Pro Tip: As you flatten out the meat mixture, you may occasionally need to lift the plastic and redistribute some of the meat to fill in the gaps.
Step 4: Gently peel the plastic wrap away from you and discard it. Flip onto the sheet pan with the parchment paper facing up. Now, carefully peel the parchment paper off and discard.
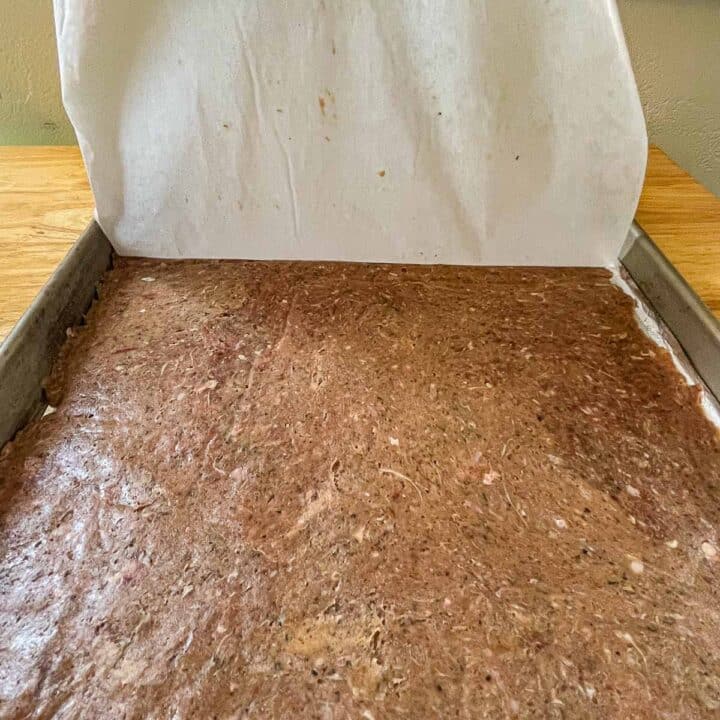
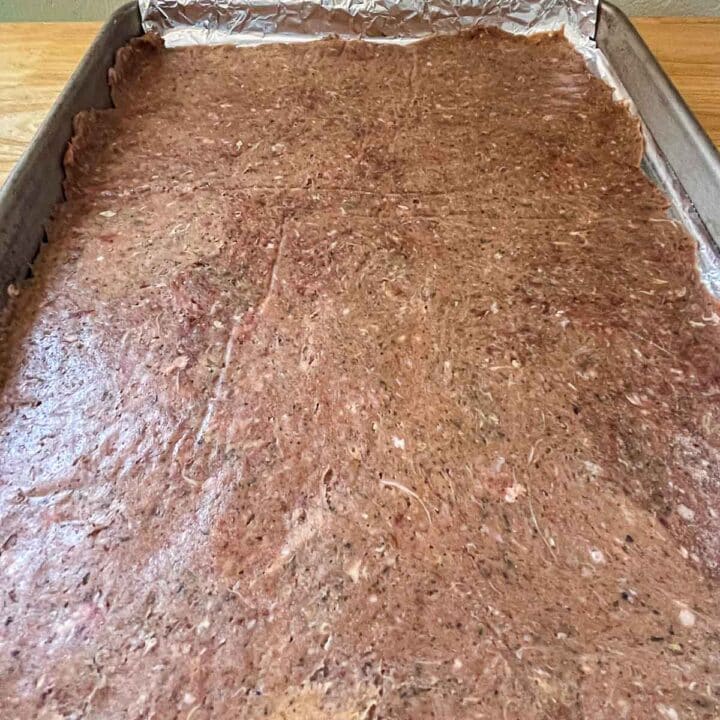
Pro Tip: An even easier option is to only remove the Saran Wrap, then place the gyros parchment paper-down onto the pan and bake!
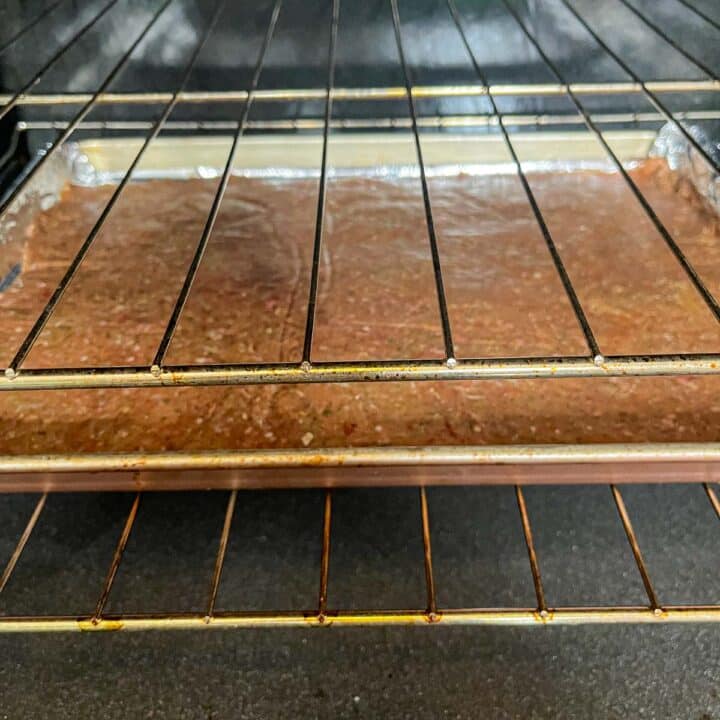
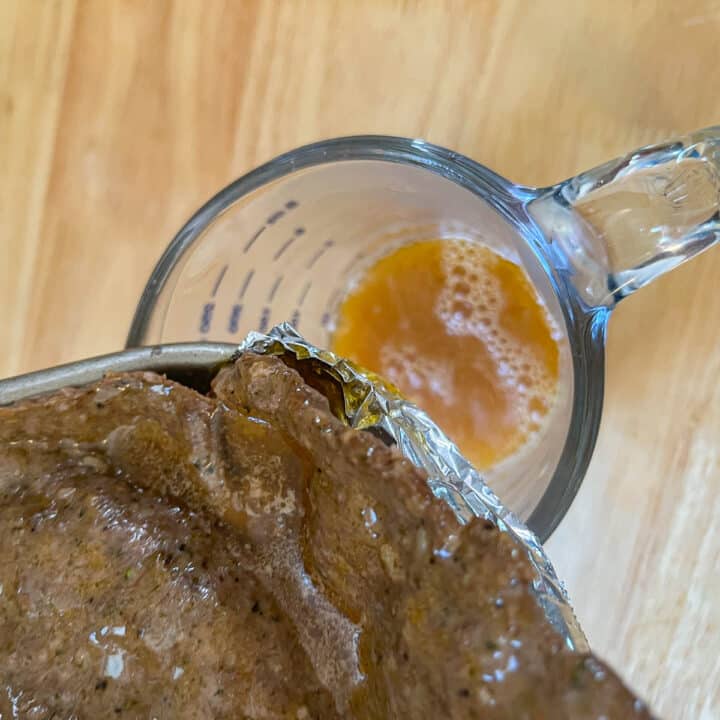
Step 5: Bake gyro meat in a preheated 400℉ oven for 4 minutes. Remove the pan from the oven, then tilt it over a cup or small bowl (hold the meat in place with a spatula) and drain the excess fat. Bake for an additional 4 minutes.

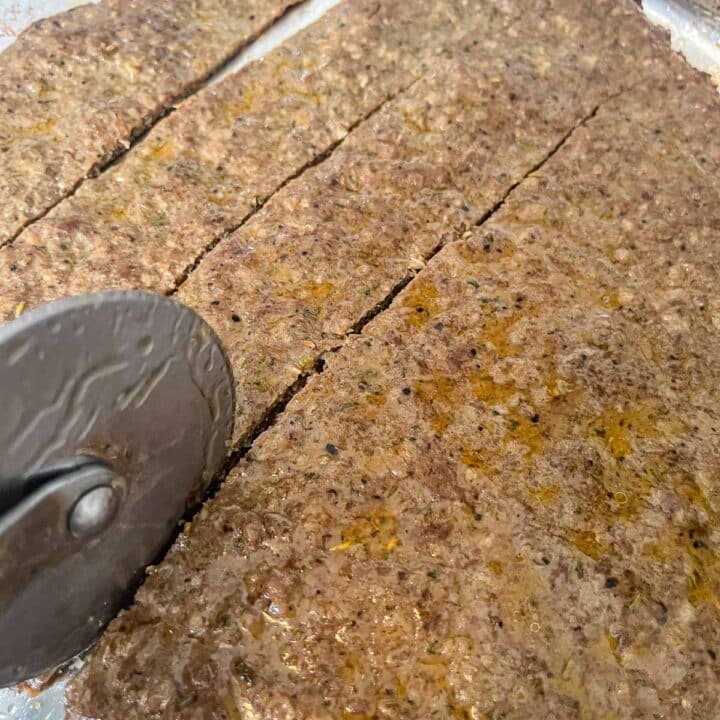
Step 6: Use a pizza wheel or a sharp knife to slice the meat into serving-sized strips. You can also toast the gyros pieces in a hot cast-iron skillet to get darker, crisper sections similar to rotisserie gyros.
🍽 Serving Suggestions
Serve with Greek pasta salad and French fries, Middle Eastern bread, or gyro pita sandwiches! You can even take it a step further by making your own Greek pita bread or this flatbread with this easy butter naan recipe!
📋 Gyro Pita Sandwich Ingredients
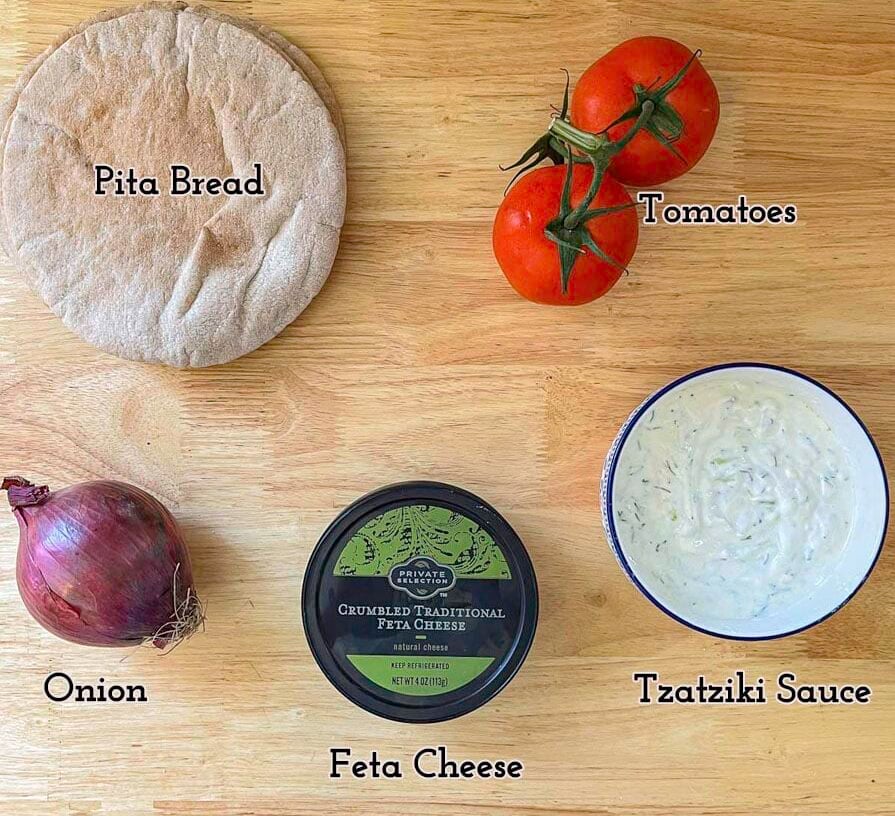
🥙 How to Make a Gyro Pita Sandwich
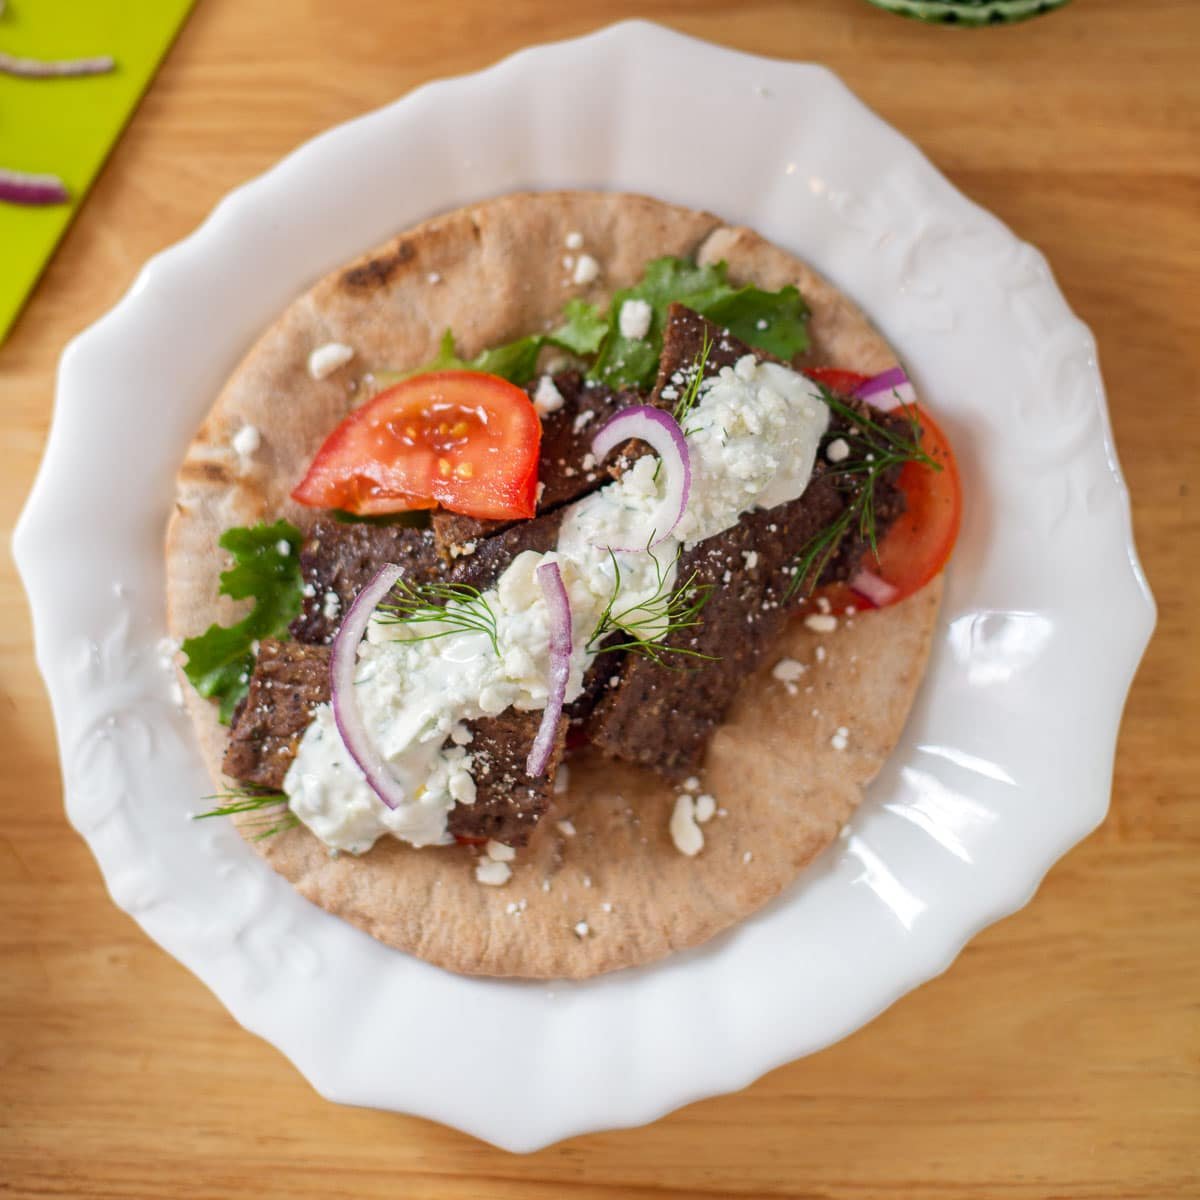
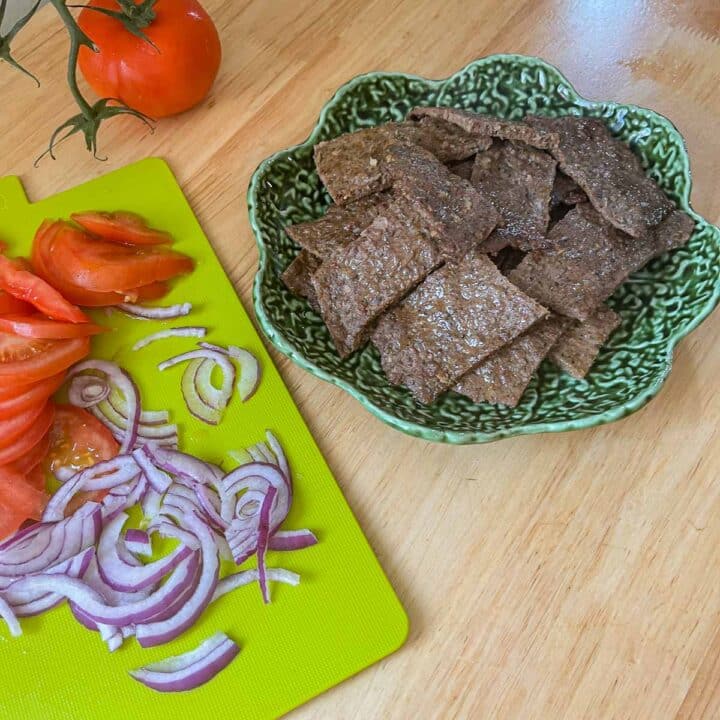
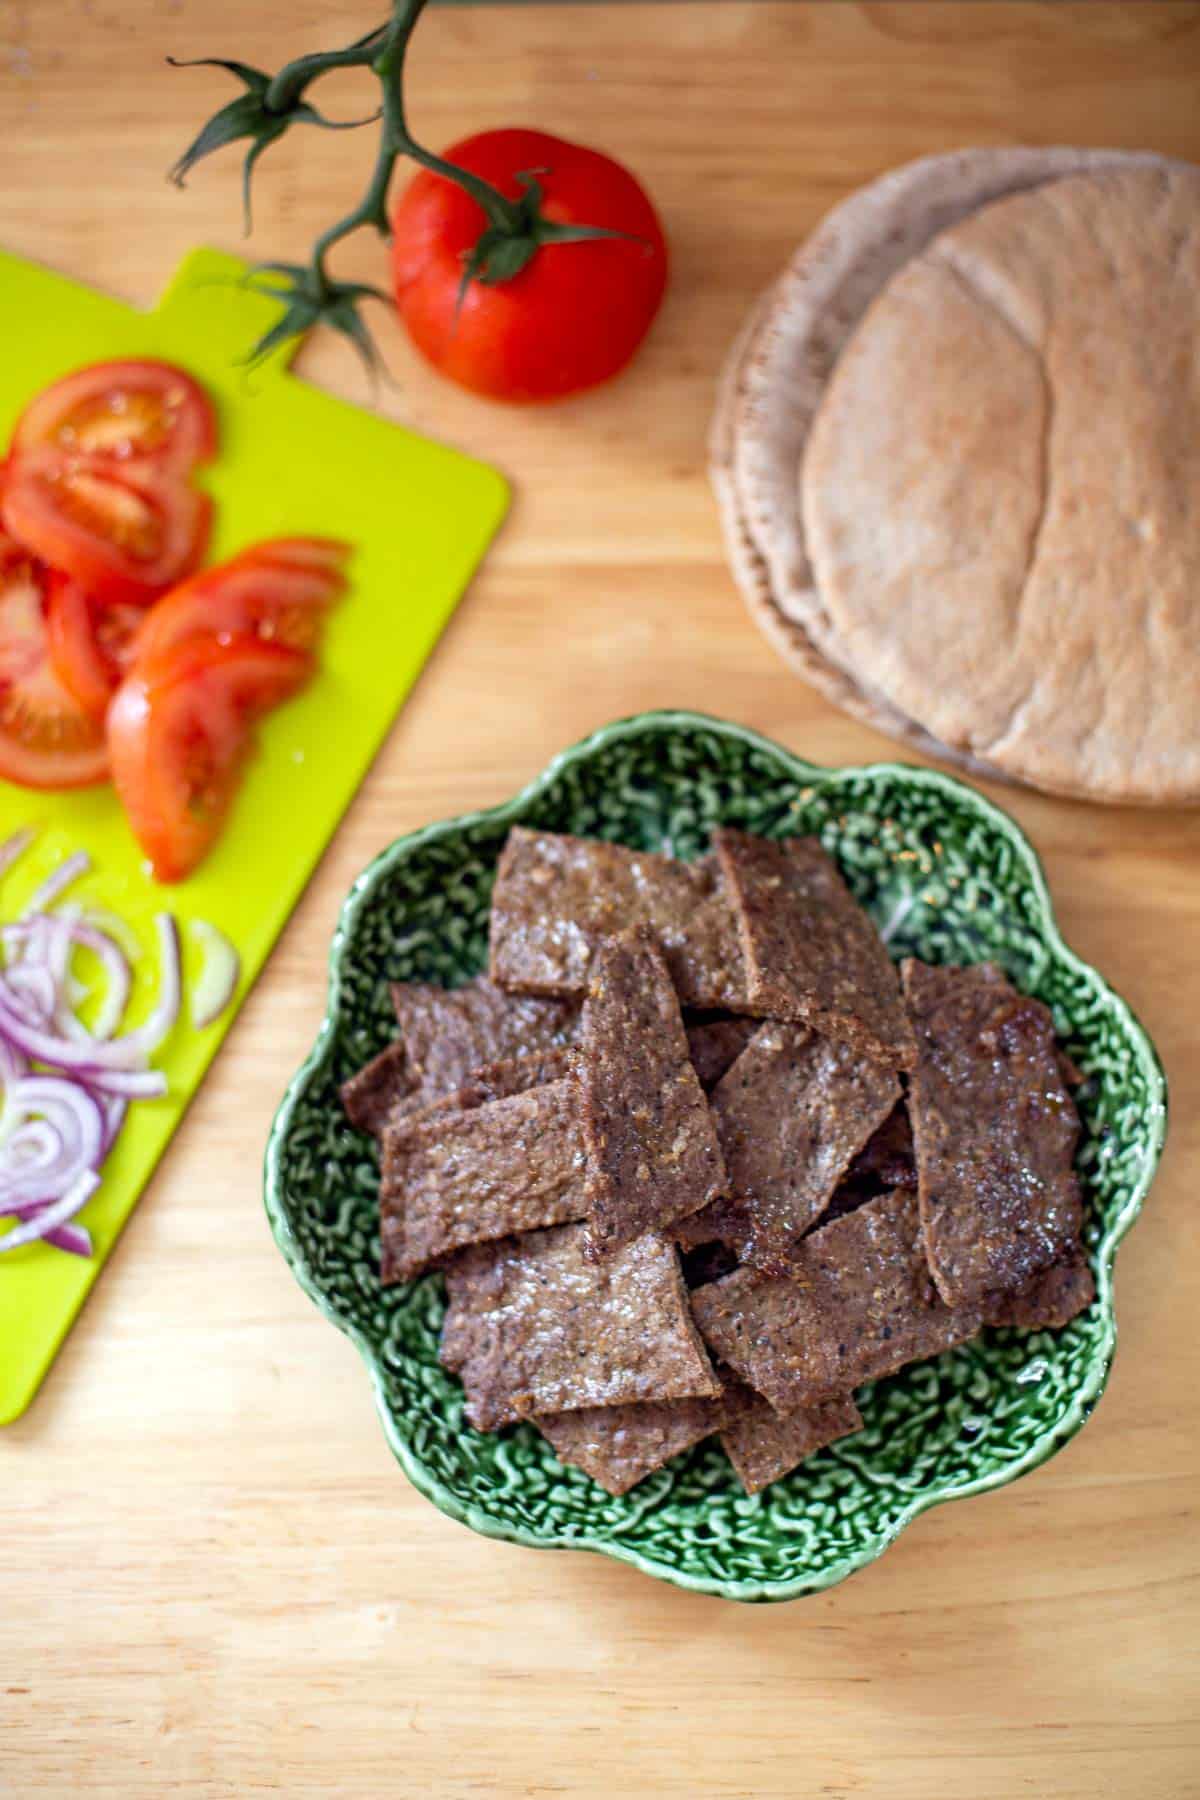
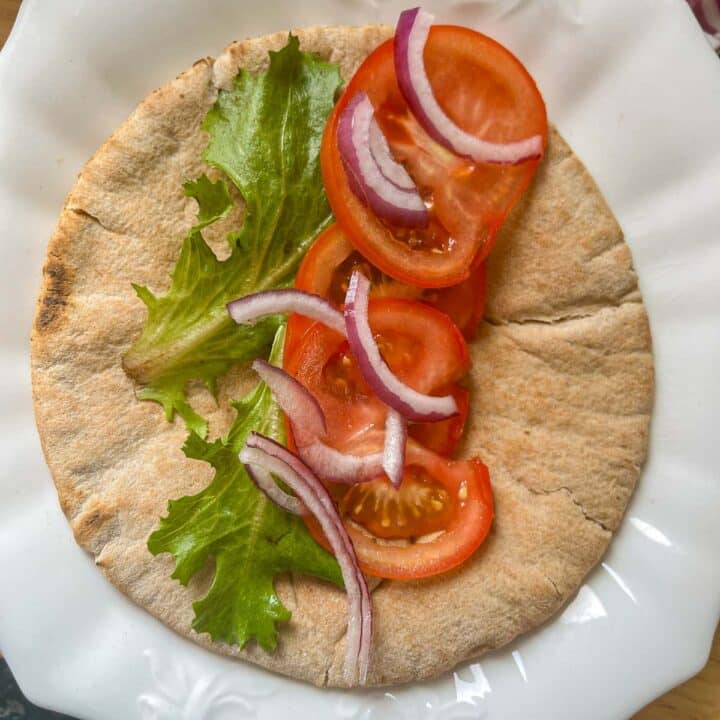
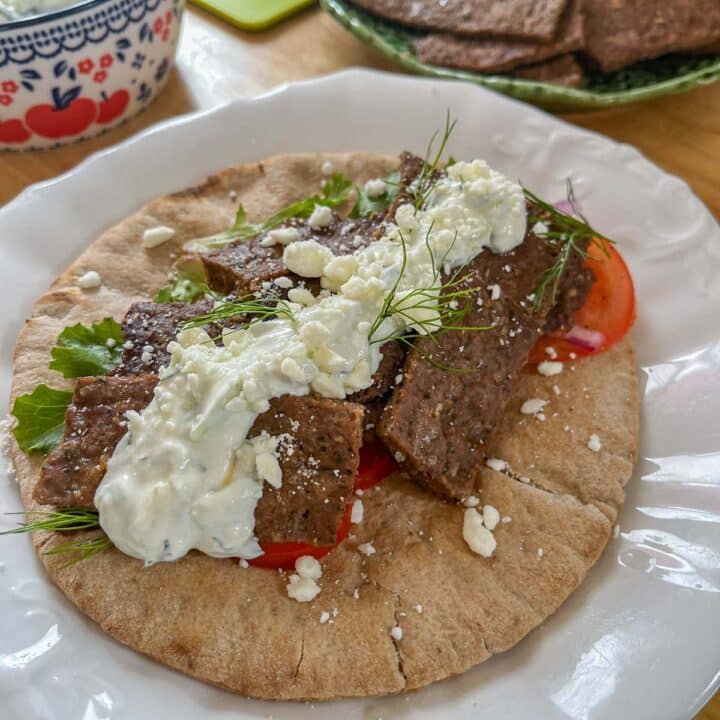
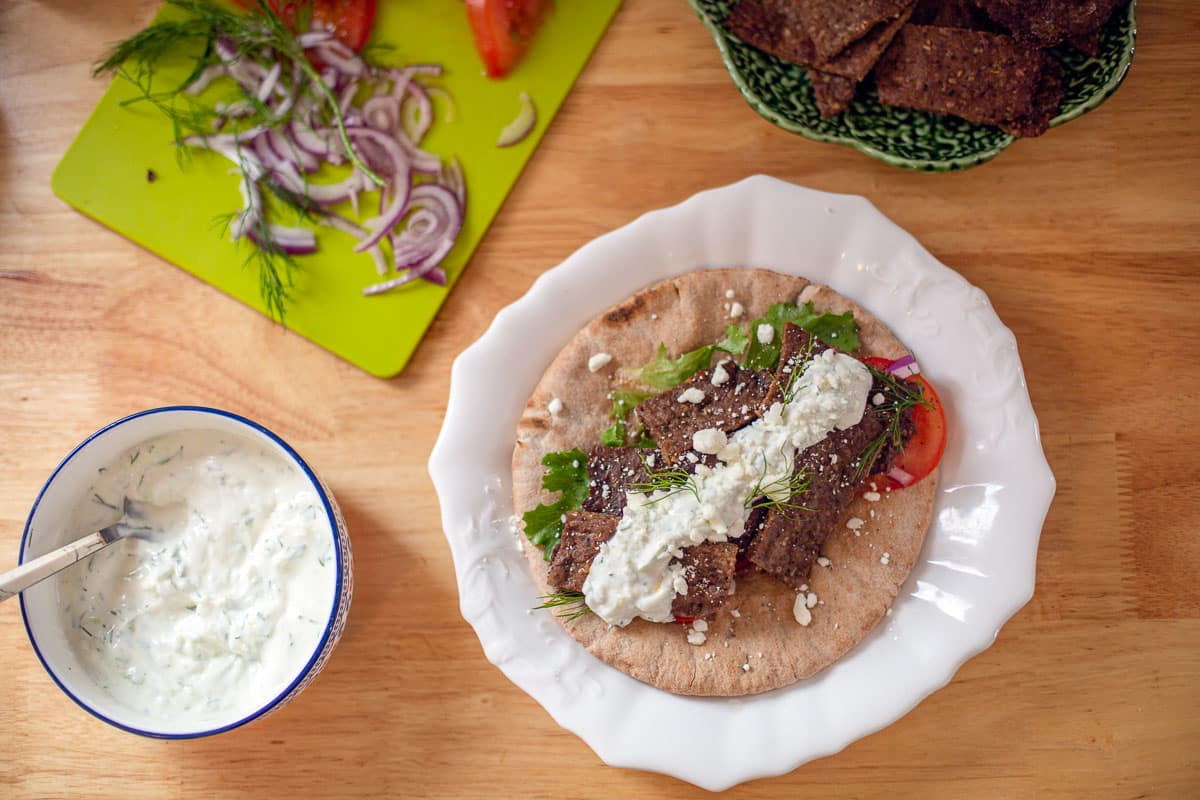
Warm pita bread or flatbread either in a hot pan or over a flame. Add lettuce, tomatoes, sliced onions, and gyro meat. Sprinkle with crumbled feta and a drizzle of tzatziki sauce. This yummy yogurt sauce can be substituted for the tzatziki! Garnish with fresh dill (optional) and serve!
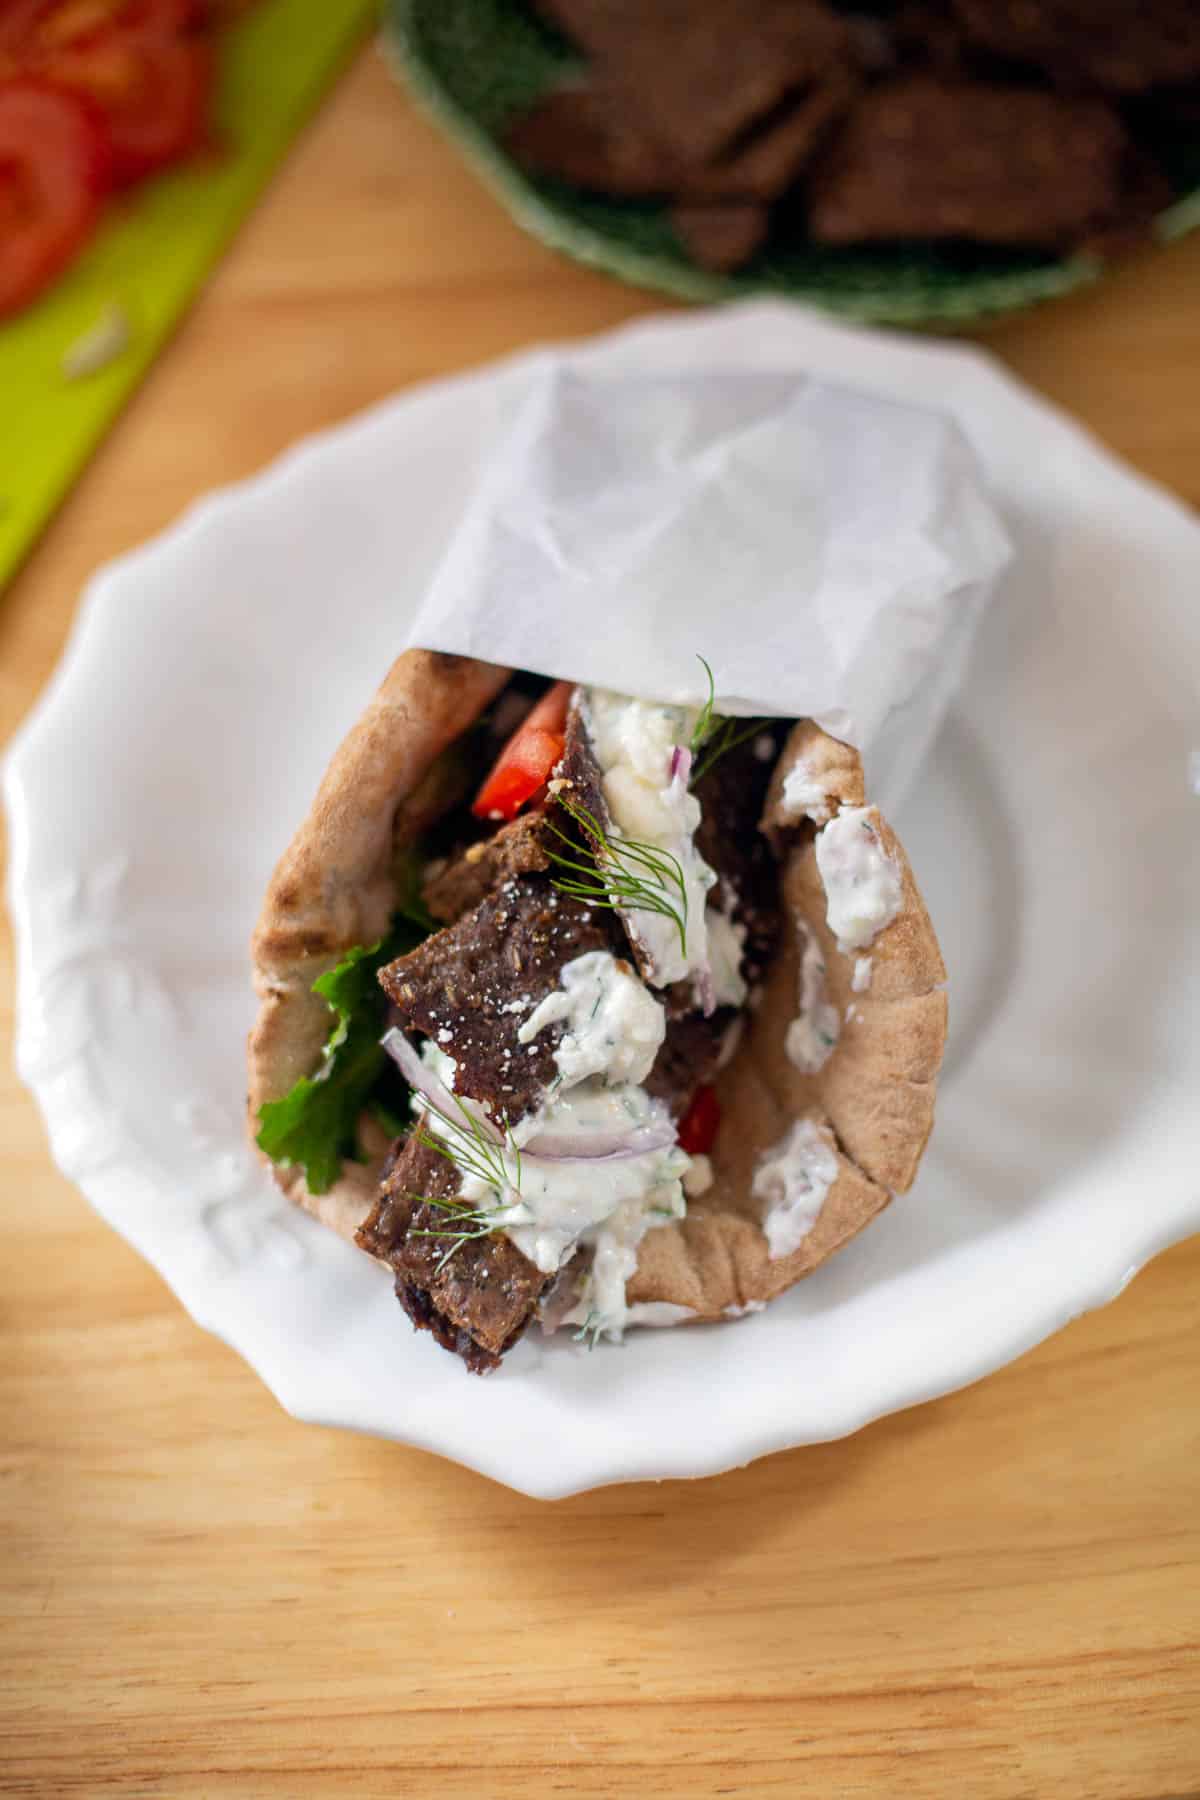
Pro Tip: Wrap half of the gyro pita with parchment paper or aluminum foil to keep the ingredients from spilling out and to make it easier to eat.
🤷🏻♀️ Recipe FAQs
Gyro meat can be prepared with beef, lamb, or a combination of the two. It is also prepared with pork and chicken. The meat is ground into a paste, along with onion, garlic, herbs, and a delicious gyro seasoning blend.
Gyro is a Greek dish prepared with ground meat (pork, lamb, chicken, or beef), herbs, and spices. The meat mixture is ground into a fine paste and roasted on a rotating spit. The gyro meat is then shaved off and served in a pita or flatbread with tzatziki sauce, feta, onions, sliced tomatoes, and lettuce.
Gyro meat is served in either Greek flatbread or pita bread. Both are round, flat breads, usually about 5 to 6 inches in diameter. While pita bread has a pocket that can be filled with gyro meat, flatbread is usually folded over the gyro sandwich ingredients.
👩🏼🍳 Pro Tips
- If you choose to make chicken gyros, use ground chicken thighs instead of breasts, since gyro meat needs to have plenty of fat to keep it from drying out as it cooks. Check out my chicken gyro recipe for more details!
- Store gyro meat leftovers in an airtight container in the refrigerator for up to 5 days.
- Gyro meat can also be frozen in freezer bags for up to 3 months or longer!
- Gyro meat is low-carb and keto-friendly. Substitute a healthy salad for bread.
🧆 More Greek Recipes

Did you make this recipe?
📖 Recipe
Would you like to save this recipe?
Greek Gyro Pita
Ingredients
Equipment
Method
- Chop onion and add to a food processor. Process until the onions are very fine. Add onions to a fine mesh sieve, dishcloth, or double-layered paper towel. Squeeze out as much onion juice as possible then add onion back into the food processor.
- Add ground beef and lamb to the food processor along with crushed garlic and gyro seasoning. Pulse the food processor until the meat is pulverized and has a paste-like consistency. You should not be able to see onion pieces.
- Place a sheet of parchment paper (the same size as your sheet pan) on your work surface. Add half of the meat mixture onto the center of the parchment paper. Cover with the same size sheet of saran wrap. Use a rolling pin to roll out the gyros mixture into a thin even layer.
- Gently peel the plastic wrap away from you and discard. Flip onto the sheet pan, with the parchment paper facing up. Now, carefully peel the parchment paper off and discard.
- Bake gyro meat in a preheated 400℉ oven for 4 minutes. Remove the pan from the oven then tilt it over a cup or small bowl (hold the meat in place with a spatula) and drain the excess fat. Bake for an additional 4 minutes.
- Use a pizza wheel or a sharp knife to slice the meat into serving-sized strips. You can also toast the gyros pieces in a hot cast iron skillet to get darker, crisper sections similar to rotisserie gyros.
- Serve with Greek pasta salad and French fries, or make gyro pita sandwiches!
- Warm pita bread or flatbread either in a hot pan or over a flame. Add lettuce, tomatoes, sliced onions, and gyro meat. Sprinkle with crumbled feta, and a drizzle of tzatziki sauce. This yummy yogurt sauce can be substituted for the tzatziki! Garnish with fresh dill (optional) and serve!
Nutrition
Video
Notes
- It may be easier to grind the meat in a few batches so that it doesn't tax the food processor's motor. Stop and scrape the sides of the bowl as needed. If you don't have a food processor, you can run the meat through a meat grinder a few times.
- As you flatten out the meat mixture, you may occasionally need to lift the plastic and redistribute some of the meat to fill in the gaps.
- An even easier option is to only remove the Saran Wrap, then place the gyros parchment paper down onto the pan and bake!
- Wrap half of the gyro pita with parchment paper or aluminum foil to keep the ingredients from spilling out and to make it easier to eat.
- If you choose to make chicken gyros, use ground chicken thighs instead of breasts, since gyro meat needs to have plenty of fat to keep it from drying out as it cooks. See my chicken gyro recipe for more details!
- Store gyro meat leftovers in an airtight container in the refrigerator up to 5 days.
- Gyro meat can also be frozen in freezer bags for up to 3 months or longer!
- Gyro meat is low-carb and keto-friendly. Substitute a healthy salad for bread.
Diane says
I made this with turkey (because it's what I had) and let it sit for a couple hours to flavor-meld and cooked it as crumbles which was low labor and easy. it was still incredibly delicious and will make really easy healthy lunches all week. the flavor is perfect and I'm so excited to have found this recipe!!
Hilda Sterner says
Thanks, Diane, I'm so glad to hear that it even worked with turkey! I was giving a friend a hard time recently who used a mixture of beef and ITALIAN sausage and still loved it. I insisted that you couldn't mix Italian flavors with Greek flavors, but he said it was excellent, so who knows? 🤣 Enjoy!
Nicole DeMink says
By far the best Gyro meat I've ever tasted! I love how easy it is to throw together and doesn't take long to cook!
Hilda Sterner says
Wow, that's quite a compliment, thanks Nicole!
Kelly Methey says
This gyro meat recipe is excellent! I had no idea making gyro meat was so easy and quick. It’s very flavorful with your spice mix.
It is really, really good on the Greek pizza recipe you have. I love a lot of flavor and this has it.
Hilda Sterner says
Thanks, Kelly! It is pretty easy to make and the recipe makes enough for 6 to 8 servings, so you can also freeze some for another time!
Kathy Fisher says
We loved the beef and lamb combination for our Gyros. Preparing the meat ahead of time and keeping it in the freezer makes it so easy to make Gyros. The spices were just right and the end result was yummy. Great recipe.
Hilda Sterner says
Thank you, Kathy! I appreciate you taking the time to review the recipe!
Linette says
Hello, how much gyro seasoning is neeed for your recipe? Is it the entire batch of the homemae gyro seasoning? I cannot season to taste because the meat is raw. Thank you!
Hilda Sterner says
Hi Linette, you probable missed it but under ingredients it states one batch of my gyro seasoning. So you'll make the seasoning and add the entire thing. Thanks for the question & good luck!
Linette C Laiminger says
Thank you! I pre-made a double batch of the seasoning (I think it was at least a double batch if not triple - shared with friend) , so I am unsure how to measure the Gyro seasoning for this fresh bacth. Is there a way to update the ingredients list to include measurement? If I were to guess, perhaps 4 TABLEspoons per batch? Sorry to be a bug... 🙂
Hilda Sterner says
The measurements are in the original link that you used to make the spices. Updating the gyro pita recipe would only duplicate that information. I'm not sure how that would help. You will probably need to make a single batch of the seasoning.
Tom Skiles says
Great details of spice ingredients AND process of why this works😏👍. Thank you. Ver informative!!
T
Hilda Sterner says
Thanks, Tom! I appreciate it!
George Mirza says
Great flavor and texture for the meat, easy to make and delicious!
Hilda Sterner says
Thanks, George! I'm glad you enjoyed it, I hope you make it at home!