Homemade Italian Potato pasta, or gnocchi, is so much better than store-bought gnocchi and can easily be prepared at home. Gnocchi can be boiled or fried in a matter of minutes and served with spaghetti sauce, pesto, or your favorite sauce!
Would you like to save this recipe?
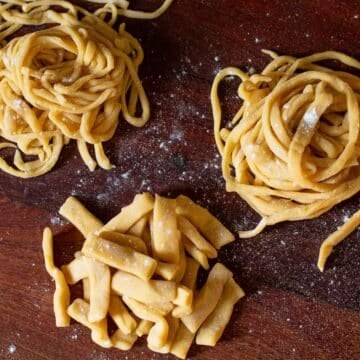
Have you ever had potato pasta aka "Gnocchi"? Better yet, have you tried making it from scratch?" Pronounced "noh-kee," this Italian pasta is made with a mixture of potatoes, flour, salt, and eggs.
I prefer gnocchi fried in butter until it's crispy on the outside and tender in the middle, who needs sauce? A little sprinkle of parmesan and you're golden!
For those who are all about the shortcuts, you can continue to buy packaged gnocchi, but for the rest of you who want to learn how to make it yourself, you're my people! Read on!
Jump to:
😍 Why You'll Love This Recipe
- It's fun to make Italian potato pasta! It reminds me of playing with play dough, especially when using a potato ricer, so get the kiddos involved!
- This recipe makes 4 servings. You can easily cook half and freeze the rest. Or make a double batch, so you can cook one batch and freeze the other batch for when you're in NEED of comfort food!
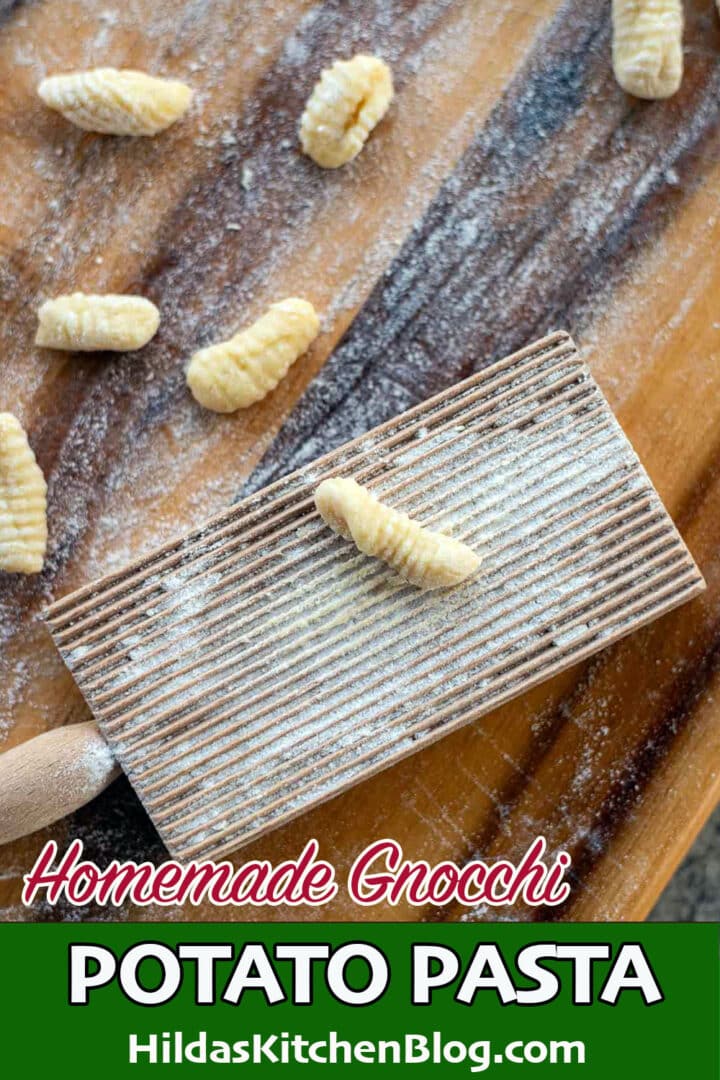
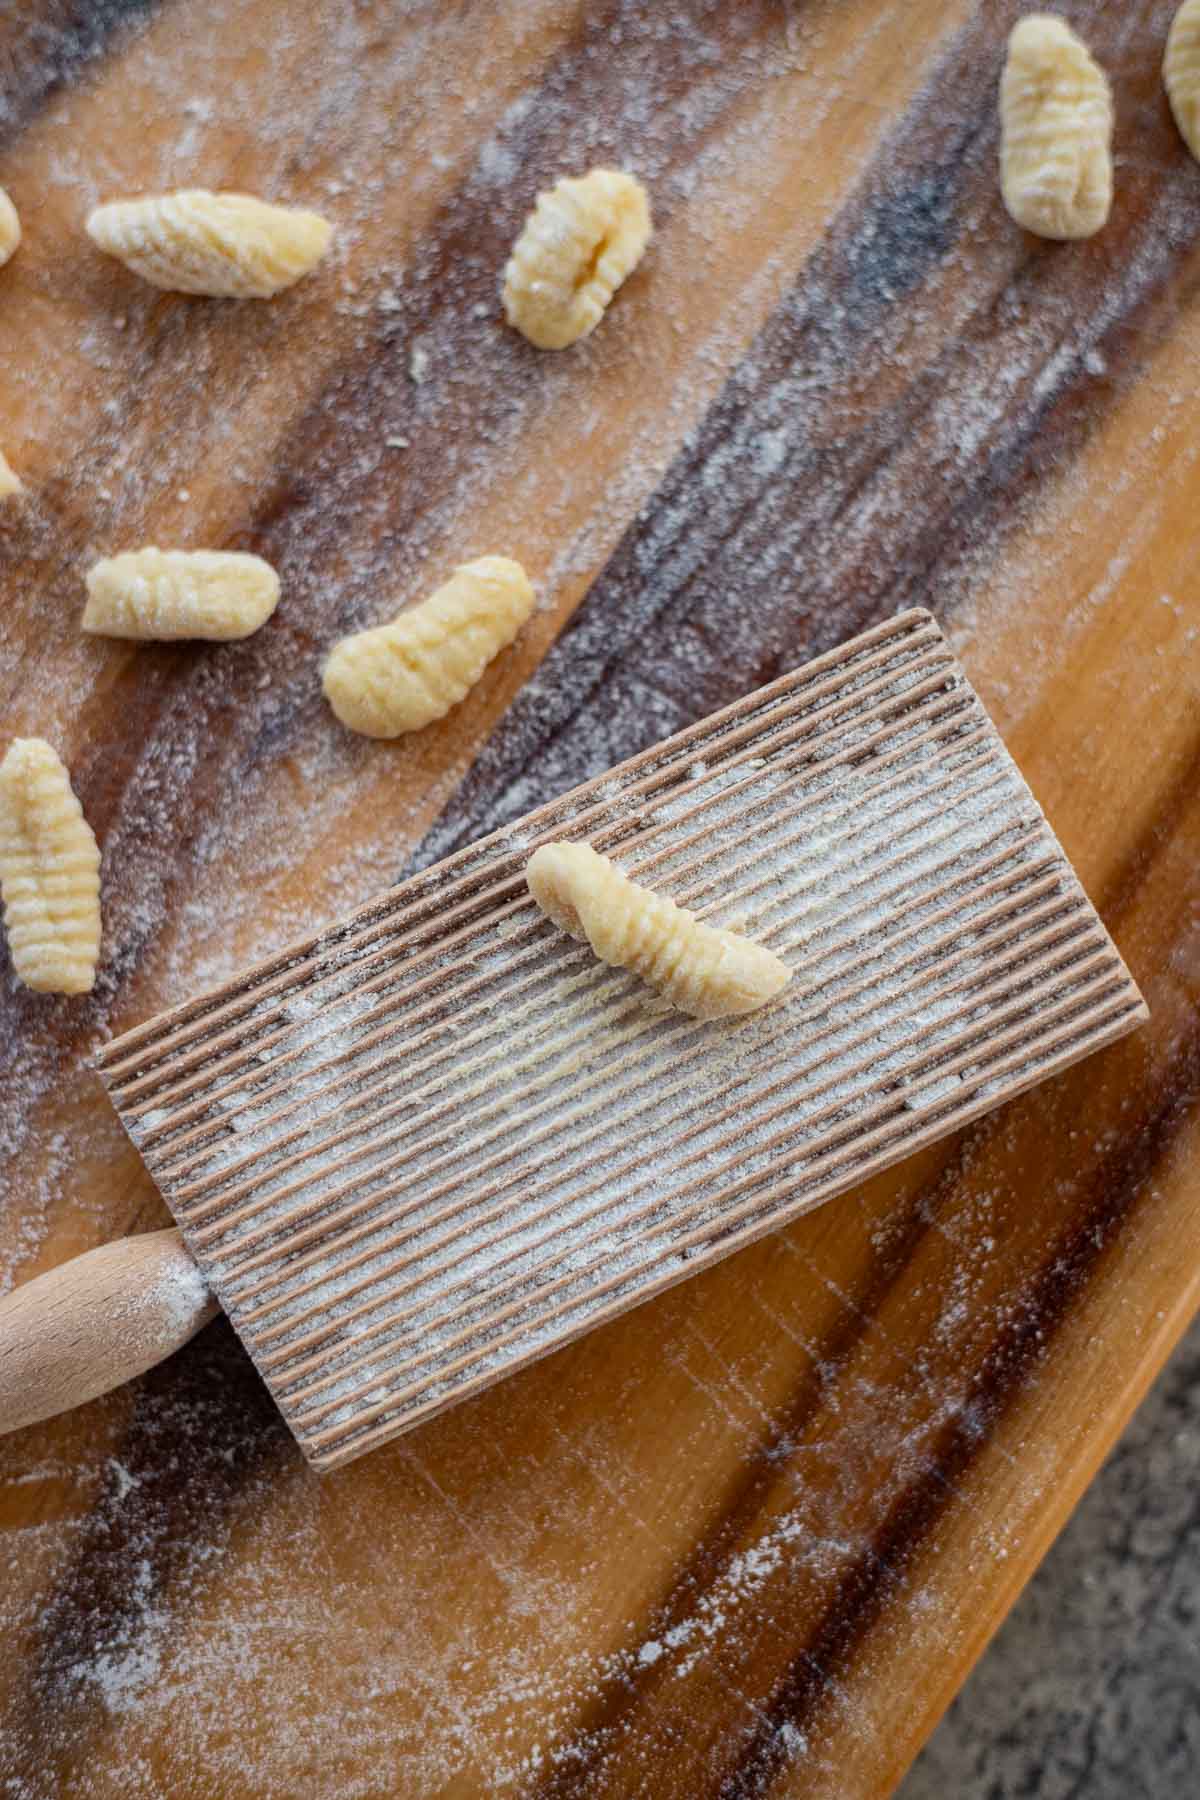
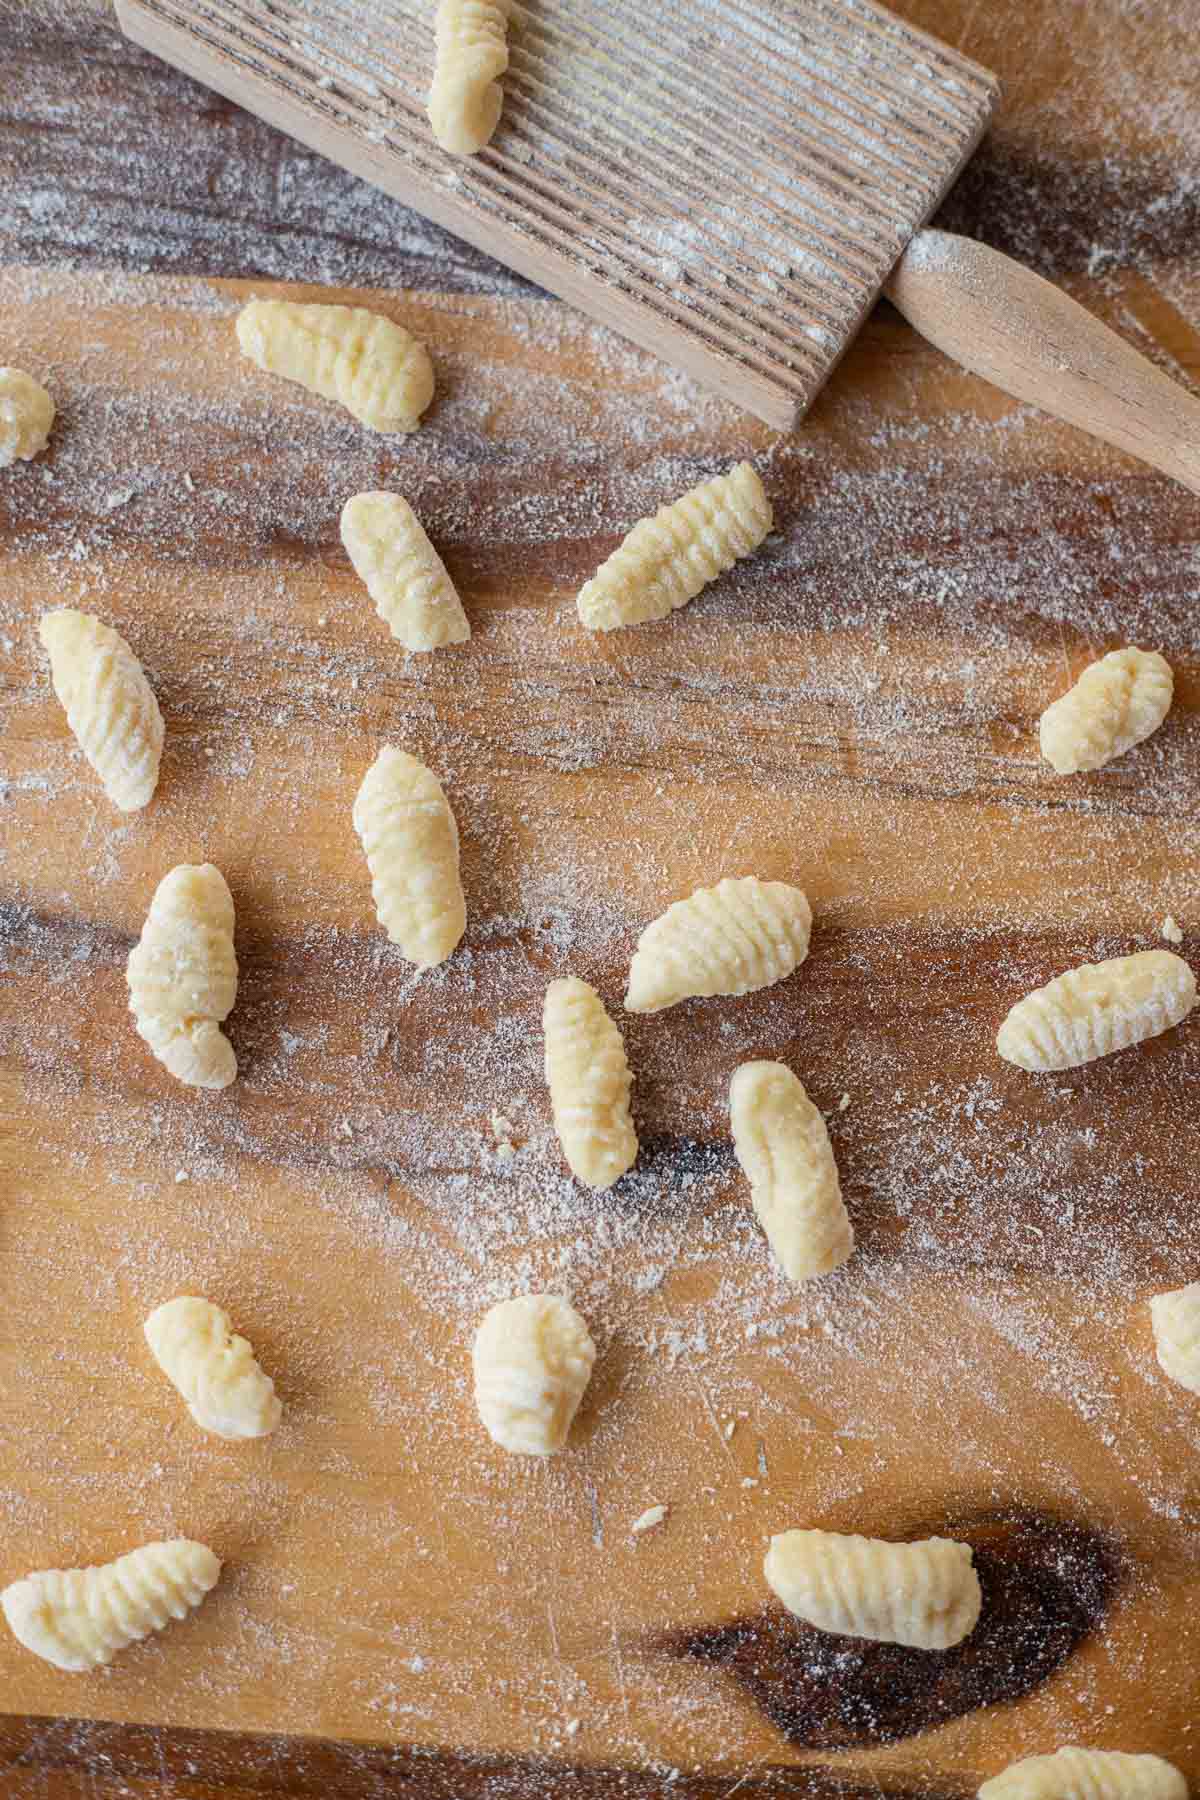
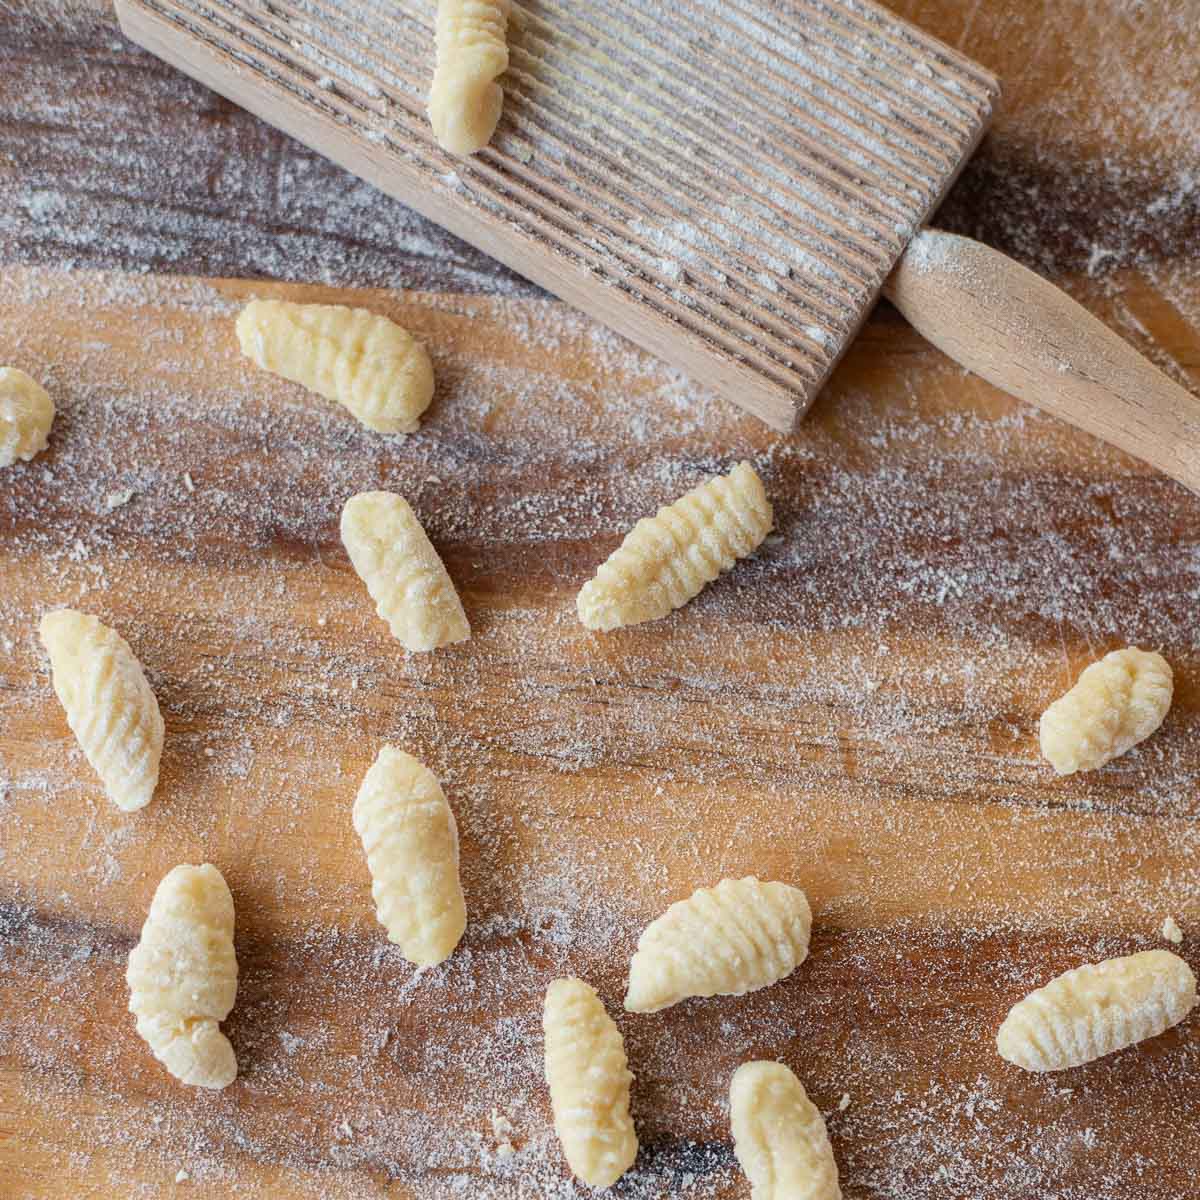
- Although you can use a gnocchi board to make gnocchi, you can also use a fork to make the ridges, or heck, cook them without the ridges!
🔖 Ingredients & Substitutions
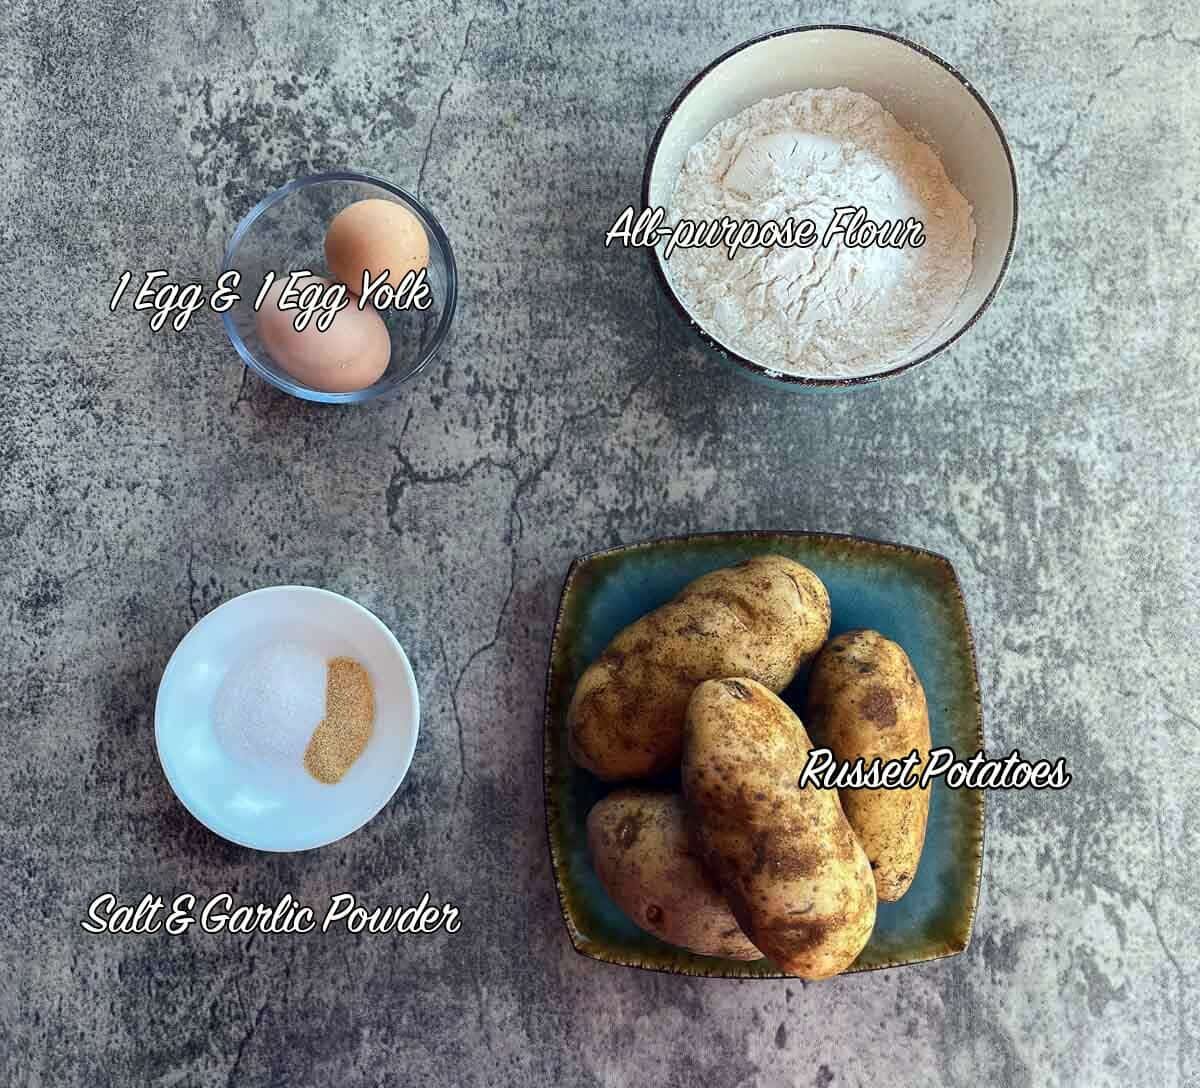
- Potatoes: You'll need 4 medium starchy potatoes such as Idaho potatoes or Russet potatoes.
- Flour: All-purpose flour.
- Eggs: You'll need 1 egg and an egg yolk to bind the rest of the ingredients.
- Salt: Sea salt or kosher salt to enhance the flavor.
- Garlic powder: Garlic powder is optional, but recommended!
- Optional: You can complement this dish with the addition of bacon, butter & sage, parmesan cheese, freshly ground black pepper, and fresh herbs (parsley or basil).
🔪 Helpful Tools
Although you don't have to have any special tools to make Italian potato pasta, there are a few tools that can make the process easier and more enjoyable!
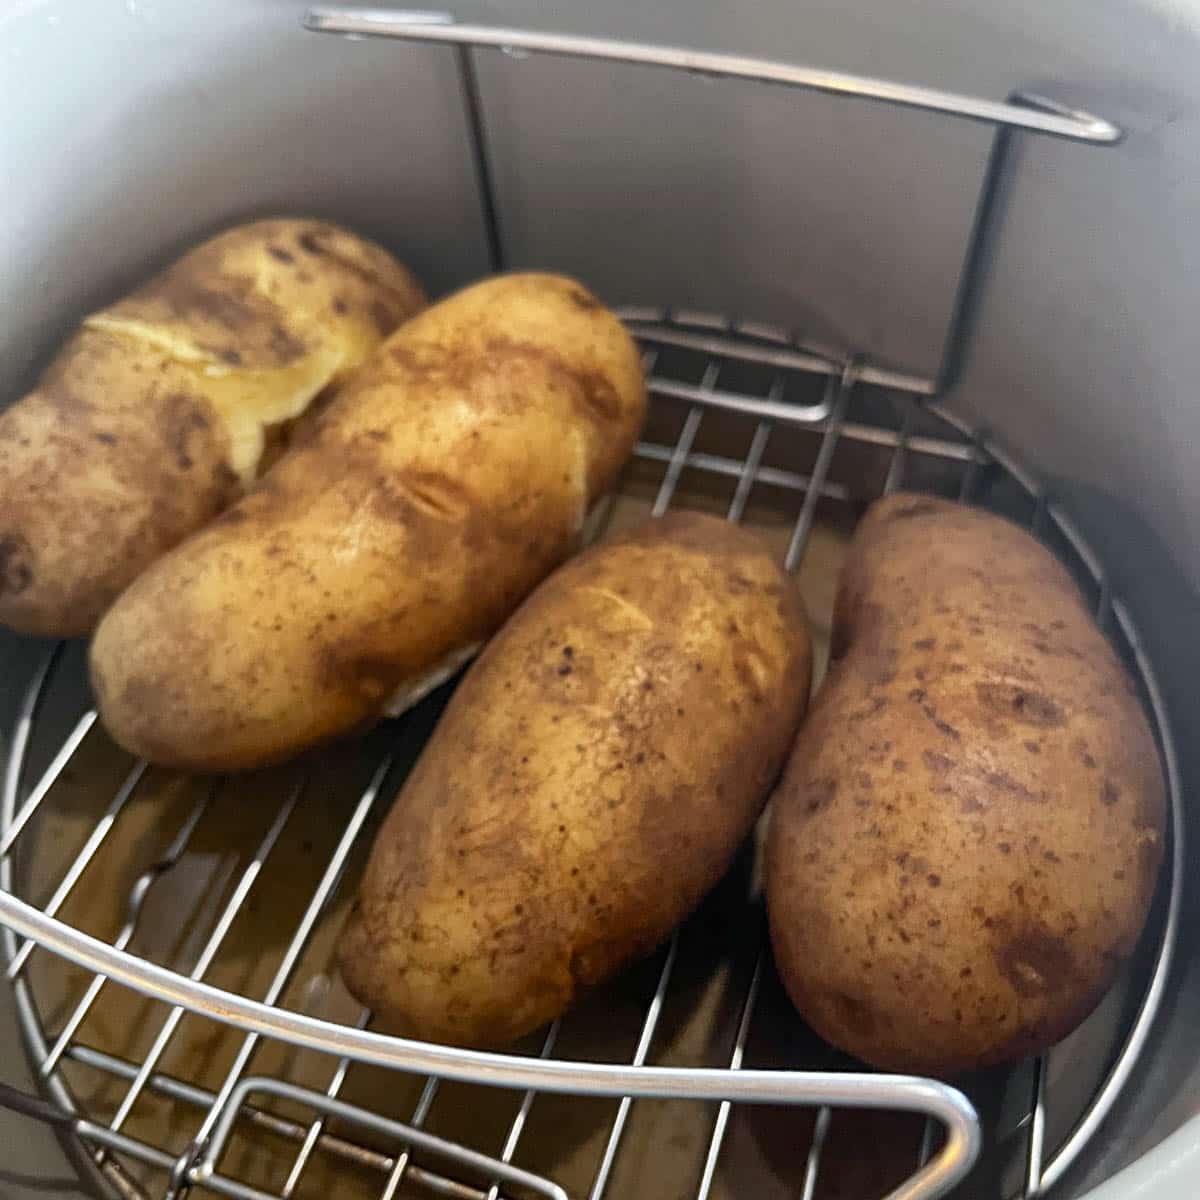
- Instant Pot for cooking potatoes
- potato ricer or a food mill
- gnocchi board
🥔 How to Make Potato Pasta
Step 1: Wash potatoes and bake in a 400°F oven for 45-60 minutes or until tender. If you have an Instant Pot, you can cook the potatoes in ½ the time using this recipe. Cool potatoes for 15 minutes.

Pro Tip: You can also microwave or steam the potatoes. Although you can technically boil them, the potatoes will absorb too much water, which isn't ideal.
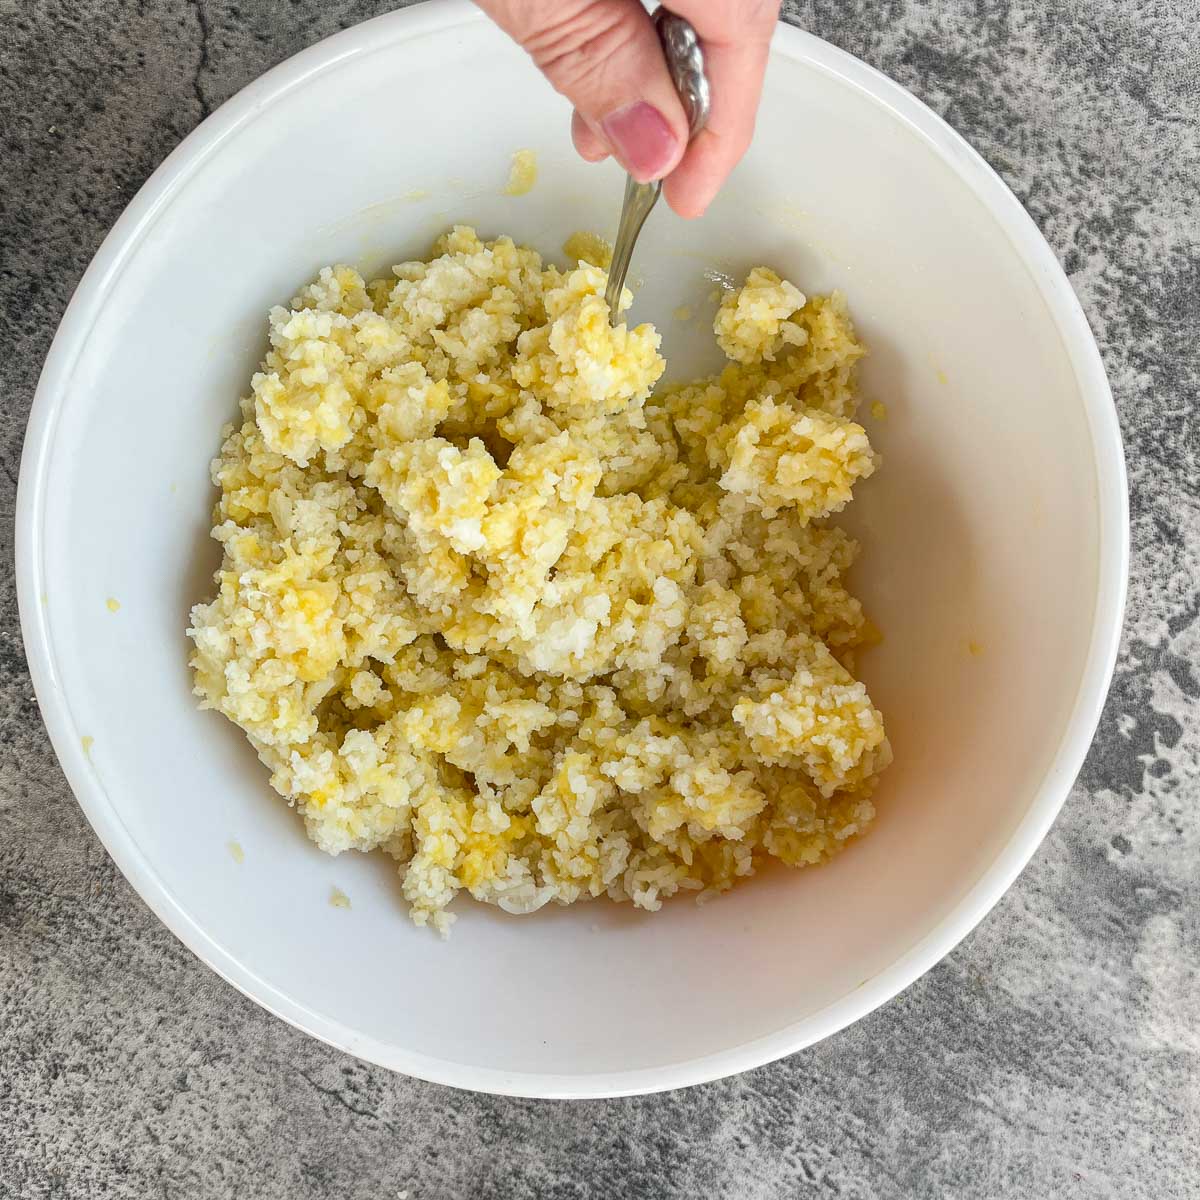
Step 2: Peel cooled potatoes and slice into 4 sections. Use a potato ricer to rice the potatoes into a large bowl. Cool for an additional 10 minutes, if needed.

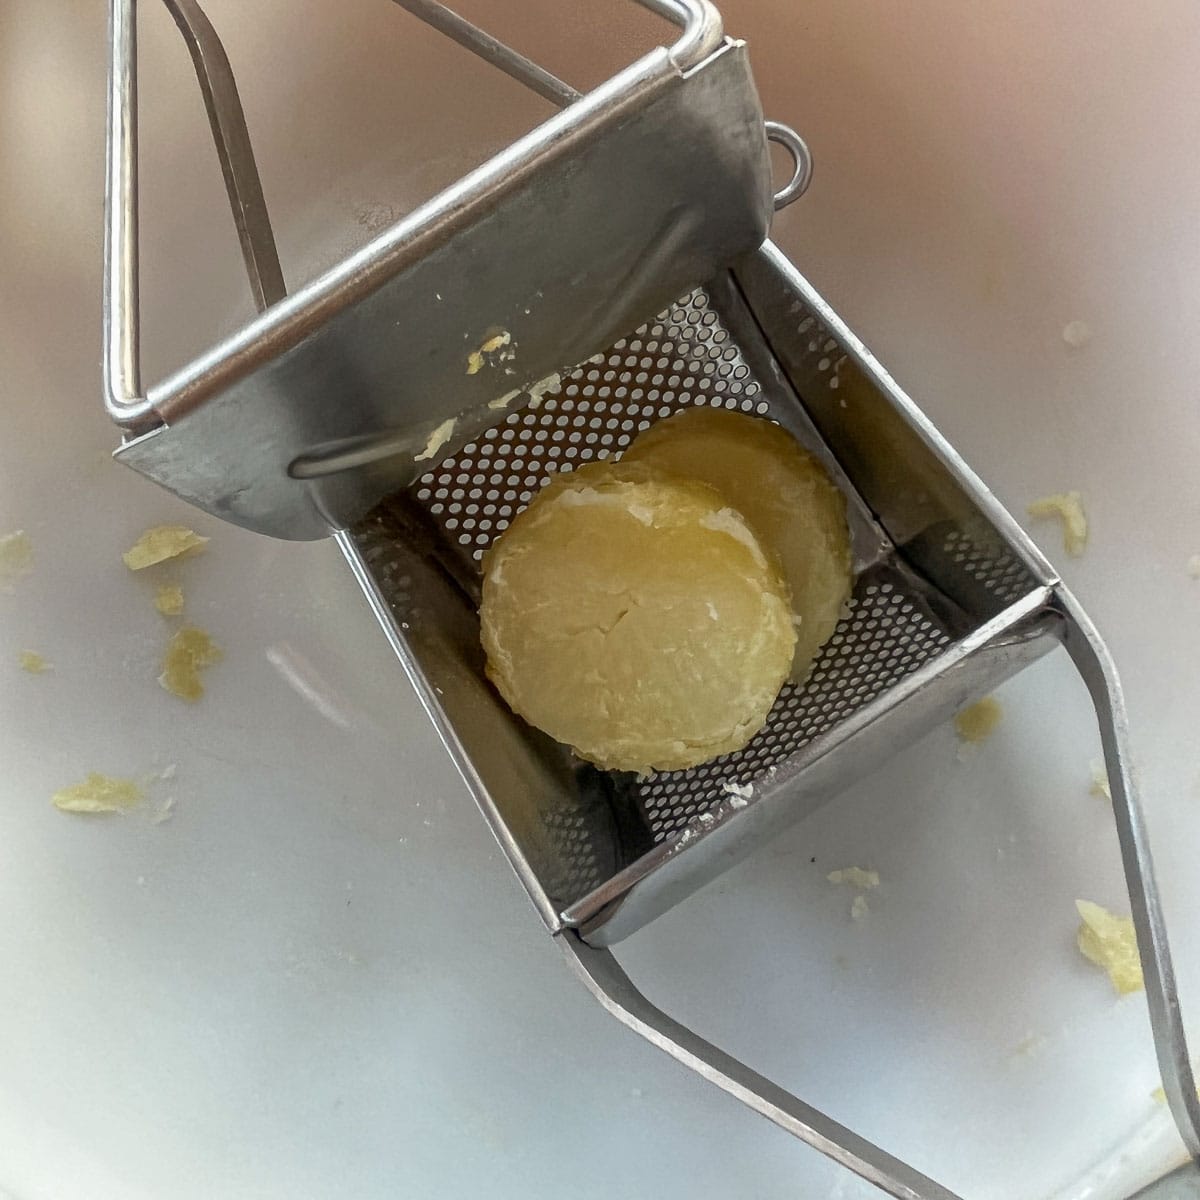
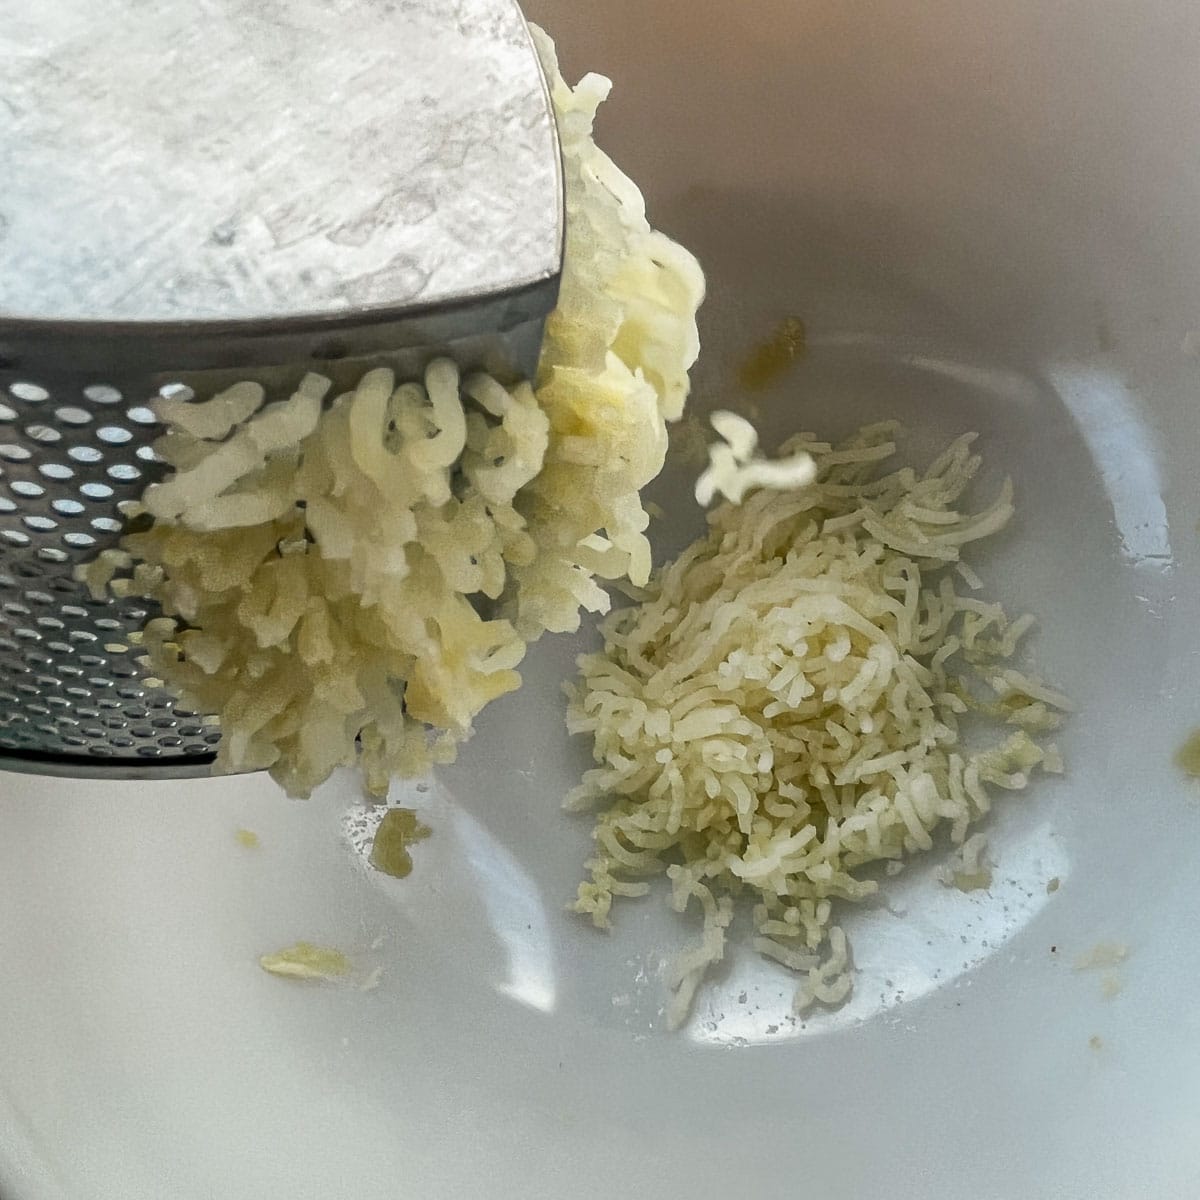
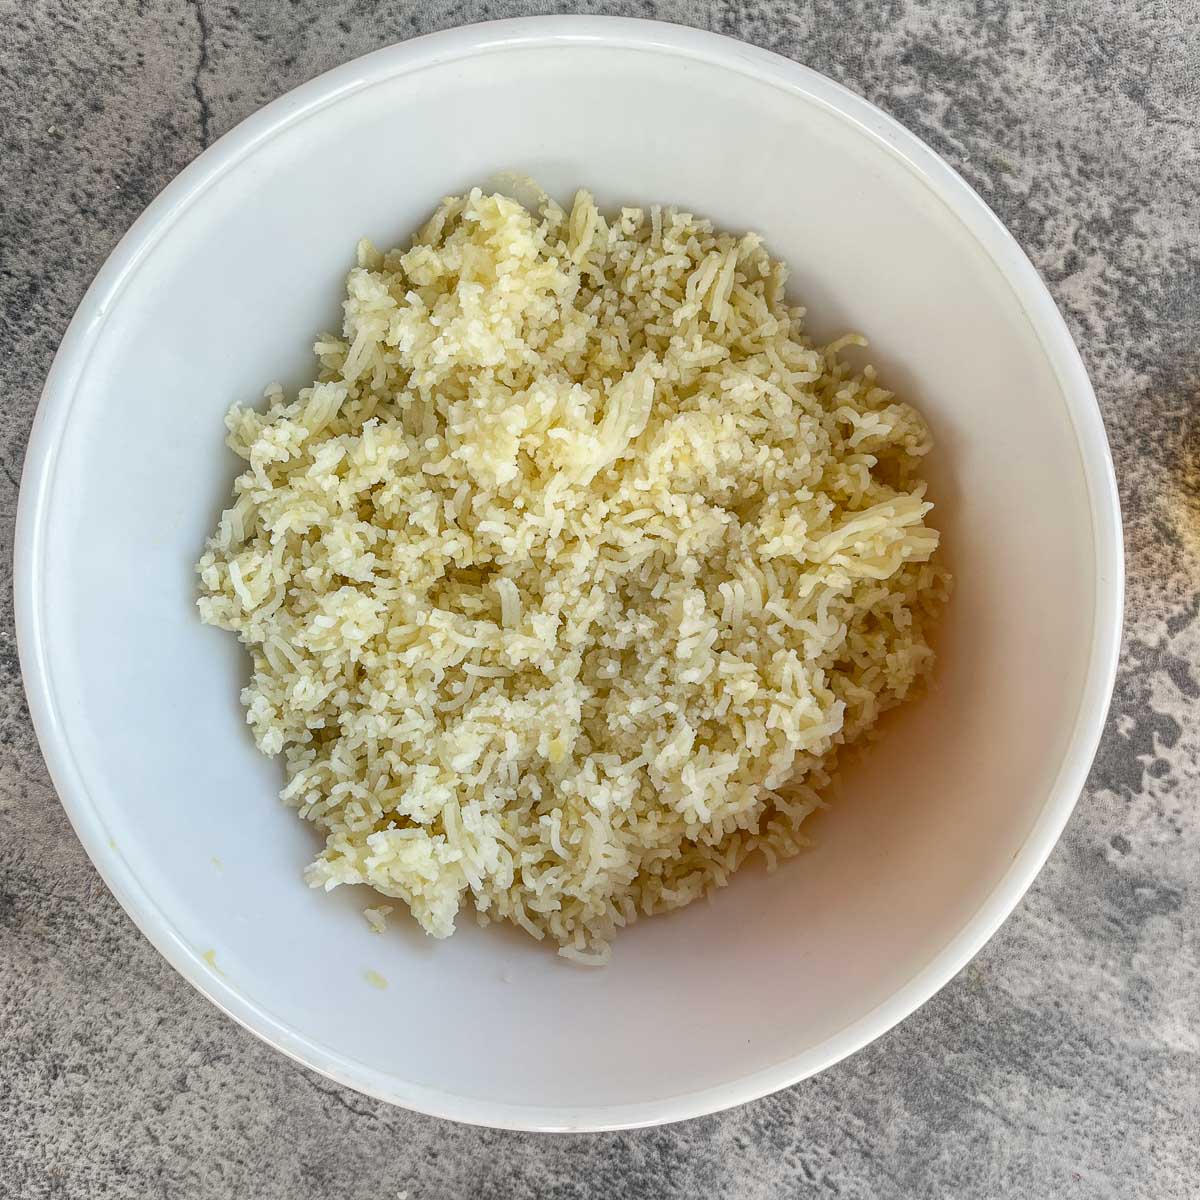
Pro Tip: If you don't have a ricer, you can push the potato flesh through a fine mesh sieve. You basically want the mashed potatoes lump-free.
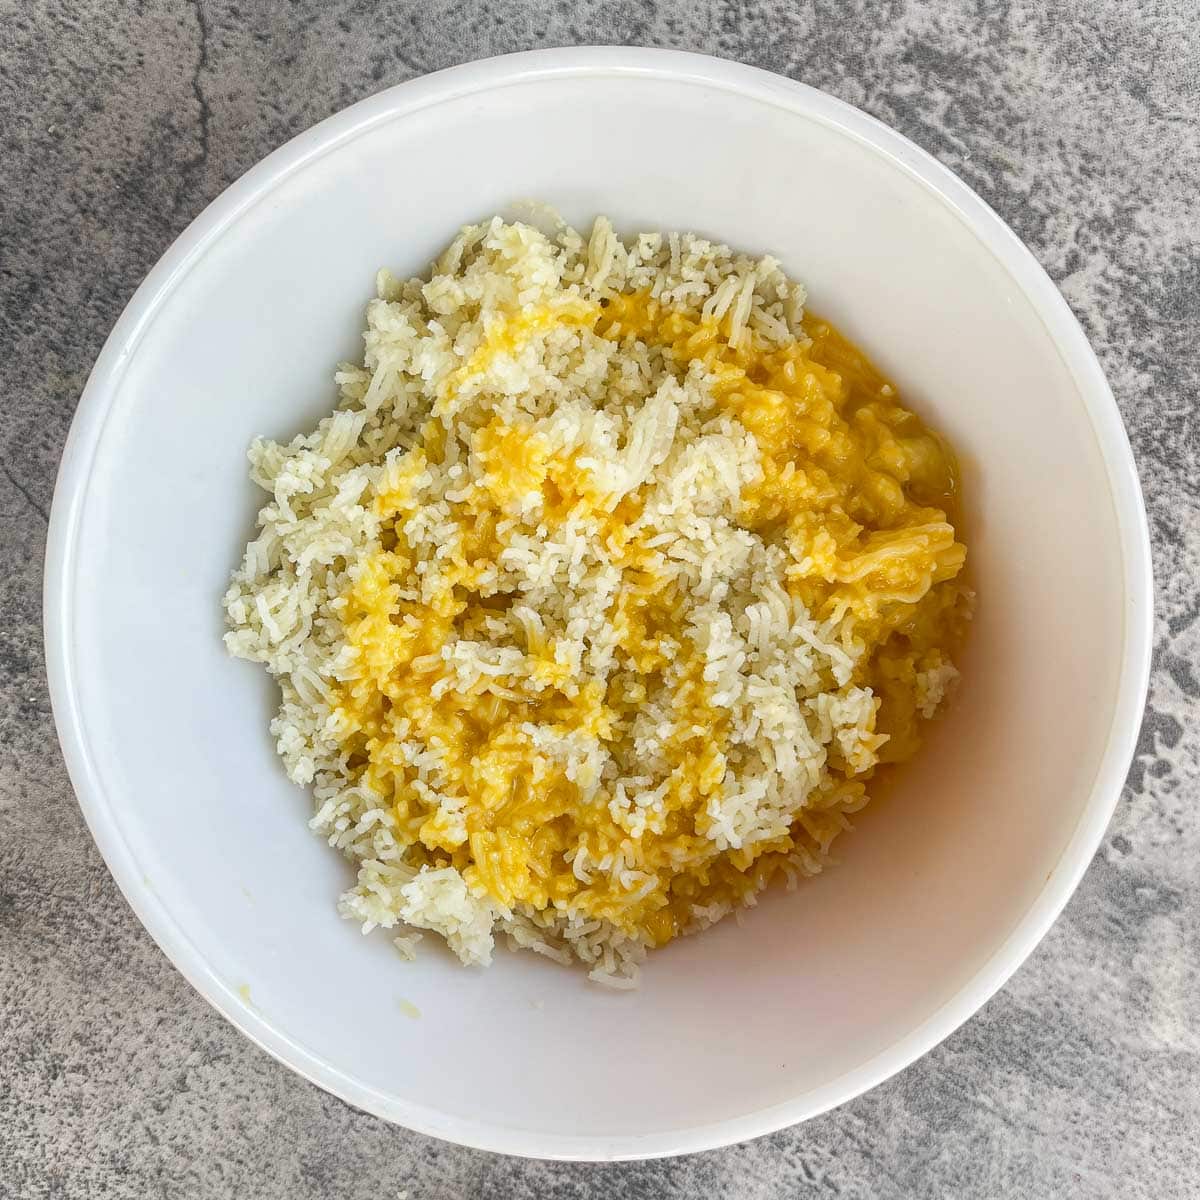
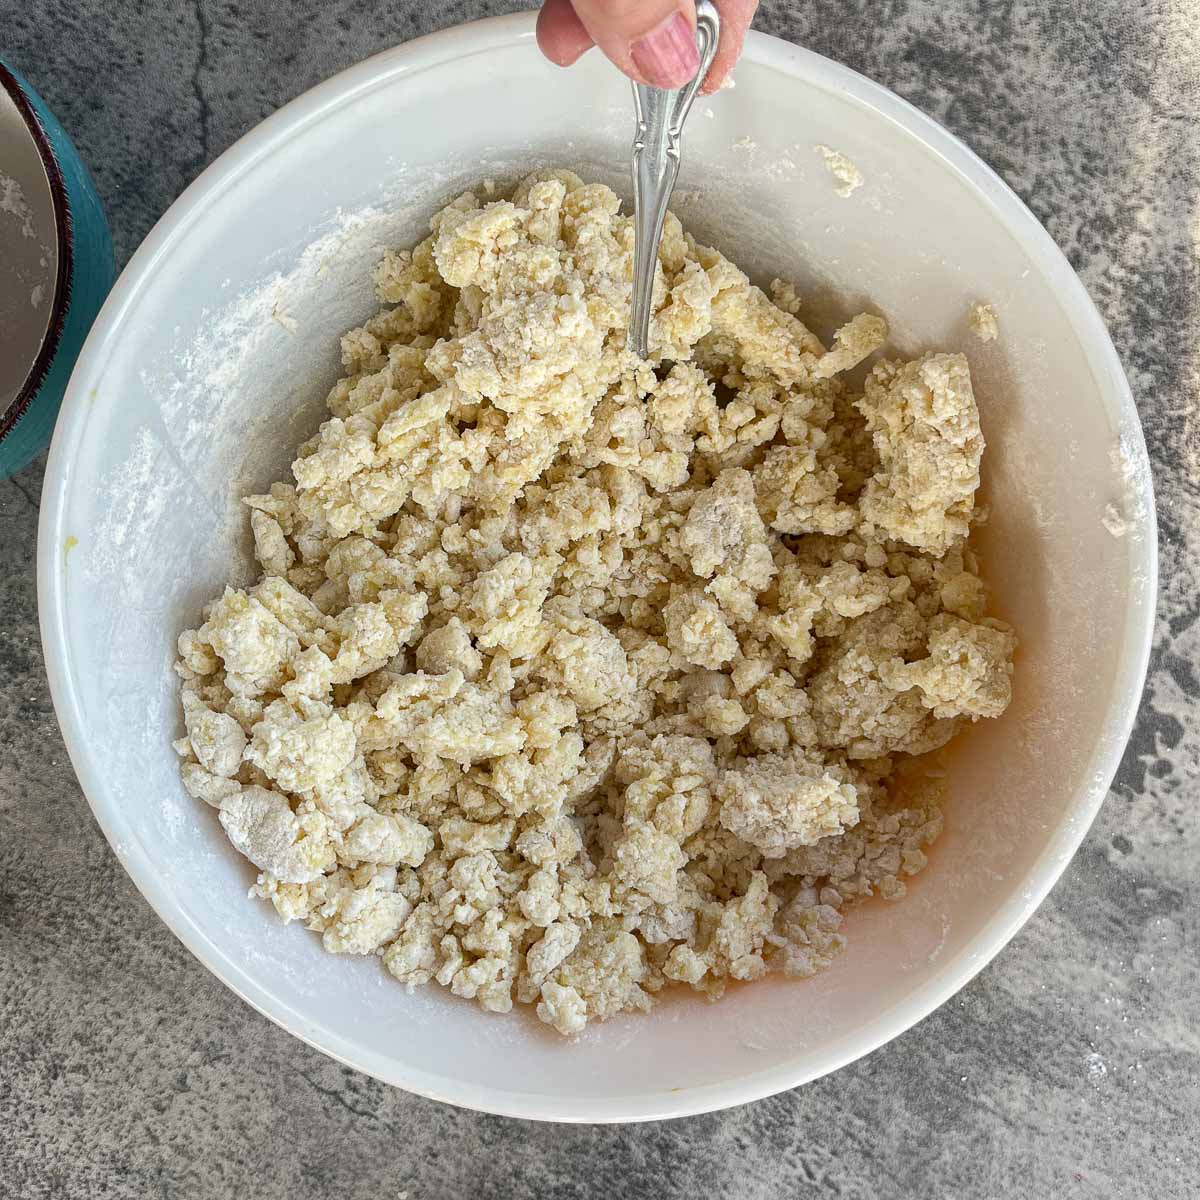
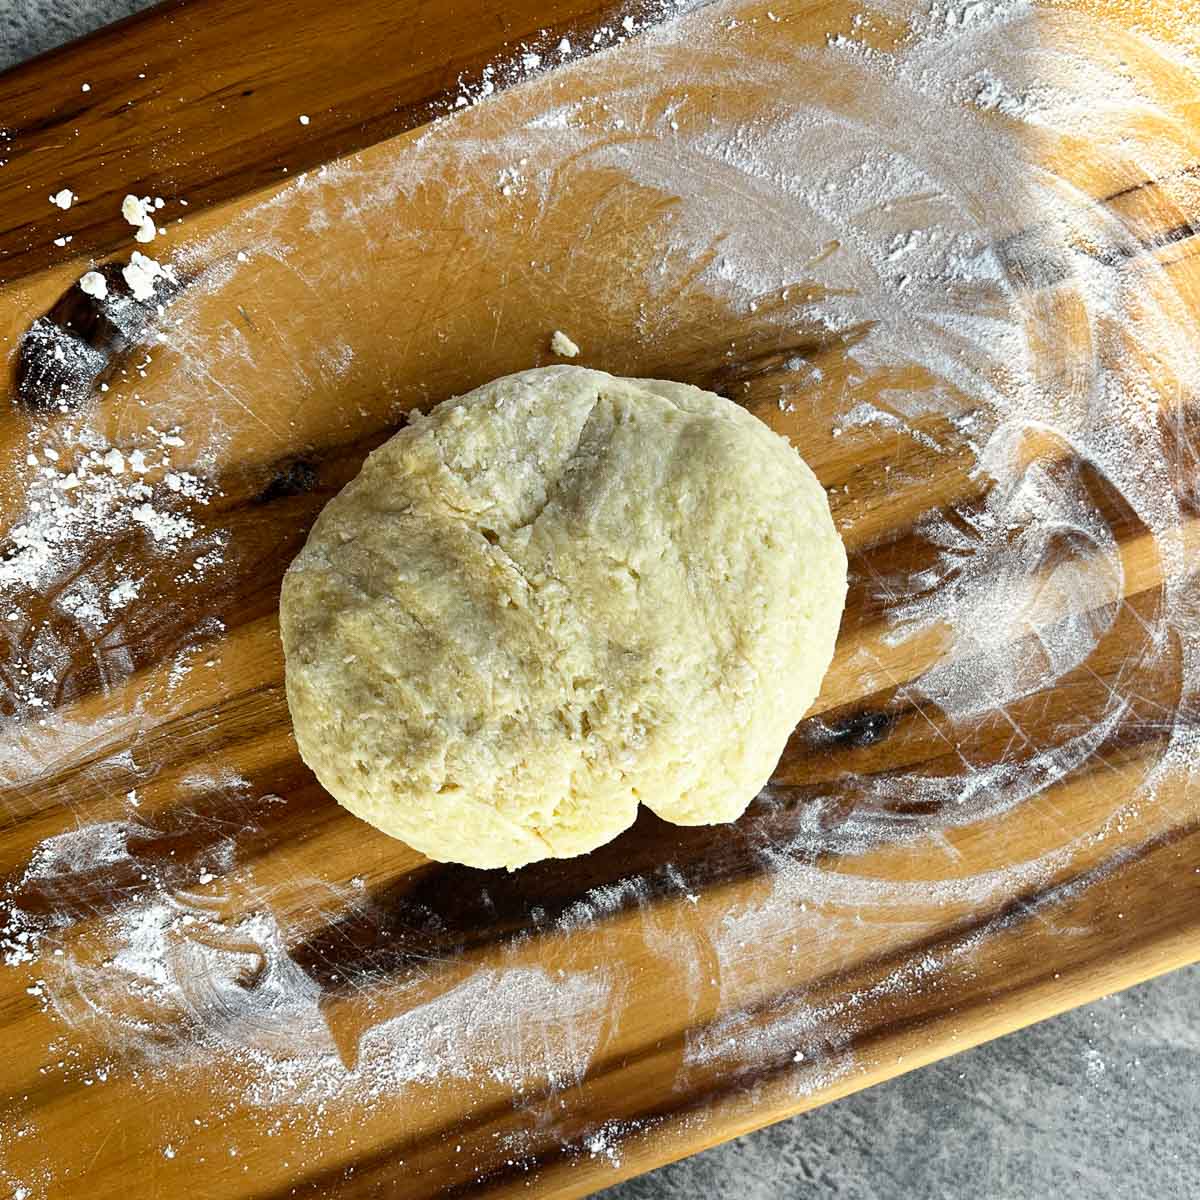
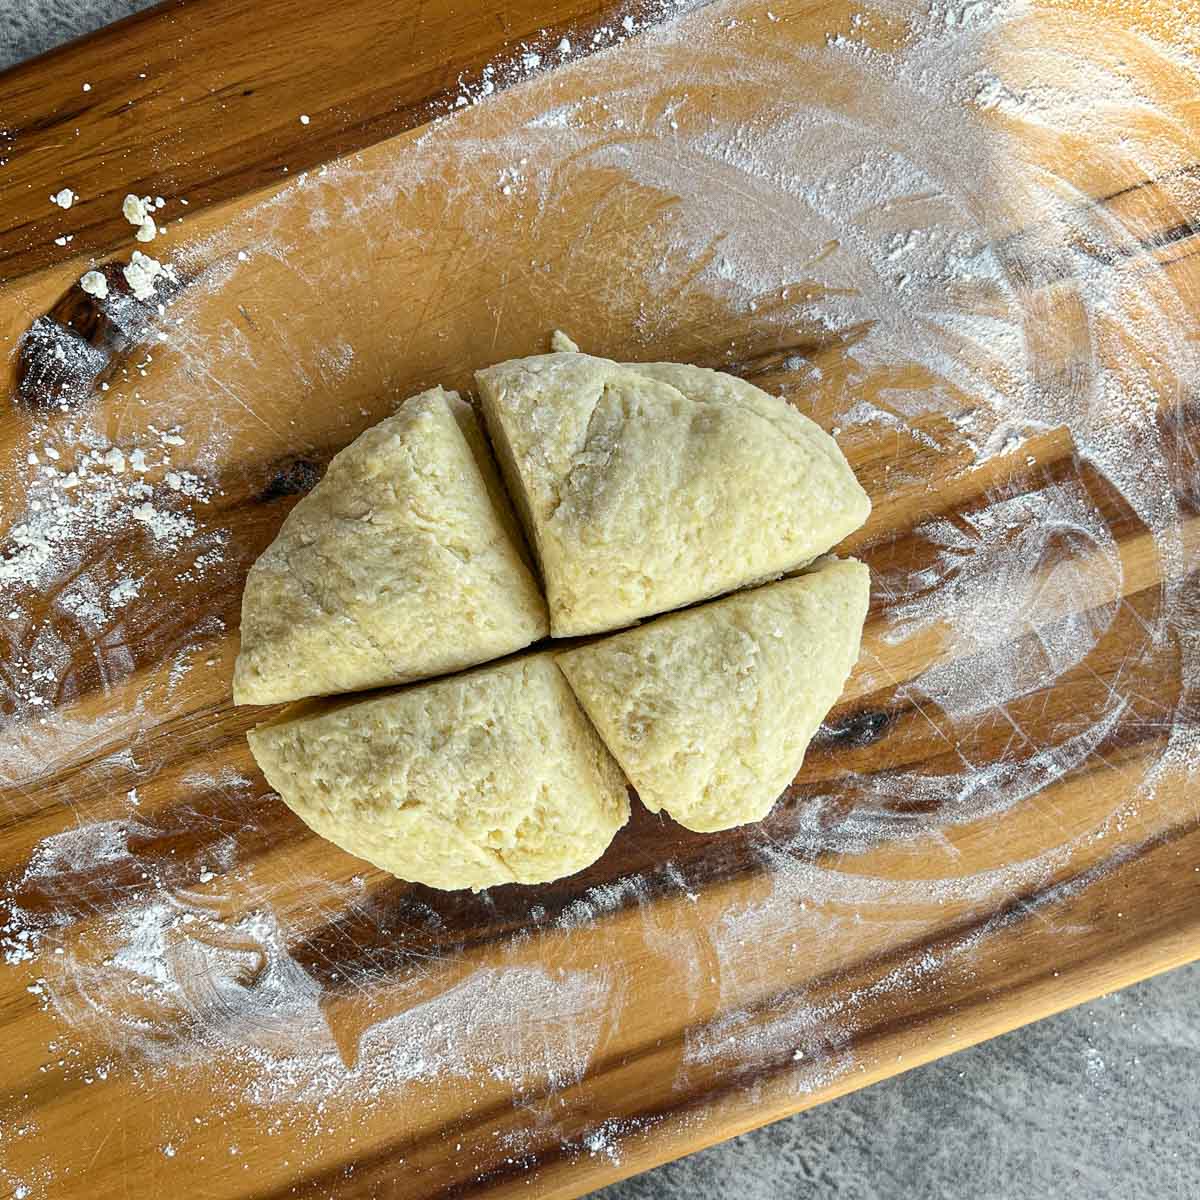
Step 3: Whisk eggs, add to potatoes, then gently stir with a fork. Mix flour, salt, and garlic powder, then sprinkle over riced potatoes in a few batches. Gently mix until all the ingredients come together. Knead over a floured surface until a light, fluffy dough forms. Do not overwork the dough.
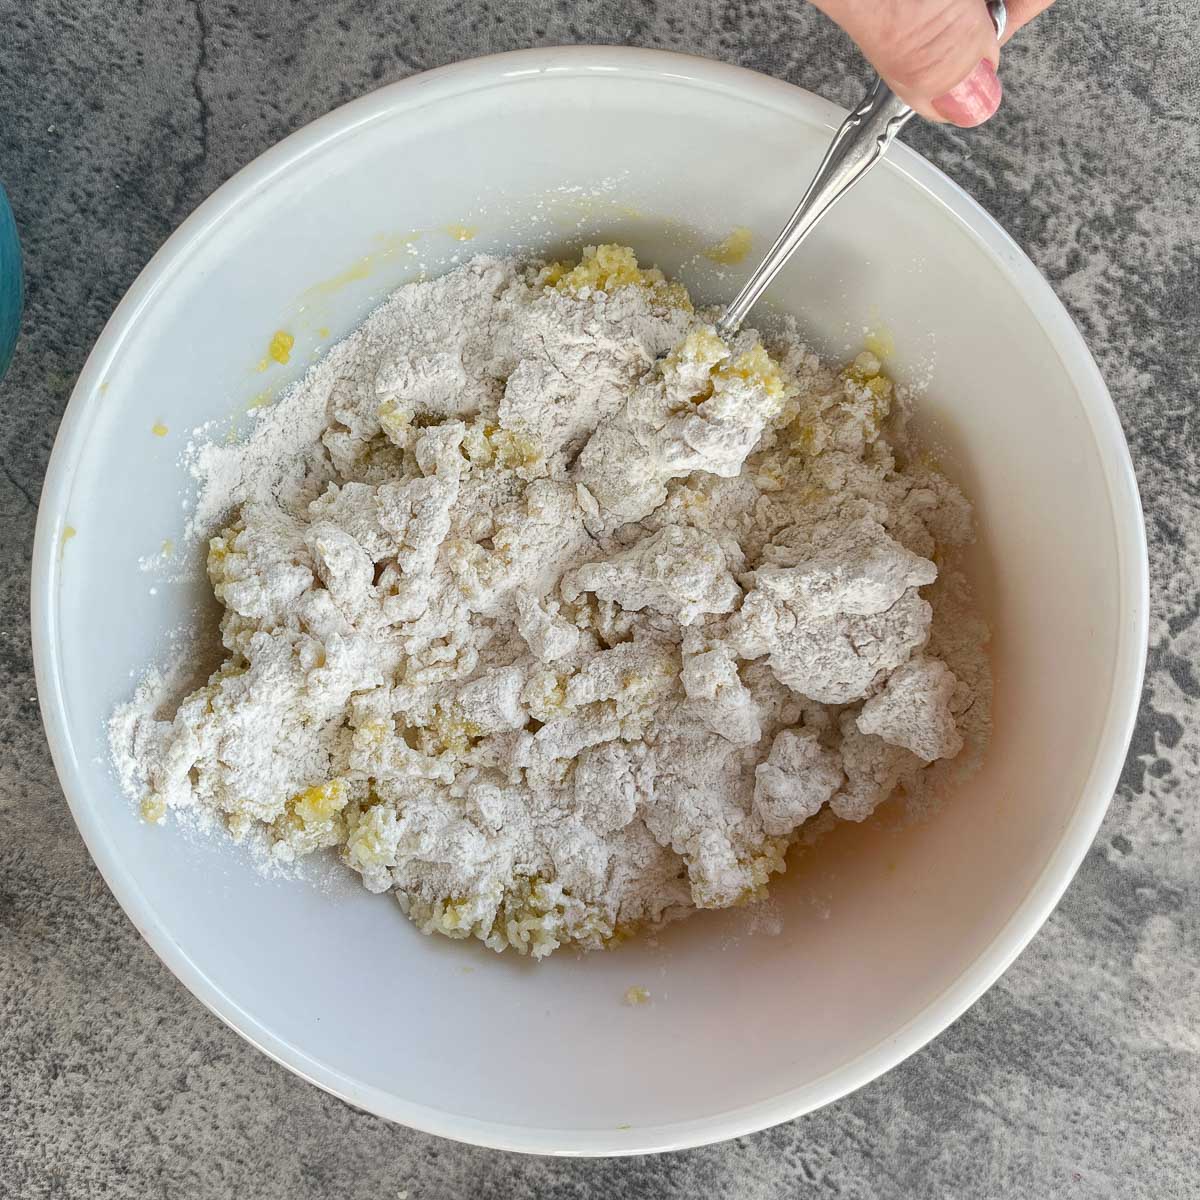
Pro Tip: While working with one portion of dough, keep the other portions covered to keep them from drying out.
Shaping the Gnocchi
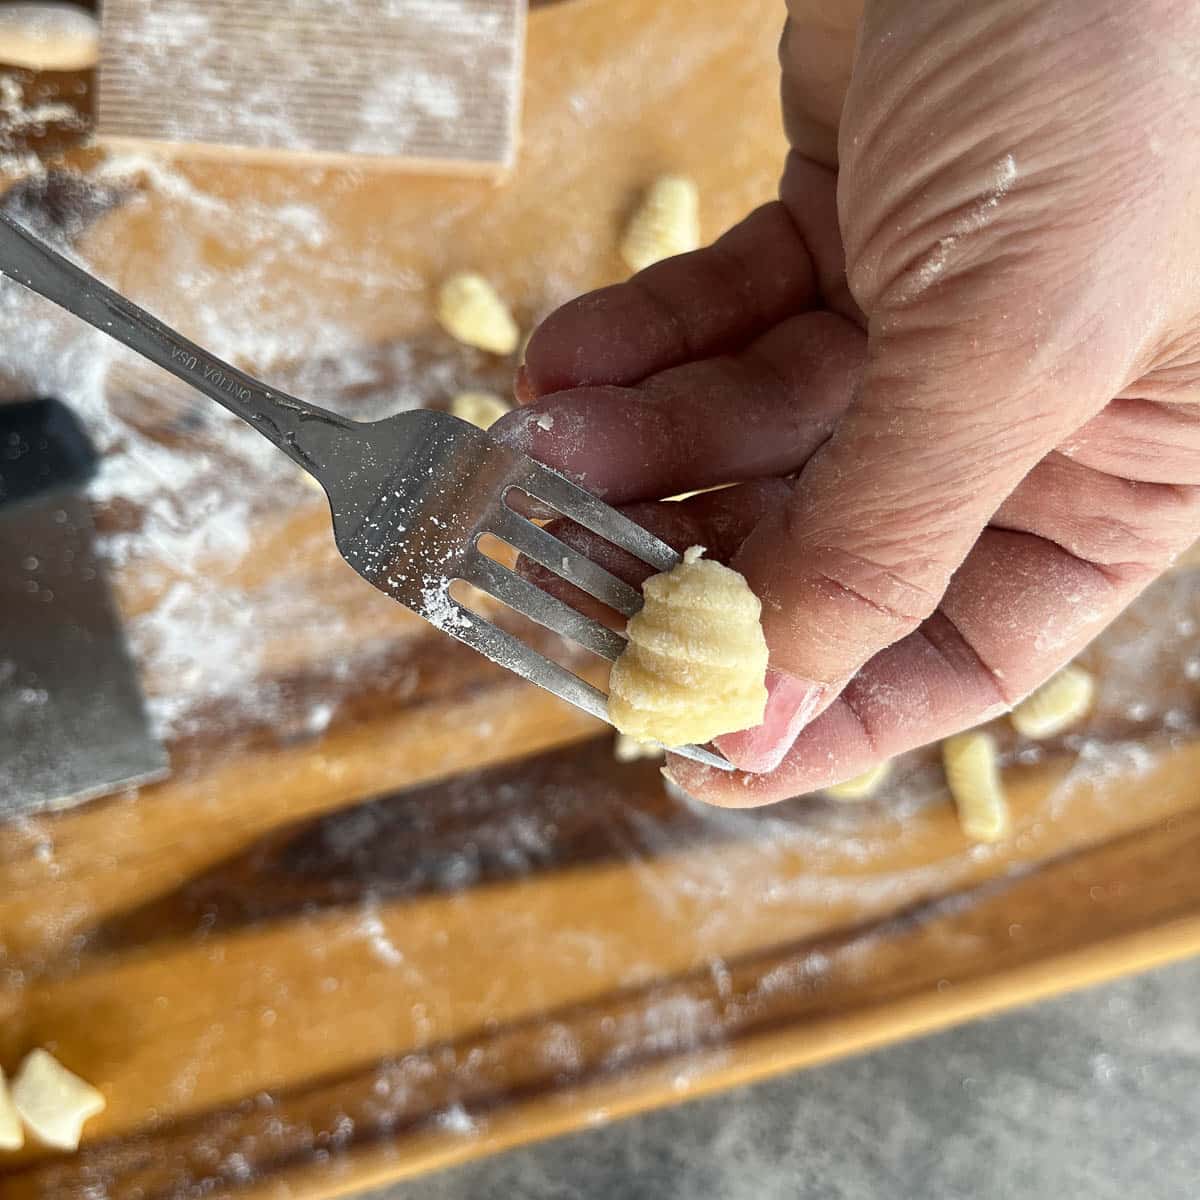
Step 4: Divide the dough into quarters. Slice each portion in two, then roll into a long "snake" starting at the center and working towards the ends until approximately ½" in diameter. Slice into ½" pieces, then using your thumb, roll over a floured gnocchi board or the tines of a floured fork to form ridges.


Pro Tip: If the dough is too sticky to work with, add more flour!
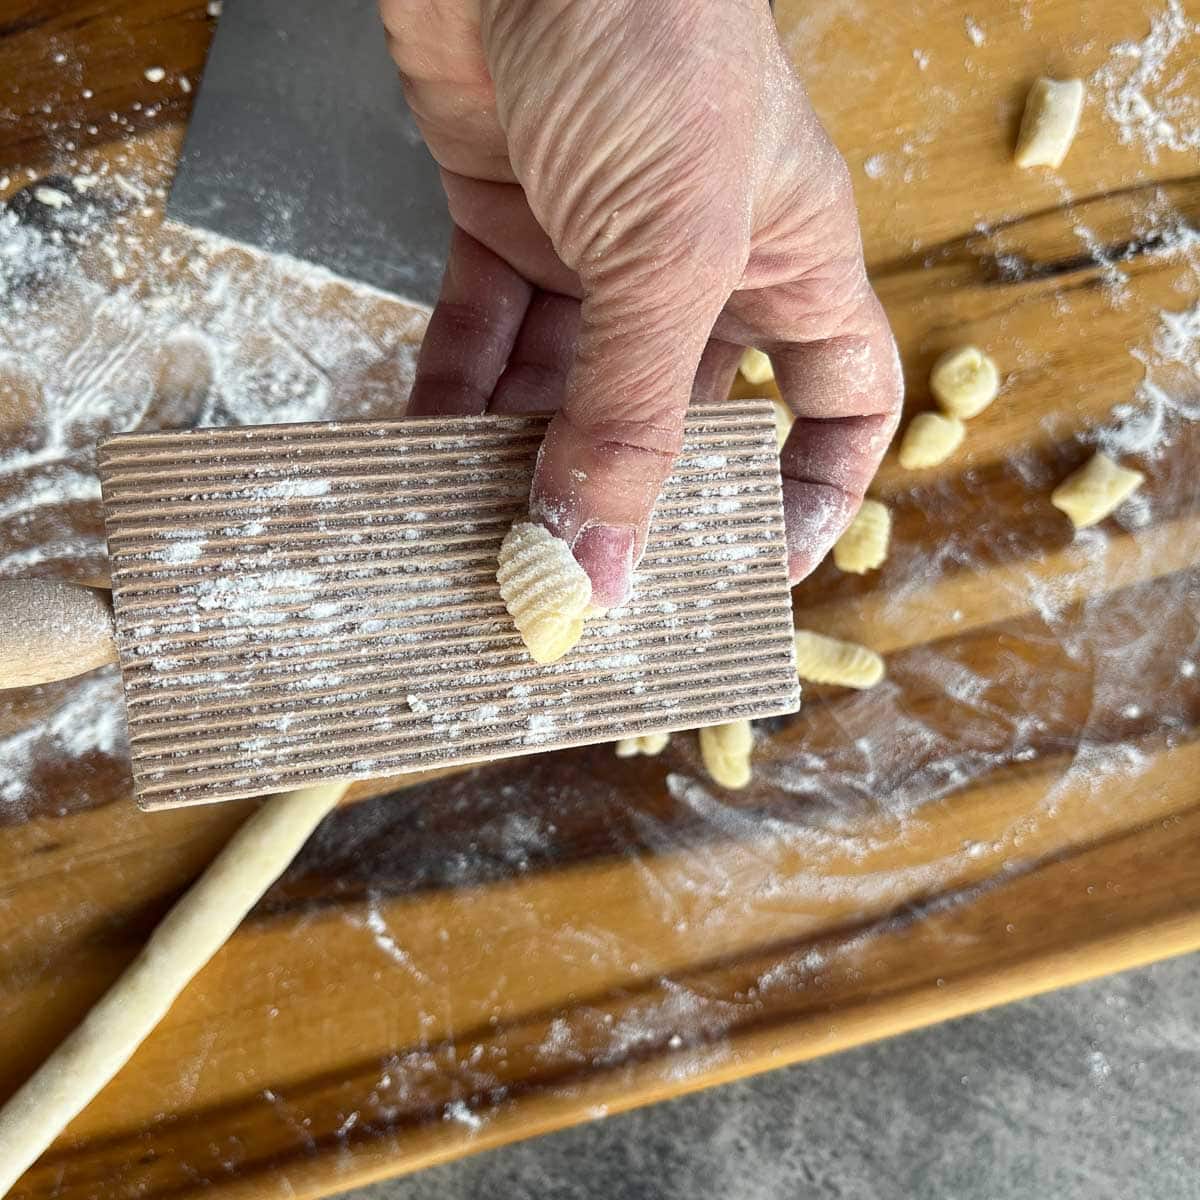
Pro Tip: Although you don't have to have ridges on gnocchi, the ridges are said to hold the sauce better. If you're a visual person, see the video in the recipe card for a demonstration!
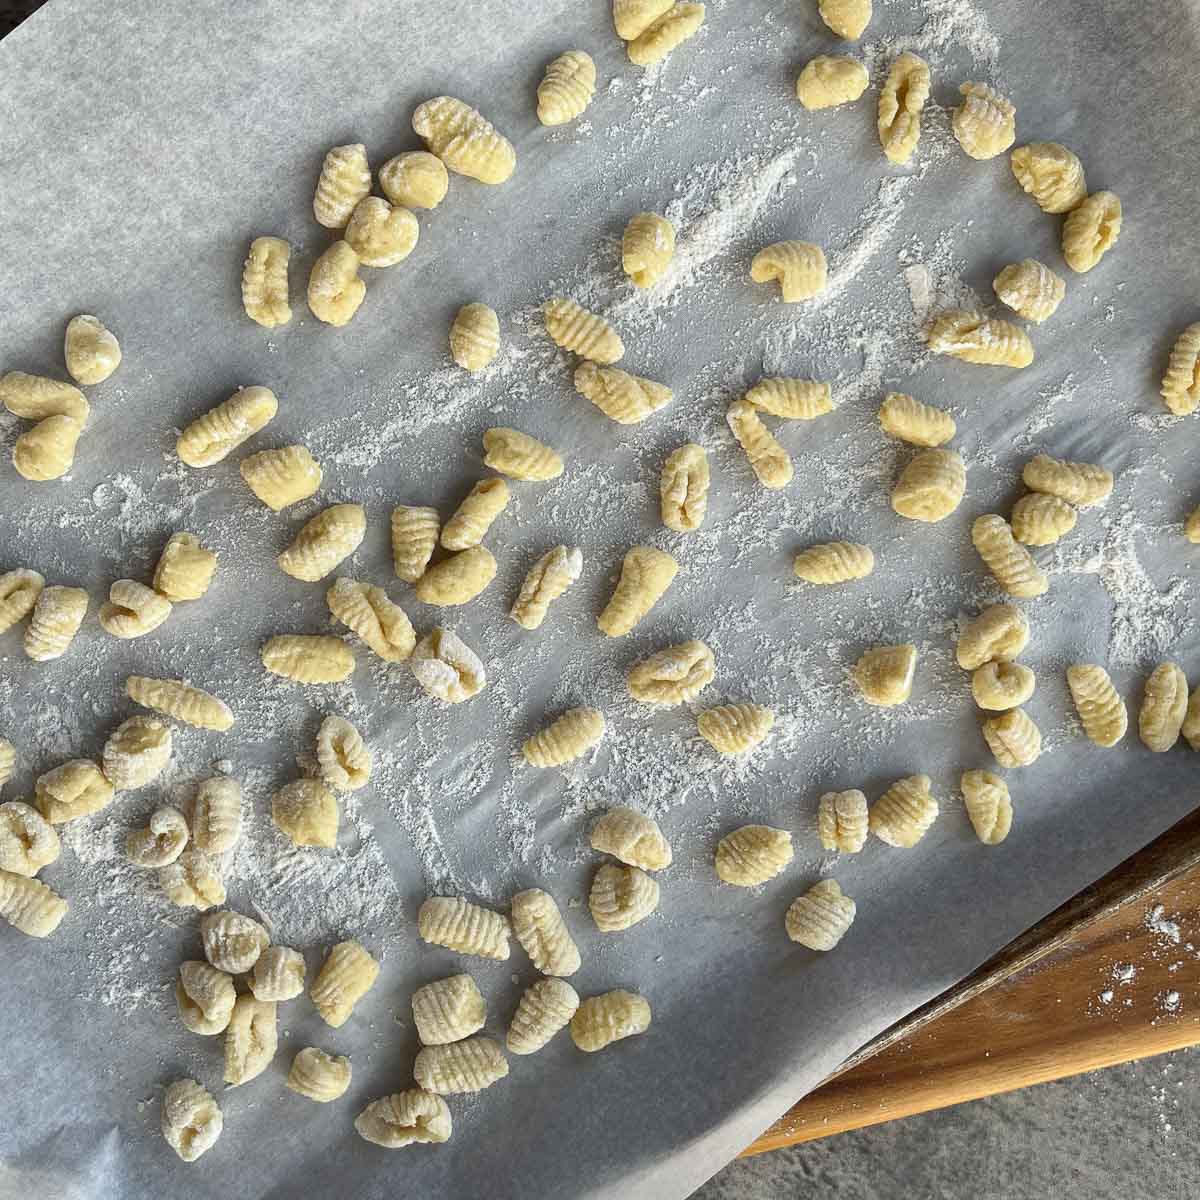
Step 5: Transfer gnocchi (in a single layer) to a baking sheet, lined with parchment paper, and dusted with flour. Continue until all the potato dough is processed.
Boiling Instructions
Step 6: Bring a pot of water with 1 teaspoon of salt to a boil. Add gnocchi in batches, being careful not to overcrowd them. Stir to keep them from clumping together. After they float, cook them for an additional minute. Remove with a slotted spoon and add to your sauce of choice.

Optional Frying Instructions
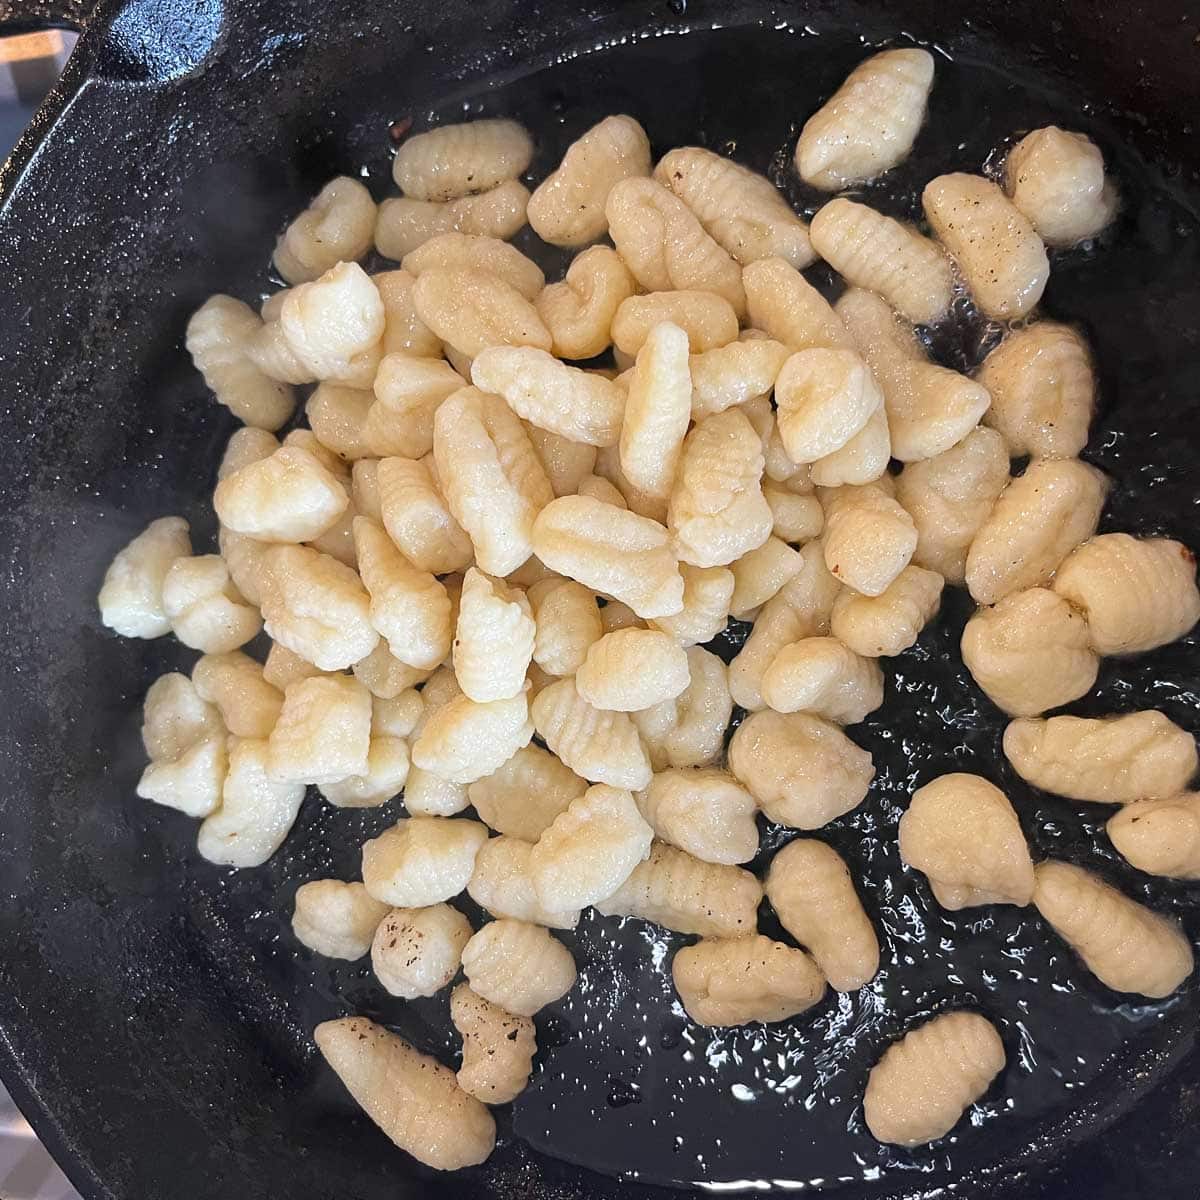
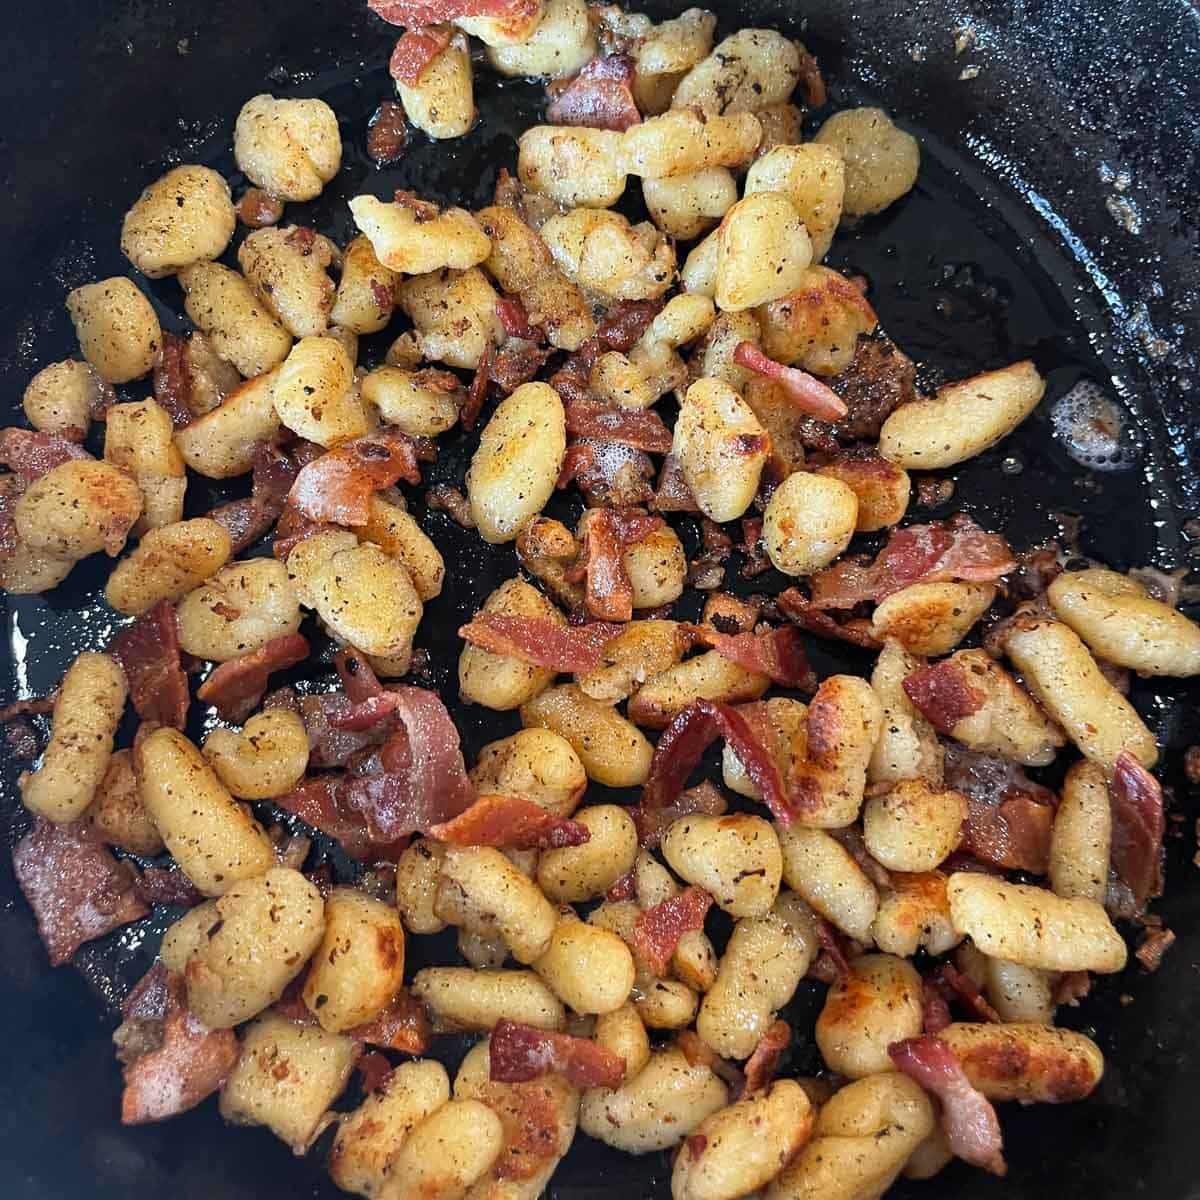
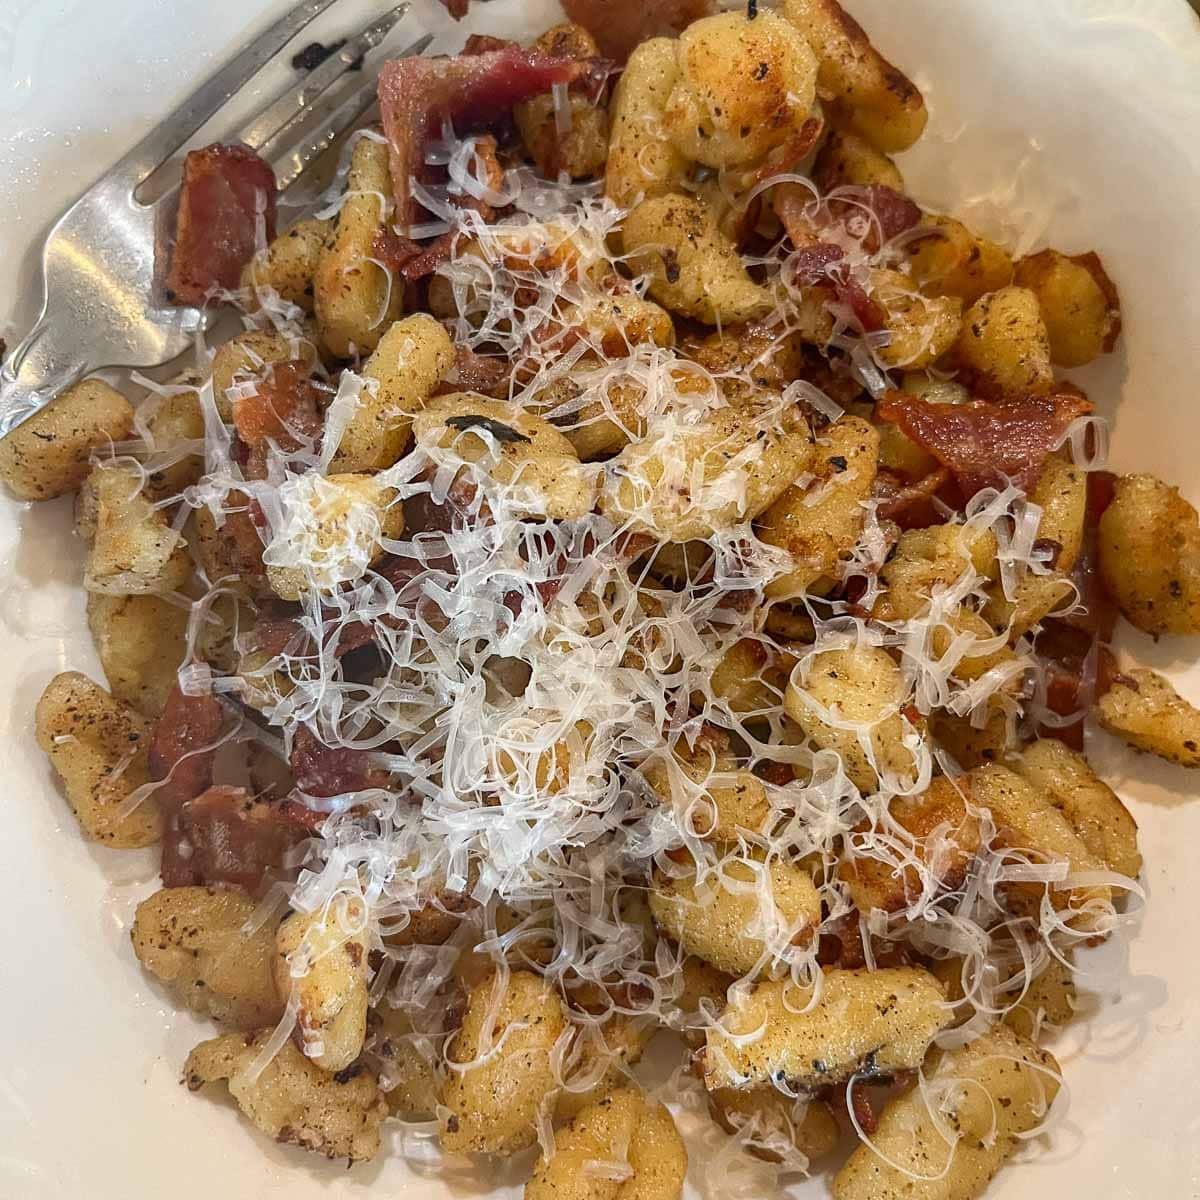
Step 7: Fry bacon in a cast-iron skillet, then remove. Drain gnocchi onto a paper towel-lined plate to drain excess liquid, which will keep the grease from splattering. Add gnocchi to bacon fat and fry until crisp on the outside and tender in the middle. Mix with chopped bacon and top with grated Parmigiano Reggiano.
Did you know that you can even cook gnocchi in an air fryer? Head over to rachnacooks.com to learn how to make air fryer gnocchi!
Pro Tip: Another way to serve gnocchi is fried in butter or ghee with fresh sage.
🍽 Serving Suggestions
You can serve this Italian potato pasta dish as a main or a side with smoked chicken thighs, this grilled ribeye recipe, or a zesty quinoa salad. In Italy, I enjoyed gnocchi with both marinara sauce and pesto, but it can also be tossed with other sauces. Try gnocchi with cream cheese pasta sauce, cilantro chimichurri sauce, or even garlic tahini sauce!
To up the protein, you can add shrimp, sumac chicken, or steak medallions. You can also add sauteed vegetables such as onions, mushrooms, peppers, carrots, sun dried tomatoes, you name it!
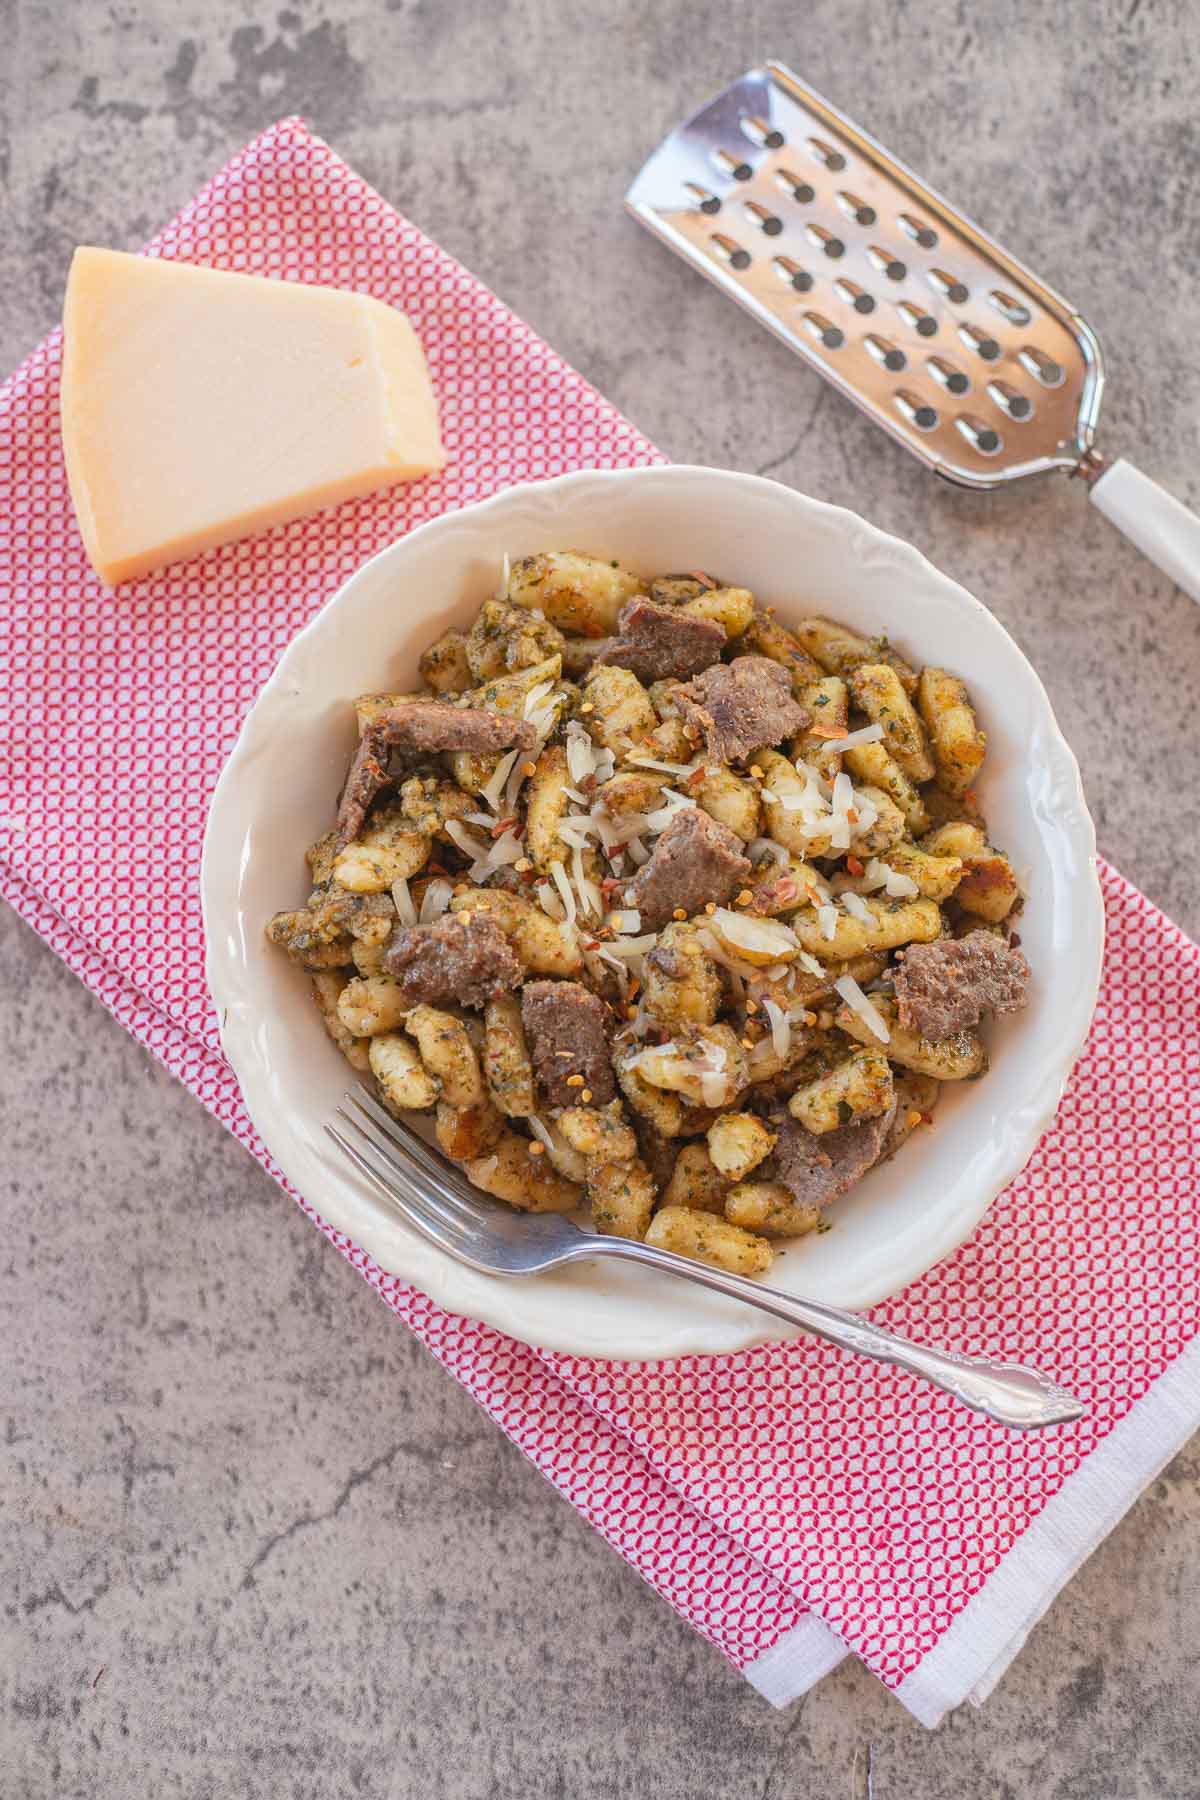
My husband, Scott, even added fried basturma (without my approval) to his pesto gnocchi. He said it was delicious, so you're encouraged to think outside the box! If you're in the mood for more pasta recipes, check out this hearty steak alfredo recipe!
🤷🏻♀️ FAQs
Gnocchi is an Italian pasta made with potatoes mixed with flour, salt, and eggs. It has a light, delicate texture similar to dumplings and can be served with your favorite sauce or coated with a good-quality olive oil and shaved parmesan cheese.
Gnocchi are similar in taste to dumplings but with a light, fluffy texture. They are usually pretty bland on their own, but take on the flavor of the sauce they're served with.
No, you don't want the gnocchi to be dense, they should be light and fluffy. The trick is to add just enough flour to bring the dough together. Adding too much flour can make the gnocchi have a denser texture.
👩🏼🍳 Pro Tips
- If you do decide to boil the potatoes, you may need to add additional flour to your dough.
- If you need to, use a second tray to keep the gnocchi from sticking to each other.
- If you don't plan on cooking all of the gnocchi, at least shape and freeze them for later use. Keeping the dough in the fridge, even overnight, will make it sticky and hard to work with.
- Store cooked Italian potato pasta in an airtight container in the fridge for up to 4 days.
- Gnocchi can be frozen on the parchment-lined tray, and then stored in freezer bags until you're ready to cook them.
Have extra potatoes? Try making Norwegian potato lefse and this potato salad with dill pickles!
🫑 More Pasta Recipes
If you enjoy this Italian potato pasta recipe, be sure to check out these related pasta recipes!
Did you make this recipe?
📖 Recipe
Would you like to save this recipe?
How to Make Potato Pasta (Gnocchi)
Ingredients
Equipment
Method
- Wash potatoes and bake in a 400°F oven for 45-60 minutes, or until tender. If you have an Instant pot, you can cook the potatoes in ½ the time using this recipe. Cool potatoes for 15 minutes.
- Peel cooled potatoes and slice into 4 sections. Use a potato ricer to rice the potatoes into a large bowl. Cool for an additional 10 minutes, if needed.
- Whisk eggs, add to potatoes, then gently stir with a fork. Mix flour, salt, and garlic powder then sprinkle over riced potatoes in a few batches. Gently mix until all the ingredients come together. Knead over a floured surface until a light, fluffy dough forms. Do not overwork the dough.
- Divide the dough into quarters. Slice each portion in two, then roll into a long "snake" starting at the center and working towards the ends until approximately ½" in diameter. Slice into ½" pieces, then using your thumb, roll over a floured gnocchi board or the tines of a floured fork to make ridges.
- Transfer gnocchi (in a single layer) to a baking sheet, lined with parchment paper, and dusted with flour. Continue until all the potato dough is processed.
- Bring a pot of water with 1 teaspoon of salt to a boil. Add gnocchi in batches, being careful not to overcrowd them. Stir to keep them from clumping together. After they float, cook them for an additional minute. Remove with a slotted spoon and add to your sauce of choice.
- Fry bacon in a cast iron skillet, then remove. Drain gnocchi onto a paper towel-lined plate to drain excess liquid, which will keep the grease from splattering. Add gnocchi to bacon fat and fry until crisp on the outside and tender in the middle. Mix with chopped bacon and top with grated parmigiano reggiano.
Nutrition
Video
Notes
- You can also microwave or steam the potatoes. Although you can technically boil them, the potatoes will absorb too much water, which isn't ideal.
- If you do decide to boil the potatoes, you may need to add additional flour to your dough.
- If you don't have a ricer, you can also push the potato flesh through a fine mesh sieve. You basically want the mashed potatoes lump-free.
- If the dough is too sticky, dust with more flour.
- Another way to serve gnocchi is fried in butter or ghee with fresh sage.
- Although you don't have to have ridges on gnocchi, the ridges are said to hold the sauce better.
- While working with one portion, keep the other portions covered to keep the dough from drying out.
- If you need to, use a second tray to keep the gnocchi from sticking to each other.
- If you don't plan on cooking all of the gnocchi, at least shape and freeze them for later use. Keeping the dough in the fridge, even overnight, will make it sticky and hard to work with.
- Store cooked potato pasta in an airtight container in the fridge for up to 4 days.
- Gnocchi can be frozen on the parchment-lined tray, then stored in freezer bags until you're ready to cook them.
Pat Manske says
I am a very fussy eater And I was not sure about eating new food, but this recipe is amazing. The first thing that I could think of about the taste is smooth!! It was very comforting. It just had a nice warm feel, what an amazing combination of flavors, potatoes, bacon and Parmesan cheese.
Hilda Sterner says
Thanks, Pat. I am glad to hear that you enjoyed it! 🙂
Teresa Evers says
This potato pasta is very delicious. It is very authentic tasting, and not difficult to make. I had it with pesto sauce, which was so flavorful. I’m sure it can be served with several various of sauces or with bacon, which I also tried, Amazing!!! It is filling and can be served with just a side salad or soup.
Hilda Sterner says
So glad to hear you enjoyed it!
Kathy Fisher says
We loved this potato pasta recipe. It's definitely comfort food. Be sure and watch the video to see the technique in forming the pasta. In my opinion there's no comparison with regular pasta. It's super delicious with bacon.
Hilda Sterner says
Great suggestions, thank you!
Kelly Methey says
This Potato Pasta recipe is so good and surprisingly easy. This is a great alternation to regular pasta. I tried it with pesto which was great. But frying it with bacon after boiling it and adding Parmesan cheese is fantastic! I could eat this everyday for a week and not get tired of it!
Hilda Sterner says
Yes, that's my favorite way to eat it too!